|
Welcome to part 2 of 2 on creating a tie knot bag. In our previous blog post "Draft-a-Long: Tie Knot Bag", we taught you how to draft the pattern for this design. In this blog post, we give you the step-by-step instructions on sewing your very own tie knot bag!
Learn more about tie knot bags by reading: Draft-a-Long: Tie Knot Bag (Part 1 of 2) Fabric ShoppingIn late Feb, I visited Maiwa Supply Store on Granville Island, after having taught a "Pattern Drafting: Make your Own Blocks" workshop at their School of Textiles. While browsing the store, three separate black and ivory hand blocked fabrics caught my eye. Each were so different and yet they complimented each other well. I felt inspired to create something that combined these fun prints. For this particular design, we did just that! Keep reading to see how we incorporated all three fabrics. 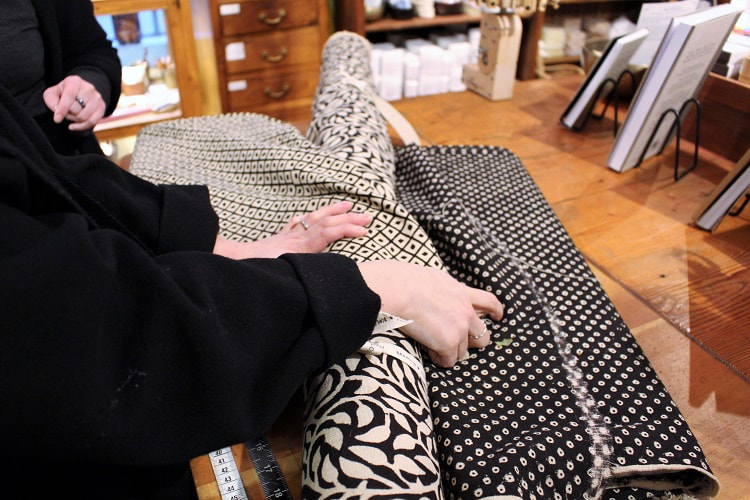 Unfortunately, the rest of my 2020 workshops were cancelled due to COVID-19, but that doesn't mean we have to stop designing during this time. We hope this Sew-a-Long will provide you with some creative inspiration. If you are just joining us, see the pattern drafting instructions for the tie knot bag, found on our Draft-a-Long: Tie Knot Bag (Part 1 of 2) blog post. Sewing Supplies
MaterialsYou will require the following materials to sew our Tie Knot Bag. This is for the 13” width version.
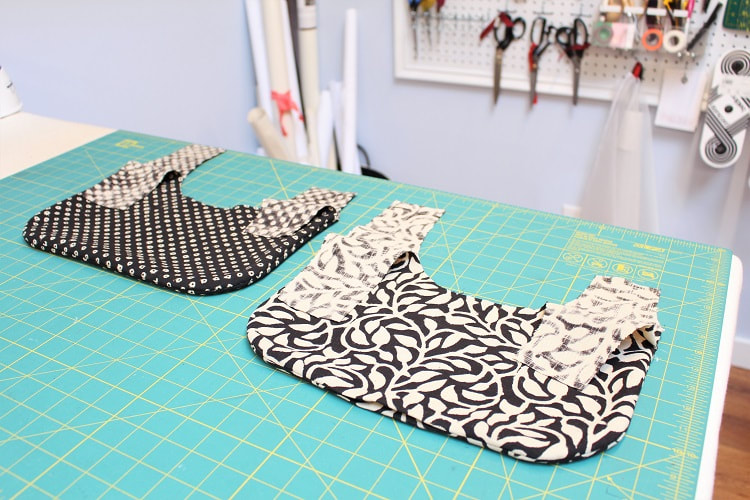
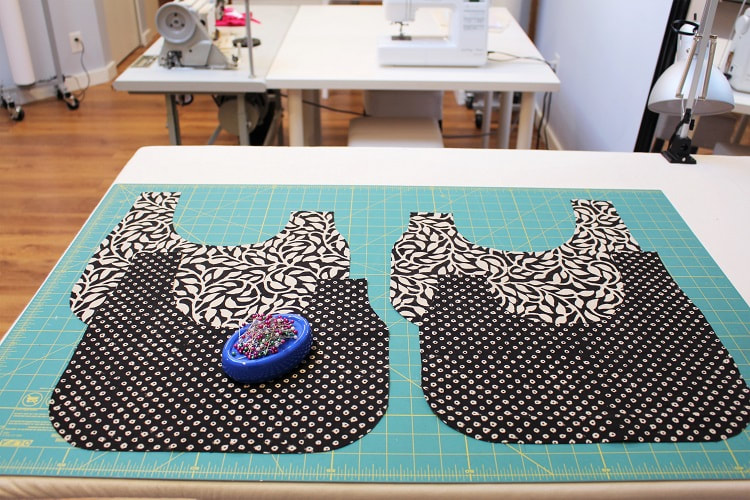
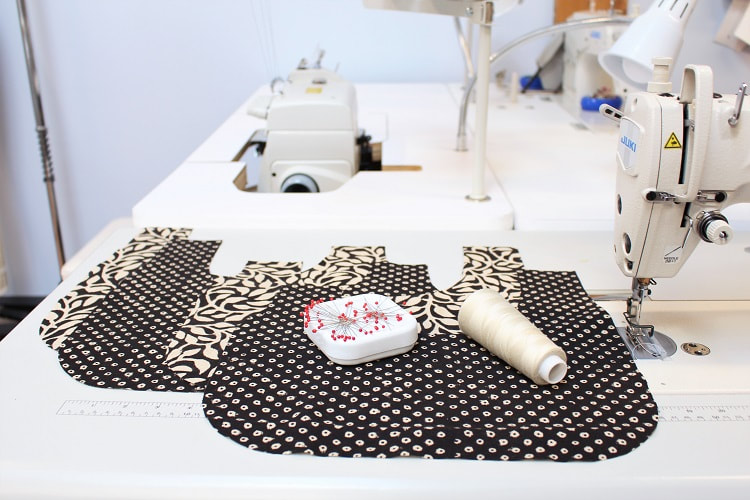 Cutting FabricThis bag is fully reversible to allow for a SIDE A (MAIN/SELF fabric) and a SIDE B (CONTRASTING fabric). You will essentially be sewing two bags and having them come together around the openings. This is an asymmetrical bag. One strap is longer than the other so before you begin sewing, ensure you have four cut bag pieces. Each SIDE option should have mirror image pattern pieces of each other. Mark all notches on the wrong side of the fabric. A reminder that notches are points E, F, N and U from your drafting.
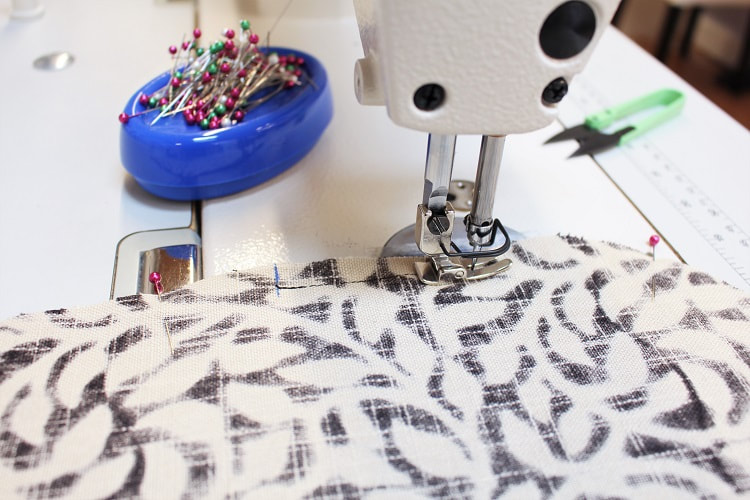
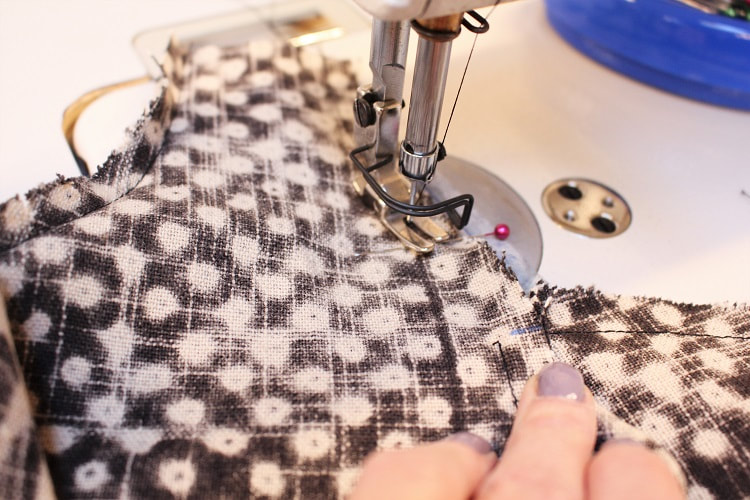
Sewing StepsStep 1With right sides of the fabric facing, line up SIDE A pieces, pin and sew from strap notch (Point E from drafting) around the bottom of bag to other strap notch (Point F). Ensure you back stitch at the beginning and end of the stitch line. Repeat the same step to SIDE B pieces. 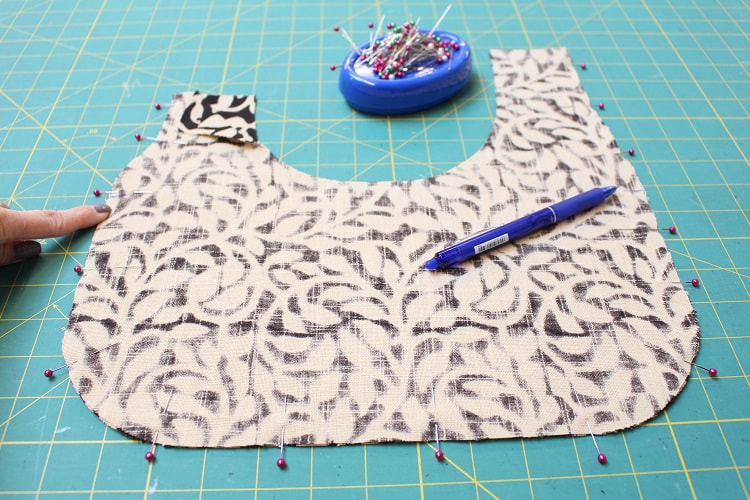
Leave a 2-3” opening at the bottom of one of the bags. In the end, this opening will allow you to create a fully reversible option bag. 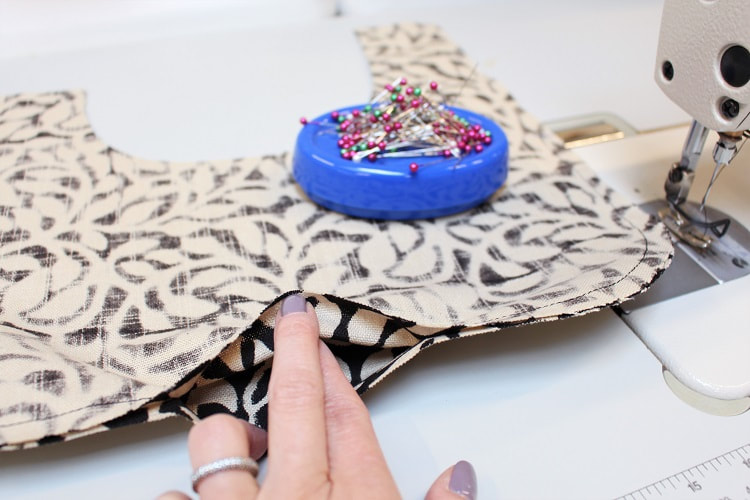 A reminder to sew at your chosen seam allowance. We are using ⅜” seam allowance.
Step 2Along the curved section of the seam allowance, create straight clips from the raw edge towards the stitch line. Stop the clippings approximately 1/16” away from the stitch line. Have each clippings ½” away from the next and feel free to stagger the clippings from the upper and lower seam allowance layers to decrease weakness along stitchline. 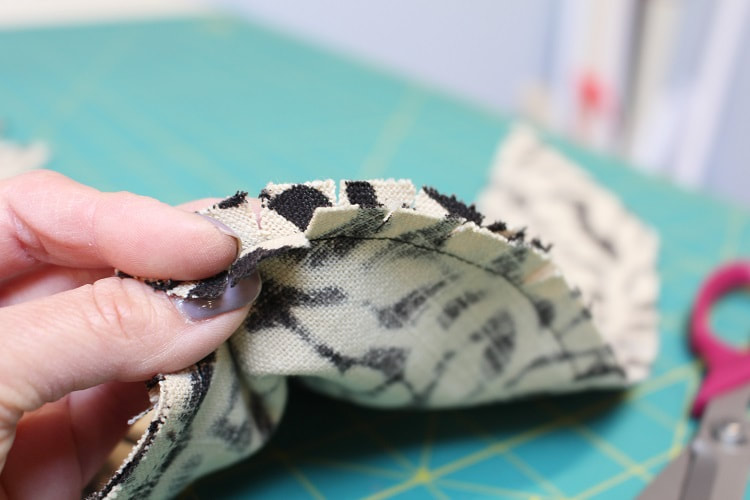 Step 3Press seam allowances open all along the stitch line. Do not press above your beginning and end areas of the stitch line (into straps). Pre-press in place the 2-3” opening at the bottom of one of the bags. This will help you later when you need to hand sew the opening shut.
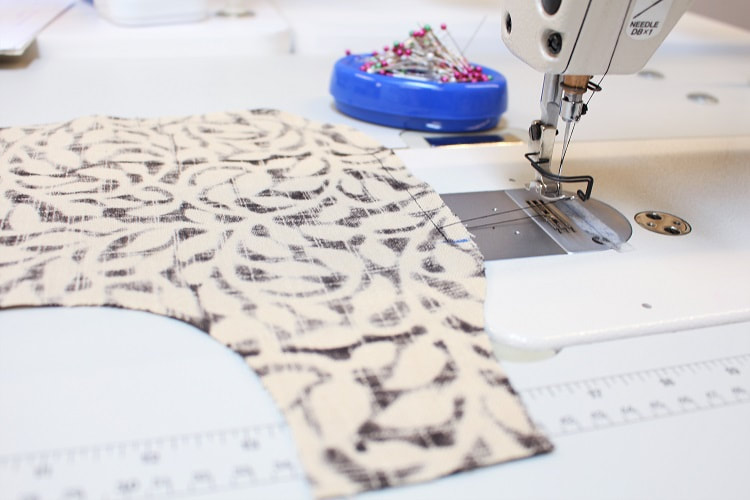
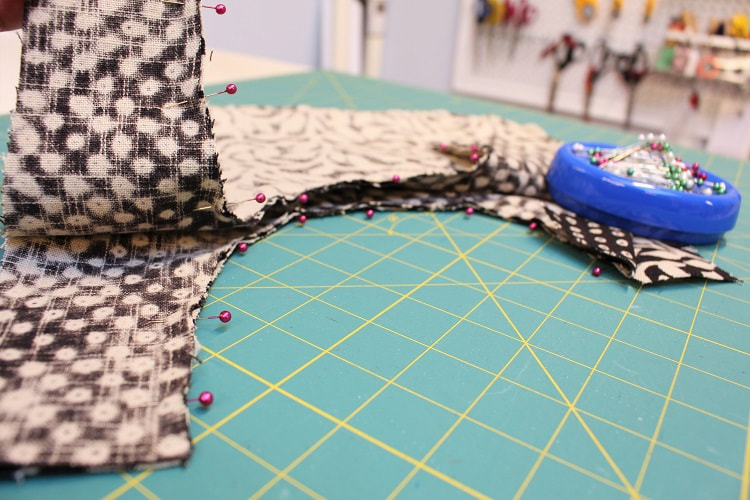
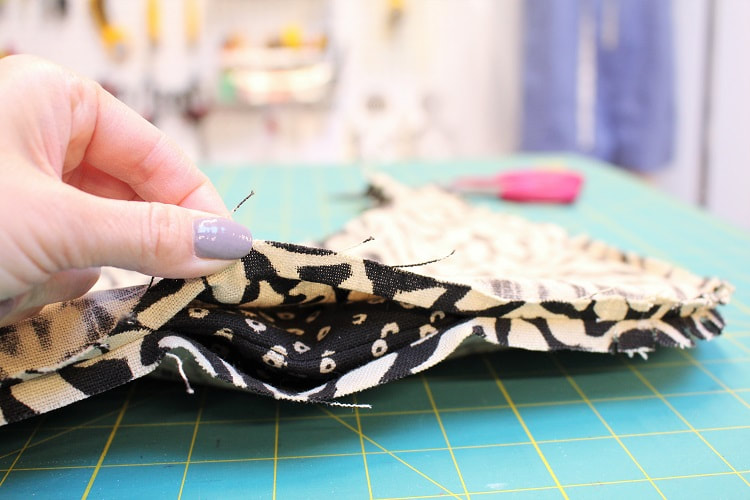
 Step 4Slide one of the bags inside the other. Ensure the right sides of SIDE A and SIDE B fabric are facing each other. 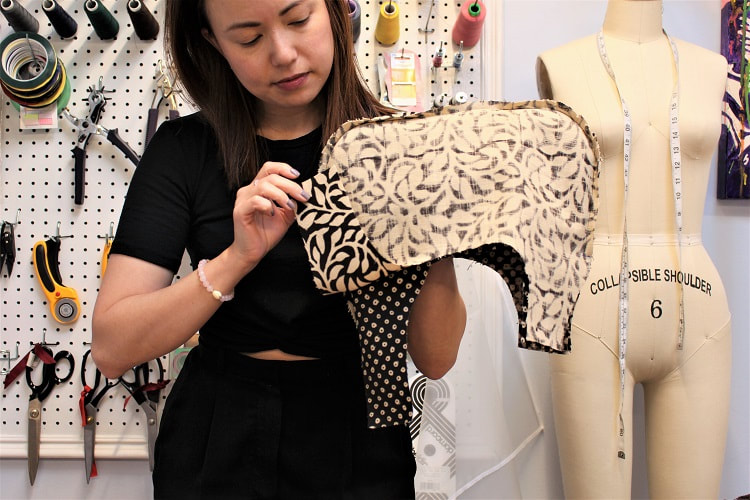 Pin and sew the interior bag opening curve from the top of the handle strap, around the curve, to the top of the other handle strap. Line up your center notch (Point N). You should have two seams to sew. They each separately sew SIDE A (SELF/MAIN fabric) to SIDE B (CONTRASTING fabric). Ensure you back stitch at the beginning and end of the stitch line.
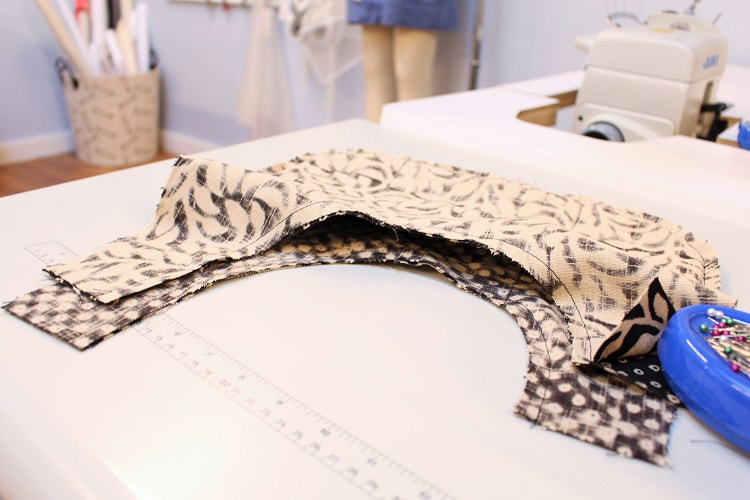
Step 5Create straight clips along the curved sections of the seam allowance. Same concept as Step 2. This will help the curved shape of the bag sit smoothly when flipped right side out. 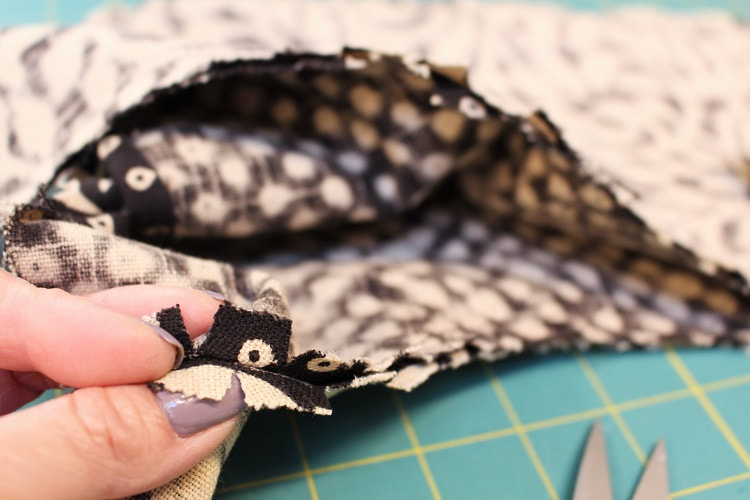 Step 6Press seam allowances along the interior bag opening, open. Feel free to pop a seam roll or the edge of your ironing board under the seam to help with pressing. Refrain from flipping the bag right side out just yet! We need to keep the bag as is for the next step-- sewing the exterior edges of the handle straps.  Step 7Using the same concept as Step 4, where the right sides of SIDE A and SIDE B fabric are facing each other, pin and sew the exterior handle straps from the top of the strap down to just before the exterior side seam stitch line. Hold back any pesky seam allowances that try to creep in as you get closer to the top of the side seam stitching line. Back stitch at the beginning and end of the stitch line. You should have four seams to sew. They each separately sew SIDE A (SELF/MAIN fabric) to SIDE B (CONTRASTING fabric).
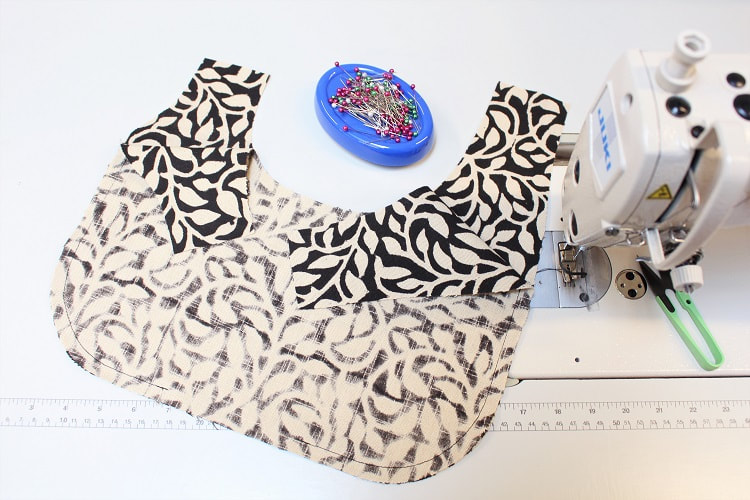
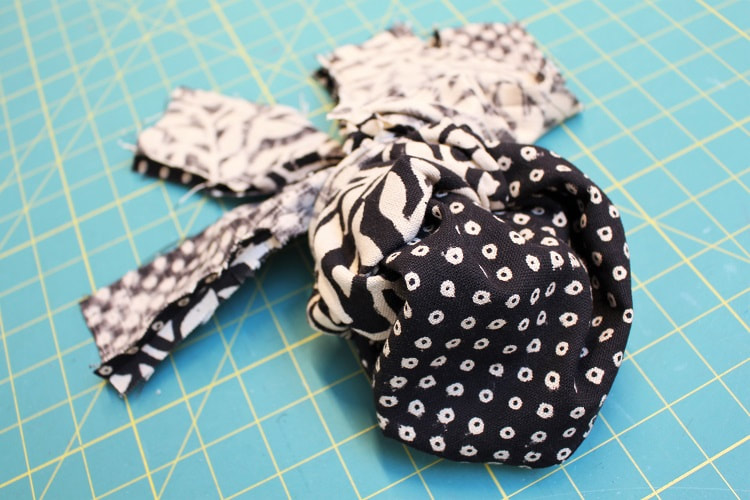
Step 8Create straight clips along the curved sections of the seam allowance. Same concept as Step 2 and 5. This will help the curved shape of the bag sit smoothly when flipped right side out. Step 9Flip the bag so that all layers are right sides of fabric facing or how the bag would sit when complete. Press exterior sides of the handle straps and interior bag openings flat.
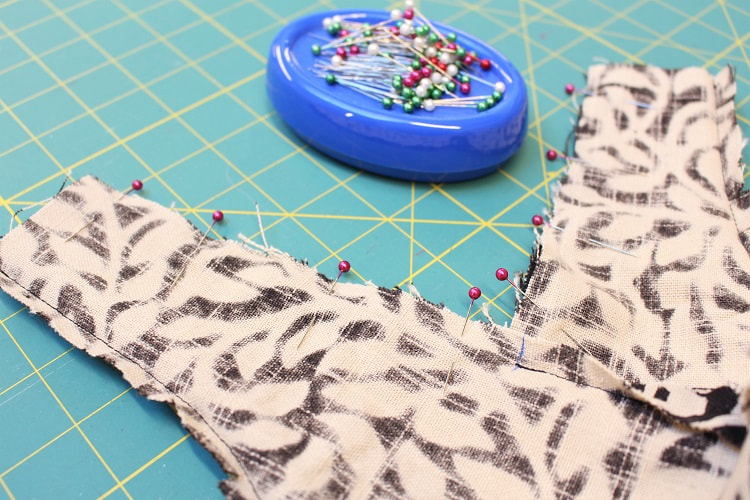
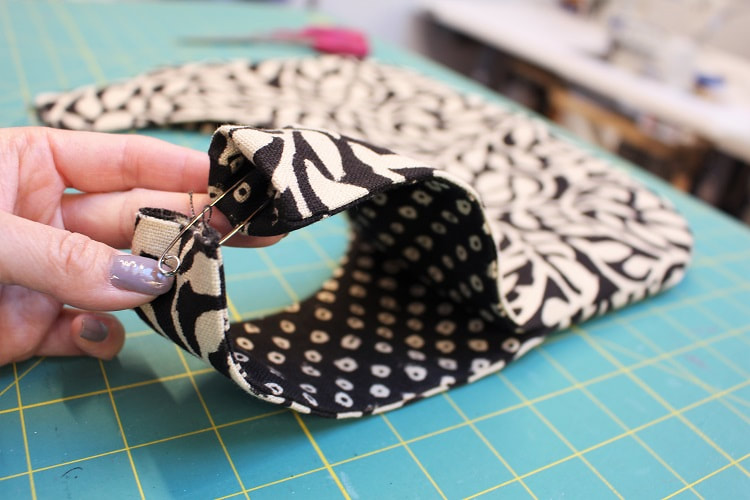
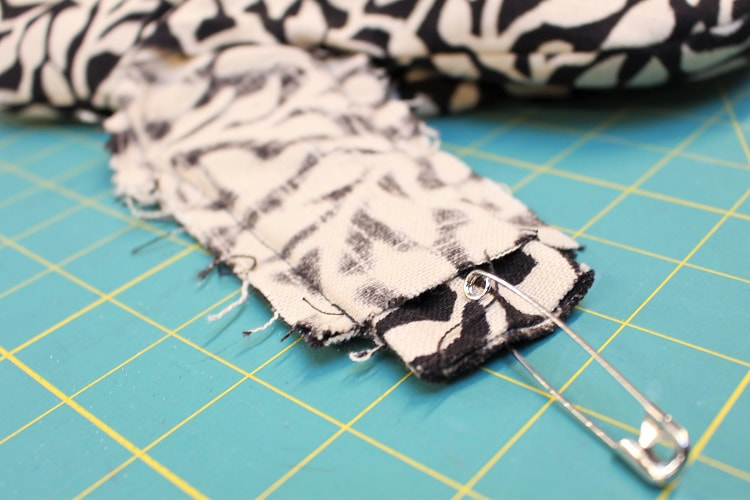
Step 10At the moment we have four unfinished strap ends hanging freely. We need to create a left and a right handle strap. We can organize the four ends as follows: left front, left back, right front, and right back. 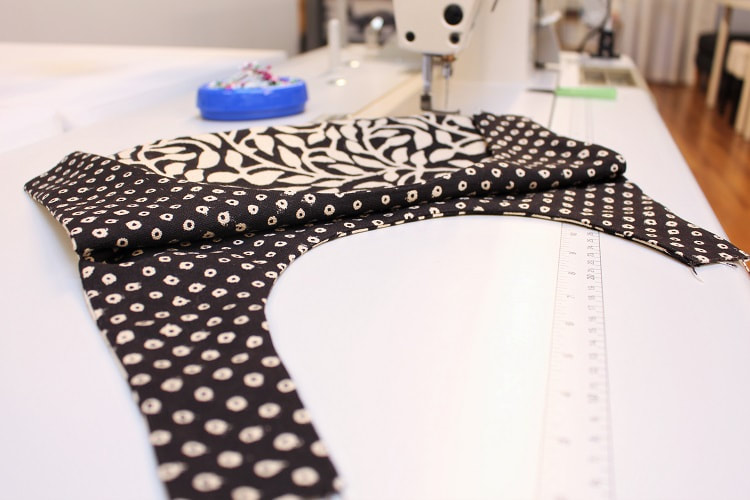 Starting with the left handle strap, feed the back strap into the front strap with right sides of fabric facing each other. You will need to gently start turning in some of the front strap raw edge fabric inside itself. Using our 2-3” opening at the bottom of the bag, pull through front/back strap ends. Feel free to use a safety pin attached to the back strap edge to help feed into the front strap.
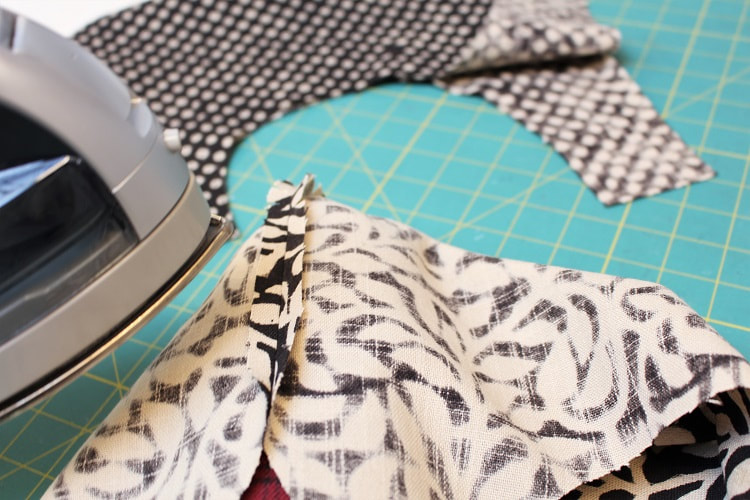
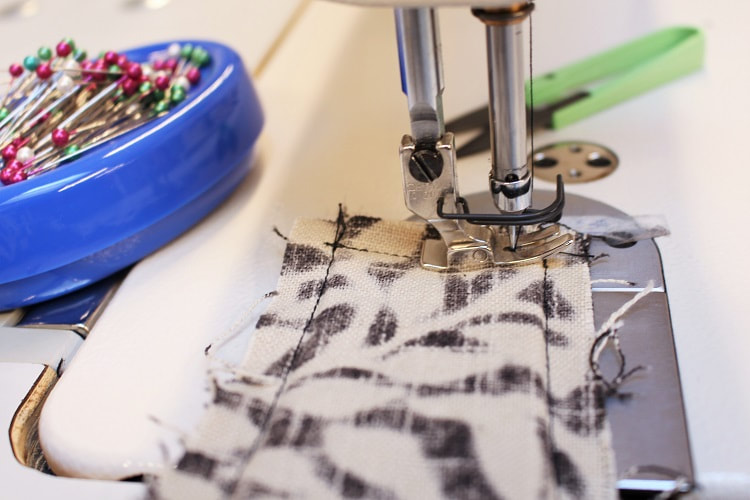
Line up the interior and exterior vertical seams of the front and back strap, pin and sew across through all four layers in between the vertical seams. Back stitch at the beginning and end of the stitch line.
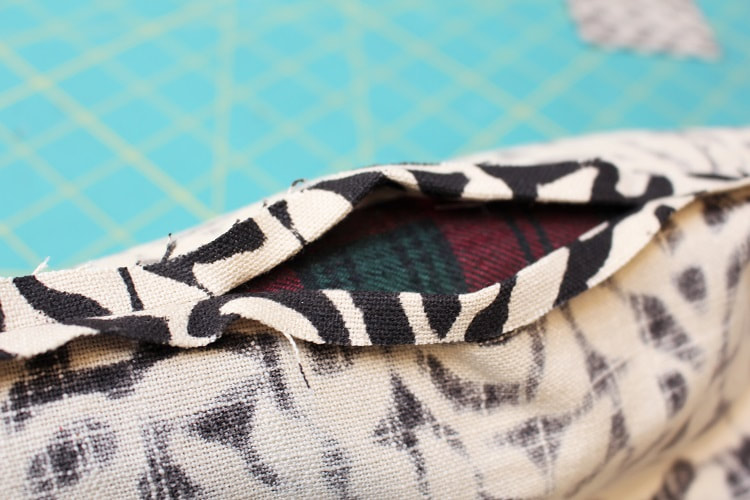
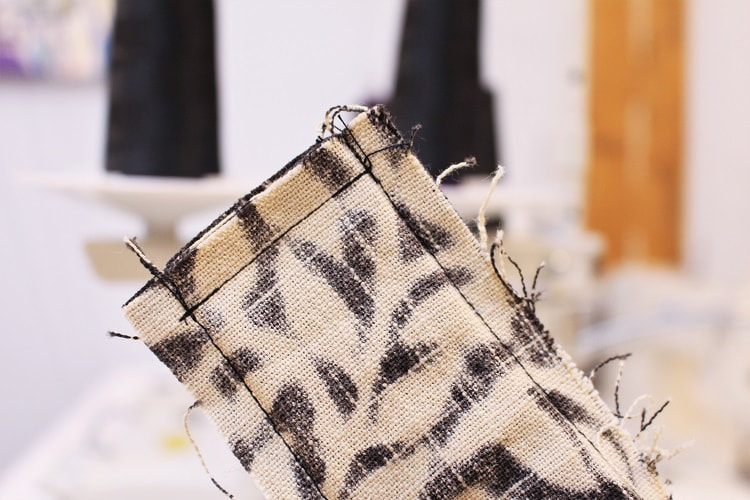
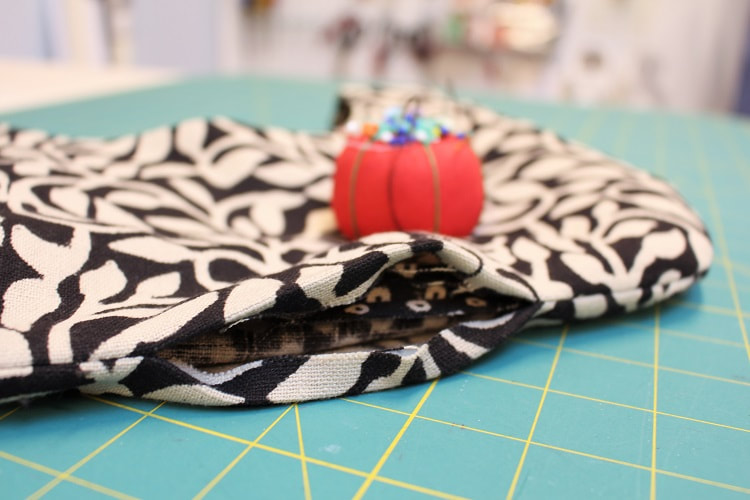
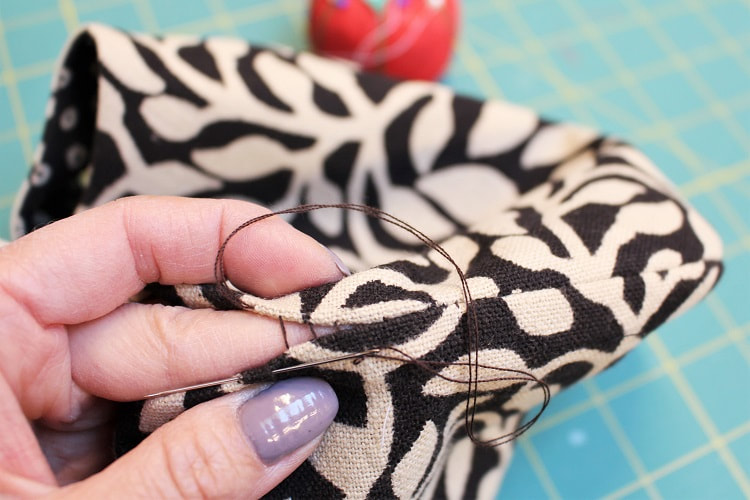
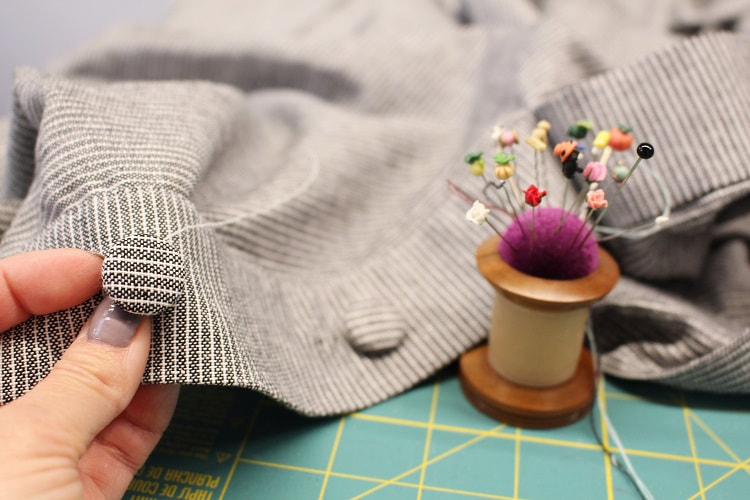
Step 11To reduce bulk along the top strap seam, trim seam allowance down to ¼”. To ensure straps lay flat front to back, trim away a diagonal piece of the seam allowance starting approximately 1” down from top of strap seam tapering to ⅛” away from strap seam. Repeat steps 10 and 11 to right handle strap. Flip bag right sides out and press the top of the strap seam. 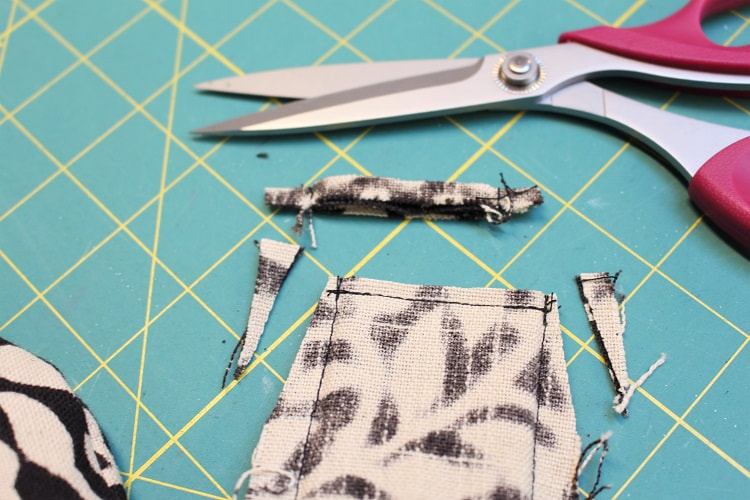 Step 12By hand, draw-stitch closed the 2-3”opening at the bottom of the bag. A draw-stitch is an invisible hand sewn stitch that “draws” together two layers of fabric seamlessly. Sewing Tip: Go through one side at a time for each stitch and when going across to the other side enter directly across where your thread exited. This will ensure no threads are visible. Tie your knot and voila! Tie knot bag complete!!!
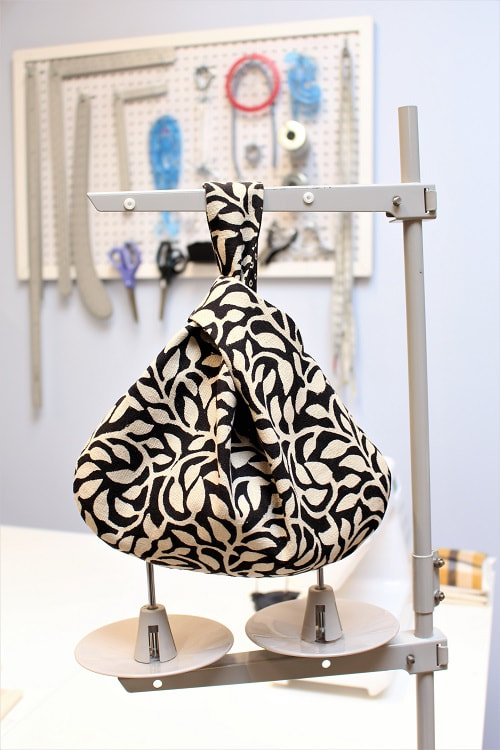
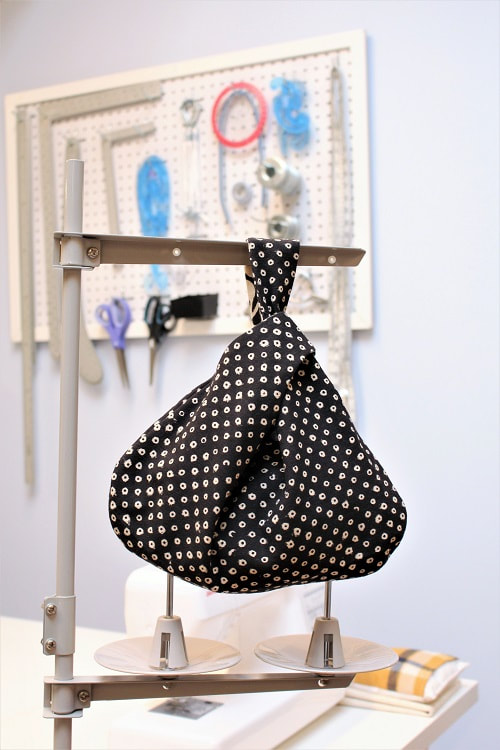
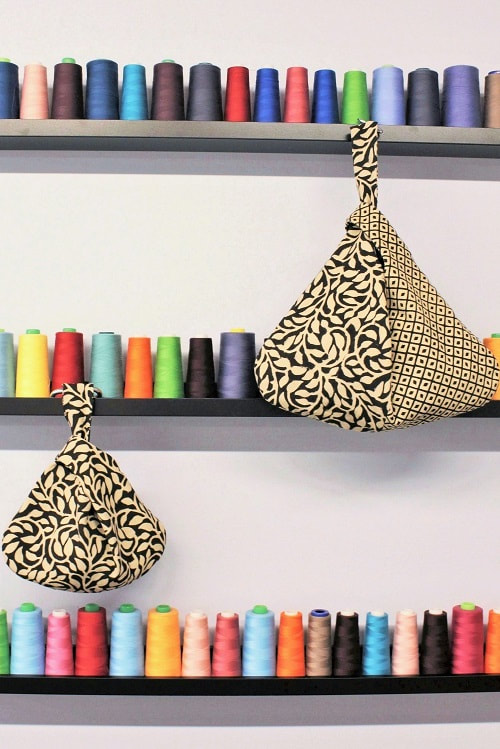
Final Design/ Size Variations2 bags are better than 1! We wanted to test out the larger size (17” x 17”) as per our previous blog post, Draft-a-Long: Tie Knot Bag (Part 1 of 2). BUT...we didn't stop there! As mentioned above, we wanted to combine all three hand blocked printed fabrics. So for our larger bag, we went with a patchwork design. Even the interior side is patchwork! Combing different prints and/or color combos is a great way to use up household scraps! Especially, if you're unable to buy fabric at the moment.
We can't decide which version we love more! Do you prefer the small or large tie knot bag? Tell us in the comment section below.  Isn't it so cute?! Tag us in your final make on Instagram! If you want to get booked in for a digital live streaming lessons during this time CONTACT us. Happy Sewing!
Designed, photographed and written by Sheila Wong Studios.
3 Comments
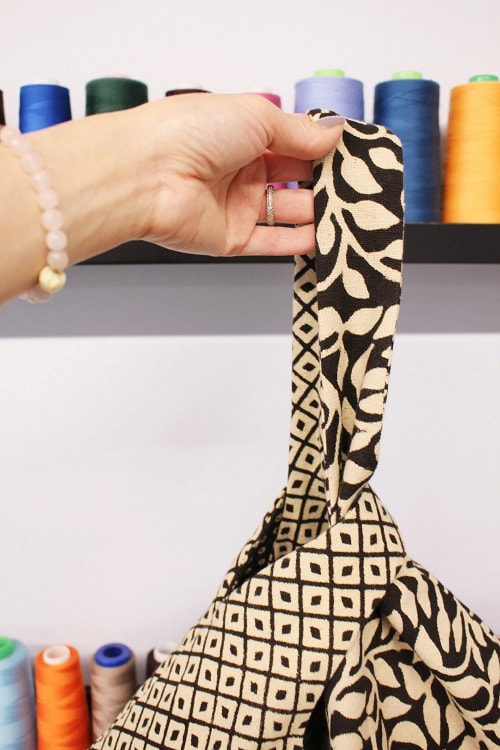
The tie knot bag is a small open tote that is meant to be carried over your wrist. The name comes from its unique design. Tie knot bags consist of one long handle strap and one short handle strap. The short handle strap slides over the long handle strap, creating a knot-like closure. You then slide your hand through the long handle strap and voila! Cutest accessory ever! Tie knot bags can be reusable/washable and come in a variety of sizes. They are often used as grocery and lunch bags. In this two-part blog series, we will share the step-by-step pattern drafting and sewing instructions to help you create your own tie knot bag. Welcome to part one, the draft-a-long.
Drafting Supplies
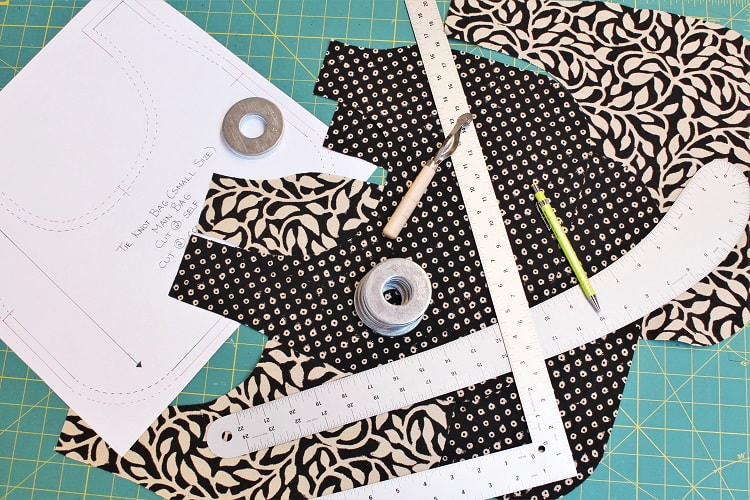 In these instructions, we will use the starting size for a small bag which is 13” x 13”. This size yields a final bag size of 13” x 6 ½” in the main body area. For a larger size try 17” x 17” as your starting size. 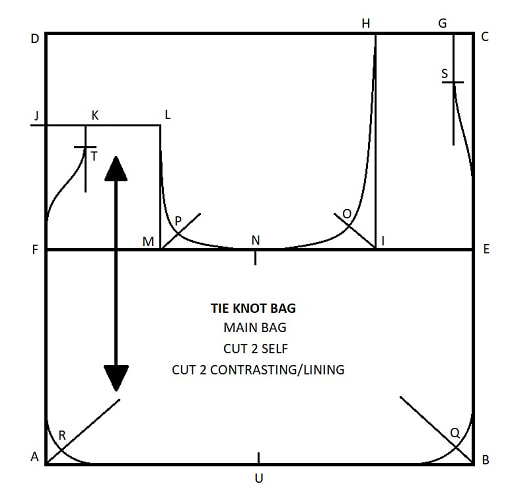 Drafting StepsA to B to C to D= Create a perfect rectangle (our example is 13” x 13”). Label each corner with A, B, C and D as illustrated. E= Midway of B to C (13” divided by 2= 6 1/2") F= Midway of A to D (13” divided by 2= 6 1/2") C to G= ½” G to H= Measure in 1 ¾”. From H, square down a guideline to E to F line, label I. F to J= Midway of D to F plus ¾” (6 ½” divided by 2= 3 ¼” plus ¾”= 4”). From J, square in a 3 to 4” guideline J to K= 1” K to L= Measure in 1 ¾”. From L, square down a guideline to E to F line, label M. N= Midway between E to F (13” divided by 2= 6 1/2") I to O= Draw a 45 degree guideline in the NW direction from I. Measure along guideline 1 ¾”, label O. M to P= Draw a 45 degree guideline in the NE direction from M. Measure along guideline 1 ¼”, label P. Draw a curved line connecting L – P – N – O – H. Stay on guidelines at L for approximately ½” and at H for approximately 1”. Level off at the center of the bag opening (M) for approximately 1”. B to Q= Draw a 45 degree guideline in the NW direction of B. Measure along guideline 1 1/8”, label Q. Draw in bottom corners of the bag with a curve. Use any circular item in your home like a pot lid or round plate. A to R= Draw a 45 degree guideline in the NE direction of A. Measure along guideline 1 1/8”, label R. Draw in bottom corners of the bag with a curve. Mimic a similar curve you used on the other corner. You can also fold the paper along the N to S line later and use a tracing wheel to transfer the same curve. G to S= Square a guideline down from G. Measure down a quarter of the C to E measurement. (6 ½” divided by 4= 1 5/8”), label S. Draw a slightly curved line from S to E. You will need to draw an S style curve for a natural look. S style curve incorporates a concave and a convex curve together. K to T= Square a guideline down from K. Measure down a quarter of the F to J measurement. (4” divided by 4= 1”), label T. Draw a slightly curved S style curve connecting F to T. U= Midway of A to B (13” divided by 2= 6 ½”) Mark Sewing Notches= Using a colored pen/pencil highlight points E, F, N and U Draw in Grain-line= Parallel to A to D line This completes your working pattern! To create your final pattern to use for sewing, place a blank piece of paper under your working pattern, weight it down and transfer your pattern using a tracing wheel. Ensure that you transfer not only the shape of the pattern but also the highlighted notches and grain-line. Add your desired seam allowance to the final pattern. We suggest using a 3/8” seam allowance. Draw in notches, grain-line and label as follows: TIE KNOT BAG (SMALL SIZE OPTION) MAIN BAG CUT 2 SELF (MAIN) CUT 2 CONTRASTING Ready to cut your fabric? Click this link: Sew-a-long: Tie Knot Bag (Part 2 of 2).
Happy Drafting!
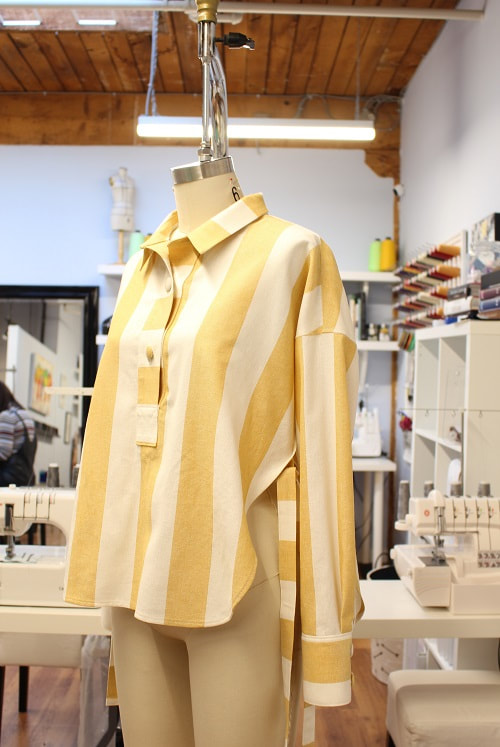
Designed, photographed and written by Sheila Wong Studios Our latest design has the cutest name— Jellyfish Tailored Shirt. The name was inspired by my favorite design element on this shirt, the high side seam slits with ties! The long side ties remind me of a jellyfish floating around the ocean. Did you know? Jellyfish is a symbol of love, acceptance, and balance. If it appears before you, it means you should have faith in your heart and follow your instincts! That's exactly what I wanted to do with this design!  Our shirt design was reverse drafted from a white tailored shirt I bought in Tokyo back in 2018. I am obsessed with the architectural look of how the hem falls and how the collar pulls back gently to reveal a bit of the neck. The pattern was drafted in 2019 while I taught a Reverse Pattern Drafting workshop at Maiwa School of Textiles. I was demoing the drafting steps during the workshop. Unfortunately, this year, my workshops were cancelled due to COVID-19, but you can still learn how to draft during this time through our live streaming lessons. Contact us to learn more. FabricIn late Feb, I visited Fabricana in Coquitlam with tailored shirts in mind. During this shopping trip, I picked up 3 fabrics in total. So far, 2/3 tailored shirts are complete! The Jellyfish Tailored Shirt and the Rainbow Faces Tailored Shirt. Check back for round 3! 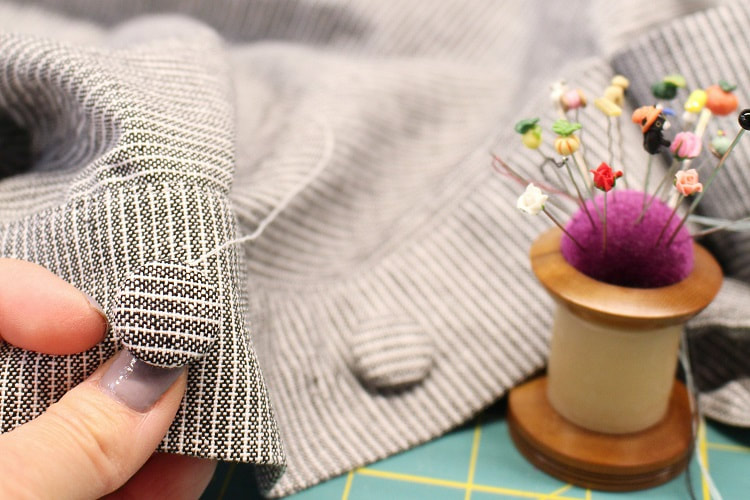 Project Specs
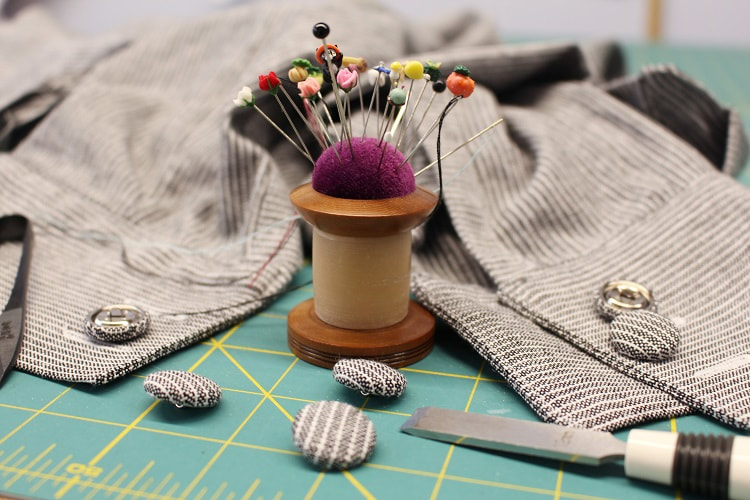
 Design ElementsTraditional tailoring techniques are all over this design. Below, I walk you through some of the stand out elements that make this shirt not so traditional. Pull-over Front PlacketTraditionally, a front opening extends down to the hem with the left and right front to be separated. Having this design only extend down the center front midway provides a more casual feel. If the placket looks familiar, it is because it is a large version of a tower placket normally seen with a cuff. Instead of a pointed tower, we opted for a square finish. 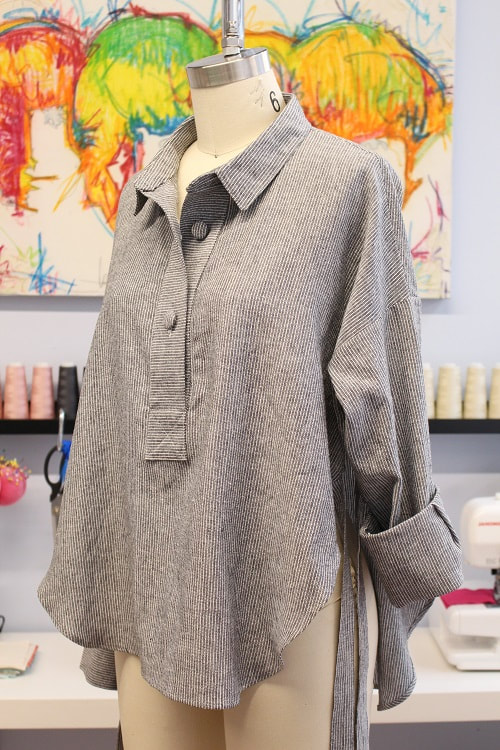 Fabric Covered ButtonsYou have seen this type of button with us before in many designs. I just couldn't find the right button or snap for this top, so no choice- fabric covered buttons for a perfect match. Love fabric covered buttons as much as us? Check-out the these blog posts: Tear-Away Jumpsuit, Plaid Button-Up Skirt, and Plaid Button-Up Dress.
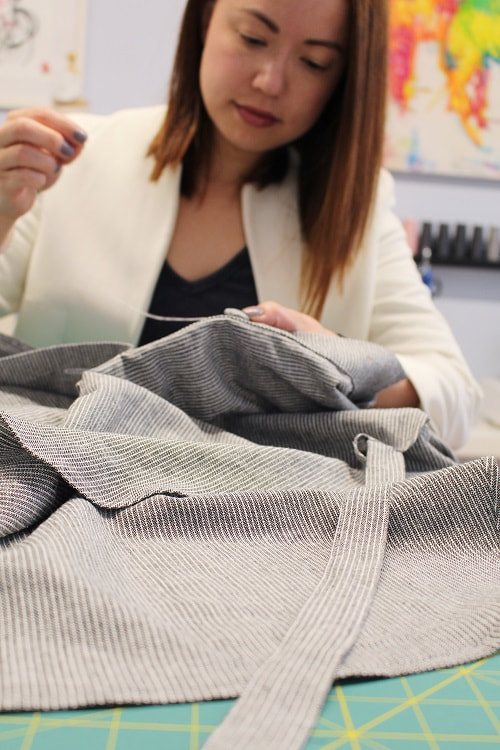
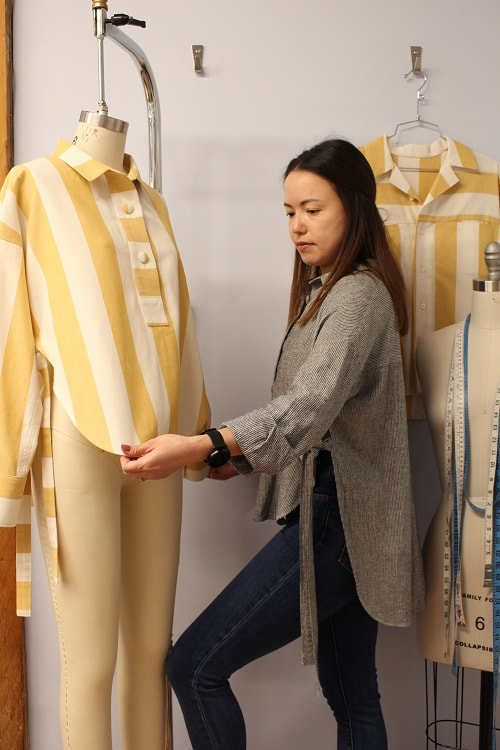
Side Seam TiesThis is what I believe makes the design unique! The lack of side seams (only 2 " from armpit) allows for mobility and the playfulness of a fabric tie. It is also the ties that inspired the name for this shirt-- Jellyfish Tailored Shirt. 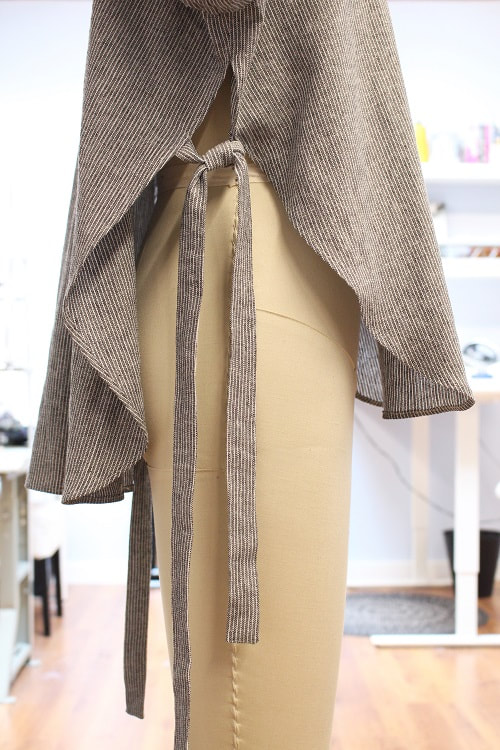 Final DesignCuff rolled-up or cuff rolled-down? Tie or no tie? Button-up or button-down? So many options!!! One of the reasons I love this design so much is it’s versatility. There are so many different ways to wear this shirt depending on how you want to style it. I think it looks best with a high waisted pant! How would you style our Jellyfish Tailored Shirt? Let us know in the comments. 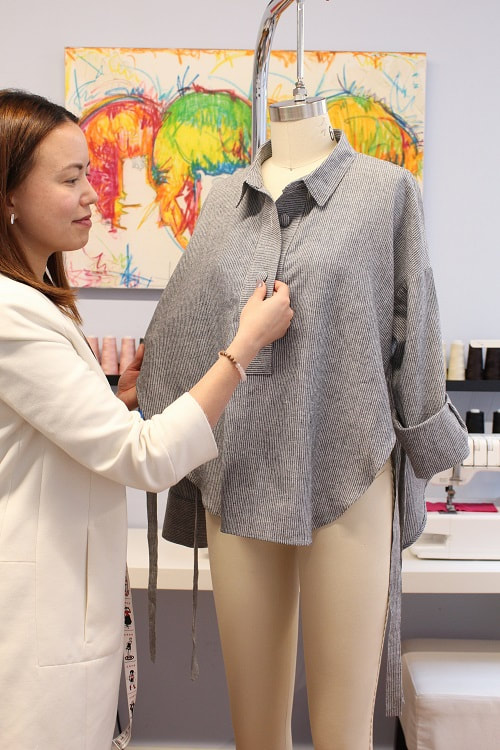 New Addition (Feb 2021)Yes you are seeing double! We had leftover fabric from our Beach Vibes Tailored Shirt. Just enough to make another Jellyfish shirt. We are fairly certain many more versions are to come over the next few years. Floral perhaps?! Follow us on Instagram to keep up to date with our designs.
If you would like to learn how to draft and construct a tailored shirt, contact us to book lessons.
Happy Sewing! Designed, photographed and written by Sheila Wong Studios. |
Archives
November 2022
|


 RSS Feed
|
|
Copyright © 2024 Sheila Wong Fashion Design Studio Ltd. All rights reserved.