|
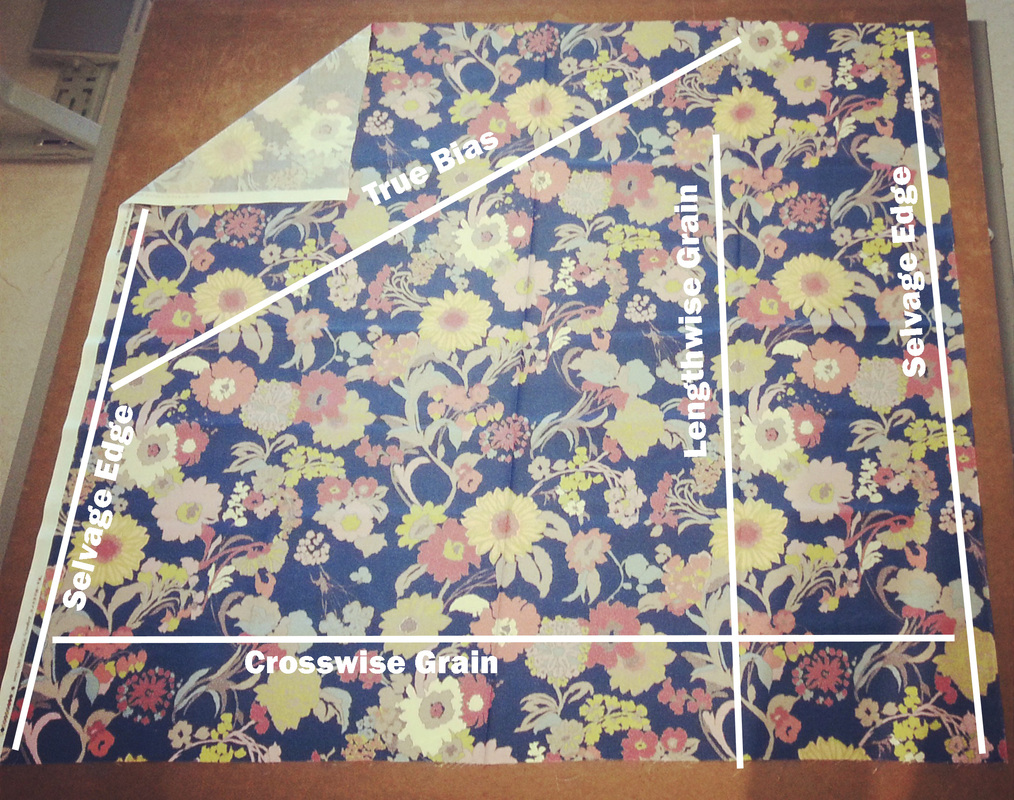
It can be extremely fun hitting up the fabric store picking up new fabric. Having an understanding of basic fabric terms will better equip you in being a smart sewer and shopper. SelvageThe finished, firmly woven edge on fabric. Sometimes you will see tiny perforated holes or manufacturers writing along this edge. This edge will run along both sides of the lengthwise grain edges. Lengthwise Grain (Warp)Running parallel to the selvage edge. These yarns are the strongest and most stable. Commonly this will run vertical on a body. Crosswise Grain (Weft)Yarns running from one selvage edge to the other selvage edge make up the crosswise grain on a fabric. Most woven fabric will have a bit of movement along these yarns. True BiasSitting at a 45 degree angle from the selvage edge, it is a line that intersects with the lengthwise and crosswise grains. True bias has alot of movement and give. It can easily conform to the contours of a body. Commonly seen in evening wear. Happy Sewing! Photographed and written by Sheila Wong Studios
3 Comments
We all love pockets so lets learn a little about the different types of pockets out there. Personally my favourite pocket is a clean hidden in-seam pocket. Flap Pocket Literally a flap, the exterior of the pocket only exposes a flap. There could be a real pocket under or maybe its just created for decorative purposes. Miu Miu 2013 retrieved from NY Mag Single Welt Pocket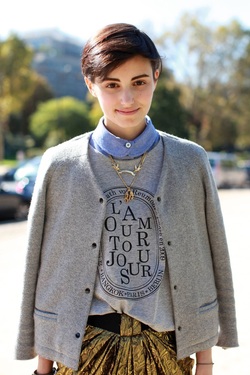 Great way to bring attention to a pocket by framing it with a welt. Mostly seen on jackets and outerwear. Unknown designer retrieved from NY Mag Double Welt Pocket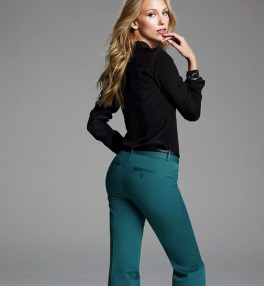 Common on dress pants and blazers. Two slim horizontal rectangles (welts) made of the same fabric as the garment line up to create a pocket opening. Can also be called a bound pocket, similar look to a bound buttonhole. Victoria Secret 2013 Side Seam/ In-Seam Pocket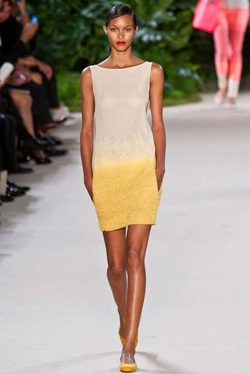 This is a very inconspicuous pocket. Normally you can not tell a pocket even exists until a wearer places their hand in pocket. Typically placed along the side-seam or any other common seam in a garment easily accessible to a hand. Akris 2013 retreived from NY Mag Patch Pocket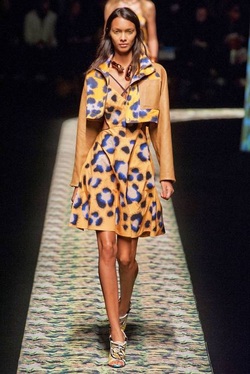 Most common couture pocket is a patch style pocket. It is a patch sewn onto the exterior of a garment. This Kenzo 2013 example is out of leather to match the sleeves. Kenzo 2013 retreived from NY Mag Bellows Pocket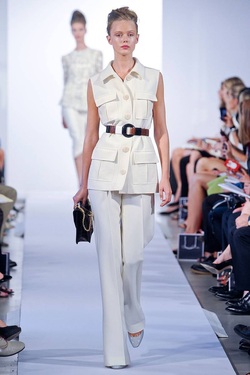 Outdoor and safari inspired. Key to make this a bellows pocket is the box pleat down the center. Oscar de la Renta 2013 retreived from NY Mag Safari Pocket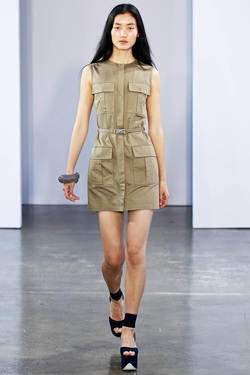 Similar to the bellows pocket, but now the box pleat has been flipped to create an inverted box pleat. Victoria Beckham 2013 retreived from NY Mag Pockets can be designed to be functional or for pure aesthetic reasons. Regardless, they make for a chic design detail on any garment.
Happy Sewing! Written by Sheila Wong Studios I always tell my clients that taking the time to press a garment along the ways of construction is essential. Why? Because it sets your designs apart in a more professional manner. I guarantee if you incorporate the following basic pressing techniques to your next design, you will not be disappointed! Before we get started...did you know that I have gone through 8 irons in the last 3 years. I press almost every day! Basic Pressing Tips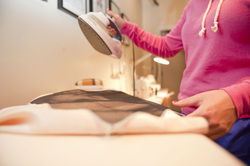 Ever wonder why you iron feels so heavy? Well the natural weight of the iron is just the right amount to press a garment. So please refrain from pushing down like hulk in the thoughts that it will assist in flattening a seam or a wrinkle. Also, no need to wiggle the iron while pressing. Steady heat in one continuous motion is plenty. 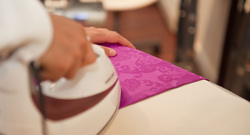 In my experience, I have found not all irons have the same heat levels. It is extremely important to test with a scrap of your intended fabric which level of heat to set your iron to. With a scrap, place your iron at a setting you think might be right and leave your iron on for 10 seconds. If there was any burning or shine created, your setting is too high. Pressing Seams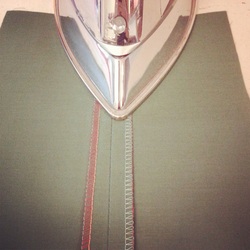 When pressing a seam that needs the seam allowances to be fully open, press from the wrong side of garment. This ensures a flat laying seam. 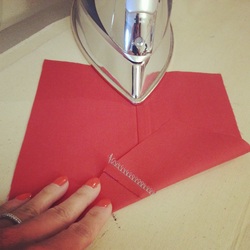 When pressing a seam that needs the seam allowances to be sitting to one side, press from the right side of garment. This lets you press the seam flat. Iron Maintenance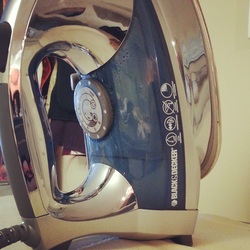 Always be aware of the water level in your iron. Do not let it get too low or else you will not receive a clean press. Also the steam function that assistants in giving that flat appearance will not work. 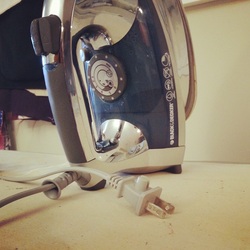 This one is really simple, yet I am still guilty of it. Turn off your iron when not in use. It extends the life of your iron. Keep an eye out for future blog posts on pressing difficult fabrics and attaching fusible interfacing with ease.
Happy Sewing! Photographed and written by Sheila Wong Studios Necklines can be used to our advantage. We can make ourselves appear taller or frame our face. Lets go through a few common necklines. V Neck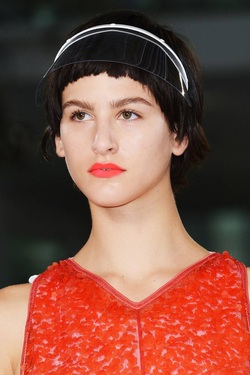 This one is fairly self explanatory. A "V" Shape is create framing the face. A V neckline is flattering on almost all figures and accentuates a face very well. Missoni 2013 retrieved from NY Mag Sweetheart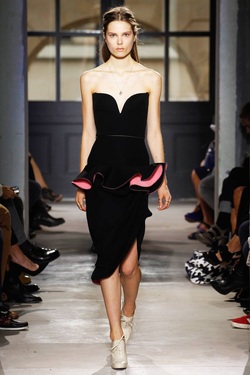 Technically of strapless origin but dips down at the centre front of a garment. This is typically seen in bridal-wear Balenciaga 2013 retrieved from NY Mag Jewel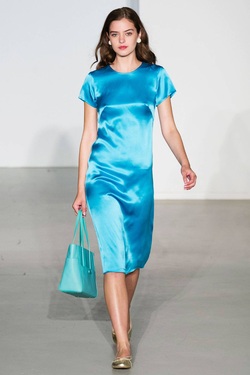 This necklines creates a cull circle around the neck, and tends to sit close to the neck base. Agnes B 2013 retrieved from NY Mag Square Creates a square like shape. This tends not to be the most flattering neckline as it plunges deep and takes a viewers eye away from a face. D Squared 2013 retrieved from NY Mag Scoop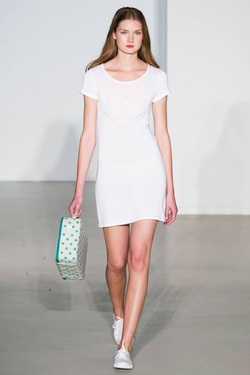 Similar to jewel neckline but does not sit as close to the neck base. Maintains a circular appearance. Can be low and/or wide. Agnes B 2013 retrieved from NY Mag Bateau Otherwise known as boat neckline. If you where to take an aerial view of the model, it would create a boat shape with the head sitting in the boat. Alice & Olivia 2013 retrieved from NY Mag Funnel-Up Can also be called a built-up neckline. The bodice and neckline are one continuous pattern piece. There are no seams to create this neckline. This about a funnel that has been turned upside down. Alice & Olivia 2013 retrieved from NY Mag One-Shoulder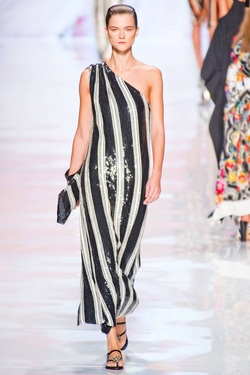 Giving off an asymmetrical look, the garment has been designed with one shoulder exposed on purpose. Do not mistake this one for off-shoulder where the garment falls off one shoulder due to the over-sized nature of the garment. Etro 2013 retrieved from NY Mag Strapless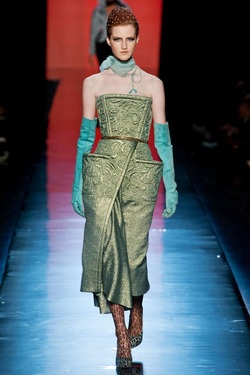 This one is easy and one of the most common in evening wear and bridal wear. Shoulders and neck are bare. Jean Paul Gaultier Fall 2013 retrieved from NY Mag Hope you have enjoyed this lesson on common necklines. Now go check out your closet and see what neckline you prefer. Happy Sewing! Written by Sheila Wong Used typically for decorative purposes either with the same fabric or contrasting fabric. A piped seam is an easy addition to your next garment. Step 1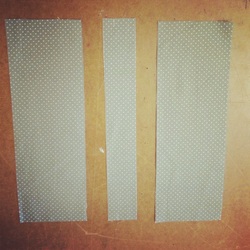 For this tutorial, I am just creating a small sample, thus why there are two rectangles in the photo. If you where creating this for a seam you would have your two pieces that make up the seam then an additional strip of fabric that makes up the piping. To figure out the width of your piping strip you need to first decide the width of the exposed piping you desire. For example, if I wanted 1/4 inch to be exposed in my finished seam I would calculate as follows: 1/4" + 1/4" + 1/2" (Seam Allowance) + (1/2" Seam Allowance) = 1 1/2" TOTAL WIDTH If you are sewing a straight seam, you can cut the strip on grain. If it is a shaped or curved seam you will need to cut strip on bias. Step 2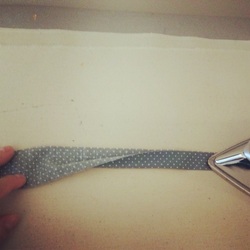 Time to prepare the piping strip. Wrong sides facing, press in half the strip lengthwise. Step 3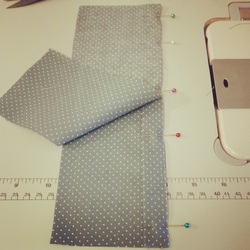 Time to sew. Right sides facing sandwich the piping strip in between the front and back piece. Line up all the raw edges and sew at 1/2" seam allowance (or whatever seam allowance you have decided). Step 4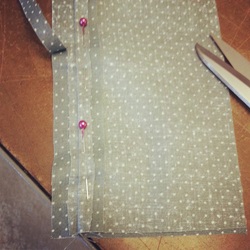 Time to trim away excess bulk in the seam allowance. We will only trim the following to the piping seam allowances:
The staggering of seam allowance width will allow the seam to lay flat easier. You will notice in the photo, I pin the regular seam allowance out of the way while trimming to avoid cutting any unnecessary fabric away. Step 5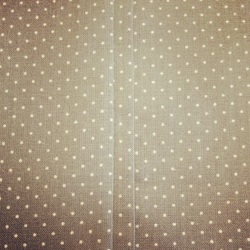 Time to press. Press all seam allowance to one side. Iron should be facing the right side of your seam. Your finished piped seam should look like this! Hope you have enjoyed this extremely easy tutorial on sewing piped seams. Send me a photo next time you decide to add a piped seam into a garment, would love to see it.
Happy Sewing! Photographed and written by Sheila Wong Studios Having an understanding of industry terms and fashion elements is pretty important alongside solid sewing skills. So, here is the first of a series of posts to familiarize yourself with the fashion industry. In this post, I will cover common silhouettes we should all know the proper names for. I'm using reference photos from NY Magazine Online, one of my favorite sites for up to date fashion shows. I always think of a silhouette as the entire outfit or garment as a whole and the shape or major eye grabbing attention it brings about. Natural Waist This is one of the most flattering silhouettes as it draws the attention to the smallest part of any individuals waist. Attention to the waist can be made with a seam, belt, fabric, color change, applique, you name it. Maxime Simoens Resort 2013 from NY Mag High Waist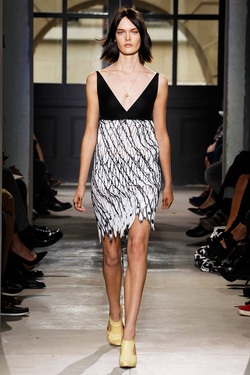 Same concept as natural waist but now the eye is raised to just below the bust line. This is extremely flattering on shorter individuals as it makes you appear taller. High waist silhouette is also called Empire, which was made popular during the early 1800's. Balenciaga Spring 2013 from NY Mag Low Waist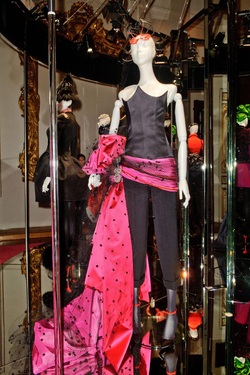 Dropped or low waist brings your eyes to the hips or just above the hips. Basically dropped from ones natural waist line. This look can elongate ones upper body, but can easily shorten you too. Schiaparelli Fall 2013 Couture from NY Mag Fitted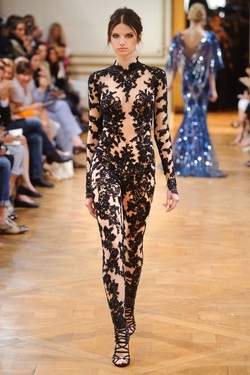 Fitted is exactly how it sounds, fitted. Now this Murad example is taking it pretty literally. But fitted shows off all the curves on a body and leaves much to the imagination. If you've got it flaunt it! Zuhair Murad Fall 2013 Couture from NY Mag Trapeze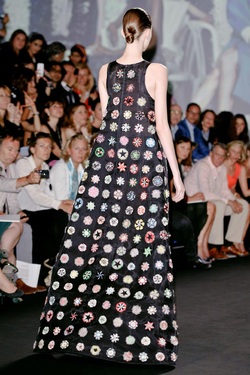 Also known as Tent or Trapezoid. Trapeze literally looks like a triangle on an individual. Thus its not the most flattering on everyone. I find this silhouette works best with sheer fabrics as it still shows off your curves. If this is your thing, you must check out Masion Martin Margiela Fall 2013 Couture collection. Christian Dior Fall 2013 Couture from NY Mag Chemise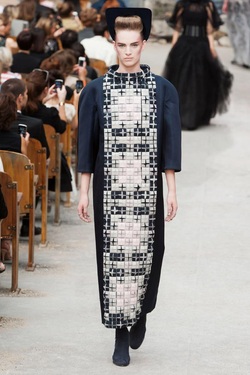 I like to think of chemise like a rectangle. From top to bottom its straight and shapeless. Chanel consistently brings out this silhouette each season. Karl Lagerfeld must know something we don't. Chanel Fall 2013 Couture from NY Mag Fit & Flare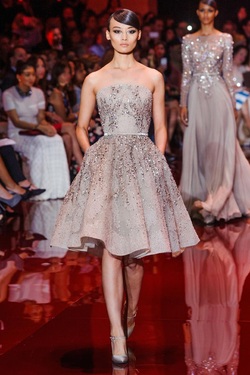 Fit & Flare skirts always have the shape of an A-line skirt. You will also notice its encompasses the idea of a natural waist silhouette too. This silhouette is extremely common right now. Check your closet. Dior does this look to perfection. Elie Saab Fall 2013 Couture from NY Mag Hope you have enjoyed learning about a few common silhouettes and now you can use correct fashion terminology.
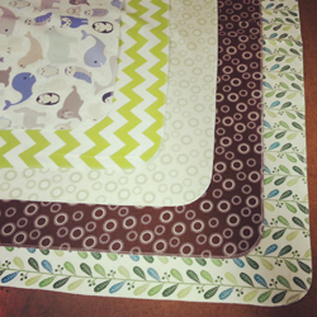
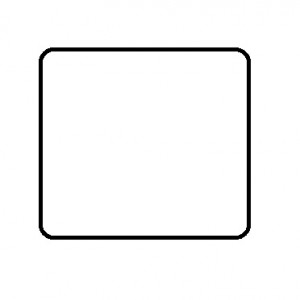
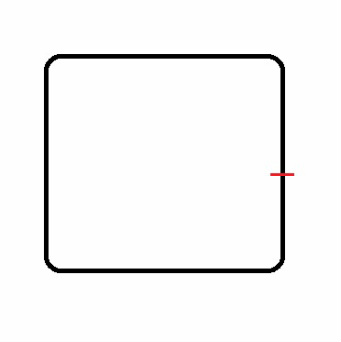
Happy Sewing! Written by Sheila Wong Studios Every so often it seems I am having to sew baby items for expecting mom’s in my life. So, I thought I would share my latest – the swaddle. For those of you non-mothers out there (including me) a swaddle is a square piece of fabric used to tightly wrap a baby. Think of a burrito! FabricI like to use a 100% Cotton Flannelette material as it can be useful in all seasons. Also, its nice and cuddly for the baby. Most fabric stores dont carry a modern variety of prints. You will find the typical cheese ball gender categorized prints, like unicorns and tractor trailers. The best place to purchase modern prints would be Fabricana. Here is my selection of gender neutral prints in Flannelette. I hear a Chevron print is fairly popular in the baby world right now. Average cost per meter for good quality Flannelette ranges from $9-15 per meter. But I have found Flannelette with less modern prints for under $5 per meter at Fabricland and Dressew. MaterialsAll you need is a serger and a few basic sewing supplies to make a burrito…I mean swaddle. To make one swaddle you require approximately 1.10 M of material. This will allow for a 41 x 41 inch dimension. Step 1Measure and cut out a 41 x 41 inch square. You can decide how large you want your finished dimension, but these dimensions have been tested out on a real baby already. Create curved corners by using a vase base as your stencil. You should have a shape like this. Step 2Serge all the way around where you have marked. For best results begin on a straight side (red line for start/end point) instead of a curved corner. This will give you a cleaner and more professional look. If you do not have a serger, you can zigzag the border. Why not make your next baby shower gift? It is definitely useful and thoughtful.
Happy Sewing! Designed, photographed and written by Sheila Wong Studios A corded seam can add that special detail to your next sewn garment. Here is a quick step by step on how to sew one. Its easy! Personally I want a corded seam on the side seams of short shorts for the summer. Now to just wait for mother nature to give me the summer part. Materials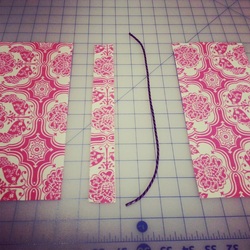
Step 1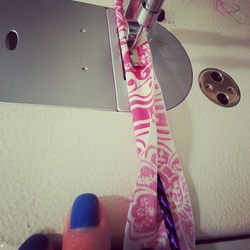 Change your machine to a zipper foot. Sandwich the cord in the middle of the strip. Sew as close to the cord as possible to encase the cord. Remember to backstitch as usual and ensure you raw edges are lined up. Right sides of the fabric should be facing out. 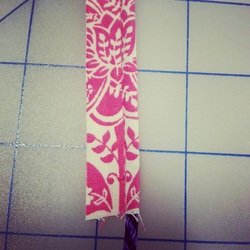 After you are done encasing the cord, it should look something like this. Step 2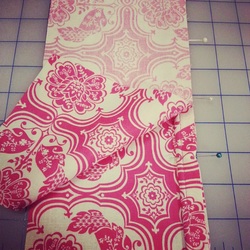 Right sides facing each other sandwich your encased cord between your fabric. Line up all four raw edges and sew as close as possible again to the cord. Throw a few pins in so the corded strip does not move around while your sewing. Step 3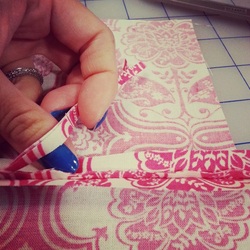 Trim away half of the seam allowance on the corded strip. This will remove any unnecessary bulk. Step 4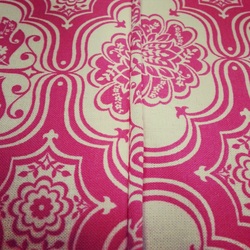 Press all seam allowance to one side. Your now done a corded seam! Happy Sewing!
Photographed and written by Sheila Wong Studios Some fabrics are just plain difficult to work with, silk being one of them. This post I will show you my simple tricks I use when designing with silk. I will focus on slippery and hard to handle silks such as Silk Charmeuse and Silk Chiffon type fabrics. Silk TipsPinning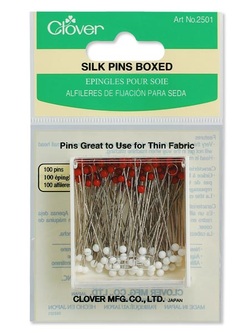 I try not to use any pins when working with silk. If you insist on using pins, use silk pins and ensure they are not dull. One dull pin can create a run in your fabric so fast! I like using silk pins by Clover as they glide through Silk Chiffon's and don’t leave a big hole. Also, if you can only pin in the seam allowance area if possible. By pinning only in the seam allowance area, it will take away from any unwanted holes on the visible side of your garment. Cutting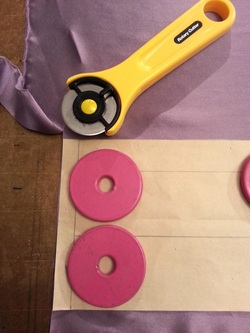 Put away your fabric shears! I use a rotary cutter as it gives you a more precise cut. They less you need to fuss around with the fabric the cleaner cut you will get out of silk. Again, I am not pinning my pattern onto the fabric. I place weights and carefully cut with a rotary cutter. Sewing Seams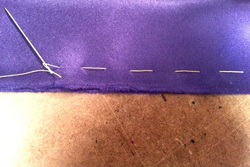 Machine sewing slippery silks can be a nightmare. After sewing several silk garments I have realized that machine backstitching can pucker your beautifully sewn seam even if your tension is perfect. Do not machine backstitch. Just sew your seam, press, and then hand stitch in your backstitches. This ensures you have a flat seam with no puckering. When sewing a seam the two layers always find a way of sliding away from each other. To remedy this I hand baste a running stitch on the sew line prior to machine sewing it. I know your thinking this is an extra step you rather not do. But don’t be lazy! It is worth the feeling of a perfectly sewn seam. Pressing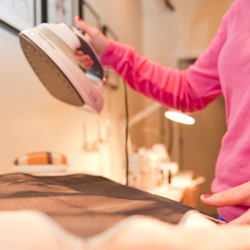 Number one thing sewers forget to use is a press cloth when working with delicate fabrics. A press cloth is placed in between your garment and the iron to avoid direct heat contact. You can make your own press cloth by cutting out a rectangle piece of fabric made of sheer light weight cotton. Silk is very sensitive to heat, when pressing a new seam try to use only the tip of the iron. This will avoid the raw edge of the seam allowance being permanently imprinted onto the right side of your garment. Hope you have enjoyed these tips on working with slippery silks. If you would like to learn more come see me in my studio, or if you would like to share your tips on working with silk please post on our Facebook or Twitter feeds!
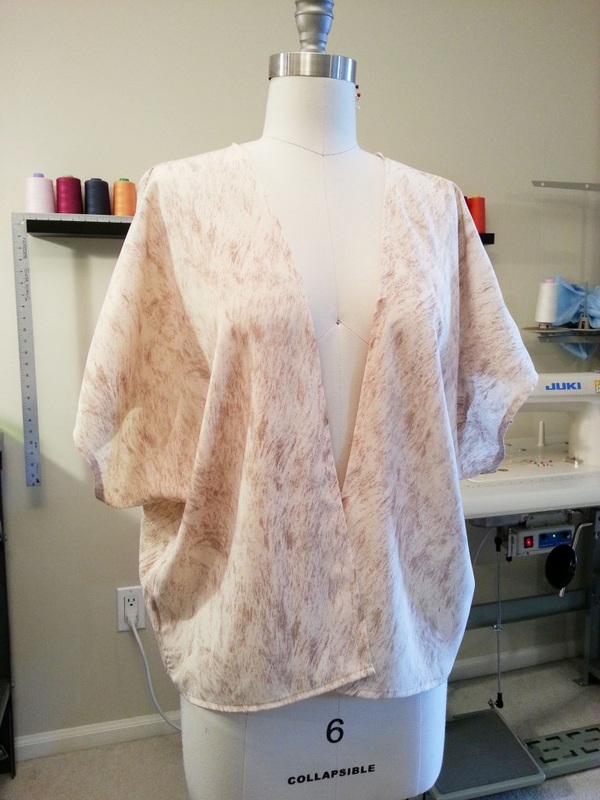
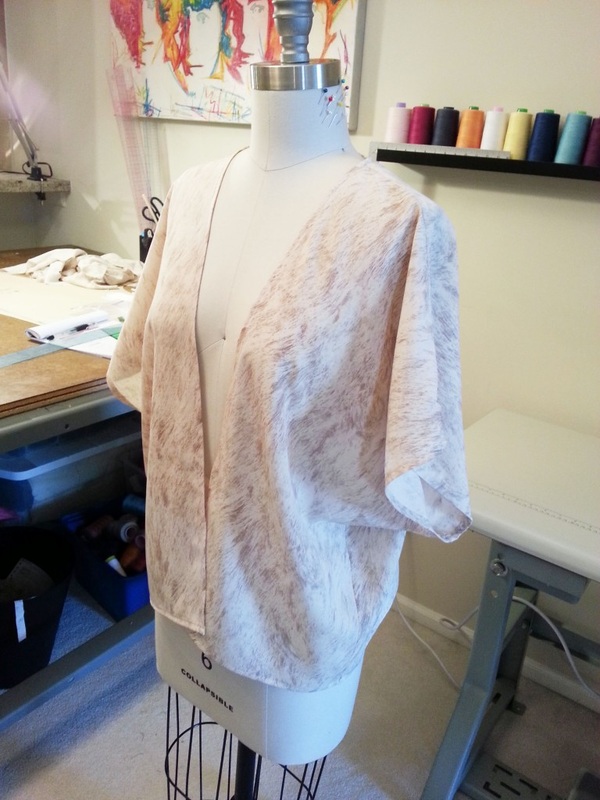
Happy Sewing! Photographed and written by Sheila Wong Studios This tutorial is inspired by my silk chiffon Propaganda top recently photographed by Desmond Cheng below. I was on a double date night with my fiancée. PS- I won at bowling that night! There is a bit of kimono inspiration mixed with a cocoon silhouette. This tutorial is a bit more detailed oriented then normal but its well worth it. You will learn how to finish off silk in a clean way with a French seam. If you have a serger that can do a rolled hem, you can sew the entire top this way. If not, then follow my steps below to completing each seam. Materials
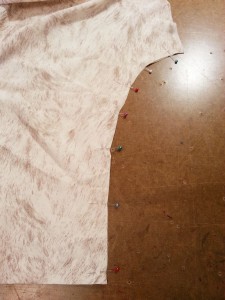
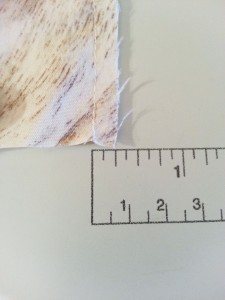
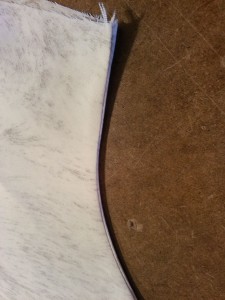
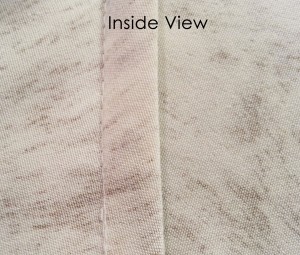
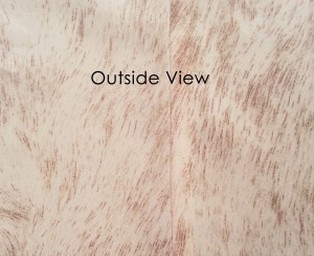
Step 1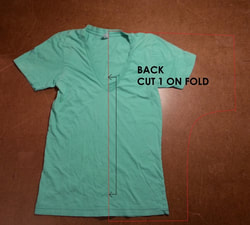 Draft Front and Back patterns based on a fitted t-shirt. Lay your t-shirt flat on pattern drafting paper (If you don’t have use newspaper or packing paper). (Back View) 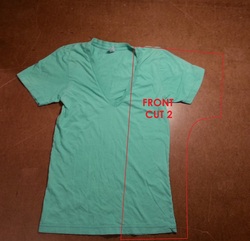 Trace out the following Front and Back patterns similar to above. Add ½” seam allowance around each traced out pattern piece. You do not need to add seam allowance to the center back seam as it will be cut on fold. (Front View) Step 2Pin and cut out fabric pieces. You should have 1 Back piece (cut on fold at center back) and 2 Front pieces (left and right). Step 3Sew side seams and shoulder seams with a French Seam. Steps to sew a French Seam: 1. Bad sides facing each other sew at ¼ seam allowance. 2. Press seam allowance to one side. Then good sides facing each other press sewn seam flat so it’s like a book. 3. Sew from folded seam in at 3/8 seam allowance. This will sandwich the raw edge thus creating a clean French Seam. Your French Seam should look like below. Here is an inside and outside view for you. Step 4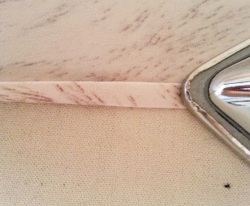 Press front neck seam by folding in twice at ¼ inch each. 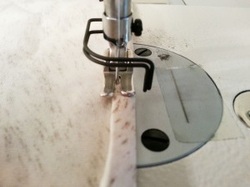 Edge stitch closed. Step 5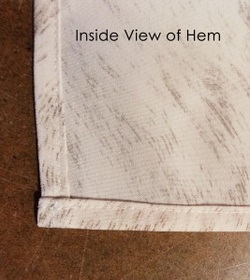 Hem bottom of shirt and sleeve the same way as step 4. Step 6Press all seams. Final DesignHere is my completed top! Let me know what you think of this tutorial. If you have any questions feel free to ask. Happy Sewing!
Designed, photographed and written by Sheila Wong Studios |
Archives
November 2022
|
Copyright © 2024 Sheila Wong Fashion Design Studio Ltd. All rights reserved.


 RSS Feed
