|
A straight woven skirt is an item all novice beginners learn while entering into the world of garment construction. You learn a variety of skills from darts, zipper installation, seam finishing, hemming, and basic hand sewn finishes. Our clients in our Intro to Garment Construction course learn just that in one of two projects.
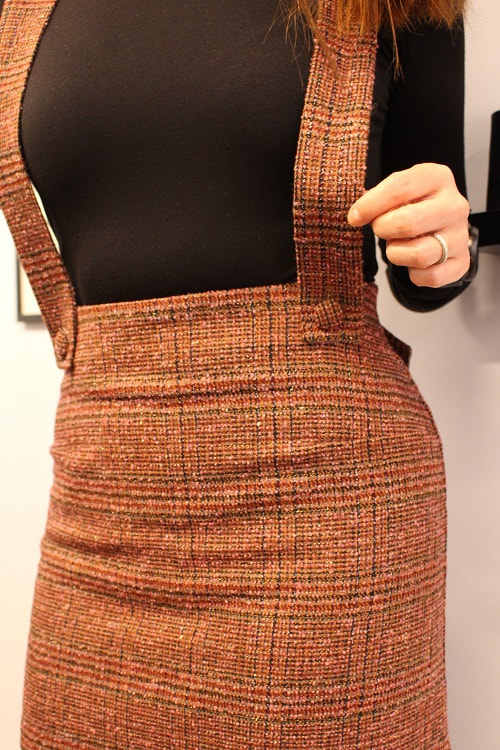
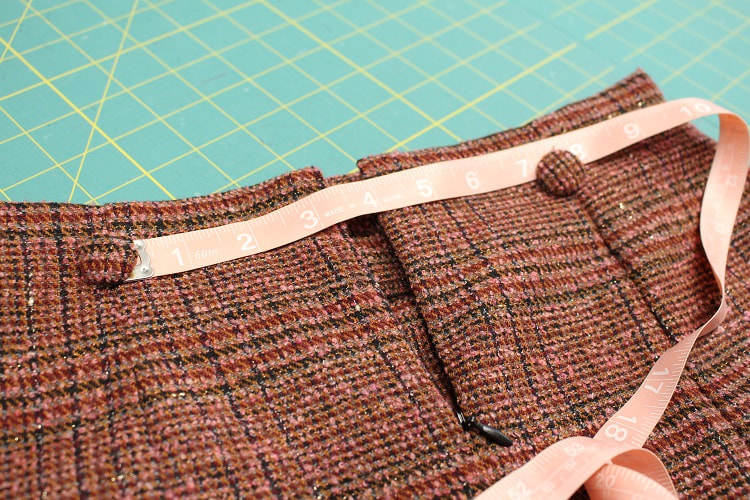
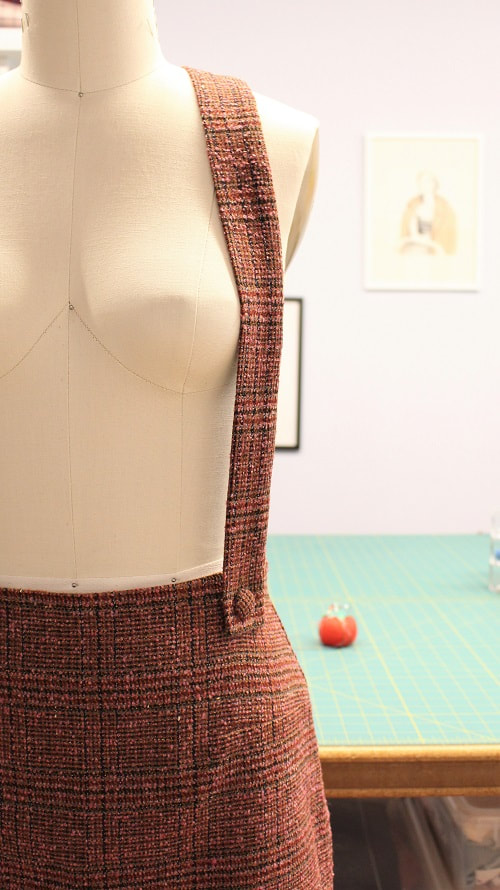
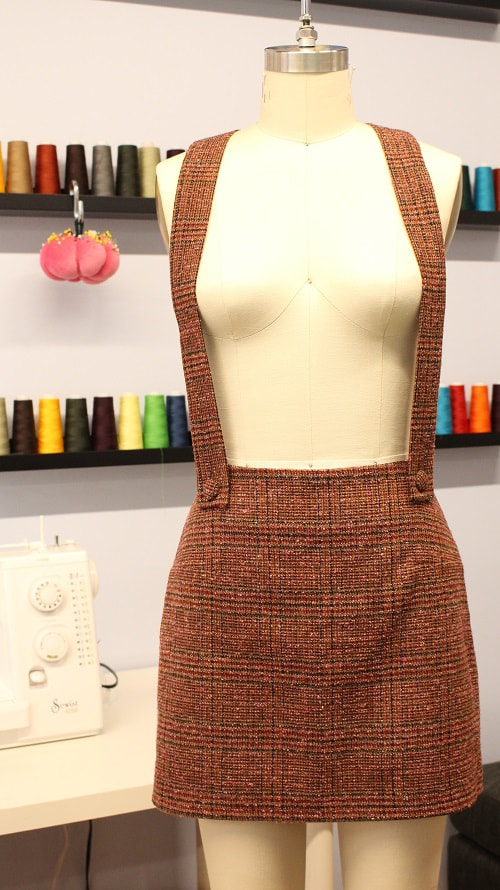
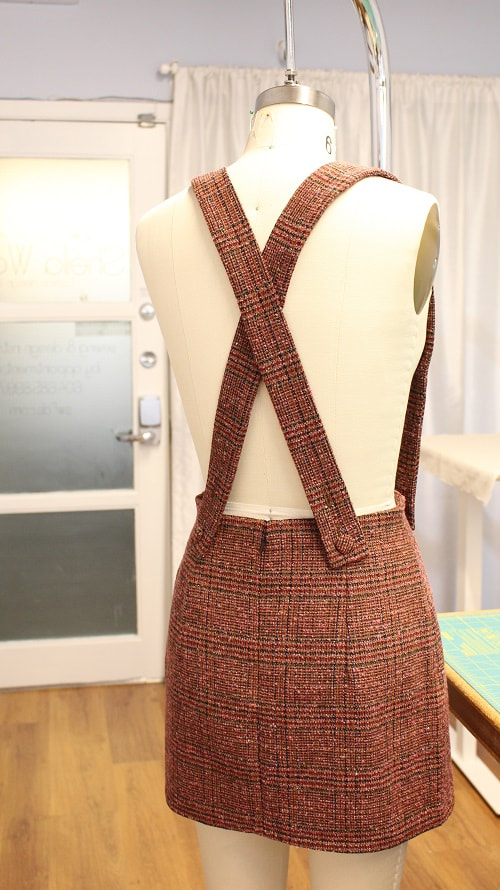
While working with one of our latest clients in Intro to Garment Construction, we demonstrated using a beautiful plaid from Atex Designer Fabrics. Our team really felt the retro color palette and vibe of the skirt could be elevated with some fabric suspenders. I had to share with you the step by step process for many reasons. Fabric suspenders are so easy to construct, it uses up scrap fabric, and you get a whole new look for a skirt. Here is a tutorial on how to measure, draft and stitch up your very own fabric suspenders. Go grab yourself a skirt you think needs an upgrade! 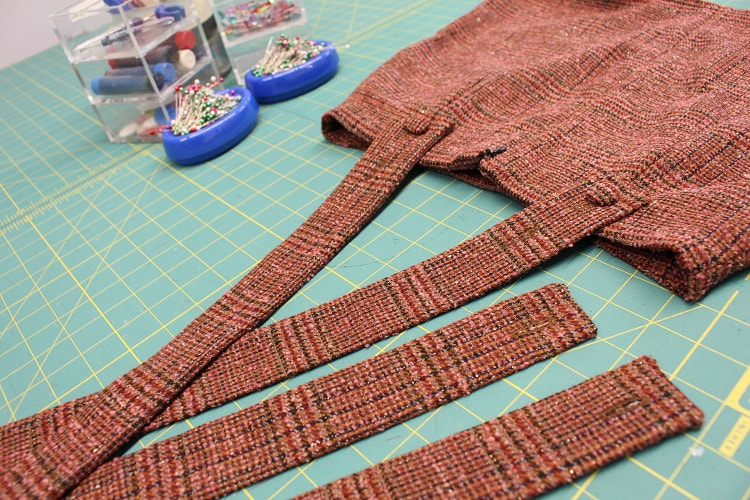 Step 1Decide where you would like buttons placed on the front and back of the skirt. In our example the buttons are approximately 3- 3 ½” away from the CF and CB of the skirt and 1 ¼” down from the waistline.
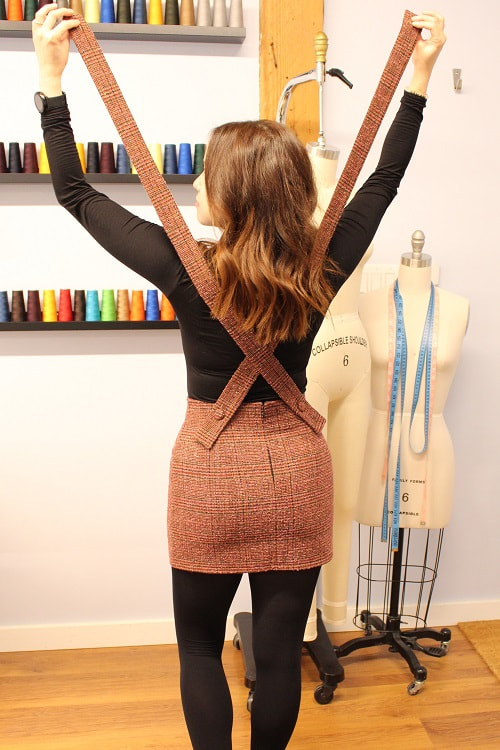
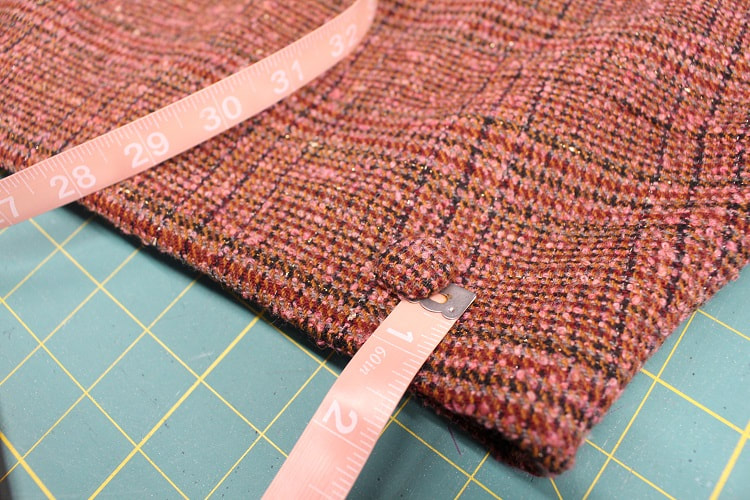
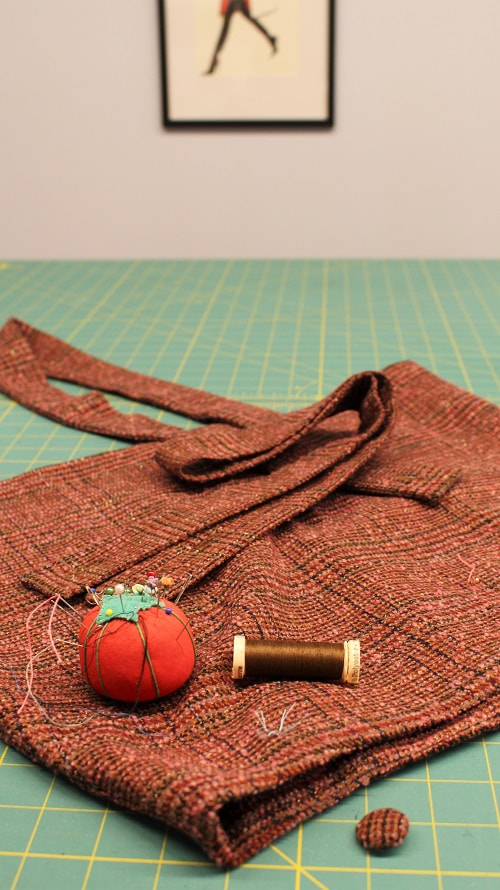
Mark with a pin or thread mark button placement. Feel free to hand sew buttons on at this point or wait until the end when suspenders are fully constructed. 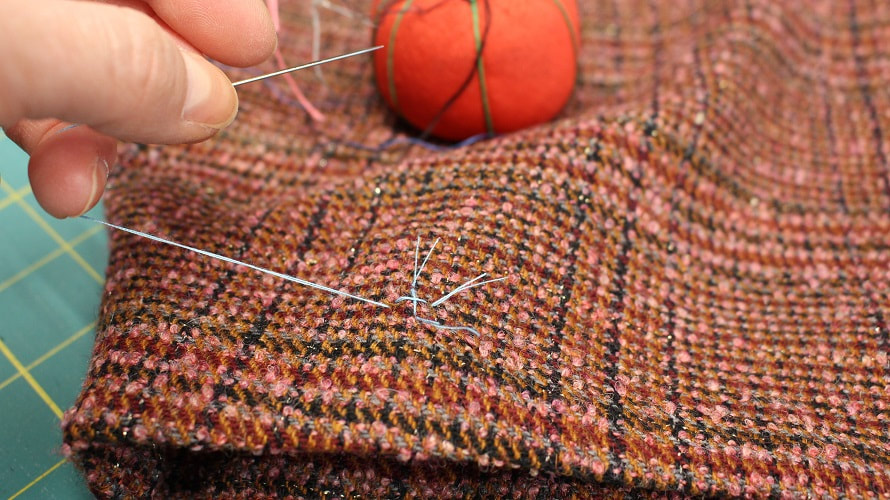 Step 2While wearing the skirt, measure from front button placement around shoulder to back button placement. Record measurement. Our length is 36” with a cross-back formation. 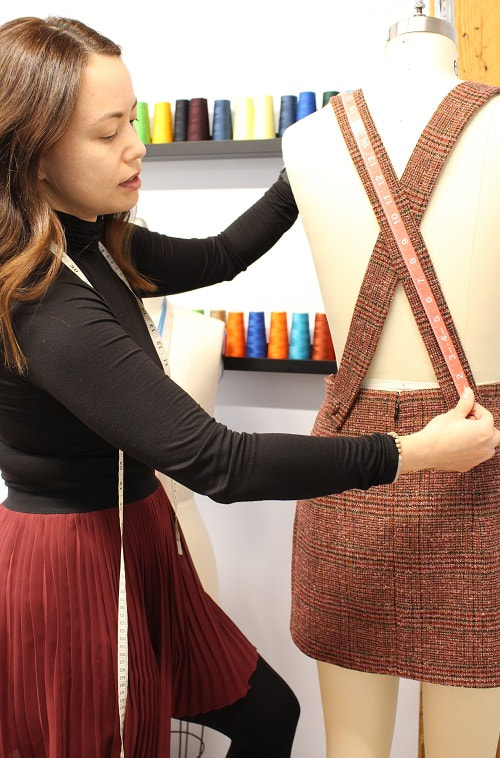 Step 3Draft out the suspender pattern as follows.  Length= Button to button measurement (from step 2) + 3” (back extension) + 1” (front extension). The back extension will allow space for two buttonholes and the front will allow for one buttonhole. Example: 36” + 3” + 1”= 40” Width= Desired suspender width x 2. Example: 1 ¾” x 2= 3 ½” Add desired seam allowance around the entire pattern piece. We are using ⅜” in our example. Step 4Cut out fabric. If you have loosely woven or unstable fabric feel free to fuse a small piece of interfacing to the backside of where the buttonholes will be stitched. Step 5Fold along the middle fold line with the right sides of the fabric facing each other, pin around three edges. Stitch around three edges using one stitch line. Drop down to a smaller stitch around corners. Leave a 5-6” opening anywhere along the longer edge. Trim away excess bulk in seam allowance, flip and press. 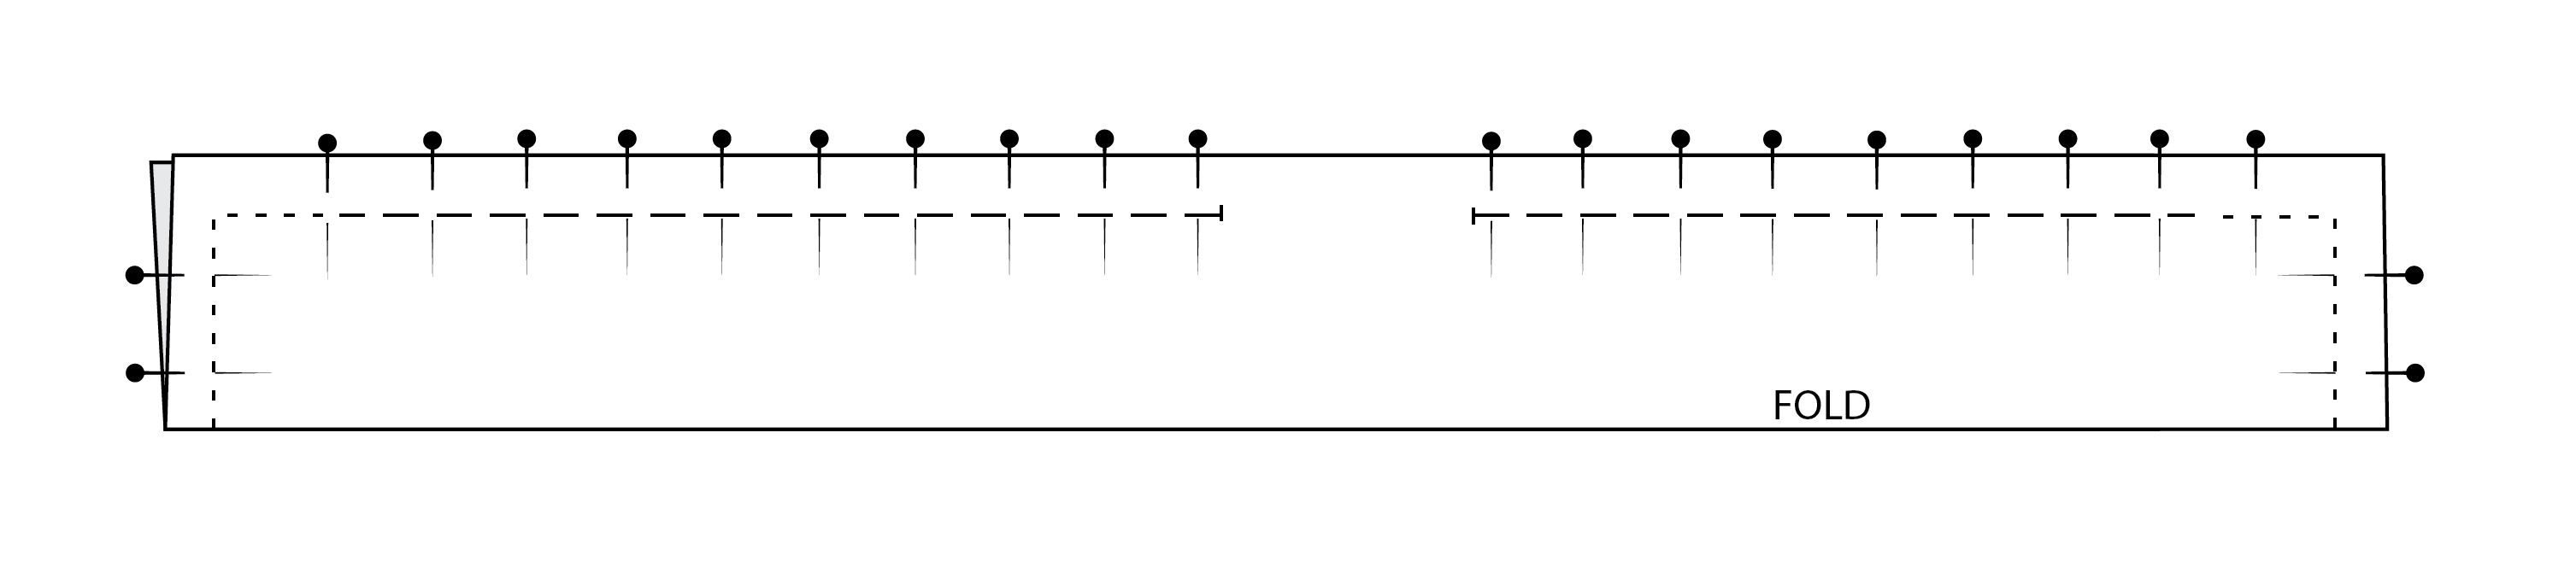 Step 6Mark and stitch buttonholes using a sewing machine or by hand. 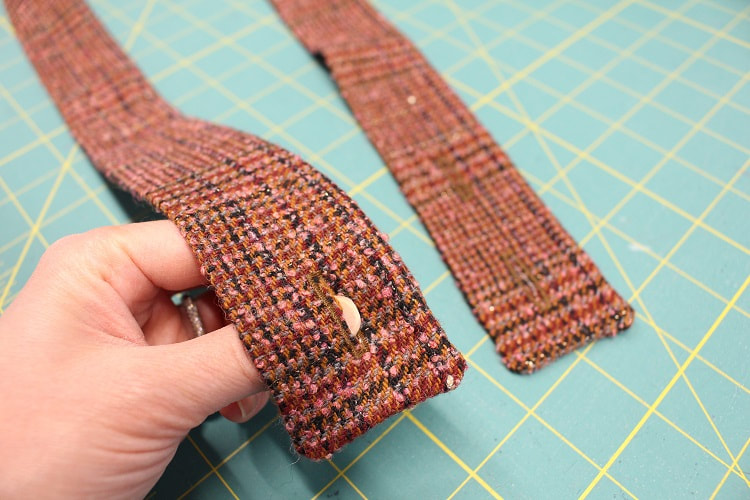 Here is our placement for buttonholes. We used two buttonhole options on the back to allow for a variety of tops to be worn under with ease. Feel free to personalize. 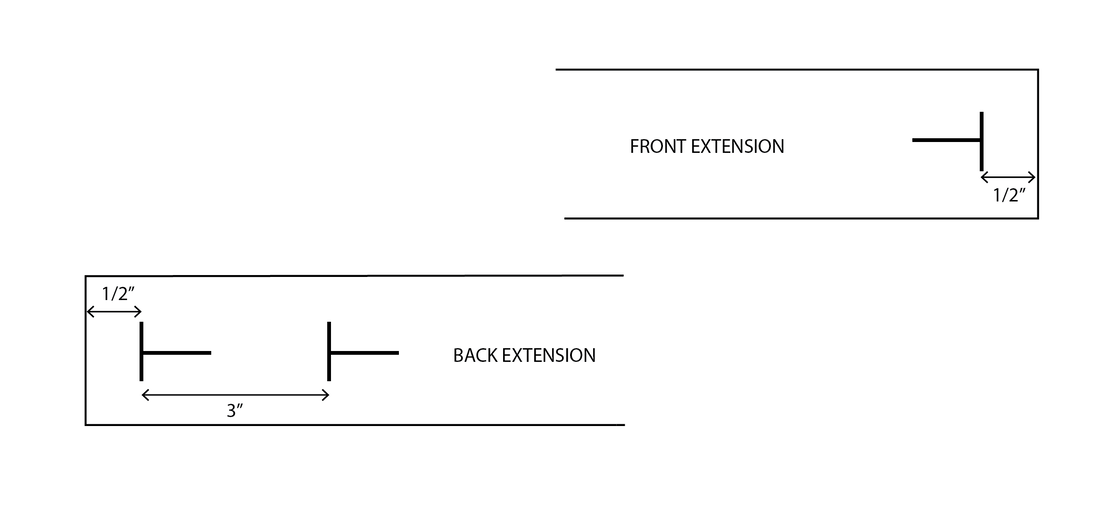 Step 7Hand sew buttons onto the skirt and hand sew closed the 5-6” opening. Draw stitch works well.
Final ThoughtsThis 60’s inspired retro skirt and suspender set was fully stitched on one of our Juki industrial machines and took just over 6 hours of sewing while instructing. We still have two meters of this lovely plaid in the studio. Let us know below if you think we should evolve this design into a pinafore with the remainder.
If this fabric looks familiar to you it's because we designed a Plaid Button-up Dress back in January of 2020. Be sure to follow us on Instagram or join our mailing list for insider tips and inspiration.
Happy Sewing! Designed, photographed, and written by Sheila Wong Studios.
2 Comments
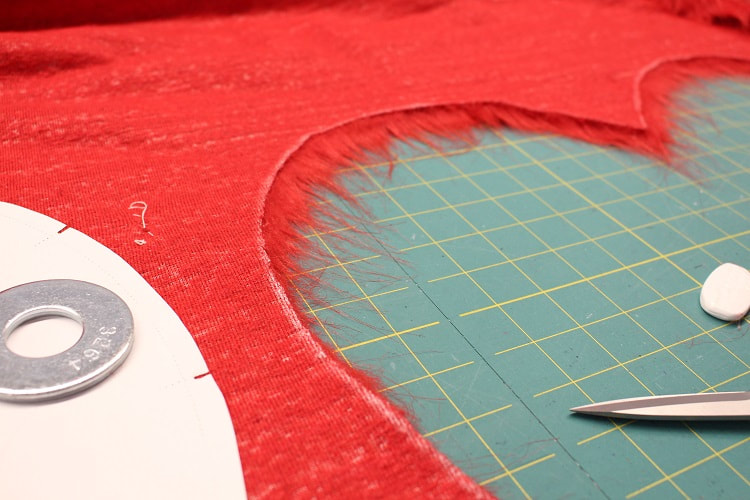
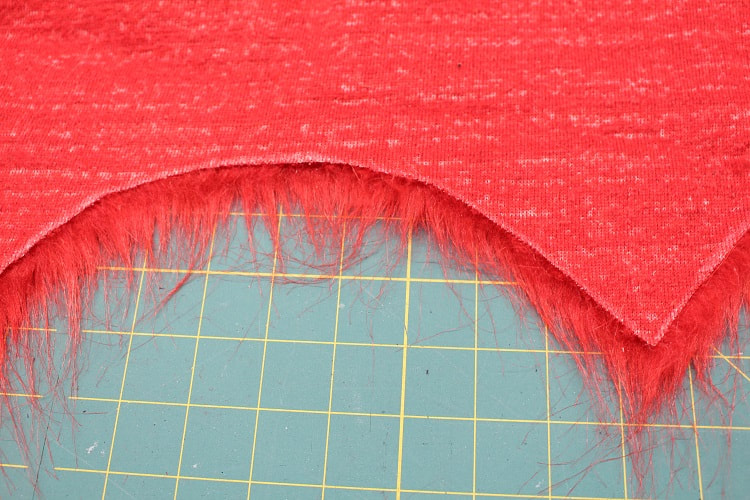
For Valentines Day our studio celebrated love by creating an intricate Quilted Heart Bag. The love continues with our latest design- Faux Fur Heart Bag. Full disclosure, I adore sewing with faux fur, so I jumped at the opportunity. This adoration all started as a teenager where I experimented with faux fur dance costumes. I still have a bin of faux fur I work with occasionally. This bright red from Fabricana is definitely the boldest color I have ever worked with. 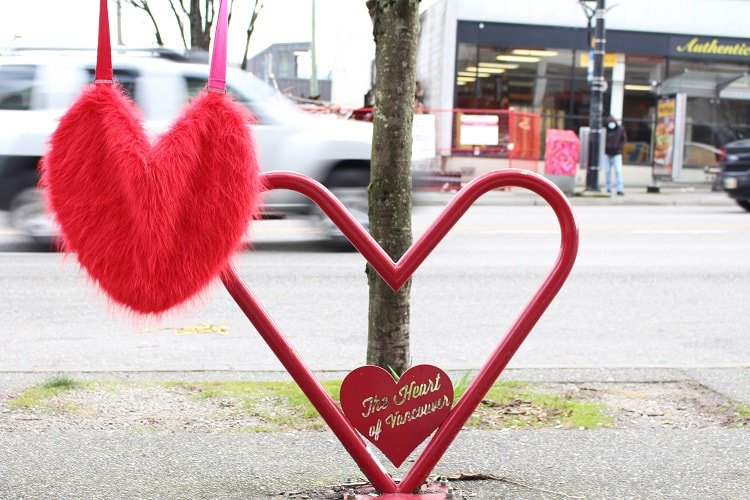 In this blog post, I will dive in-depth into how to cut out faux fur without creating a fuzzy mess. You even get a short YouTube video of my must-do steps. Please let me know in the comments below if you would like a second blog post focusing on sewing with faux fur. 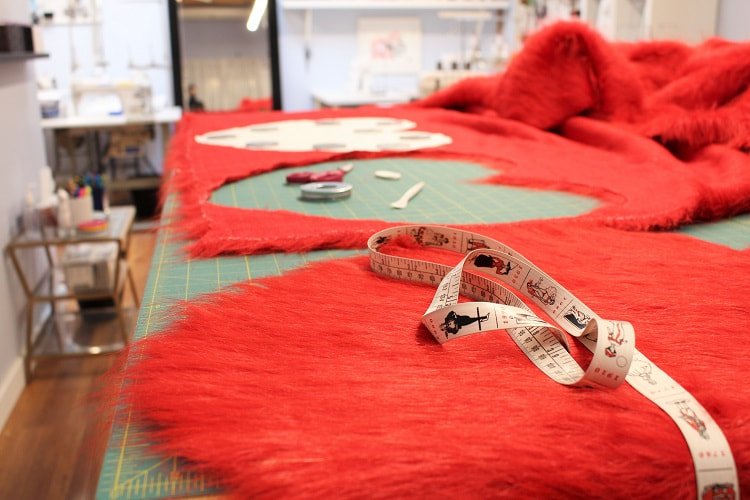 Cutting Faux Fur TipsIf you have ever cut into faux fur you have probably experienced fur fibers flying in the air, sticking to the walls, your clothes, and possibly in your mouth. The mess deters many of us from cutting into this fun fabric. After two decades of working with faux fur, I now implement a few essential steps. 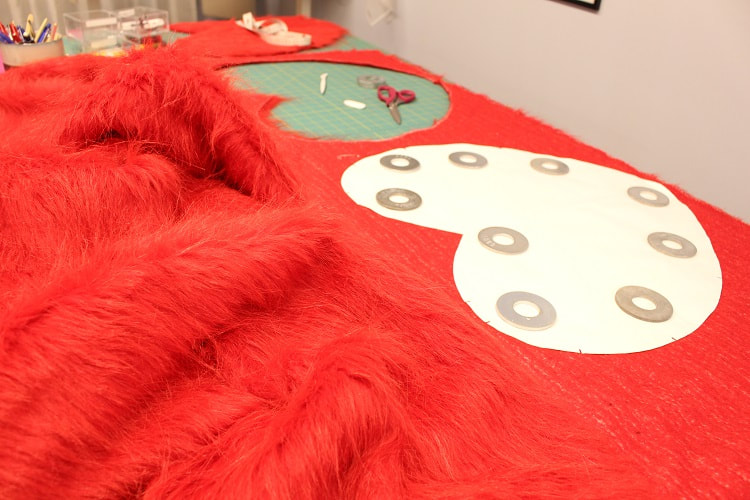 Here is a step-by-step how to cut faux fur on your own. Video and photo options available below. Step 1Layout fabric with the wrong side (backside) facing up. Be aware of the fur direction (nap). You can even chalk in an arrow on the wrong side for guidance. Once you have your pattern pieces on grain, weigh down the pattern and begin marking around the pattern and the notches. Avoid pinning pattern pieces down as it will distort the pattern edge shape. Once marked, remove weights and pattern. 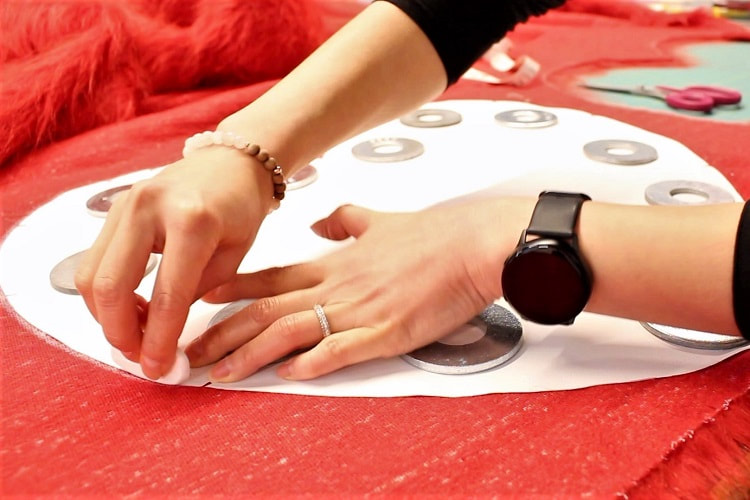 It is important to note we will be cutting one layer at a time. If you are cutting out any asymmetrical pattern pieces, ensure you flip your pattern pieces as you proceed cutting out any more than CUT 1 patterns. Step 2Cut through just the backside of the fabric along your marked lines, avoiding the fur pile. DO NOT cut through any fur. You want to maintain the length of each fur fiber.
With high-quality faux fur, you can glide your fabric scissor edge along the backside of the fabric avoiding any closing of the scissors on the fur itself. Once cut, pull out each pattern piece. This is where the magic happens! If you have cut correctly, there will be minimal fur stray bits. 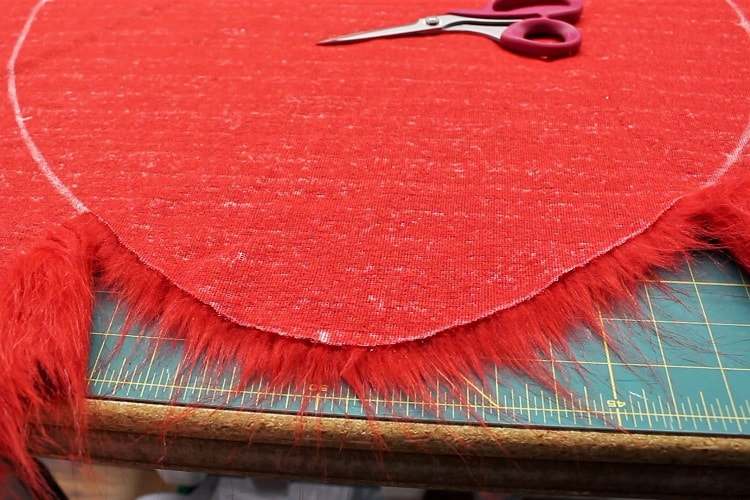 Step 3Keep a vacuum handy. Vacuum all the edges of each piece after cutting to remove away any excess dust or fibers hanging on. If you have leftover fabric, be sure to vacuum the cut edges before storing them away.  Bonus TipAlways wear a mask when cutting out high pile fabrics like faux fur. For years, we have kept N95 masks in the studio for this purpose. Here I am in 2015, cutting out faux fur for a fully lined vest. 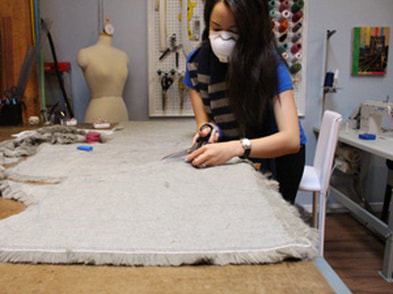 Project Specs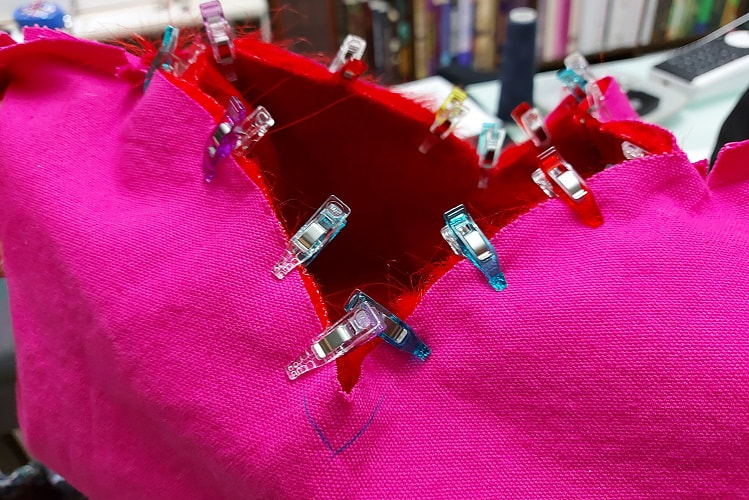 Final ThoughtsI hope this blog post provided you with the confidence to cut into faux fur fabric. Fun fact, items I have made using faux fur include a vest, stole, bolero, skirts, dresses, crop tops, triangle tops, boot coverings, and bags. 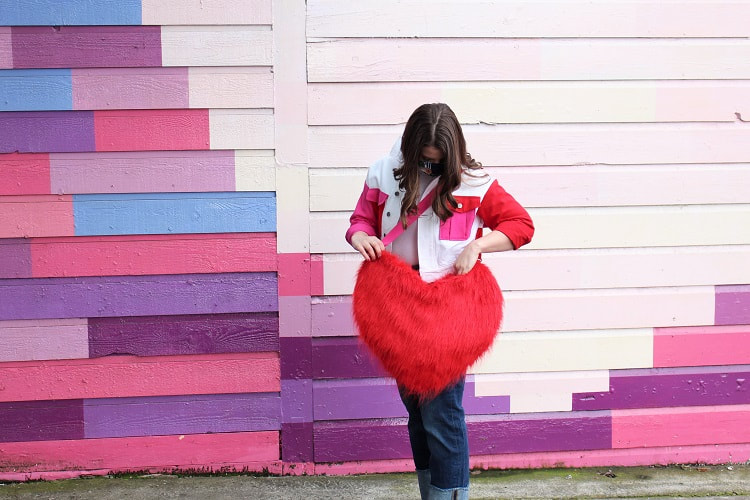 Happy Sewing!
Designed, photographed, and written by Sheila Wong Studios. |
Archives
November 2022
|
 RSS Feed
|
|
Copyright © 2024 Sheila Wong Fashion Design Studio Ltd. All rights reserved.