|
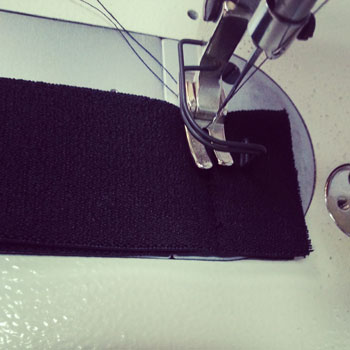
A bound seam finish is not often seen in mass produced garments. Its a beautiful way to finish off raw edges inside of a garment. It is typically used to finish unlined garments in which the fabric has a high fray rate. Follow this step by step tutorial on how to apply a bound seam finish. 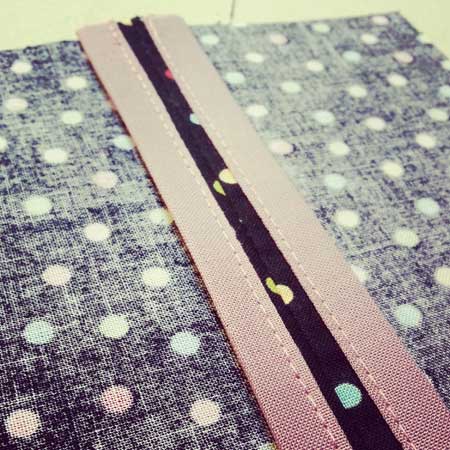 Step 1
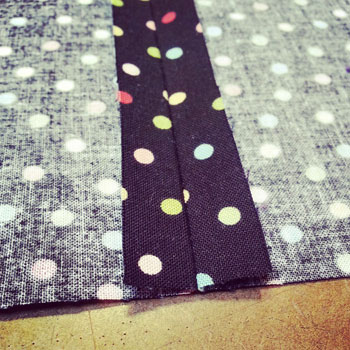
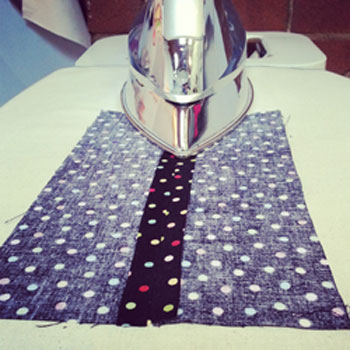
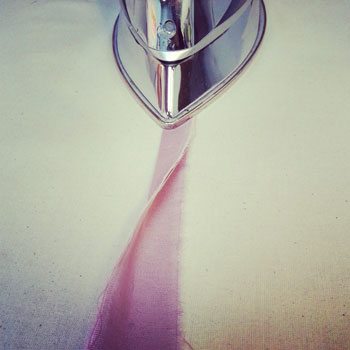
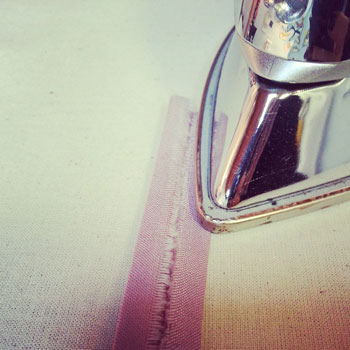
Right sides facing sew your seam at 1/2" seam allowance and press seam open. Please note for this tutorial I will be using a 1/2" seam allowance, please check your pattern prior to sewing to see what the allocated seam allowance is. You have the choice to bind the seam allowances together, or bind them separately. Consider the thickness of your fabric, where the seam is located in the garment, and what style you desire. For this tutorial, I will demonstrate how to sew them separately. Step 2Now its time to create the binding tape. For a straight seam, cut a strip of fabric on grain or on the crossgrain as per sketch below. If you are applying a bound finish to a curved seam, cut your strip on bias. If you are unfamiliar with the terms: grain-line, crossgrain and bias please click HERE to learn. Its best to use light to medium weight 100% cotton for the binding tape. 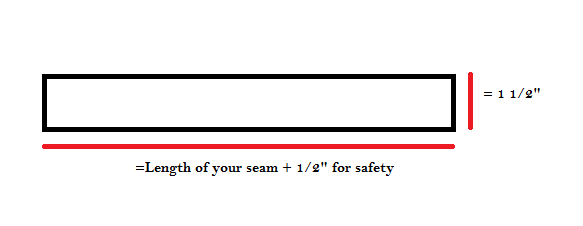 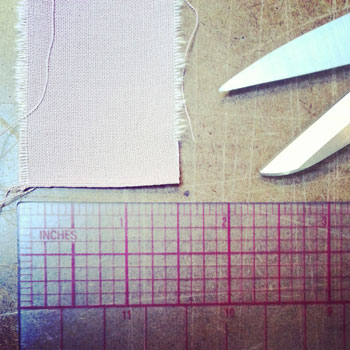 Step 3This is a 3 part pressing process to create the binding tape. Follow photos from left to right.
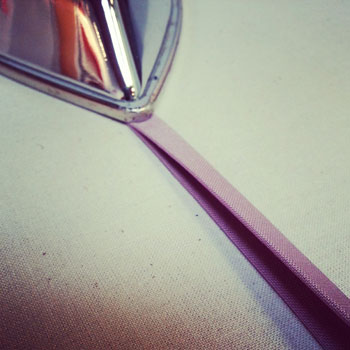
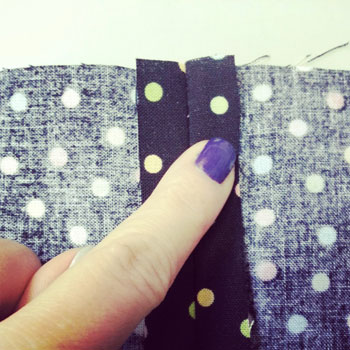
Once the 3 part pressing steps are complete, you will have 4 sections measuring 3/8" each. This fits the original 1/2" seam allowance from step 1. 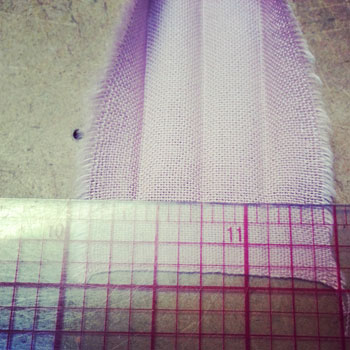 Step 4Pick one side of your seam allowance, right sides facing pin the binding tape to seam allowance.
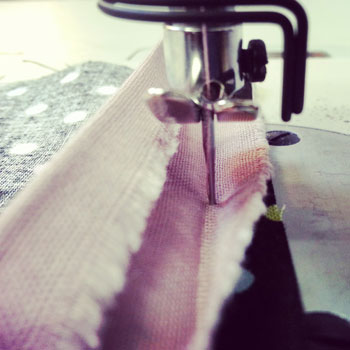
Sew binding tape to seam allowance on first fold line.
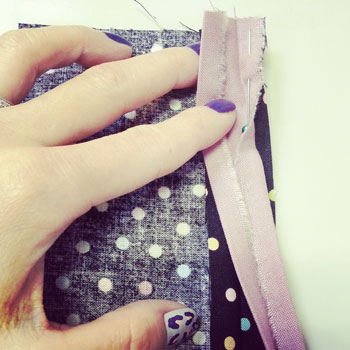
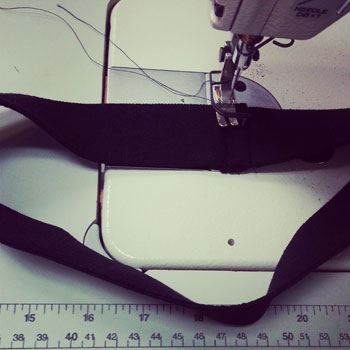
Step 5Wrap binding tape around seam allowance to the back, lay flat and edge stitch (approx 1/16") tape down. This sew line should capture the back of the binding tape too. Click on my video link below to see the TOP and BOTTOM views.  YoutubeHere is a clip I took on what the Bound Seam Finish should look like from the top and bottom view of the seam allowance. Happy Sewing!
Photographed and written by Sheila Wong Studios
1 Comment
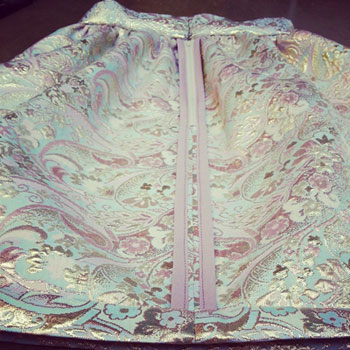
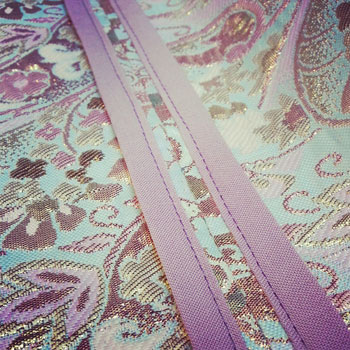
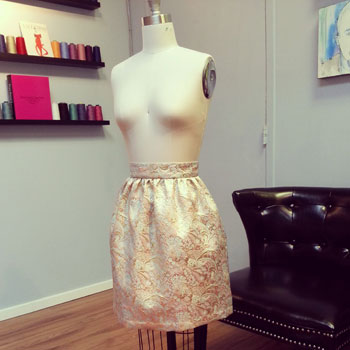
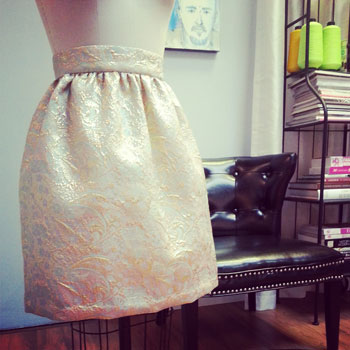
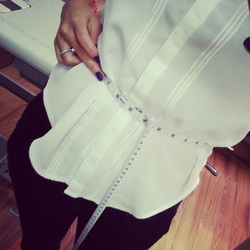
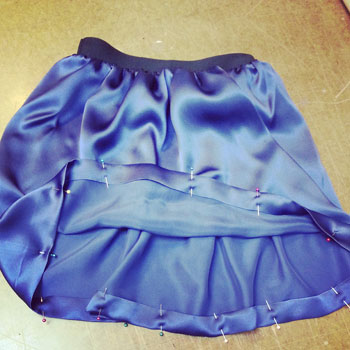
My latest sewing project is a holiday party skirt. What makes it holiday? Definitely the fabulous fabric. What makes it a party skirt? Every skirt is worthy of a good party in my eyes. 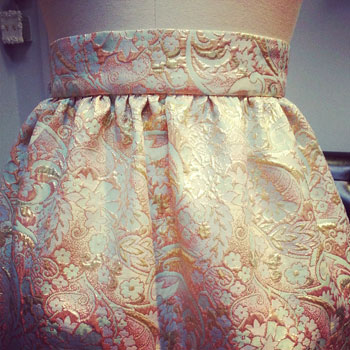 The following are some of the design elements and techniques used to construct this holiday party skirt. Design ElementsCentered Zipper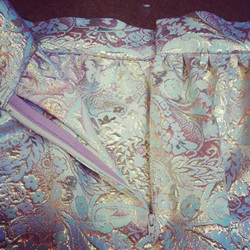 Inserted in the center back seam to avoid bulk, a zipper is the easiest skirt closure out there. Hook & Eyes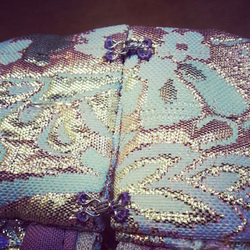 Hook & eyes are a fantastic closure choice on top of a zipper to ensure the opening lies flat. I used two sets as my waistband is 2 inches in height. These are fully hand sewn. Fully Enclosed Waistband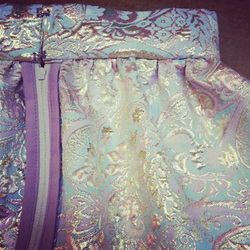 Top of waistband was cut on fold of fabric, then all seam allowances pressed in and slip stitched shut to avoid any exposed raw edges. If you are not adding any lining to the skirt, this is the best technique to keep all your mess (threads, fraying fabric, etc.) hidden. Hand Gathering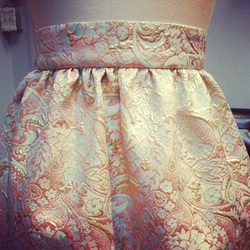 Prior to attaching waistband onto skirt, a running stitch in the longest stitch length possible was sewn in the seam allowance area. By hand, I pulled the ends of the threads until an even gather that matched the length of the waistband was achieved. My tip is to take your time so you don't snap the threads! Bound Seam FinishMy fabric frayed just looking at it, so the best way to hide ultra fray rate fabric is to apply a bound finish to the seams. In this case, I also bound the zipper tape to the seam allowance for a clean finish. PS-I will be releasing a blog post on how to create your own binding and how to sew a bound seam finish soon!
Slip-Stitch (Blind Hem)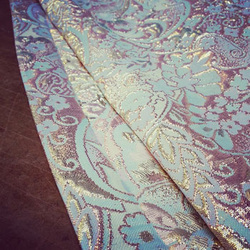 One of my favorite ways to finish a hem is a blind hem in a slip-stitch finish. Click HERE for my video tutorial. Final DesignI've sewn this entire skirt on my Juki industrial sewing machine and a hand sewing needle.
Want to learn how to create your own holiday party skirt? BOOK time in the studio now with me.
Happy Sewing! Designed, photographed and written by Sheila Wong Studios Sew your own high-waisted gathered skirt with this step by step tutorial. I have been meaning to post this for a while now as its one of the easiest and quickest skirts you will ever sew!  Sitting at your natural waistline this skirt creates the gathered look through the use of an elastic waistband. You will also find a video tutorial on how to hand sew a blind slip stitch on the hem. Materials
Step 1
Step 2Create the above pattern or just mark the fabric directly. To create gathers in a garment we need to give additional fabric to the width of the skirt. A good formula for creating gathers is to multiple the natural waist measurement by 2 to get a good amount of gathers. 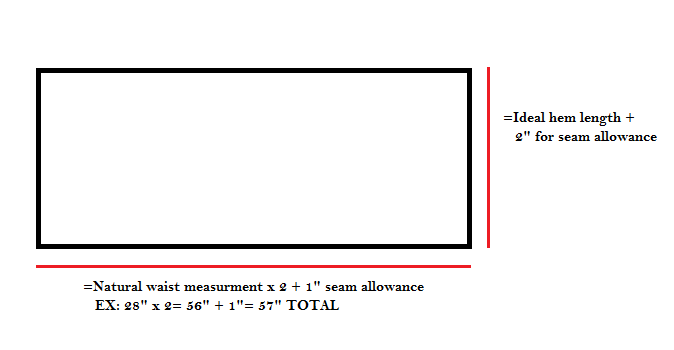 Step 3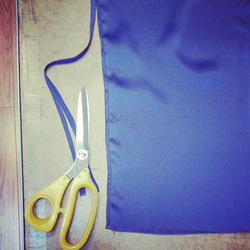 The vertical sides of the rectangle represent either a center back seam or a side seam. Sew these 2 raw edges together to create a seam. I have applied a French Seam finish. Please click HERE for my tutorial on how to sew one. Step 4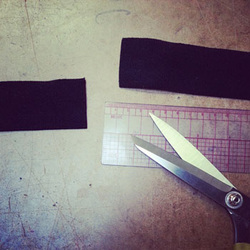 Measure and cut out the elastic. Natural waist measurement - 2" = Final cut elastic to be used on skirt. Step 5Right sides facing, sew elastic ends together at 1" seam allowance. Open elastic waistband so right side is facing you, sew down seam allowances to one side at 3/4" seam allowance from seam.
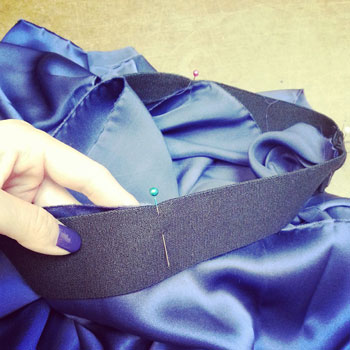
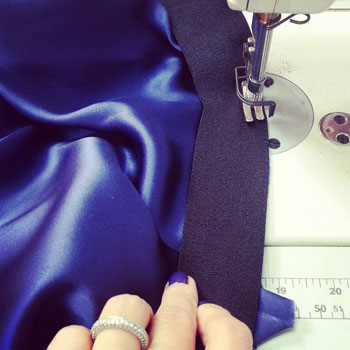
Step 6You should now have a circular elastic waistband ready to attach onto skirt. Divide your elastic into 4 equal sections. Mark as shown in below sketch, at the beginning of each quarter with either a pin or chalk. Use your side seam and/or center back seam as one of the marks. Mark the skirt the same way, using your side seam and/or center back seam as one of the marks. 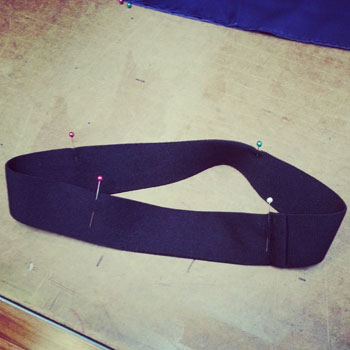 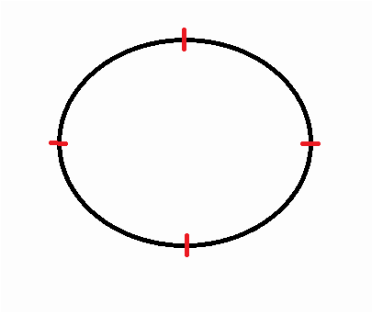 Step 7Right sides facing each other, line up the four points of elastic to the skirt. Ensure raw edge of fabric is lined up to elastic edge. Sew elastic to skirt at 1/2" seam allowance, stretching elastic to lay flat onto fabric as you sew, for each quarter section. This part will take a great deal of patience. Don't give up! You are almost done. If quarters are too much fabric to work with, break your sections up further into 8 sections.
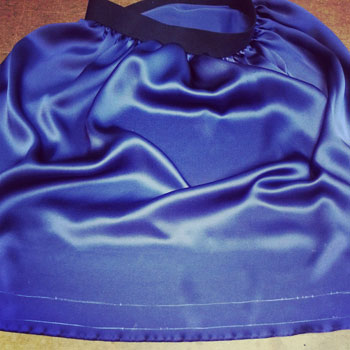
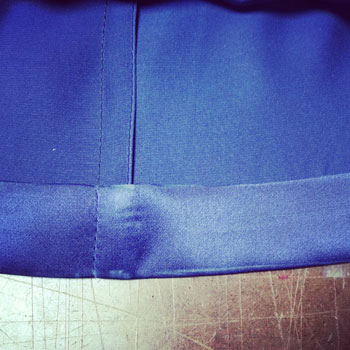
Once your done sewing, your waistband should look like this.  Step 8
Its time to hem! You may choose your own hemming method. 1 1/2" has been allocated to finish the hem in this tutorial. I used Silk Charmeuse, so I want to use a hand sewn finish to avoid any top stitching. I will be applying a tailored hem finish with a blind slip-stitch. Follow the following steps to complete the same hem. You will first need to prep the fabric by marking two fold lines with chalk prior to pressing. One line is 1/2" from bottom, the other is 1 1/2" from bottom. Press up skirt on marked lines and pin. Click below video for a detailed demo on how to hand sew a blind slip-stitch. If you have any questions or comments, leave one. Dont forget to share your gathered skirt on Facebook.
Happy Sewing! Designed, photographed and written by Sheila Wong Studios Prints are massive in Fashion right now, but do you know the proper names for some of the top print trends? A print can be defined as a design applied to a fabric by means of a mechanical or hand method of printing. I wanted to share with you some of my favourite top print trends and how to identify them. Which print will you wear next? Floral Print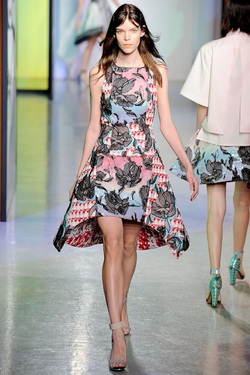 A floral print can take on many forms, petite lady like roses to over-sized abstract flowers. From season to season this is one print that remain a staple. Floral printed trousers are everywhere right now. Zara has a really nice selection. Peter Pilotto retrieved from NY Mag. Art Deco Print Originating in Paris in the 1920's, Art Deco came from a period of time when society began to embrace technology and travel. Known for its clean and strong lines. Think the Chrysler building in New York. Today's take on Art Deco prints are extremely literal and bold. How stunning is this black and white Art Deco inspired dress by Peter Pillotto? Peter Pilotto retrieved from NY Mag. Geometric Print Geometry is the science of mathematics dealing with shape, size and space. When it comes to fashion, a geometric print is comprised of a series of shapes. It naturally has a very tribal feel to it. Miu Miu is notorious for playing with geometric shapes. Makes sense as Miuccia Prada pulls inspiration from the 1960's for Miu Miu often. Miu Miu 2013 retrieved from NY Mag. Scenic Print Take a photo of the busy streets in Tokyo, now print that image onto a garment. THERE, now you have a scenic print. The graphic can be applied before the garment construction process or after. By the way, any scene can be used, not just my busy streets in Tokyo example. Think a star filled sky, cityscape, or a Hawaii sunset. Carven retrieved from NY Mag. Prints are playful and exciting. Don't be afraid to mix your prints either.
Happy Sewing! Written by Sheila Wong Studios Its time to share more beginner sewing terms with you. Part 2 of beginner sewing terms is focused more on the basic tools used for sewing. Missed out on Part 1? Click HERE to learn more. Pattern Notch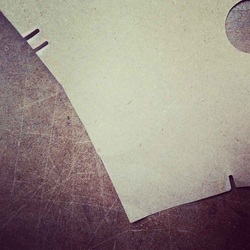 Small marked cut out in the paper pattern that require you to snip your fabric at those points. These notches will help guide you during the construction of the garment. They are there to line pieces up, let you know where to start and stop sewing, where a zipper ends, where a pocket sits, etc. Fabric Shears Titled fabric shears or scissors for a reason. Specifically used for fabric only. Thread Scissors Small sized scissors used to cut thread only. Tailors Chalk Composed of chalk and wax, this tool marks fabrics to help in sewing. They are available in a variety of colours and washes off when laundered. Press(ing) With the use of an iron, press open a newly sewn seam. Ironing is a chore. The term pressing should be saved for garment creation. Happy Sewing!
Photographed and written by Sheila Wong Studios 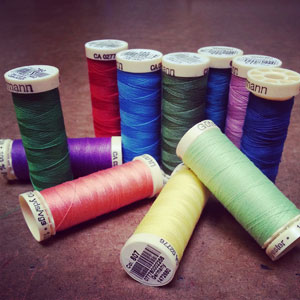 You're at the fabric store, excited that you found the perfect fabric for your holiday dress. You just finished grabbing your zipper and now you are standing in front of the wall of spools thinking "Which color will match my fabric?" Sometimes, this can be the most daunting task. The right thread color can enhance the quality of your garment. Here are a few of my tips on how to flawlessly pick the best thread color for your next garment. Solid Color Fabric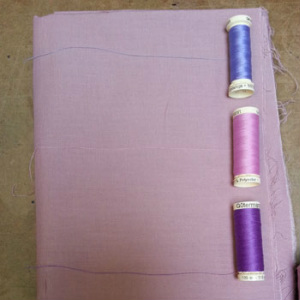 Pick a thread color that matches your fabric exactly. If you cannot find an exact match it is best to go a shade darker than your fabric. Darker shades are more flattering than lighter shades. If you are a new sewer and wish to sew with black or white fabric, choose a thread color a shade off that way it is easier to sew. All-over Print Fabric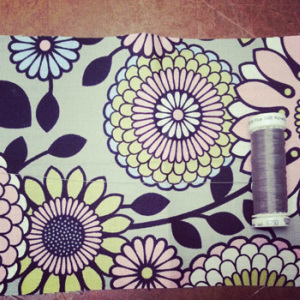 You have a few options in this scenario. Best bet is to match your thread color to the background color of your fabric. You will notice in the last two photos that I pull the thread out off the spool and lay it on the fabric. This is the BEST way to see what that color will potentially look like sewn. The spool on its own is too saturated with color, so pull out a tail and check it. Happy Sewing!
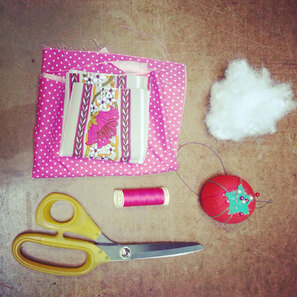
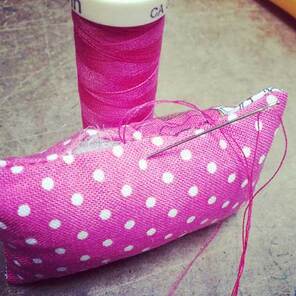
Photographed and written by Sheila Wong Studios 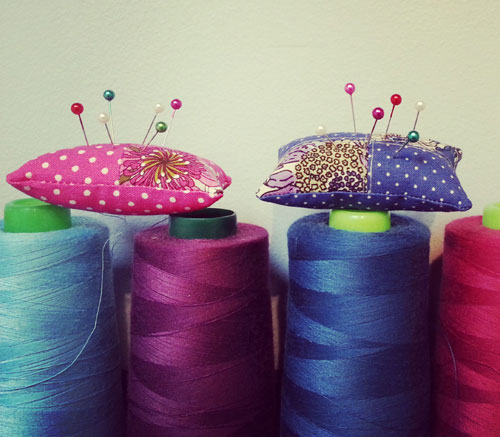 A great way to use up scrap fabric, sew your own mini pin cushion. Here is a step by step sewing tutorial on how to sew one. Materials & Supplies
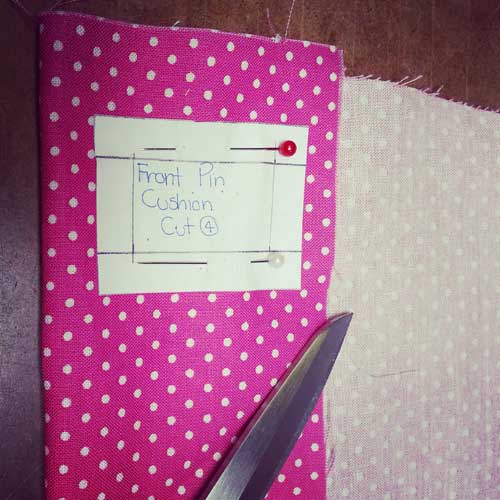
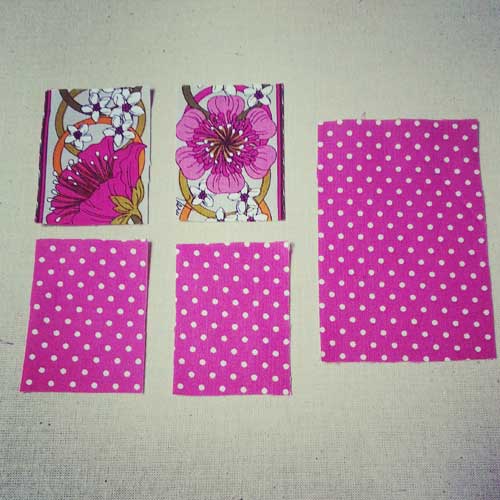
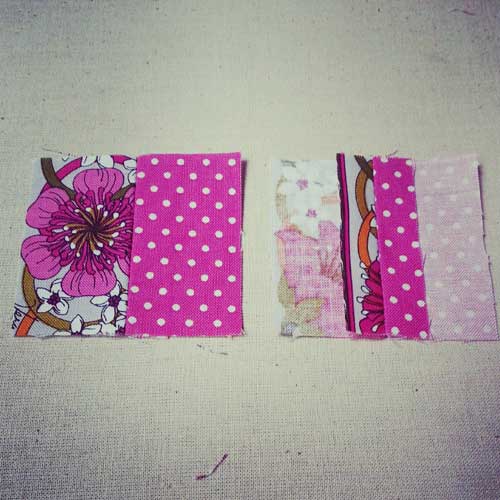
Step 1To make the same style of pin cushion shown in this tutorial, create pattern pieces as shown below. You can experiment with other shapes then a rectangle if you like. just ensure the finished shape when all top pieces are sewn together match your bottom piece. Complete pin cushion dimensions are 2 1/2" x 1 3/4". 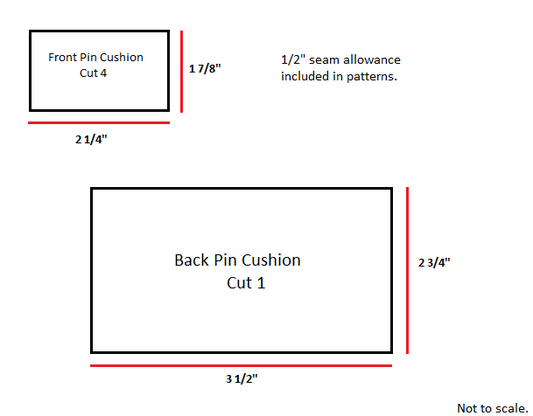 Step 2Cut out fabric as per pattern pieces. Before you start sewing, you should have 4 small rectangles that make up the front and 1 large rectangle that makes up the back.
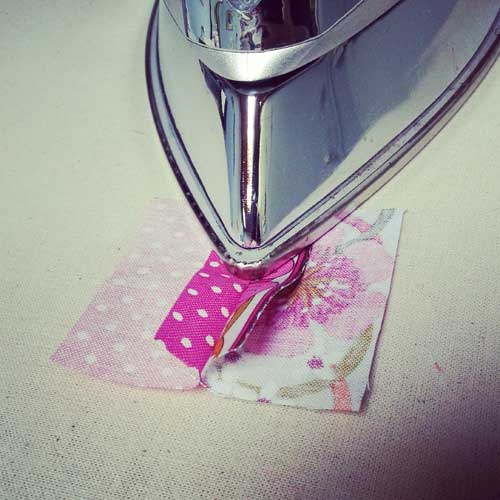
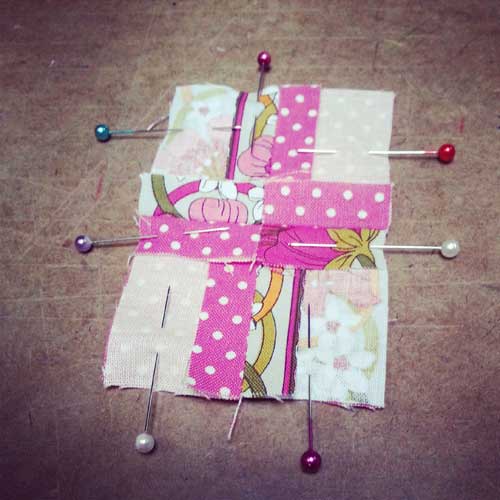
Step 3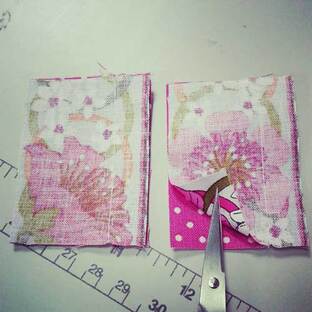 Right sides facing sew two Front small rectangles together on its length at 1/2" seam allowance. Repeat for other two rectangles. Step 4Press Step 3 sewn seams open.
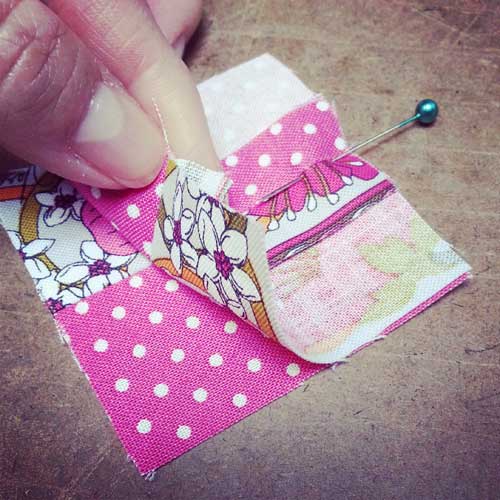
Step 5Right sides of fabric facing each other, bring together the 2 half's of the Front and sew at 1/2" seam allowance.
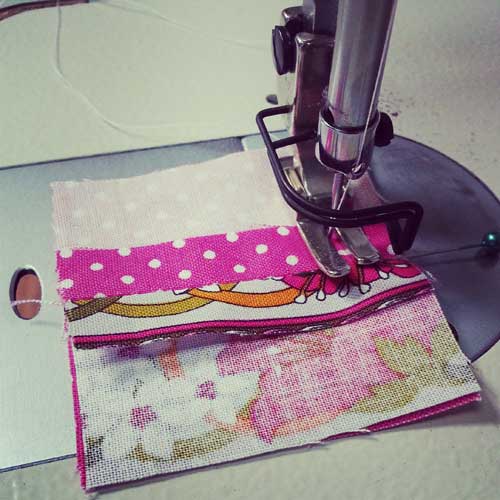
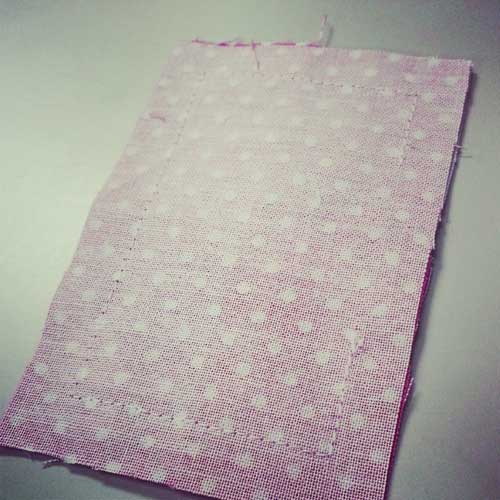
Step 6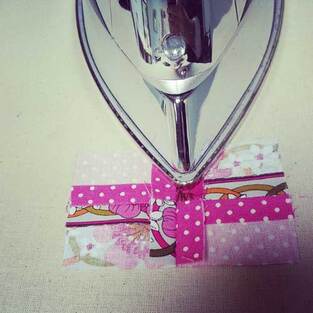 Press Step 5 sewn seam open. 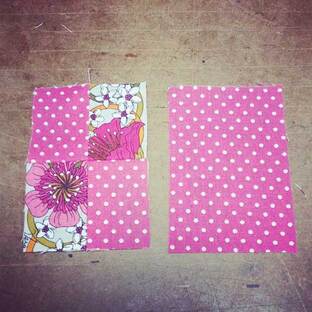 You should now have your front pin cushion complete and ready to sew the Front to Back. Step 7Right sides facing, line up the Front and Back. Pin and sew all the way around rectangle leaving a 1-1.5 inch opening to flip. Follow red sew line below.
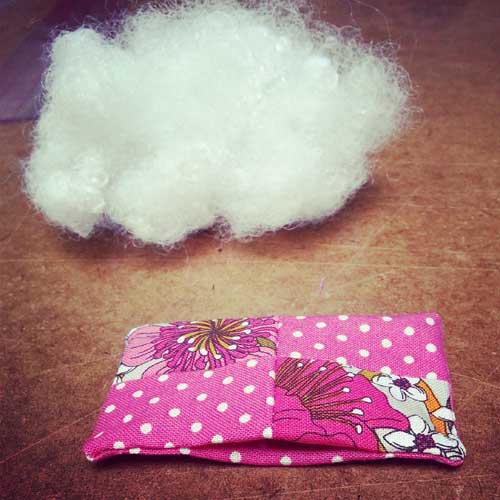
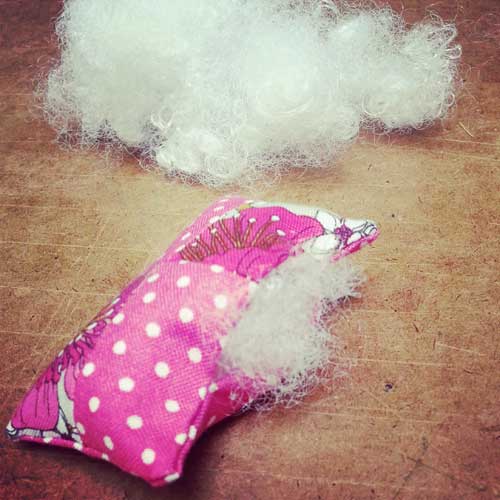
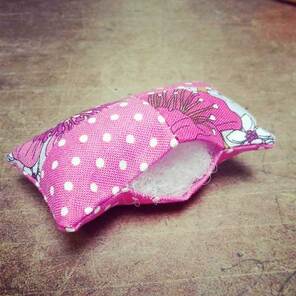
 Step 8Trim excess bulk in seam allowance at corners as per sketch. Keep 1/8" away from sewn corners. 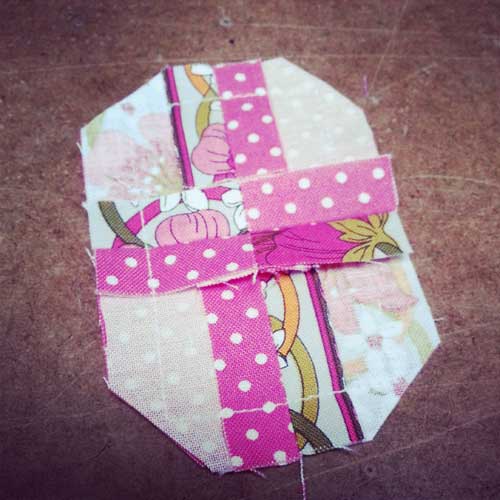 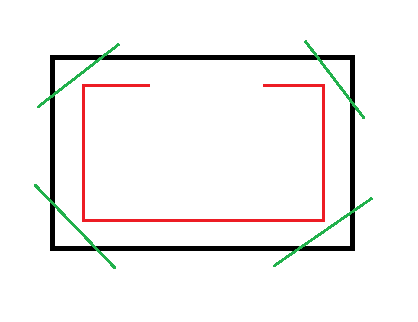 Step 9Flip inside out, and at stuff opening as full as you can.
Step 10Slip-stitch opening shut. For a video tutorial on slip-stitching, click HERE.
Final Design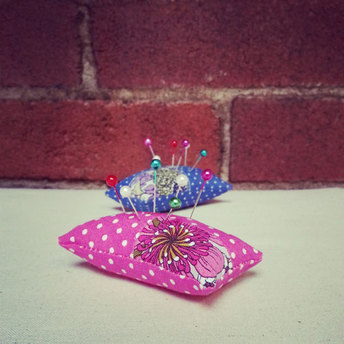 Happy Sewing!
Designed, photographed and written by Sheila Wong Studios |
Archives
November 2022
|


 RSS Feed
|
|
Copyright © 2024 Sheila Wong Fashion Design Studio Ltd. All rights reserved.