|
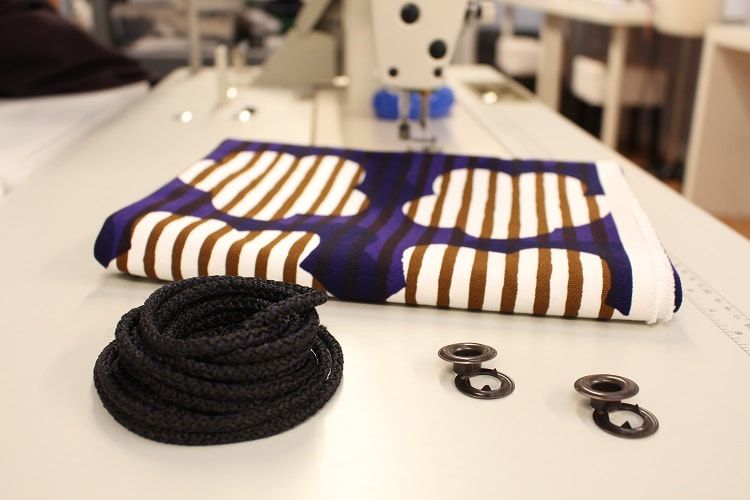
Time to stitch with us in our latest sew-a-long! We received a ton of requests for a tutorial on our drawstring backpack, so here it is.  Materials
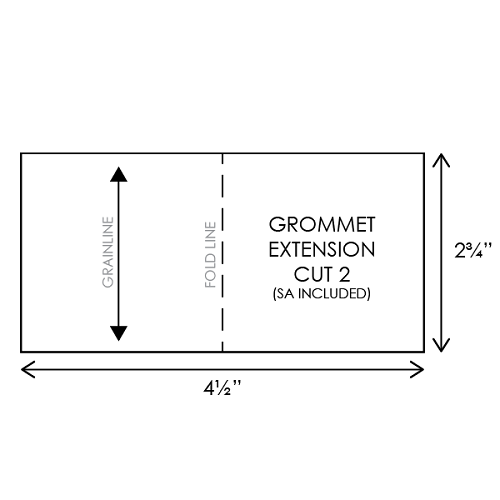
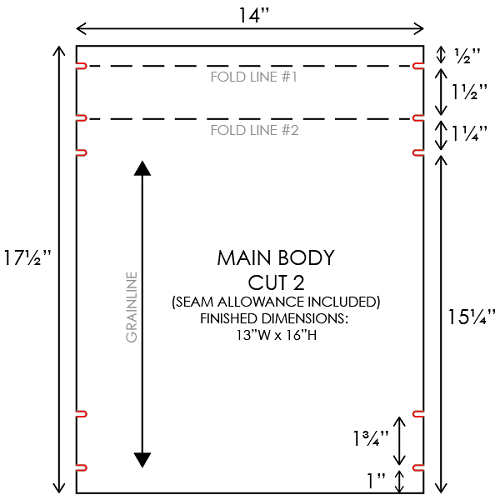
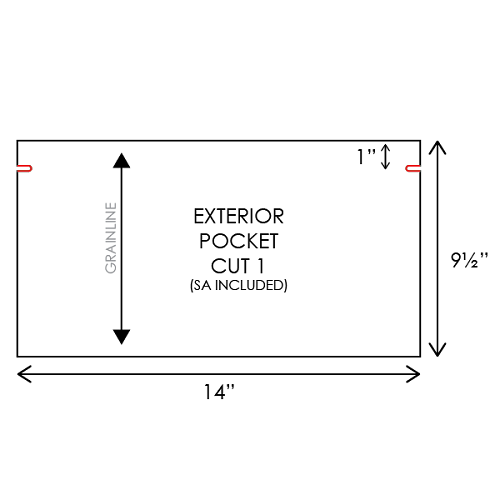
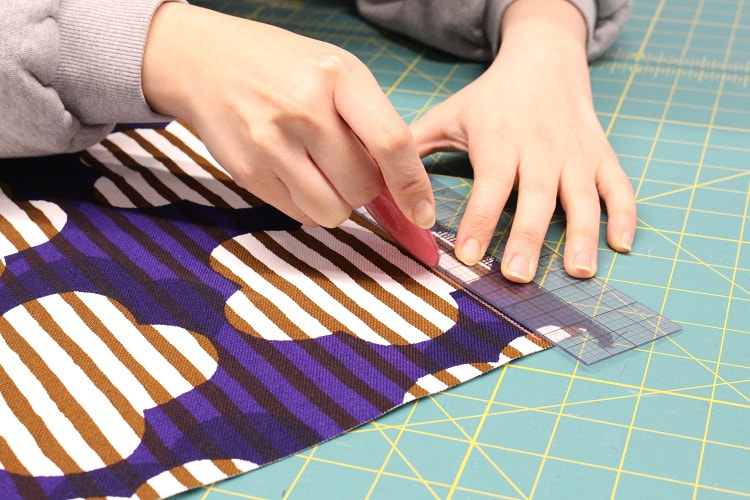
 Step 1Create paper patterns for the following patterns, or mark directly onto fabric. Seam allowance included in dimensions: MAIN BODY, EXTERIOR POCKET & GROMMET EXTENSION.
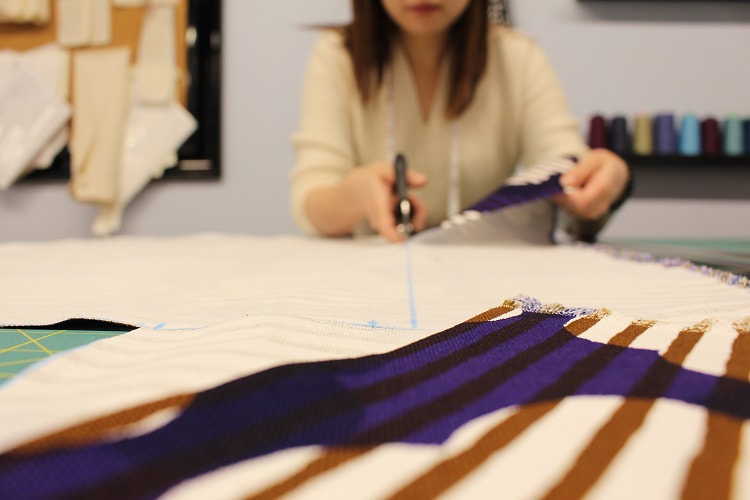
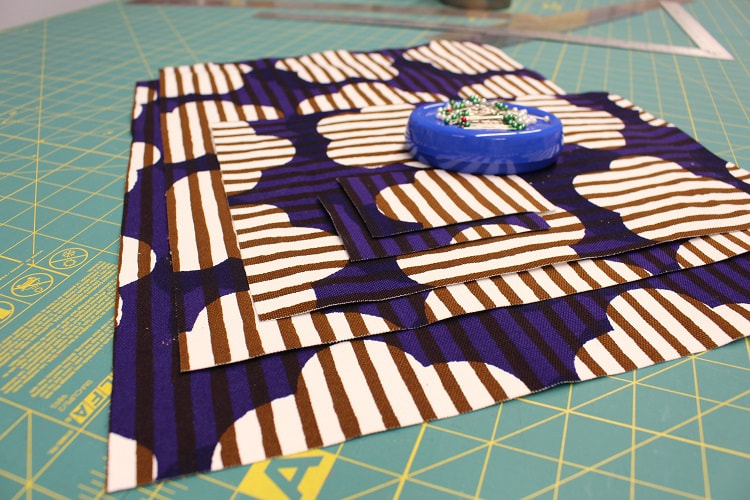
Step 2Cut out all fabric and mark notches. 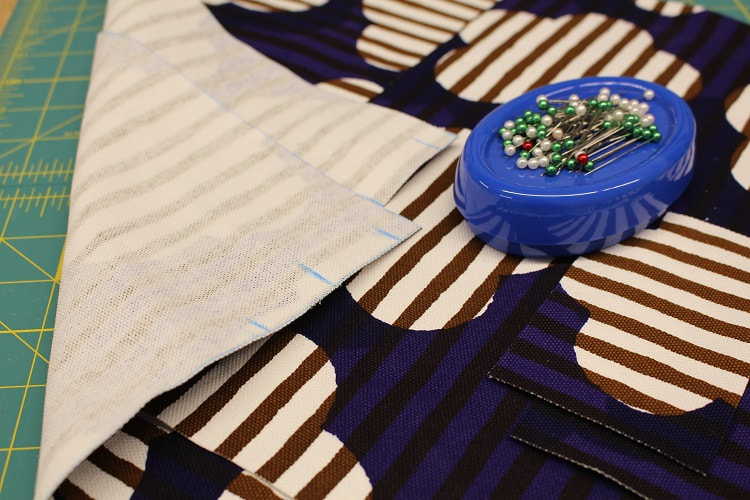 Step 3 Over-lock top raw edge of the EXTERIOR POCKET piece. Alternatively, you can zig-zag or pink your raw edges too to avoid fraying. 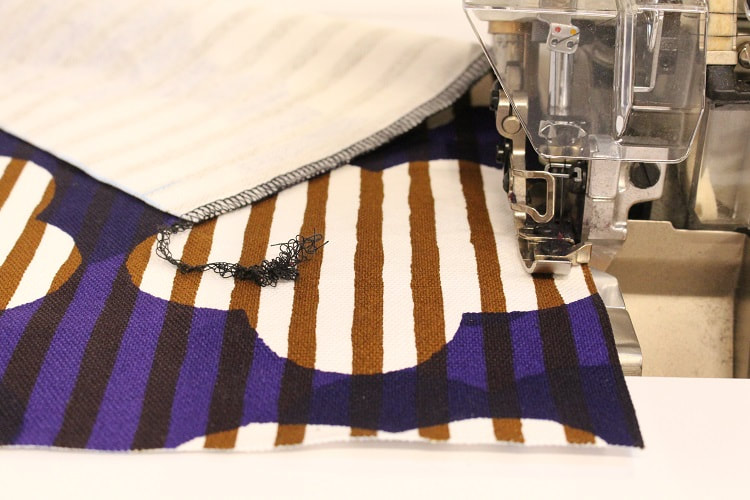 Step 4Mark and fold in top of the EXTERIOR POCKET by 1”, press in place. Pin and stitch at ¾” seam allowance.
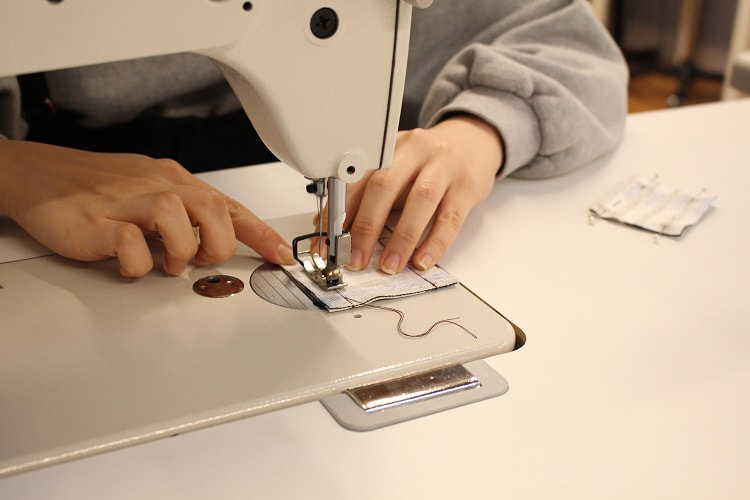
Step 5Place the EXTERIOR POCKET on top of one MAIN piece, lining up the side seams and bottom. Pin and stay-stitch pieces together. Stay-stitching is a stitch done to hold two layer of fabric together prior to being attached onto another layer of fabric. It is typically done in a longer stitch length (4mm) and done within the seam allowance to hide it away.
Step 6Create separate pockets on the EXTERIOR POCKET. Mark a vertical line wherever you wish, pin and top-stitch in place. We decided to create 2 pockets equal in size. 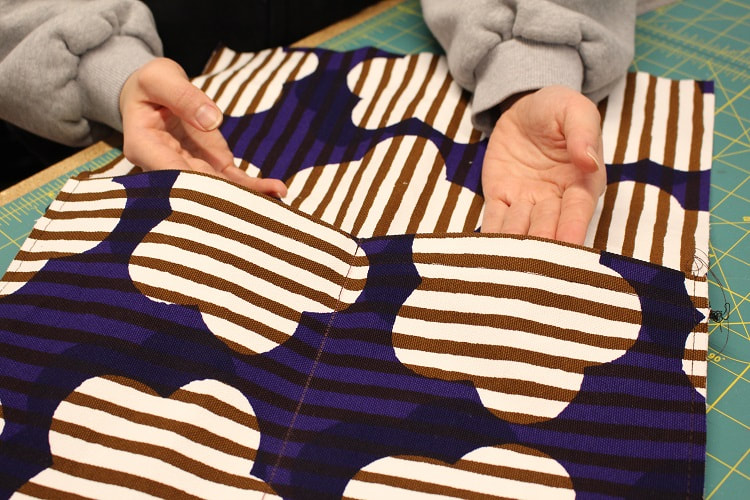 Step 7With right sides of the fabric facing each other, pin and stitch the top and bottom seams of the GROMMET EXTENSION pieces. Repeat to the other piece so you have two in total. Clip away excess fabric in the corners. Flip and press.
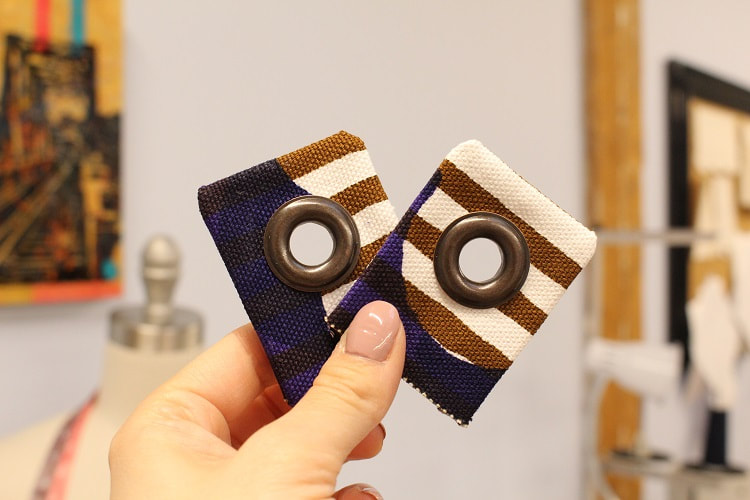
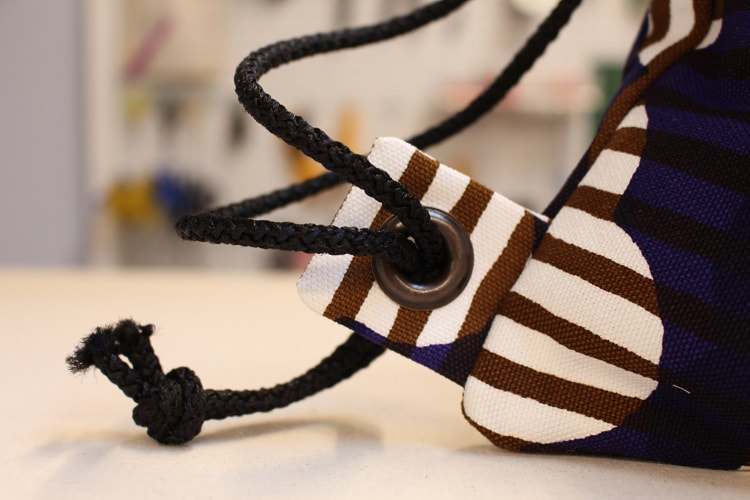
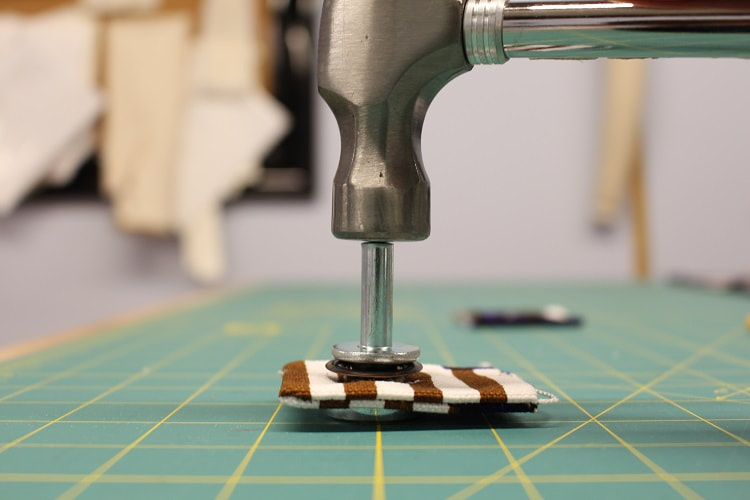
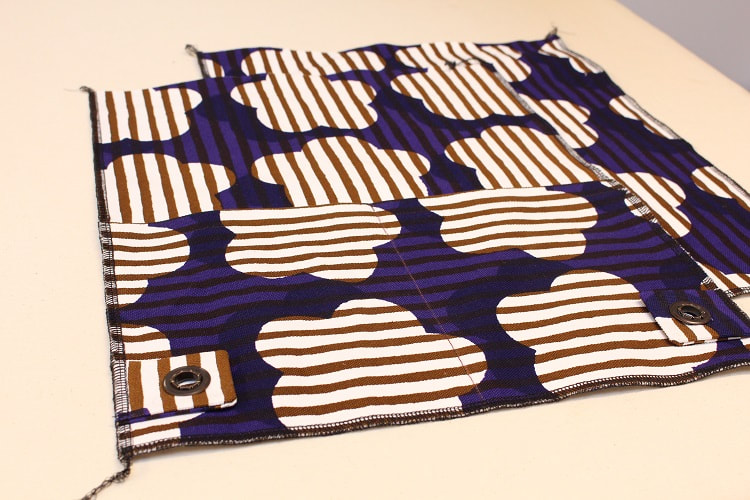
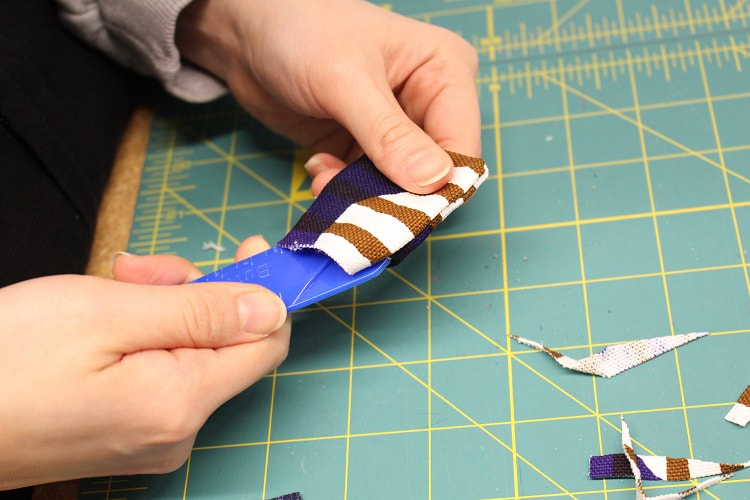 Step 8Create a small hole in the center of the GROMMET EXTENSION, just enough for the male piece of the grommet to fit through. Place the female grommet under and hammer in place securing the grommet.
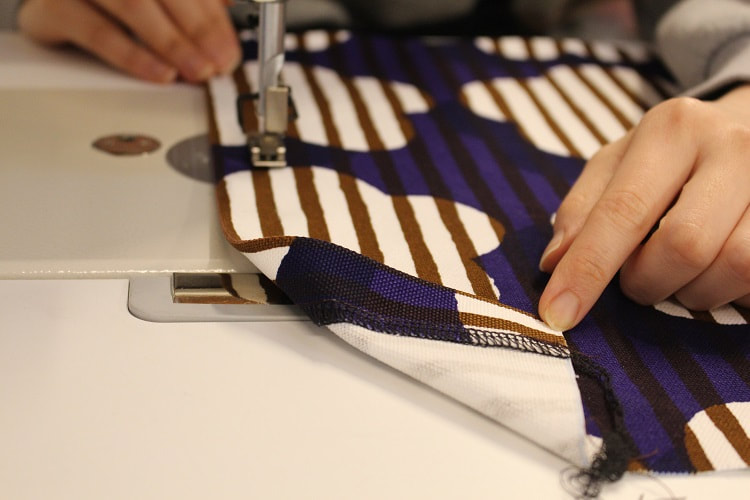
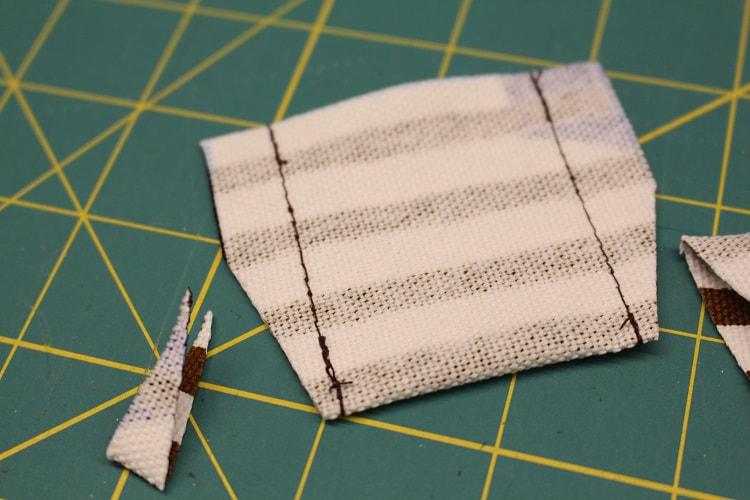
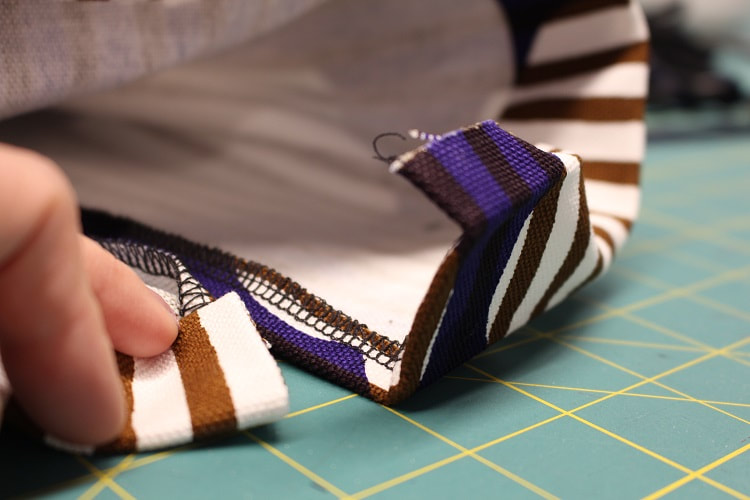
 Step 9Stay stitch the GROMMET EXTENSION to the side seams of the MAIN piece, lining up to notches marked on the MAIN pattern piece. 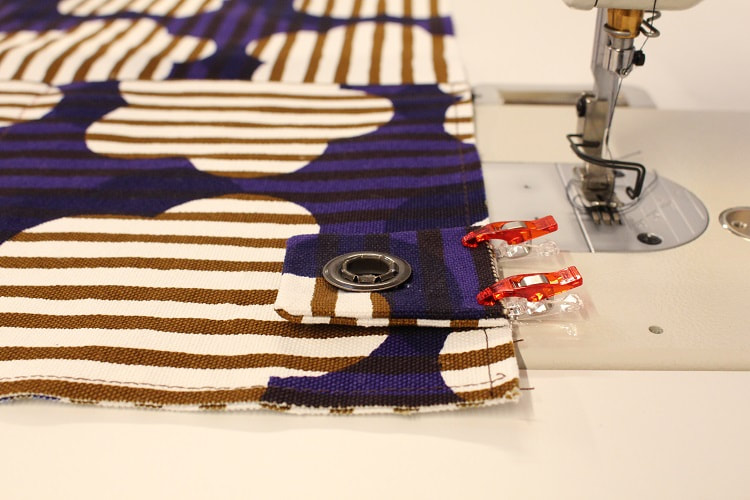 Step 10Over-lock separately each side seam and bottom of the MAIN pieces.
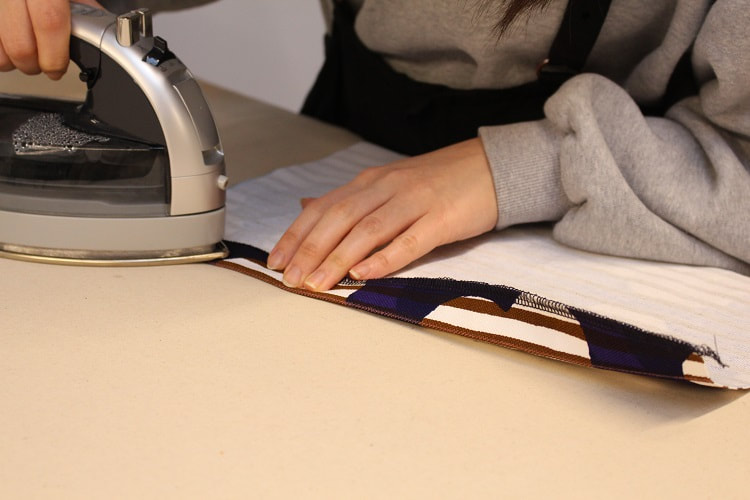
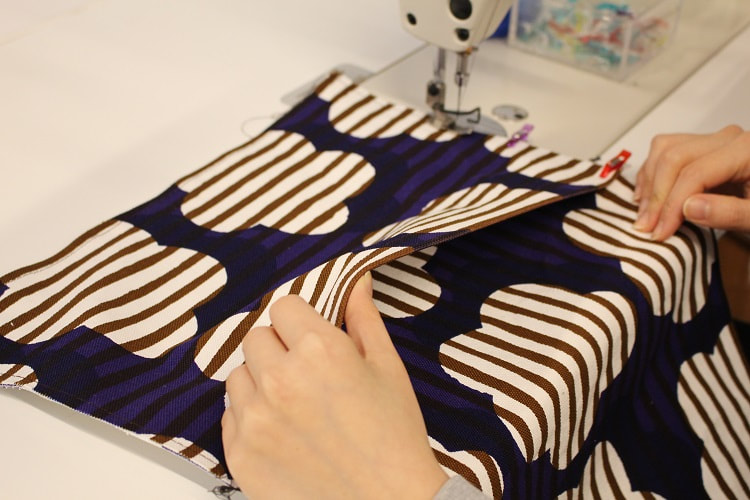
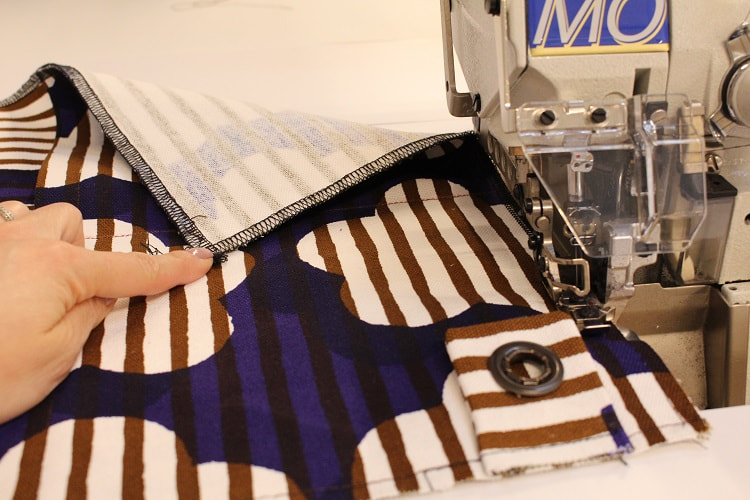
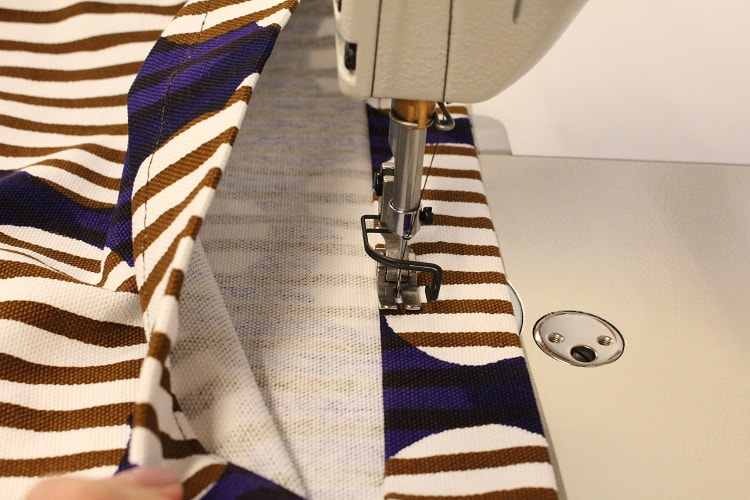
Step 11With right sides of the fabric facing each other, pin and stitch the MAIN pieces together. Starting at the top opening notch, going down a side seam, pivoting at the corner, across the bottom, pivoting again and back up the other side seam stopping at the opposite notch. 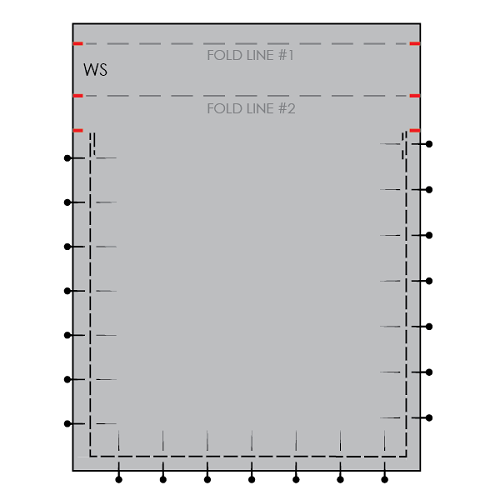 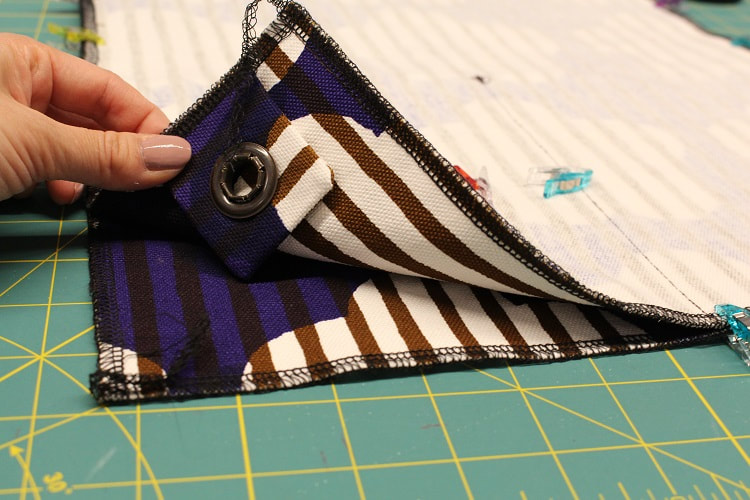 Step 12Press seam allowances open, continue to press the remainder of the side seam up to the top edge of the bag by the ½” seam allowance. 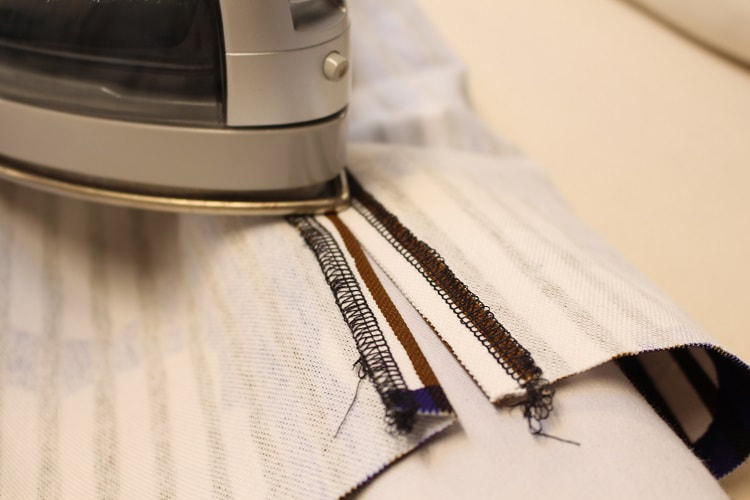 Step 13Press in top along fold line #1(½” seam allowance) and then fold line #2 (1 ½” seam allowance). Pin top of bag folded edge in place and edge stitch.
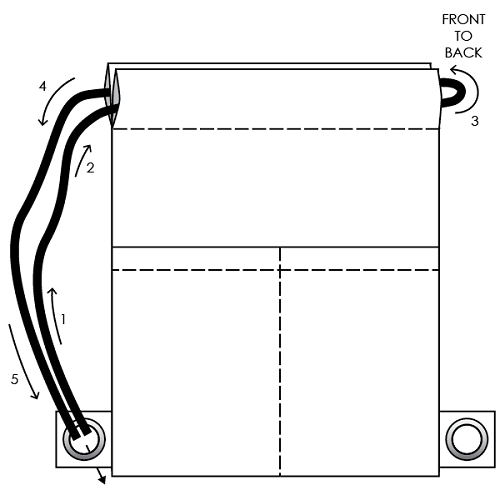
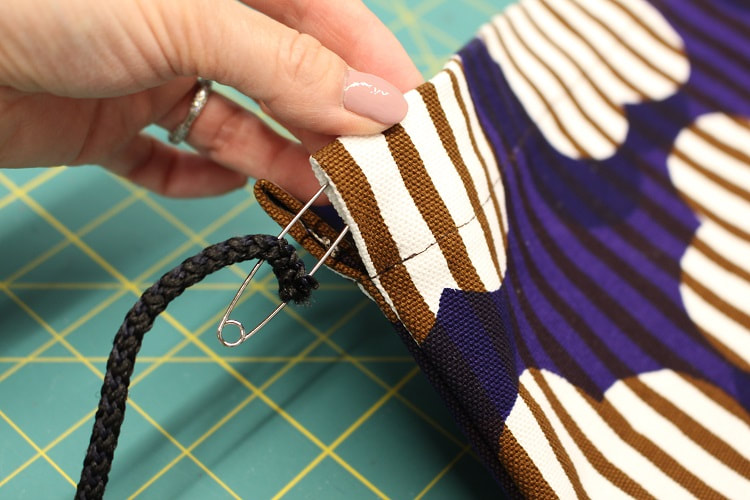
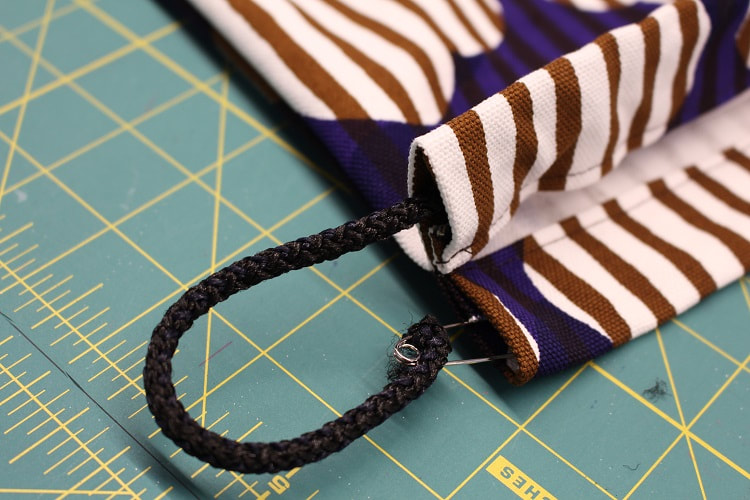
Step 14Divide your cording in half, so you have 2 pieces that are approx 1.8 m in length each. Depending on your height, you may need a longer amount. This size is good for a 5' 4" person.  Step 15One piece of cord will have its ends tied together and live behind one grommet. Starting with one piece of cord, feed it through the front top hem tunnel, turning in towards the back top hem tunnel. The two ends of the same cord should be coming out the same side of the backpack. Take those ends and feed them through the grommet and tie them together to create a knot. Repeat the same to the opposite side using your second cord piece. Use a safety pin to help feed cord through.
  Final DesignTa-da! You've just made your own Draw-String Backpack. Tag us on social media to show us your creation. 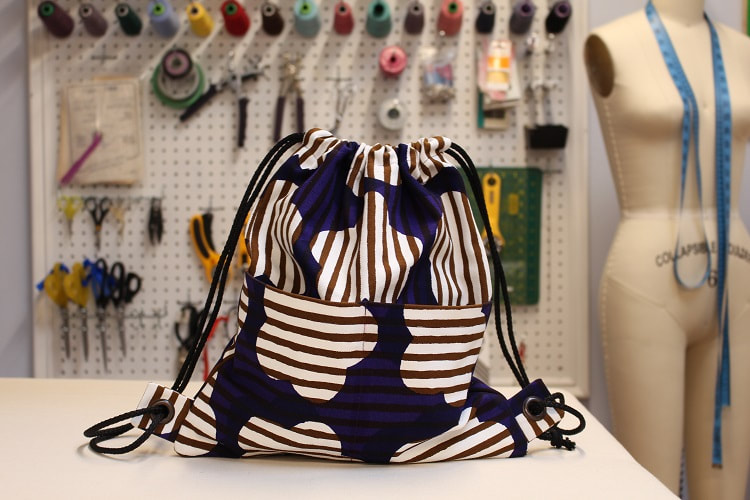 Happy Sewing!
Designed, photographed and written by Sheila Wong Studios
0 Comments
Going into 2019, we are still deeply in love with wide pants. Our latest design pushes the limits on how "wide" wide pant legs can be. Do you think there is such a thing as too wide? We believe that if you can imagine it, you can make it. This blog post will give you an insider view of our Tailored Culottes. By the way, the fabric was purchased from Nippori Textile Town in Tokyo, Japan. 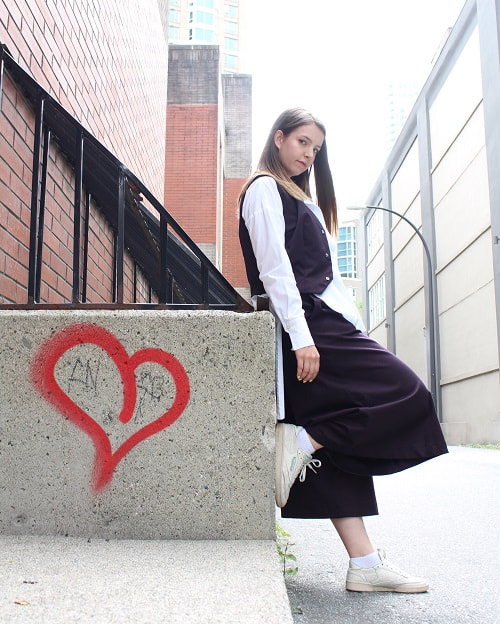 Project Specs
Design ElementsThere is nothing super fancy about these pants. The usual elements of a waistband, pocket, zipper, hook closures and darts are present. The following elements are our favorite elements to share with you. Fully Enclosed Waistband Getting the waistband to sit cleanly takes a ton of pinning, stitching, pressing, clipping and REPEAT. We wanted to reduce bulk in the waistband, therefore the initial waistband seam was graded (SA's cut at different widths). We also over-locked and exposed the interior waistband edge on the inside of the garment. From the exterior, we 'stitched in the ditch' to maintain a really clean look.
Slash PocketsA slash pocket is very common in commercially made clothing. BUT if you have ever pattern drafted one, you can easily get confused. When drafting the working pattern, we color co-ordinate each pattern piece nestled on top of each other. By doing this, it makes it easier to extract the final pattern pieces. 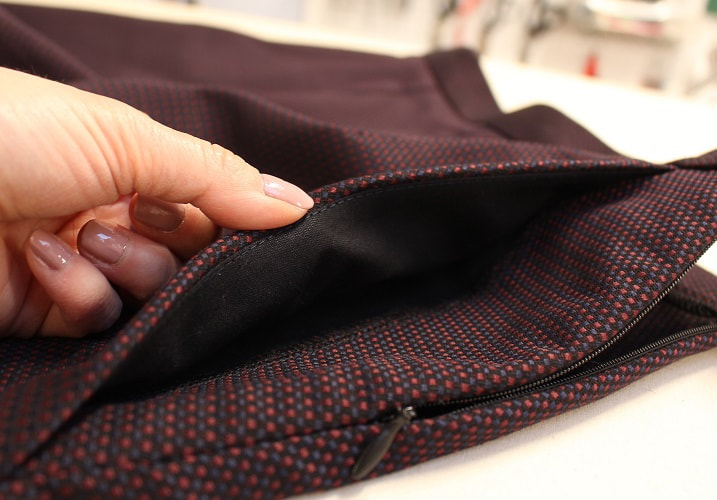 A slash pocket involves main fabric, lining fabric and interfacing. It can also be comprised of up to five pattern pieces. We recommend creating a color legend on your working pattern like us! 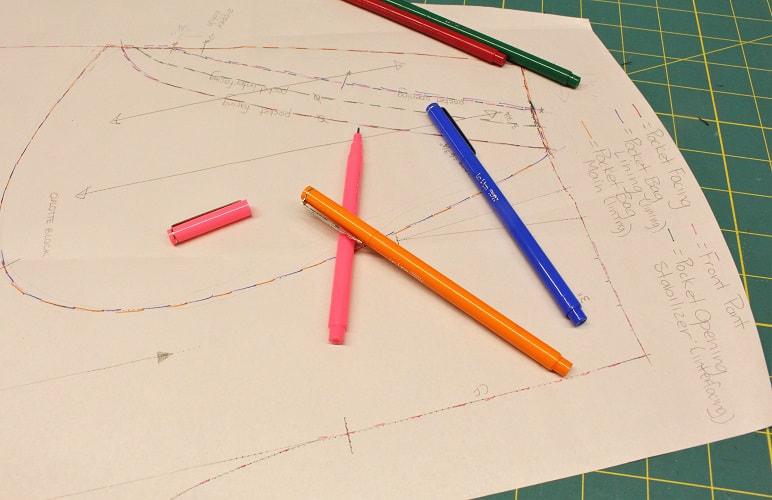 Waist DartsDamn girl! Not going to lie, the back view is the best view on these culottes. The darts create shaping around the waist and hips, while the slash pocket creates a very slimming line along the side seam. 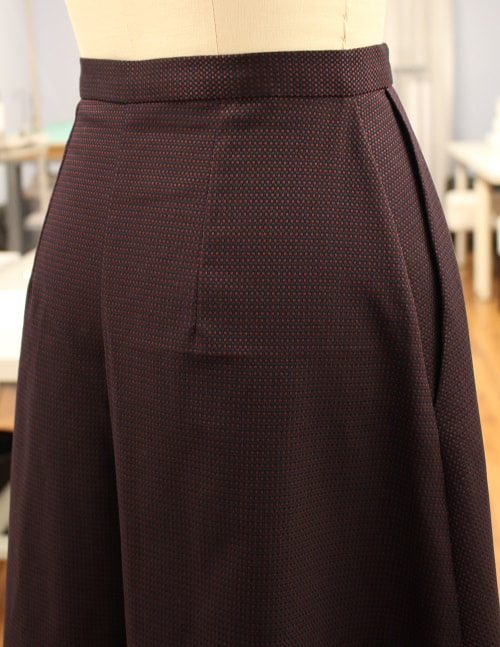 Wide LegsJust to give you an idea of how wide these pants are, we had to photograph them in widescreen like this for ya! One leg opening has a circumference of 42". That measurement beats many of the skirt hems we've designed. 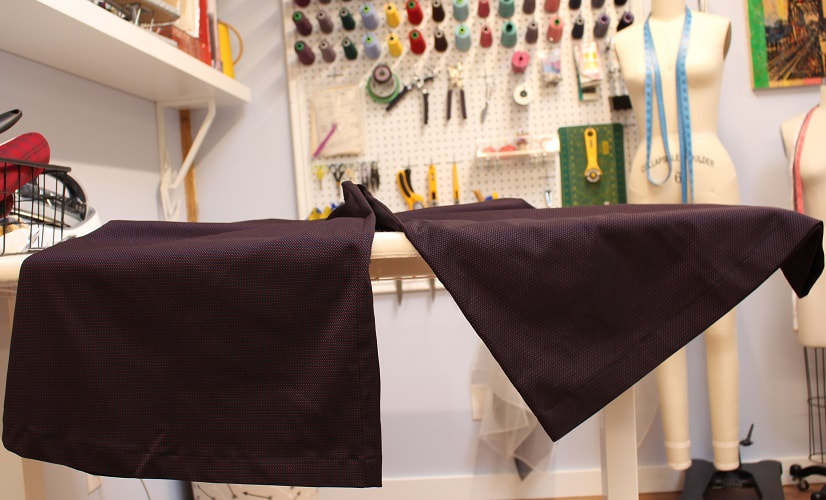 Final DesignHere's our completed design. In true culotte fashion, it appears like a skirt, but it is not! How would you style these wide leg pants? Let us know below! 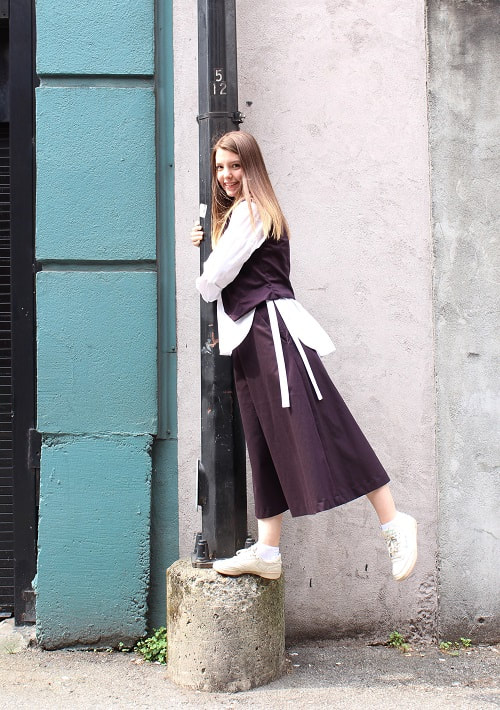 Happy Sewing!
Designed, photographed and written by Sheila Wong Studios |
Archives
November 2022
|


 RSS Feed
|
|
Copyright © 2024 Sheila Wong Fashion Design Studio Ltd. All rights reserved.