|
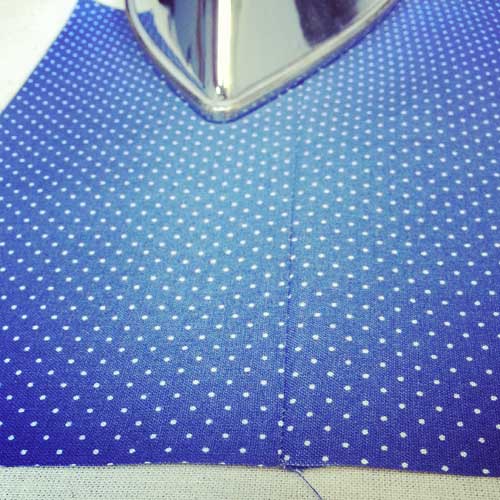
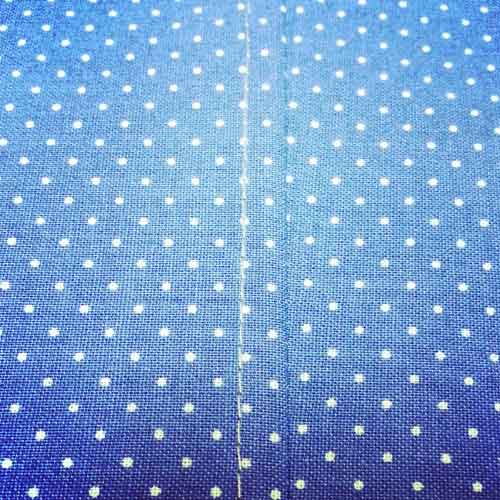
You may have never heard of a flat felled seam, but guaranteed you have worn one in the last few days. Found on almost all jeans and common in sport/athletic type garments and accessories. It adds strength and durability to a seam. Here is a step by step tutorial on how to sew a flat felled seam. If you have any questions, just leave a comment! Step 1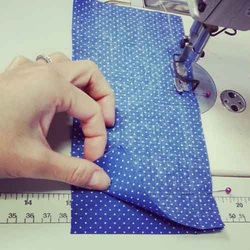 Right sides of fabric facing each other, sew at 1/2" seam allowance. Step 2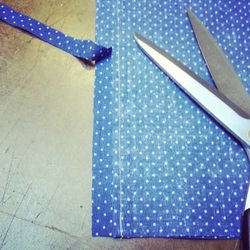 Trim one seam allowance down to 1/8". Step 3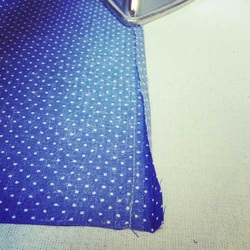 Press untrimmed seam allowance over to have its raw edge just touch the sew line. It should be encasing the trimmed down (1/8") seam allowance. Step 4Press all seam allowances facing one way from the right side of your fabric. Seam allowance should be pressed to hide any exposed raw edges. The back of your seam should look like the photo on the right.
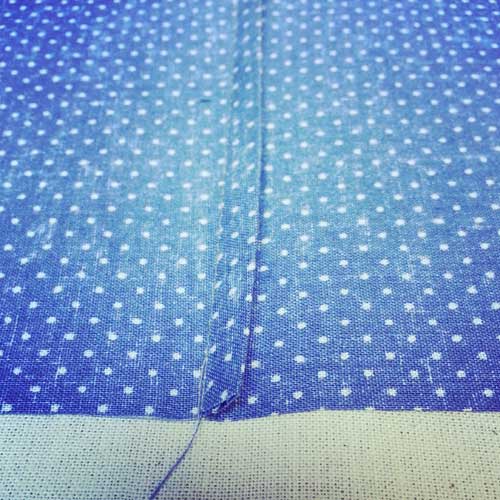
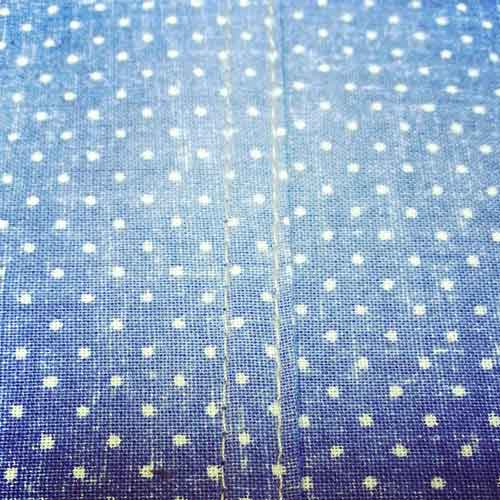
Step 5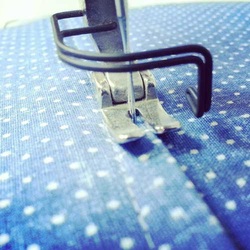 On the wrong side of the seam, edge stitch down the folded seam allowance. Normal edge stitch is 1/16" away from folded edge. Completed Seam
Happy Sewing! Photographed and written by Sheila Wong Studios
0 Comments
This one is for the virgin sewers out there. My beginner clients receive a list of sewing terms to assist in their learning process. I thought it would be nice to share a few with you. Here is part 1, in a 3 part series of basic beginner sewing terms you should know. Stitch Length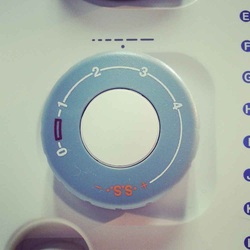 Each individual stitch is measured in millimetres. 2.5mm is the normal stitch length to hold a seam secure. Bobbin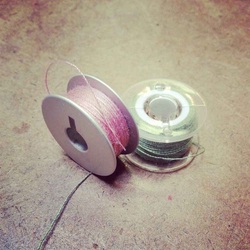 Thread from the bobbin feeds the bottom of a sew line. One of two thread sources required to create a sew line. Bobbin is placed by hand into machine. Bobbins come in several heights, make sure you use the correct height for your machine. Spool Thread used to thread the sewing machine and to fill the bobbin. One of two thread sources required to create a sew line. Hand Wheel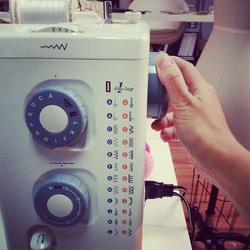 Used to manually sew or move machine needle out of project. Found on the right side of a machine, it should only be turned towards the user, never away. Presser Foot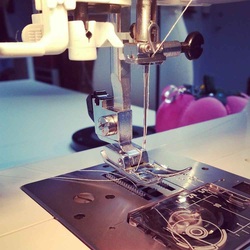 Presser foot sits on top of seam being sewn. It gives enough pressure to hold project in place. Presser foot is controlled by a hand leaver on domestic sewing machines. Foot must stay up while threading machine, and must be placed down while sewing. Happy Sewing!
Photographed and written by Sheila Wong Studios
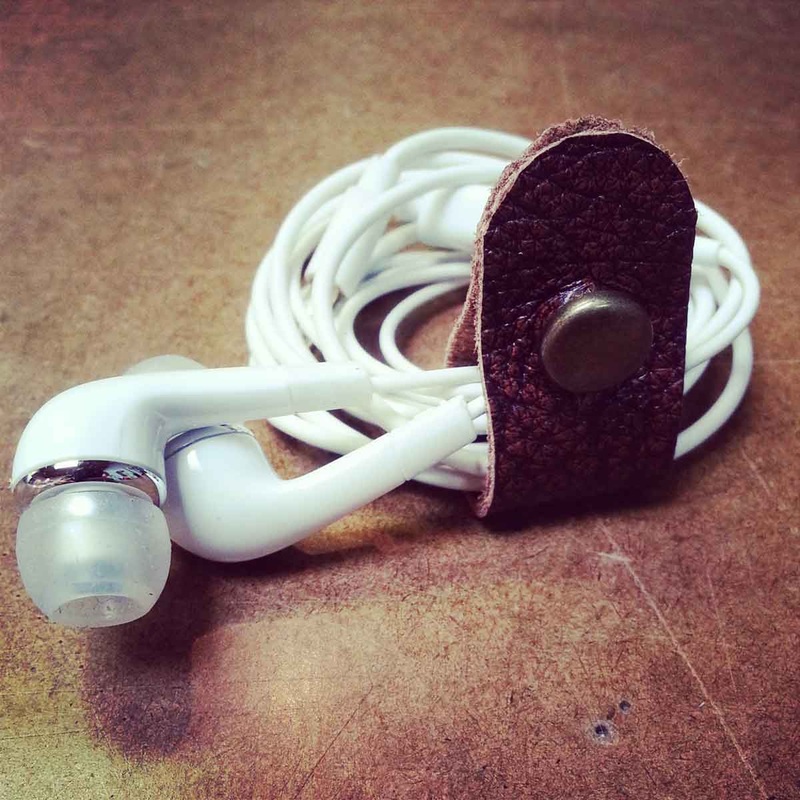
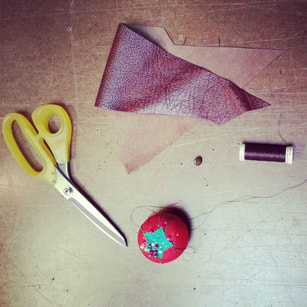
Loose cords drive me nuts, especially headphone cords at the bottom of my bag. Practical and simple to make, here is your step by step tutorial on how to sew a headphone cord organizer. Materials & Supplies
Step 1Create a paper pattern using dimensions below. You can round off the corners too. 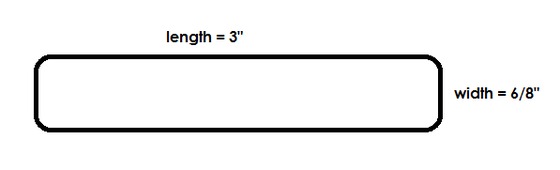 Step 2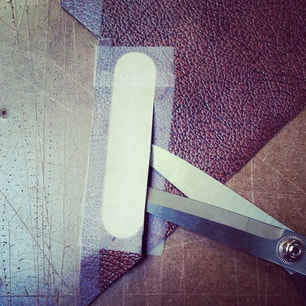 It is best not to pin leather as permanent little holes can be left behind. I suggest taping the boarder of the pattern to the leather. Then you can cut out leather. Step 3Hand sew a shank style button onto the back side of leather. Center the button 1/2"-3/4" away from edge.
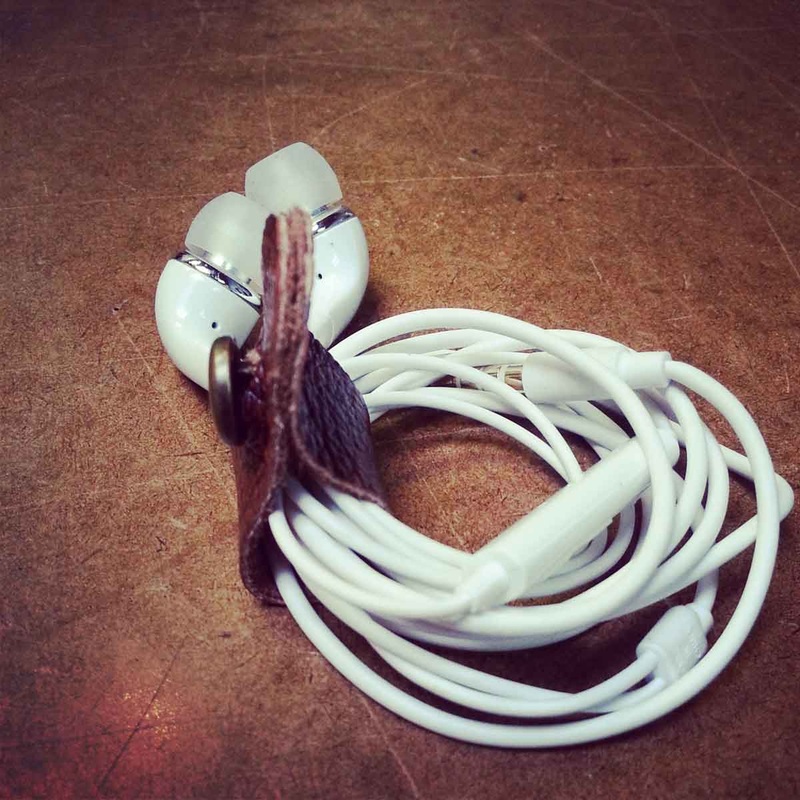
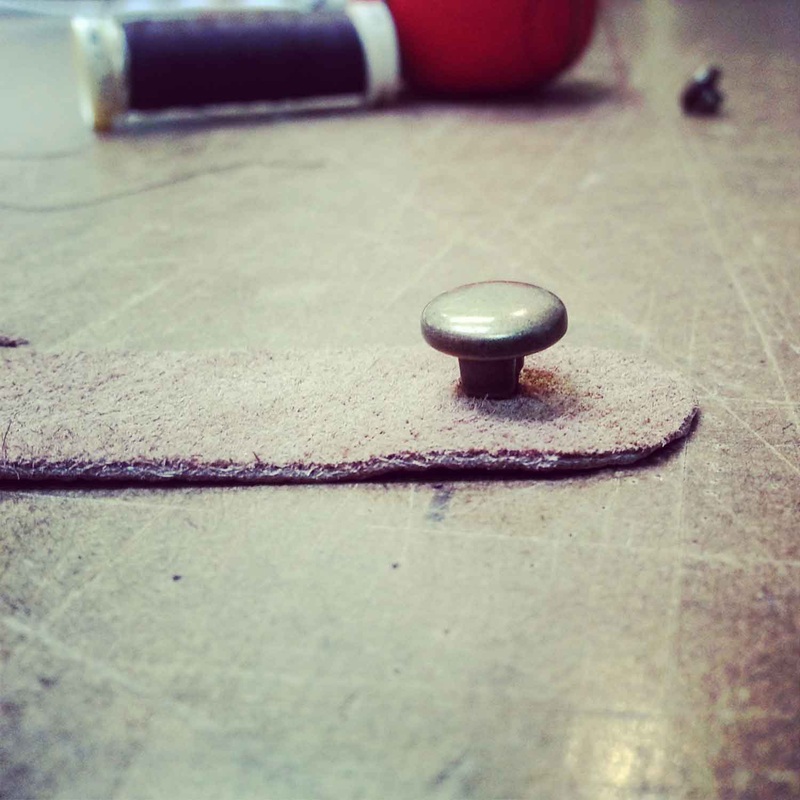
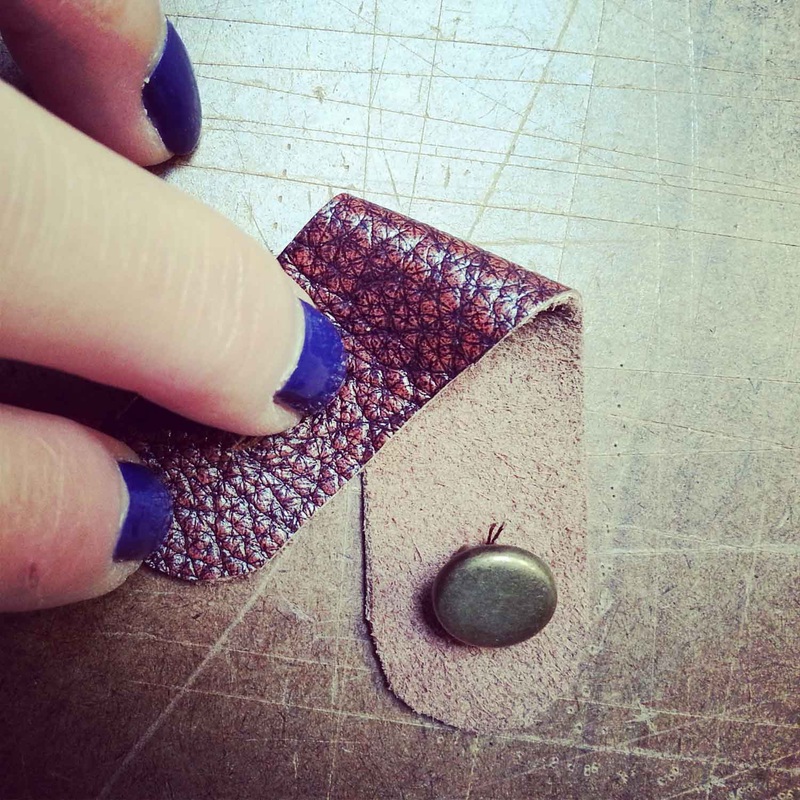
Step 4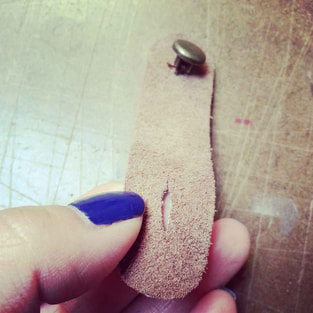 On the other side of leather tab, cut a slit down the center starting 1/2" away from the edge. Button width + shank height = Slit length 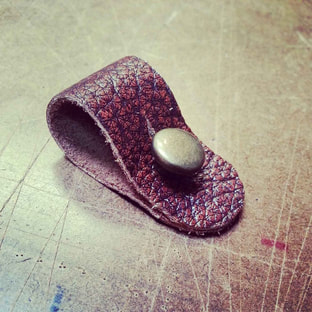 Button up your leather tab, you are done! Final DesignYou can use your leather organizer for keeping your measuring tape in tact too. 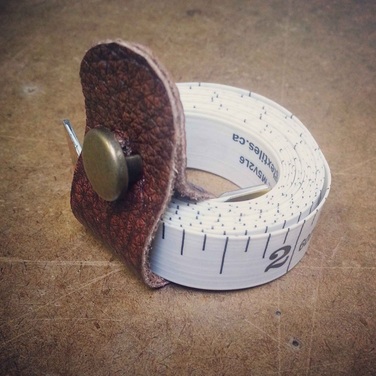 Happy Sewing!
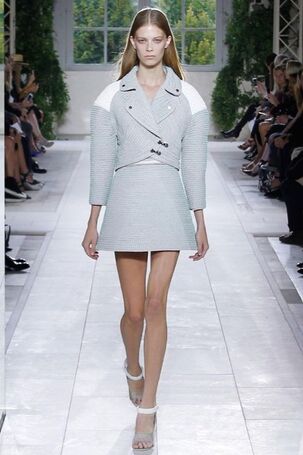
Designed, photographed and written by Sheila Wong Studios This one is for the boys! All men should know the top three types of lapels commonly found of blazers and jackets. If not, then continue reading. Lets begin with Intro to Lapels 101. There are three major sections you need to know. 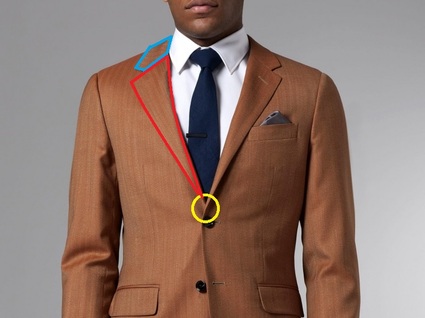 Starting from the top, highlighted in blue this is the collar. The collar changes very little from suit to suit. Marked in red is the actual lapel area, this shape changes depending on the style of lapel. The break point is marked in yellow. This is the point where the lapel begins to fold or break to create the lapel from the center front. Notched Used in women's and menswear, a notched lapel is commonly used on single breasted jackets. I have heard several people describe a notched lapel as looking like a step from the collar to lapel. Sure that works, but I think the easiest way to point out a notched lapel is to imagine the shape of a bird with their mouth open. Burberry Prorsum Spring 2014 retrieved from NY Mag. Peaked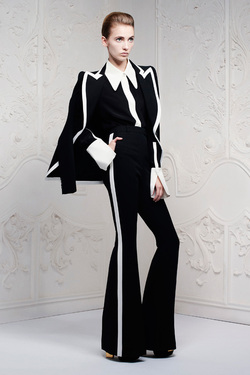 Peaked lapels are found commonly on more formal and double breasted blazers/jackets. Can also be called a pointed lapel. Who am I kidding? I have to include the ladies too. How beautiful is this extremely peaked lapel by Alexander McQueen? Alexander McQueen Resort 2013 retrieved from Style.com Shawl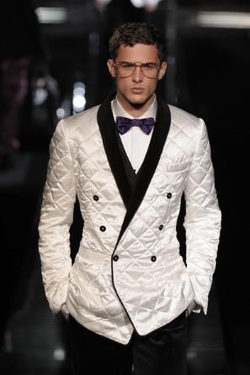 This version brings together the collar and lapel in one continuous piece. Can be referred to as a shawl collar or shawl lapel. A shawl collar brings out a more casual feel. Its origin is on a smoking jacket. Hugh Hefner popularized this style of collar/lapel as he was typically seen lounging around in a smoking jacket. Dolce & Gabbana Fall 2009 retrieved from LA Times. Happy Sewing!
Written by Sheila Wong Studios Hope you all had a happy Saint Valentines day. I kept warm with my DIY faux fur stole this Valentines. Here are the step by step instructions on how to sew one. By the way, I kept it super chill this Valentines by going to Costco for pre-dinner fries with the man then delish sushi for real-dinner.  MaterialsStep 1
Cut out one piece of faux fur and one piece of lining in the measurements below. I have used a jersey rib knit as it stretches nicely and is soft when wearing. You can also use a silk for lining. 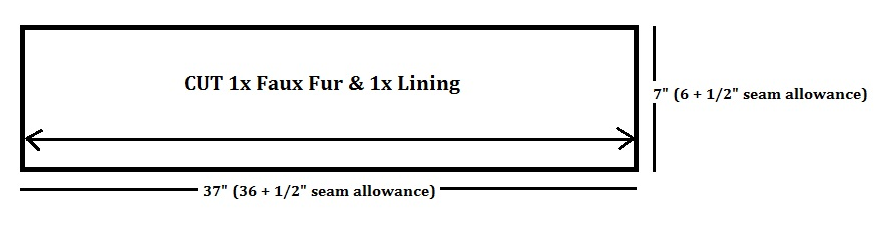 Your seam allowance is 1/2 inch. Please take note of the grain-line. Your grain-line should be running parallel to the selvage edge of the fabric. Step 2Cut out slits on fur piece as shown. This becomes the holder area for the other end of the stole to sit in. I recommend cutting from the wrong side of the fabric that way the fur pile does not get in the way. 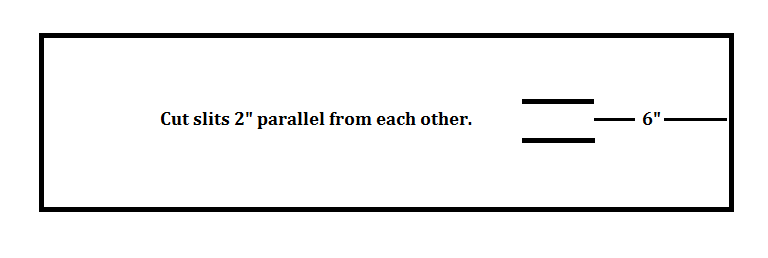 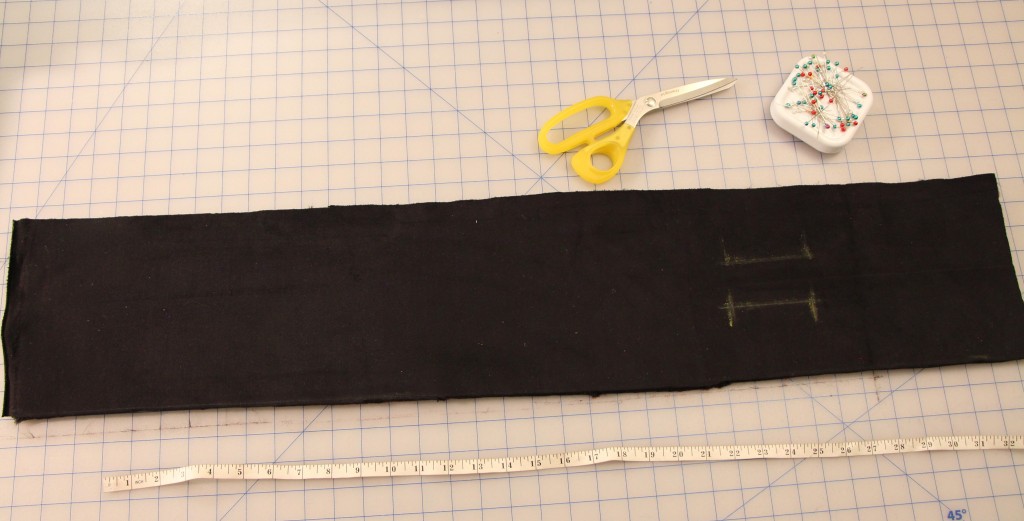 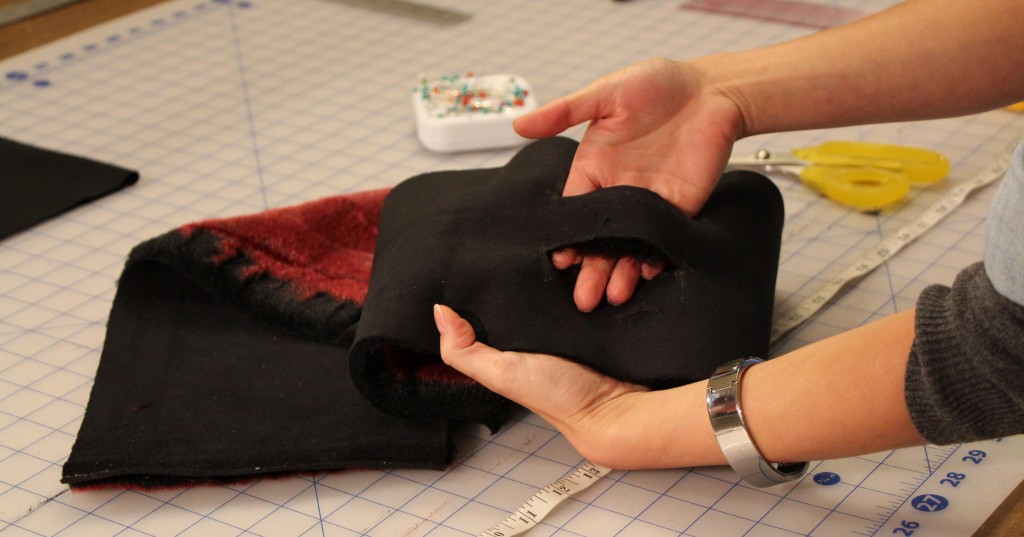 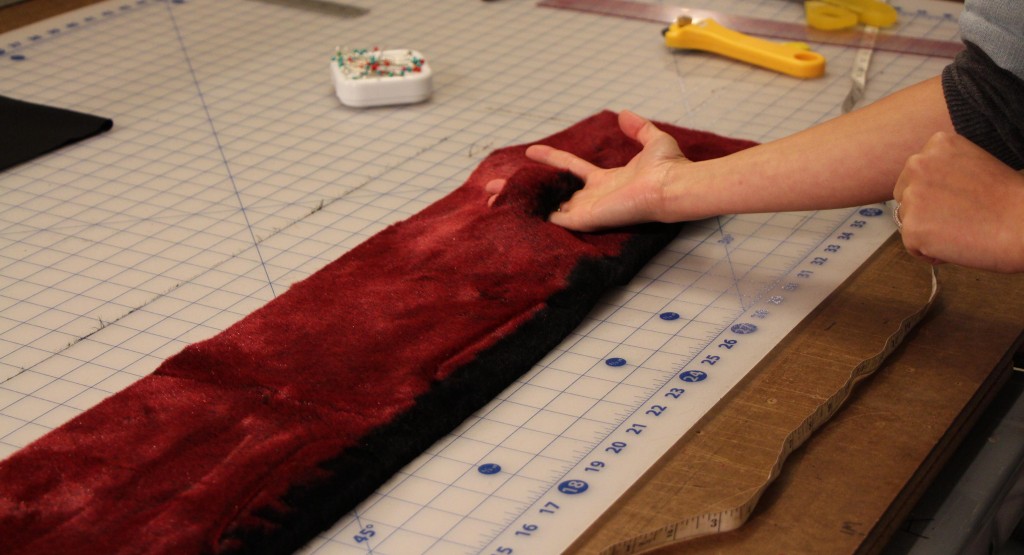 Keep your vacuum handy! Vacuum your project after you do any cutting to the fur. 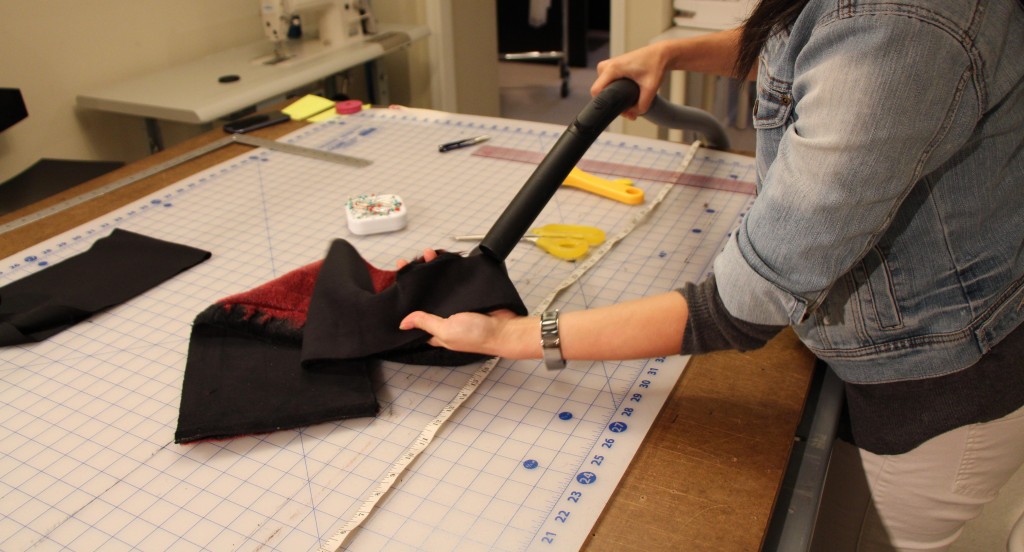 Step 3Place fur and lining right sides facing each other and pin. Leave a 3-5” opening to flip inside out. 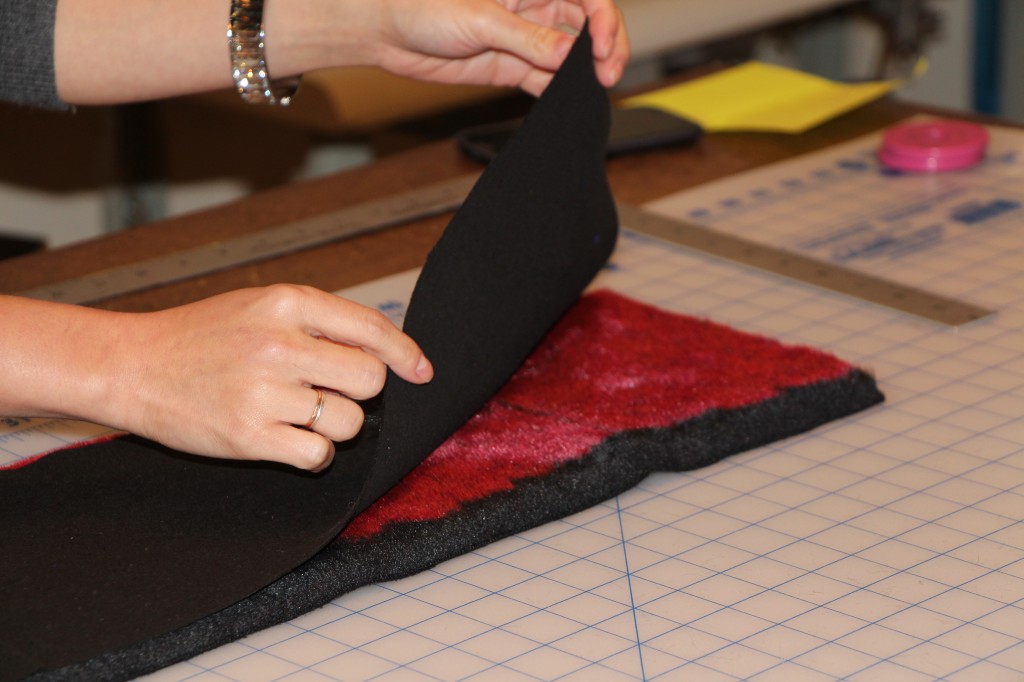 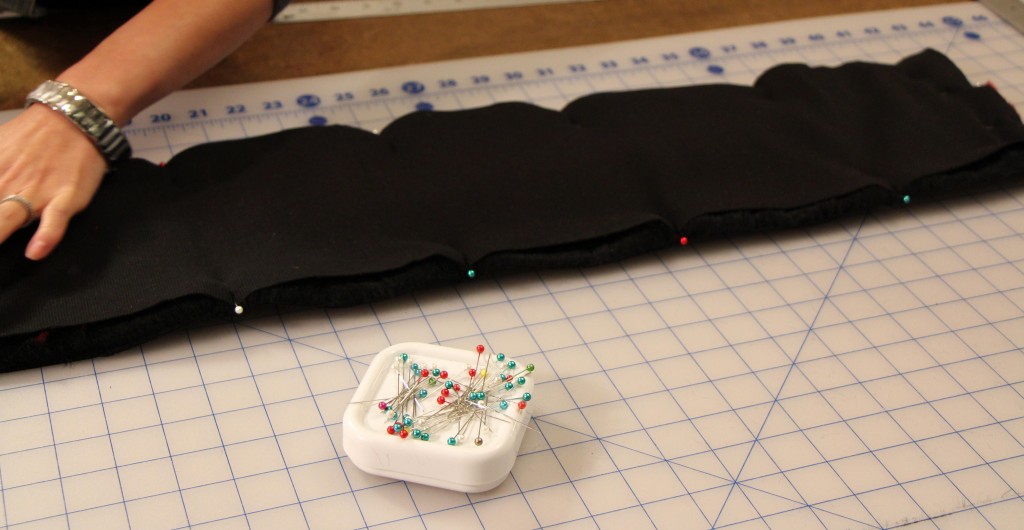 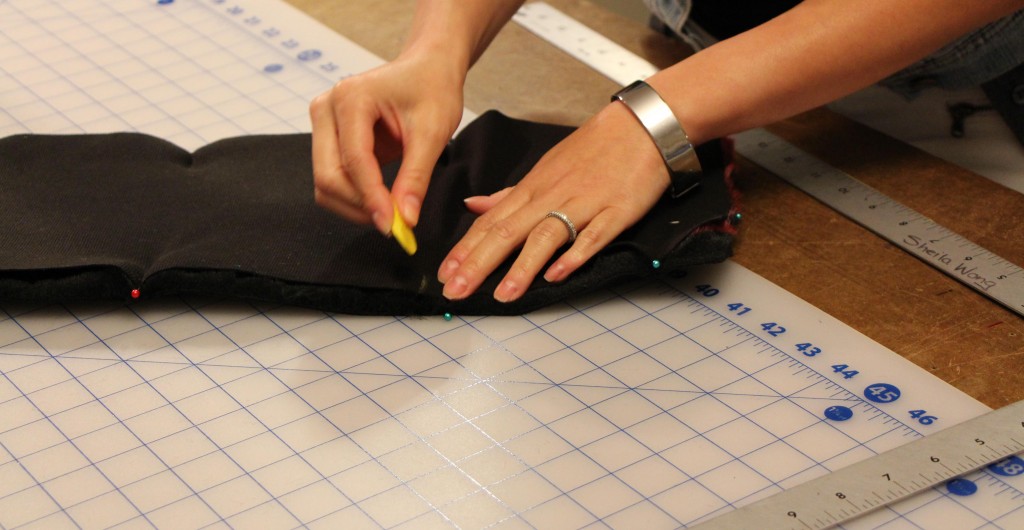 Step 4Sew all the way around the stole, leaving your opening, un-sewn. Be sure to backstitch at the opening area so the opening does not rip open while flipping later. Your seam allowance is 1/2 inch. Red line below is your sew line. 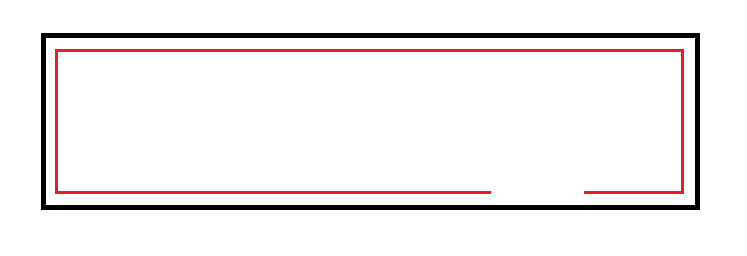 Step 5Trim away any excess bulk fabric in your seam allowance area. I always trim away excess fabric at the corners, that way your corners actually look like a corner. 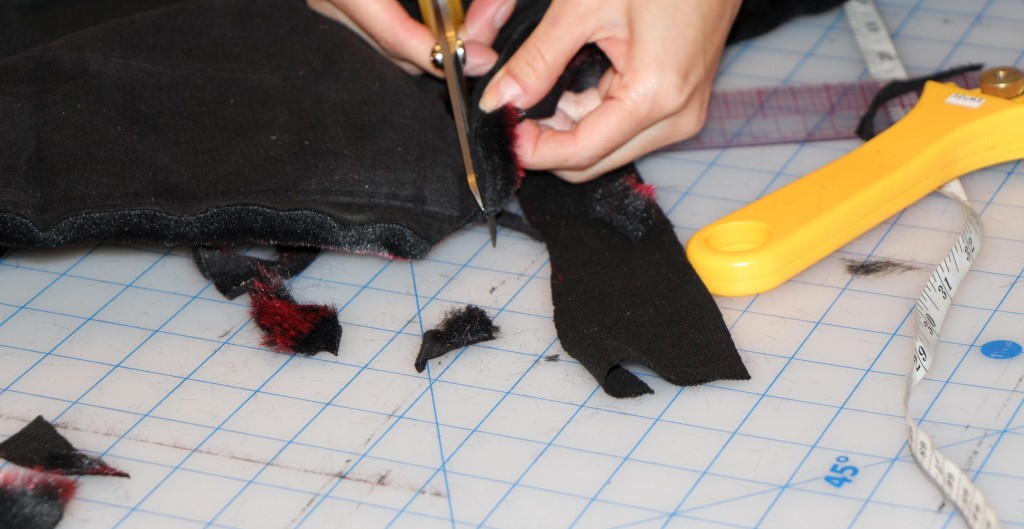 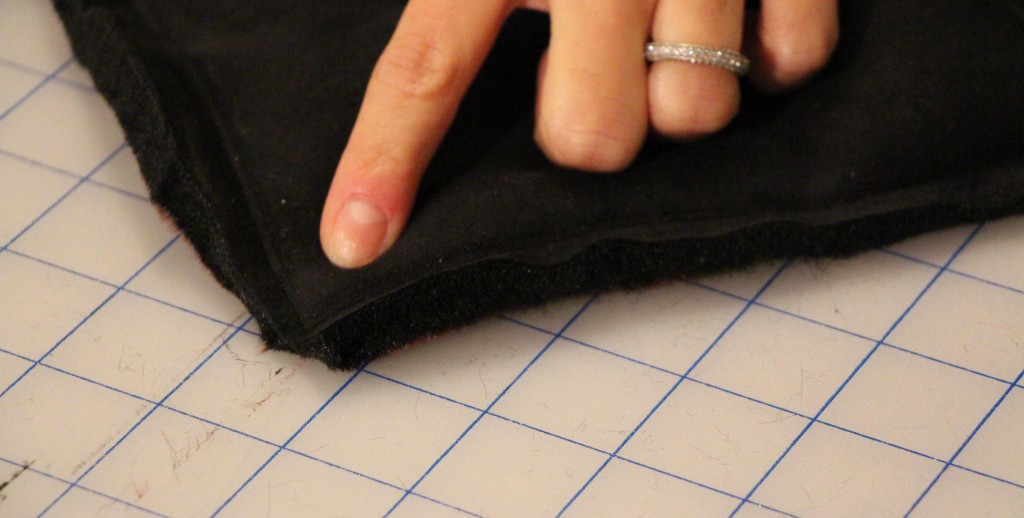 Step 6Flip inside out. FUN TIMES! 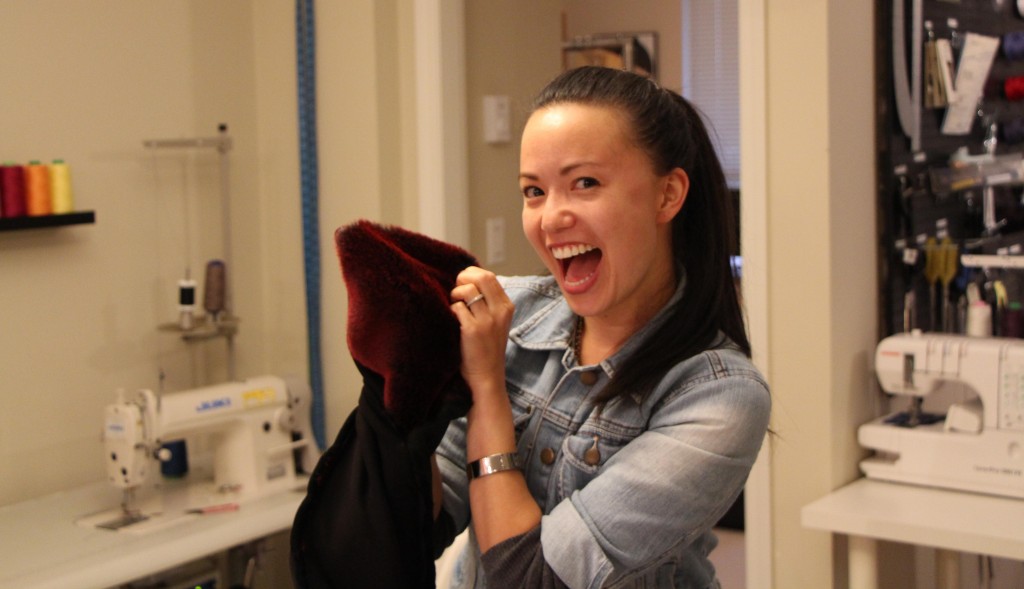 Step 7Slip-stitch shut the opening by hand. 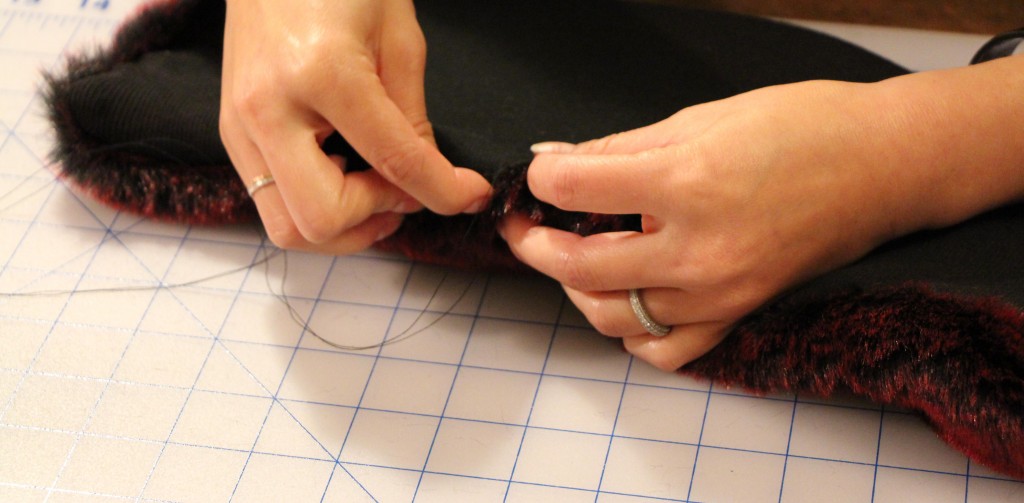 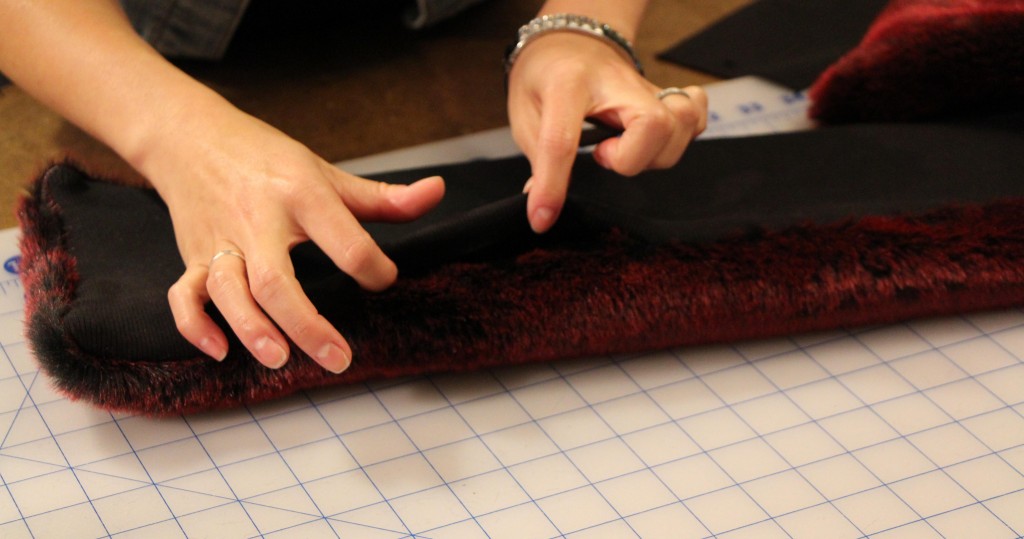 Hope you have enjoyed this fur filled tutorial. Its time for me to brave the cold night, but at least I have my fur stole. - Sheila
Happy Sewing! Designed, photographed and written by Sheila Wong Studios Essential for Fall and Winter, pants keep us warm. But they can also be an extension of our personality through colour, fabric choice and silhouettes created when worn. Get your learn on here with pants you may not see everyday. Paper Bag Waisted Pants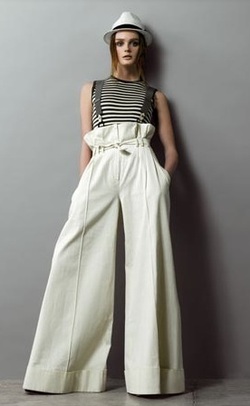 How fun are these pants?! The waist is tied like a paper bag, hence the name, paper bag waist. Naturally they sit at the smallest part of the waist. When unbelted and laid flat, the pants look like a rectangle from top to bottom. I recently inherited a vintage pair of Ralph Lauren paper bag waisted pants. Check out my Instagram as I wear them this Thanksgiving Monday. Pant example retrieved on Google Images. Pegged Pants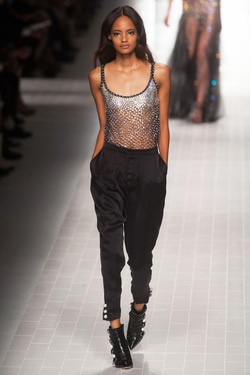 Think volume at the hips then narrows by the time it hits the hem. Perfect pants to install a side seam pocket. Pegged pants are easily mistaken for jodhpur style pants. But, jodhpurs volume at the hips is so much more exaggerated. I always think of pegged as the city version of the jodhpur. Blumarine Spring 2014 RTW retrieved from NY Mag. Bell Bottom Pants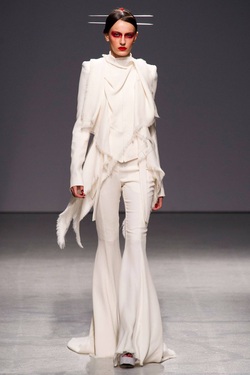 If you grew up in the 90's, you definitely owned a pair of bell bottoms. I admittedly owned several pairs. Remember the brand Silver? I loved wearing my Silver bell bottoms to school. Characteristics that make up a true bell bottom is fitted at the waist, hips and down to the knees then flares out dramatically to the hem. Gareth Pugh 2013 retrieved from NY Mag. Cargo Pants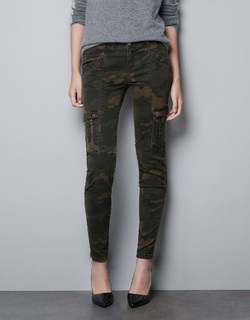 Cargo pants where made for utility purposes. The wearer needed to hold alot of items easily and keep them organized. must have several pockets and made from a durable material. This version from Zara is a modern cargo pant. Do not think you can fit more than a slim phone and a lipstick in these. But who needs to hold things in your pockets when we have big purses right? Zara 2013 retrieved from Zara Online. Harem Pants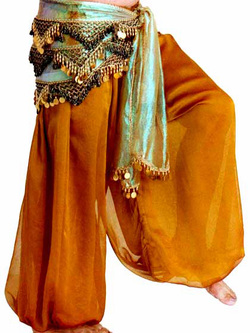 Absolutely a gypsy feel to these pants. Traditional harem pants are super full then gathered at the hem with an elastic or cuff. Newer versions are not as full but follow the elastic cuff at the hem. Pant example retrieved on Google Images. Palazzo Pants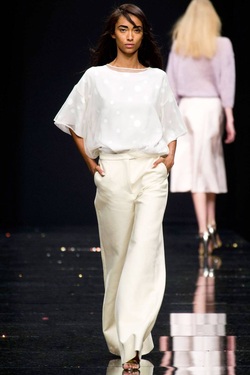 Palazzo pants are fitted at the waist and hips then flares out dramatically to the hem, they are much wider than wide leg pants. Often times can be mistaken for a long flared maxi skirt in certain angles. Great for showing off a small waist, but be prepared to make some attention while walking with all the extra fabric! Antiprima 2013 retrieved from NY Mag. Happy Sewing!
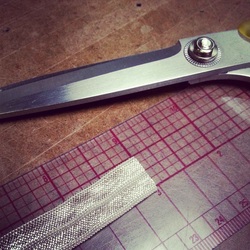
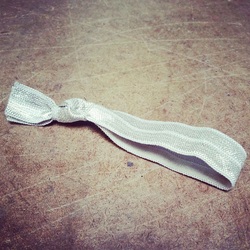
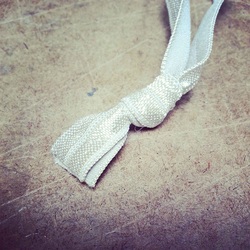
Written by Sheila Wong Studios OK, first off I want to apologize for lying to you in the title, there is absolutely no sewing involved in this tutorial. This is all about how to make your own hair ties. I am posting this tutorial because it is simple enough for anyone to do and because it does not cost very much either! Materials
Step 1
Step 2
Step 3
Give-AwayWant to win a package of handmade hair ties? Here's how:Winner will be announced on Oct 30 2013 at 3pm. 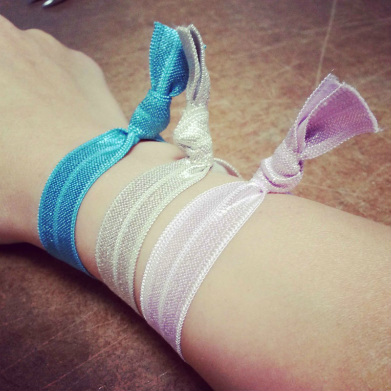 These will make fantastic gifts and/or colourful arm candy.
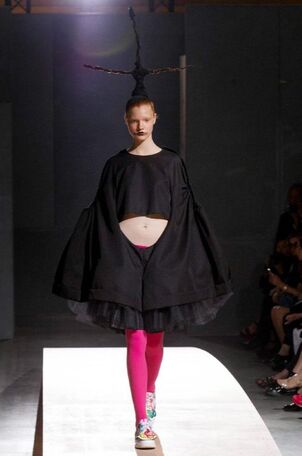
Happy Sewing! Designed, photographed and written by Sheila Wong Studios Heading into Fall season, sleeves are... well everywhere! There is more than just your basic short and long sleeves out there. In this post I will go over some pretty amazing sleeves with equally amazing names. Now the question is, which sleeve will you slide your arm into this Fall? Cap Sleeve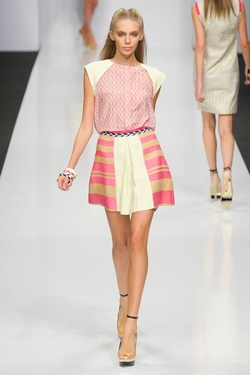 Just a smidge more fabric than a sleeveless garment. A cap sleeve literally caps your shoulder. Most cap sleeves are made by extending out the shoulder seam. Byblos Spring 2013 retrieved from NY Mag. Gigot Sleeve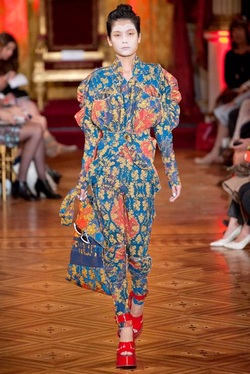 This sleeve is one of my favourite sleeves to say out loud. Try is with me, 2 syllables- "jgie zhego"! Sounds like you are calling for a dog. Another name for this sleeve is leg o'mutton, equally as fabulous to say out loud. The easiest way to spot this sleeve is to picture a chicken leg. Extremely full at the top and fitted down to the wrist. Used in the 1800's, the idea was that if your gigot fullness was extreme, it would make your waist appear smaller. Vivienne Westwood 2013 retrieved from NY Mag. Bishop Sleeve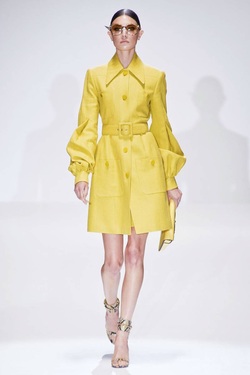 A long sleeve with fullness at the bottom created by gathers or pleats and narrow at the top. Fullness is controlled by a cuff at the wrist. Gucci Spring 2013 retrieved from NY Mag. Dolman Sleeve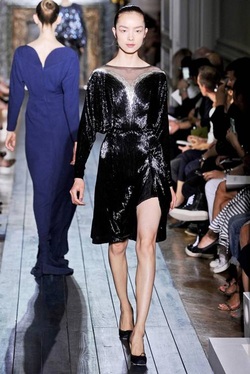 This sleeve reminds me of bat-wings. Personally I dont think this is very flattering on most figures, as it takes away from a women's natural curves. But leave it to Valentino to make a dolman sleeve flattering by cinching in the waist- good job! Important elements for a dolman sleeve include a fitted sleeve from wrist up to elbow region then excess amount of fabric dropped from armhole area. Valentino 2012 retrieved from NY Mag. Bell Sleeve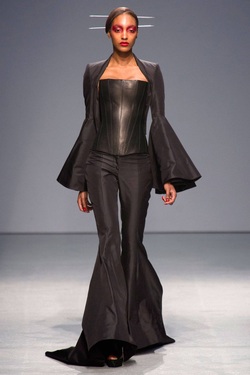 Visually just picture your arms are bells, with some bells being larger than others- this is a bell sleeve. There are variations of this sleeve where the bell can flare out at any part of an arm. Typically you will see a seam connecting the top of the sleeve to the bell part, this allows a designer to achieve the flare. Bell sleeves can add drama to any outfit, but I dont recommend dining in bell sleeves. Gareth Pugh 2013 retrieved from NY Mag. Puff Sleeve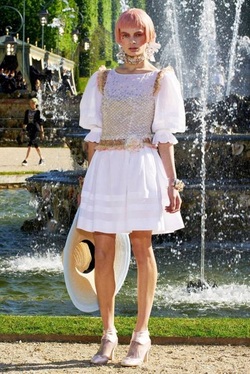 Gathers at the sleeve cap and sleeve hem make up a perfect puff sleeve. Extremely feminine and youthful sleeve. I think the last time I wore this sleeve, I was 12. If you have broad shoulders, this sleeve only makes you look wider. Chanel Resort 2013 retrieved from NY Mag. At times, certain sleeves defy conventional labels and fall under their own unique category. Here are two of my favourite one of kind sleeves from Spring 2014 shows. Happy Sewing!
Written by Sheila Wong Studios |
Archives
November 2022
|
 RSS Feed
|
|
Copyright © 2024 Sheila Wong Fashion Design Studio Ltd. All rights reserved.