|
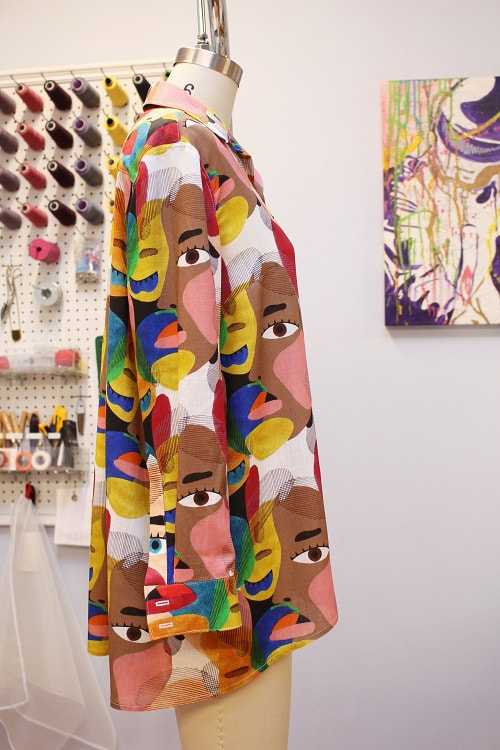
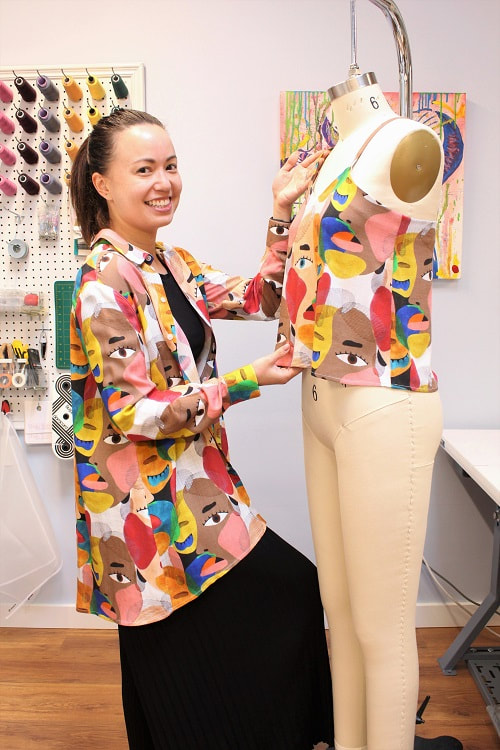
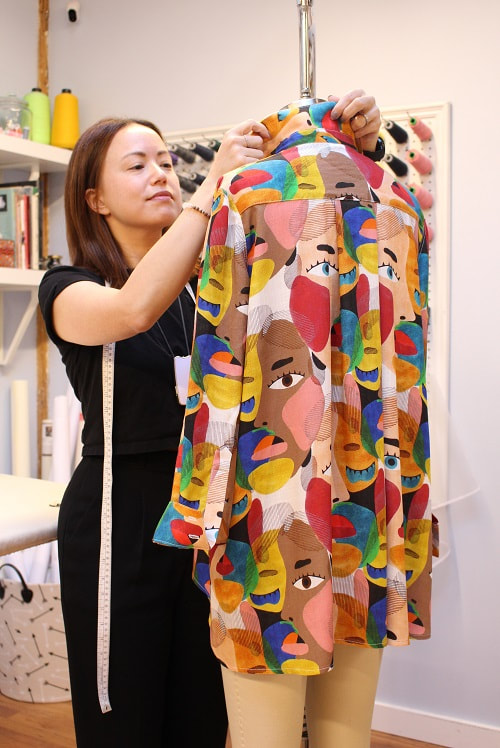
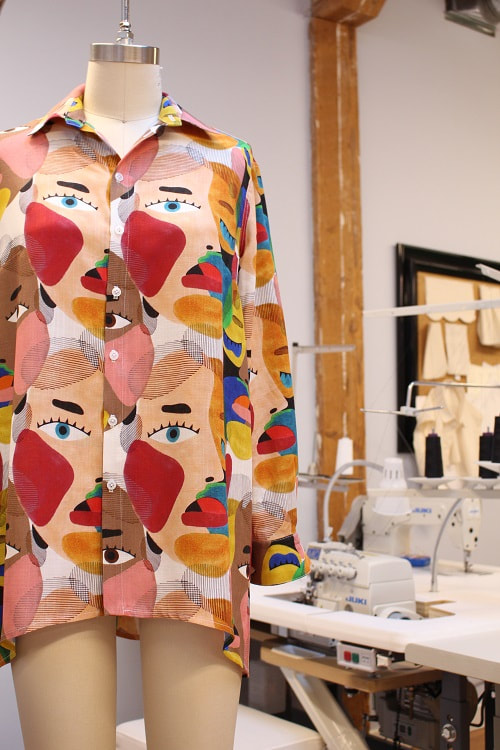
Color is not my go-to but for some reason the color and faces on this print were just too stunning to walk away from. In this case, the fabric was the main inspiration! The energy I felt from this fabric was that we are all unique in our on way and that we should embrace our own uniqueness and that of others. 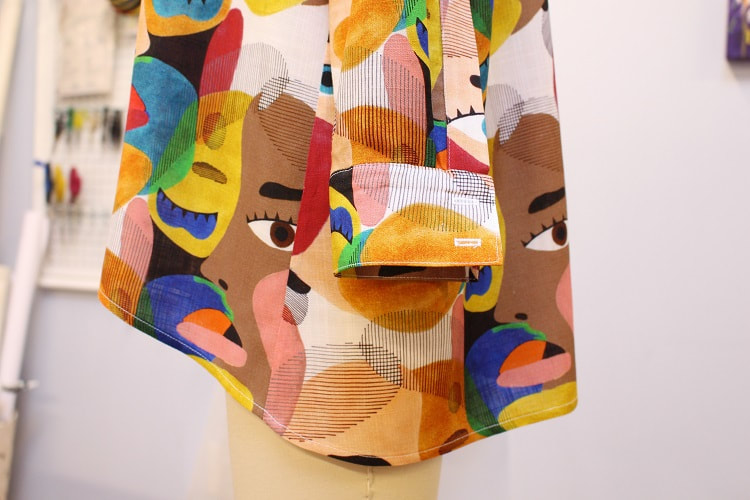 Drafting this design was not very complex as I already drafted a basic tailored dress shirt in the past. I traced out a copy of that pattern and made the following adjustments to the new pattern.
FabricIn late Feb, I visited Fabricana in Coquitlam for the first time. Normally I frequent their Richmond location, but that location has been closed since Oct 2019 for renovations. I do prefer the set up of the Richmond location but it was nice to explore a new store to me. During this fabric shopping trip, my focus was on tailored shirt fabrics. I picked up 3 in total, so be prepared to see more tailoring techniques over the next month or so. 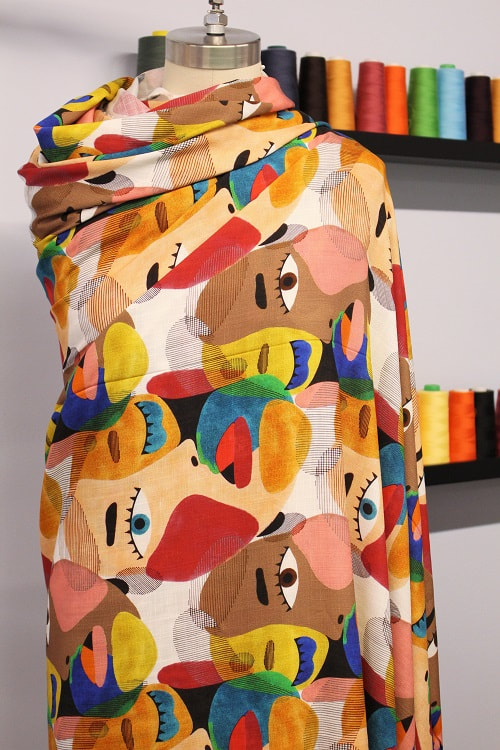 Project Specs
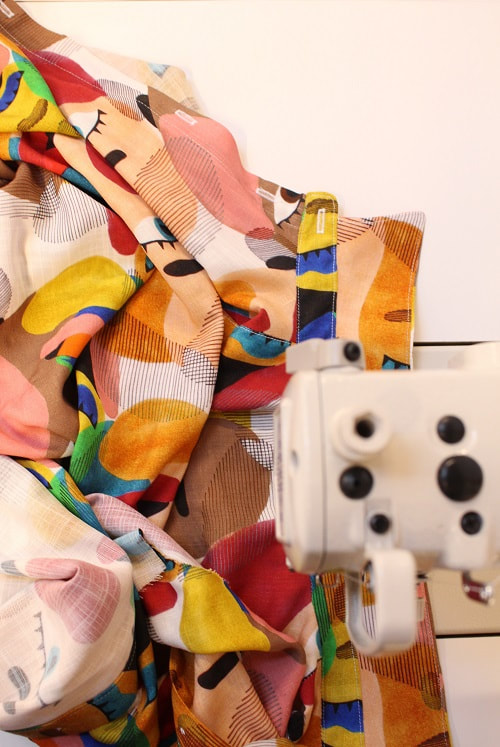
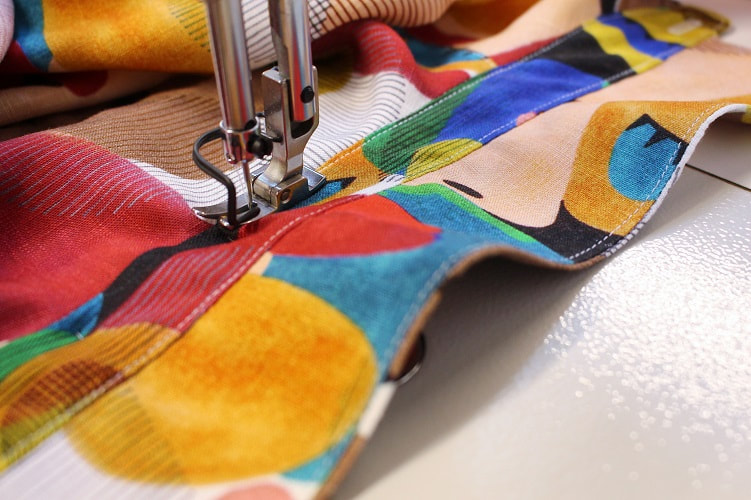
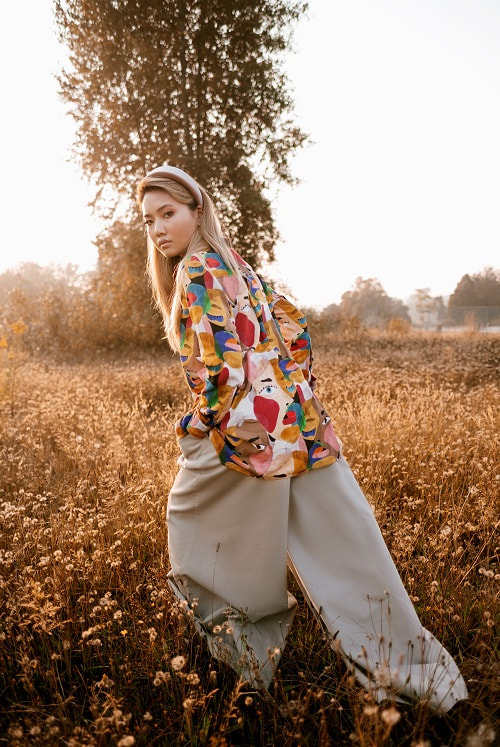
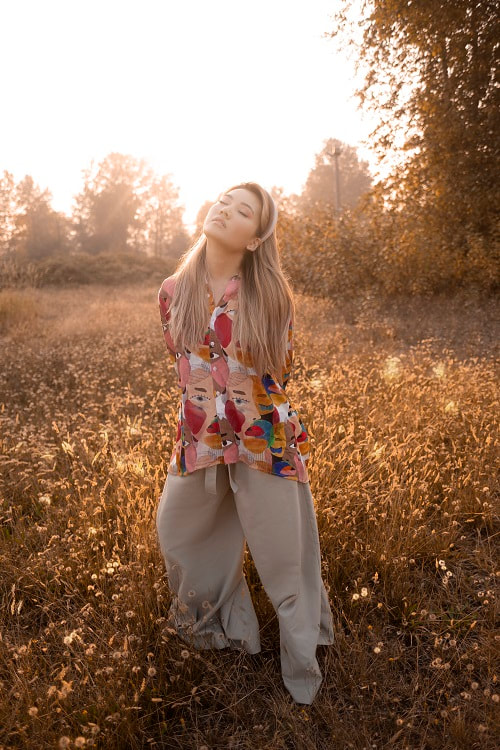
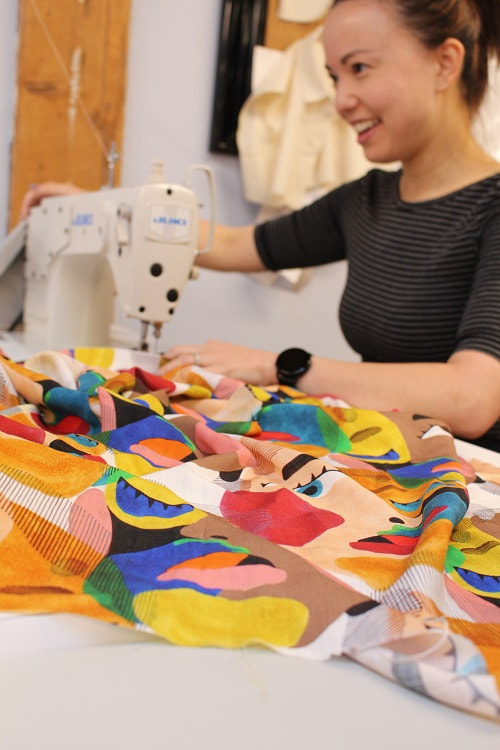 Design ElementsTraditional tailoring techniques are all over this design. Below, I walk you through some of the stand out elements and share a few essential button hole tips I discovered that have changed my opinion on how easy sewing a tailored shirt is. The only non traditional elements are the light weight fabric, extra flare in the back and the asymmetrical hem. Top-Stitching and Seam FinishesAfter you take in the beauty of the fabric, you will notice the top stitching flowing throughout the entire shirt. Top-stitching is important in a tailored shirt as it holds each area stable and adds strength to over-worked areas such as the armhole, shoulders and back yoke. In addition to the top stitching, french seams and flat felled seams where applied to all exposed seams in the garment.
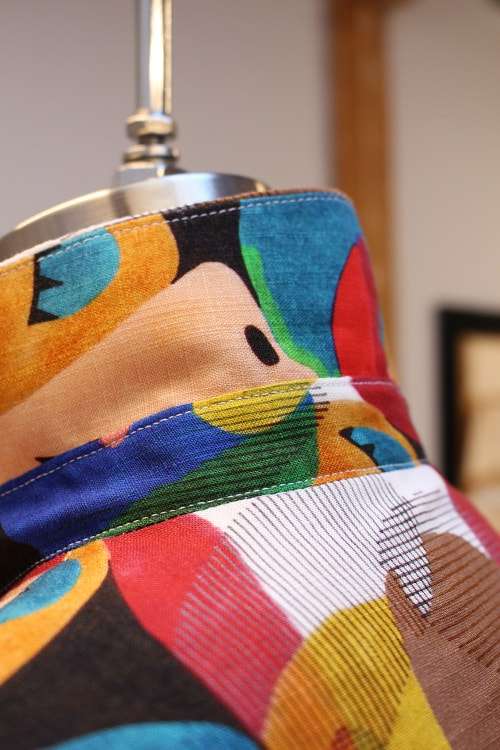
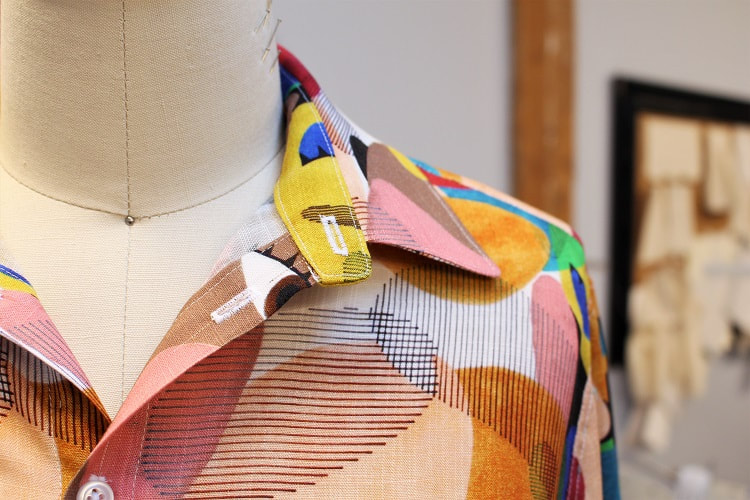
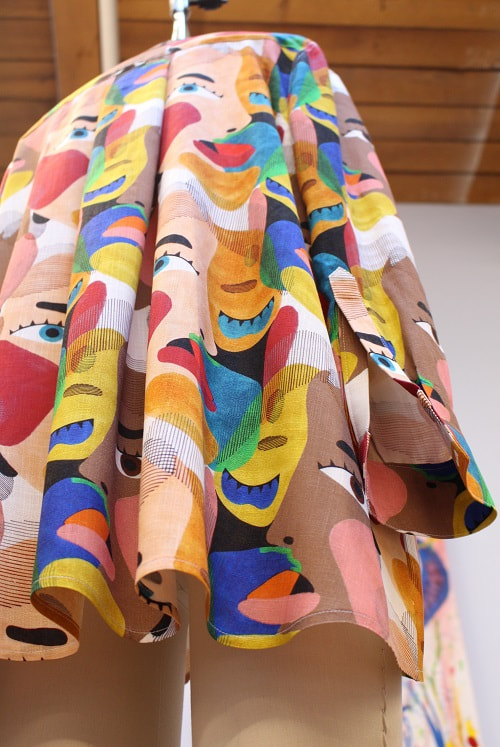
Tower Placket and CuffsThe term "placket" refers to any opening in a garment that opens up for the wearer to easily get in and out of in more fitted areas. Do not confuse it with the hem opening of a garment though. Typically, the placket has a closure of some sort— button, snap, thread/fabric loop, etc. A "tower placket" is recognizable for the tower like point at the top and is one of the most traditional tailoring elements found in a shirt. If you have ever constructed one, you will know that you have to be extremely accurate in the cutting, marking and pressing of the tower. If you are off by an 1/8" it will make for a leaning tower. 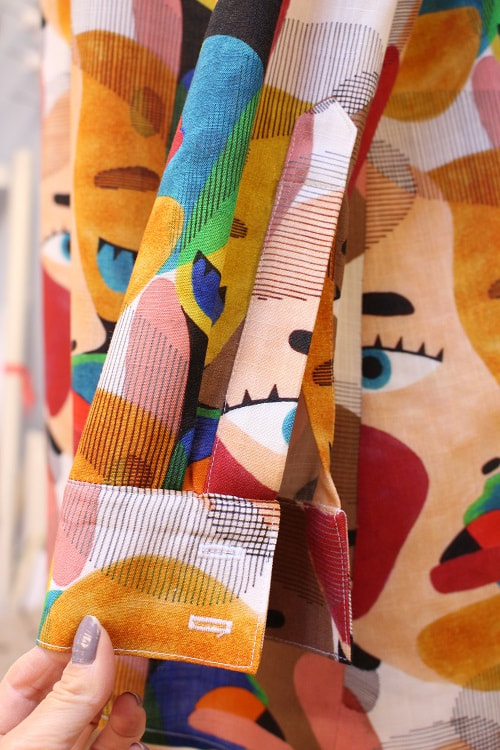 CB Box Pleat w/FlareI have made several tailored shirts, so I decided to inject some femininity through a few changes. Added flare to the back panel, and created a larger center back box pleat. No flare was added to the front. I think we could all use a built in cape once in a while! Lengthening the hem and creating an asymmetrical hem makes for more of a shirt dress or tunic silhouette as well.
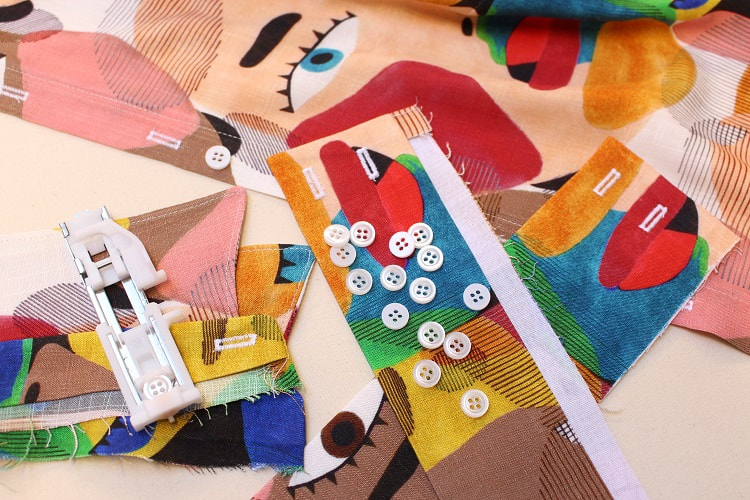
Sewing Tip: ButtonholesMachine sewn buttonholes can be unpredictable for a number of reasons— fabric thickness inconsistency under the foot, too thick of fabric, and weight of certain areas in the garment pulling it from the sewing foot areas. BUT, it is possible! I discovered recently that if you follow these sequence of steps, your life will be easier!
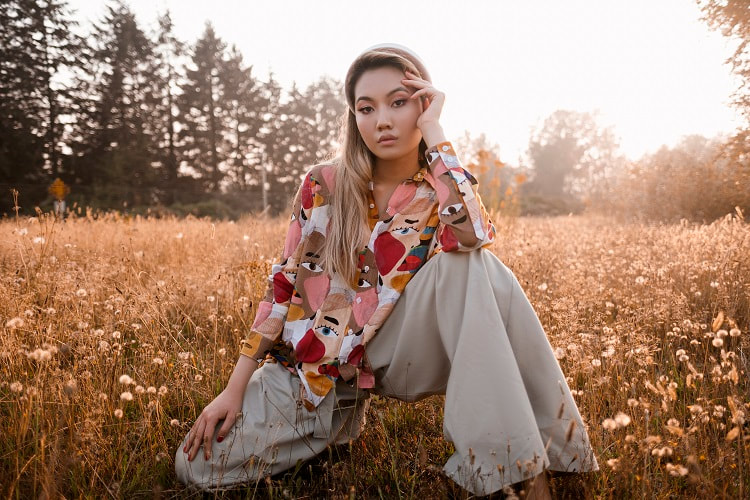
 Photoshoot CollaborationI am so happy to be collaborating with local Vancouver photographer Paulo Miguel (@paulomguel) again. More to come this year, so stay tuned and check out his Instagram page for more lovely shots. Below are our favorite shots of our Rainbow Faces Tailored Shirt from this set. Modelled on @joannazhg.
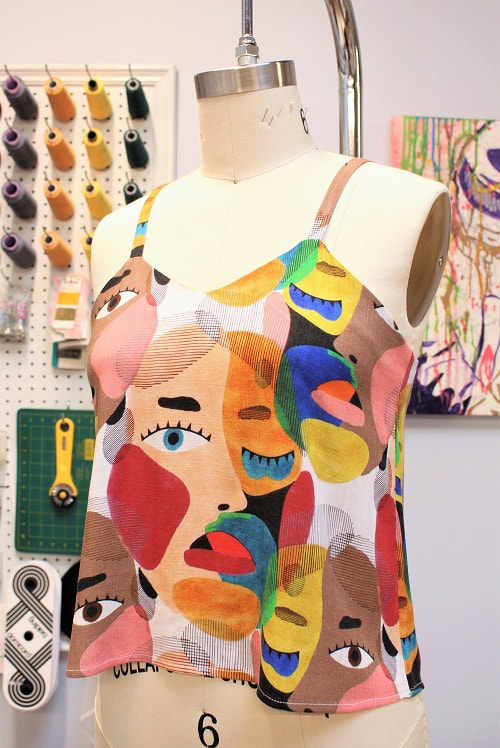
 Rainbow Faces Slip TopWe had enough fabric leftover, and this is how we made use of the scraps! This design was drafted while working with our client Anita (@anita.early). We drafted a slip top together via her digital lessons and this was the outcome. Pretty fun we think!
The more i work with this print, the more it reminds me of a Pablo Picasso painting during the Cubism movement of the 20th century. Combining different art forms is one of my favorite ways to design and is something I’d like to continue exploring. Garments are wearable art after all! Final DesignThis design was a real pleasure to stitch up. Our world got turned upside down very quickly with the spread of COVID-19. Sewing reminded me that we all need our therapy to help process our feelings. This design provided me with time to slow down and enjoy each stitch. May we all find joy in the little moments each day, as they do exist if we open our eyes— kinda like the faces in this design.
If you would like to learn how to draft and construct a tailored shirt, contact us to book lessons.
Happy Sewing! Designed, photographed and written by Sheila Wong Studios.
1 Comment
4/20/2020 05:14:39 am
This rainbow colored T-shirt that you have is quite interesting. I am in the business of selling T-shirts, and I absolutely love it! If I can go and acquire the design for this, then I would love that. I am willing to pay you for it, so just name your price. Of course, this is a business, so we have to go and decide on it fairly. I want to get this design for my shop, so let me strike a deal. Leave a Reply. |
Archives
November 2022
|
 RSS Feed
|
|
Copyright © 2024 Sheila Wong Fashion Design Studio Ltd. All rights reserved.