|
We draft our own patterns in studio, but recently we have fallen in love with vintage and retro sewing patterns. Today we're showing off our latest vintage pattern make- couture bow blouse. This was made using a vintage pattern from the 1950's. By the way, anytime we work with a vintage pattern, we ONLY use hand sewn techniques. 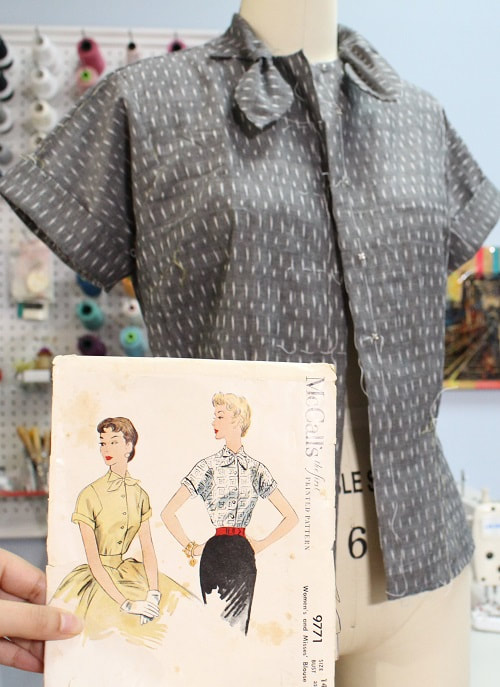 Project Specs
 Design ElementsFull couture sewing techniques applied to this design. No sewing machines involved, all done by hand! Snap ClosuresSnaps are quick and clean to apply. Here are a few tips when hand sewing snaps onto your next garment.
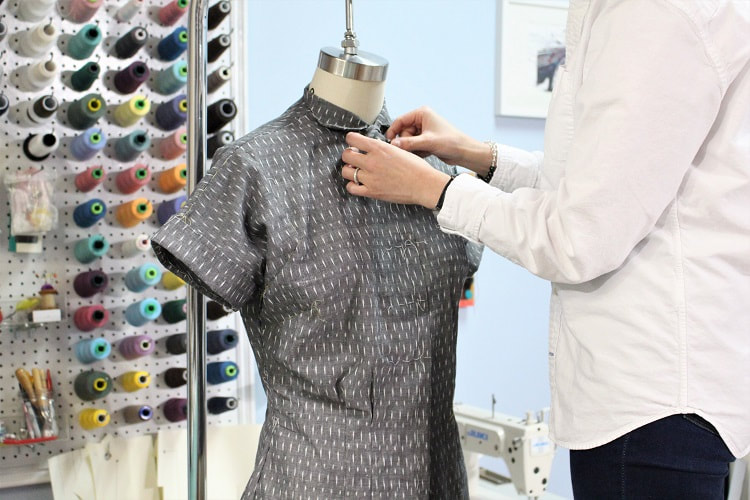
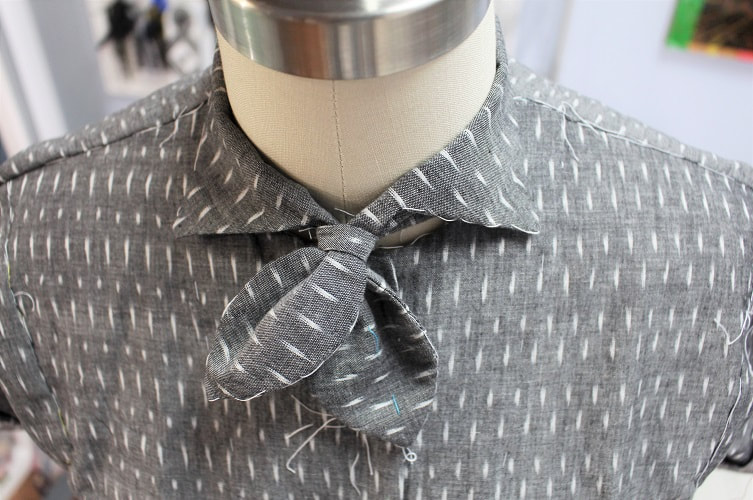
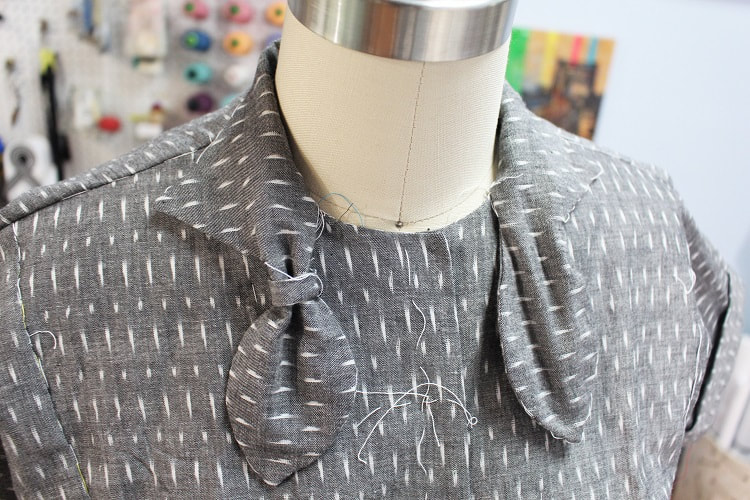
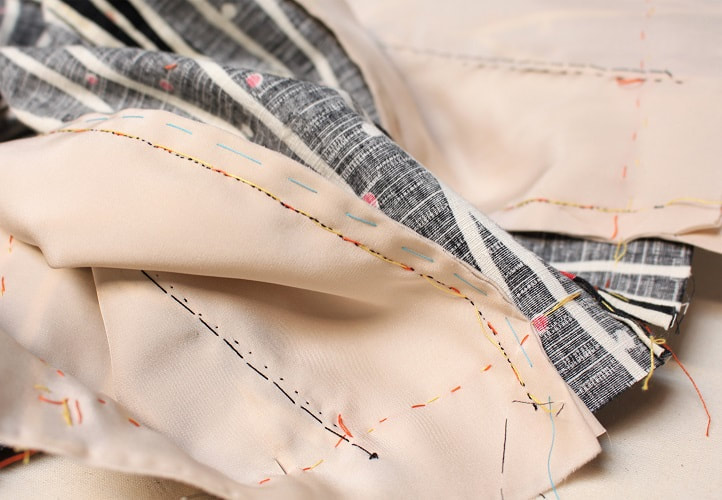
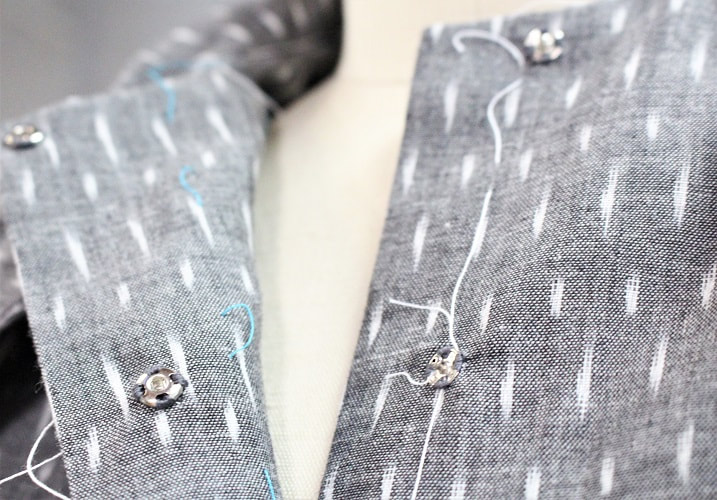 Couture Thread MarkingsApply thread marking around each pattern piece and important landmarks like notches, darts, pleats, tucks, button holes, etc prior to cutting out the fabric. This will create absolute accuracy while stitching up the garment. Use a 1-2" seam allowance, and trim down as you work with each seam accordingly. 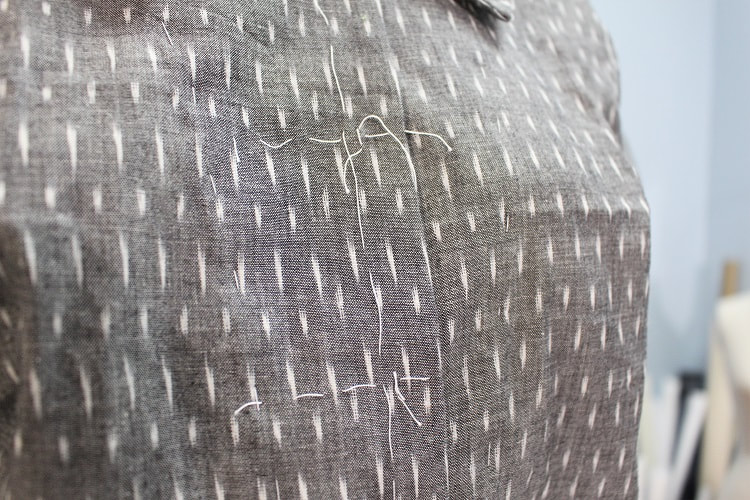 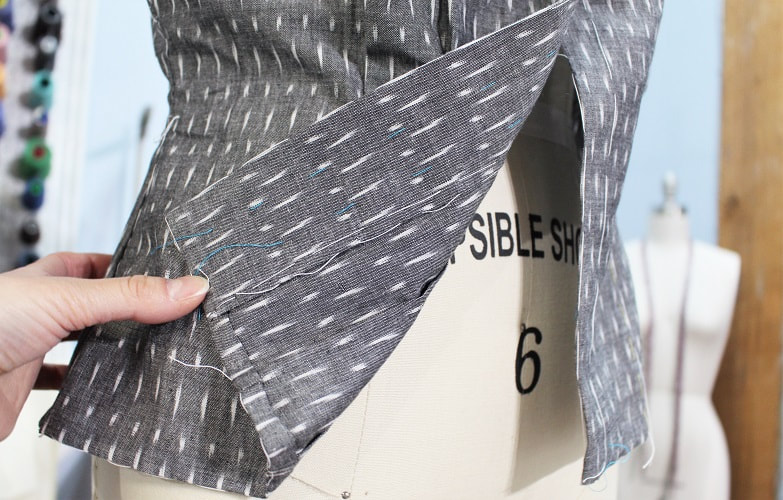 Couture Seam FinishesFalse French seam finishes were used to clean up all the seams in this design. If you do not know what a 'False' or 'Faux' French seam finish is, check out our step by step blog post about it HERE. This type of French seam finish is great to use in couture designs where you always want to work with the right sides of the fabric facing each other.  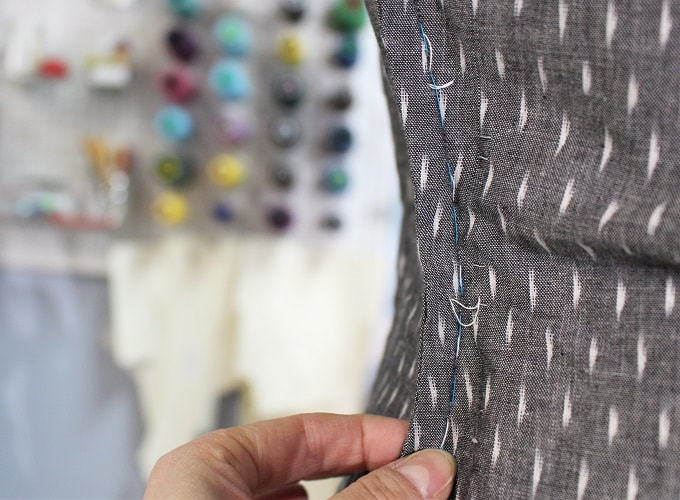 Bow Tie CollarThe dearest detail on this design would be the front bow tie closure. It is such a creative detail to extend out from a collar. You cannot see it but silk organza was catch stitched in between the collar layers to add structure to this area.
Final DesignSeveral vintage tops from the 1950's did not have set in sleeves such as this one. BUT, they would still use creative seams either in the front or back to decrease excess bulk around the armhole area. In this particular design you can see a front inset seam. What would you wear with this top? We are thinking a pair of high-waisted wide leg denim jeans would look so pretty. Let us know your thoughts below. 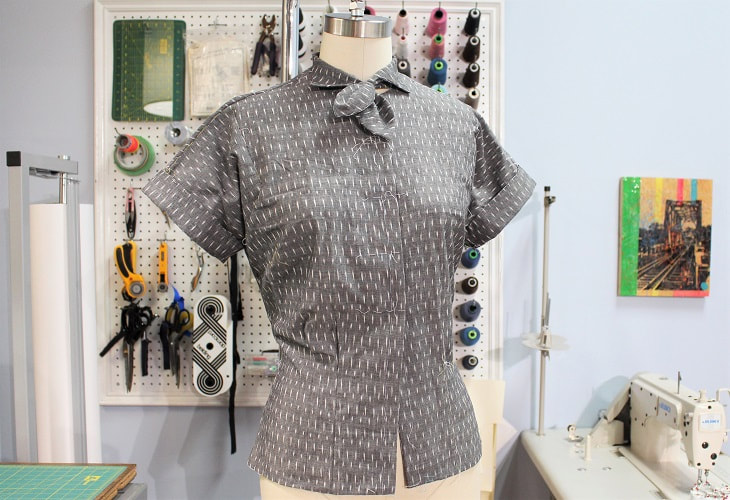 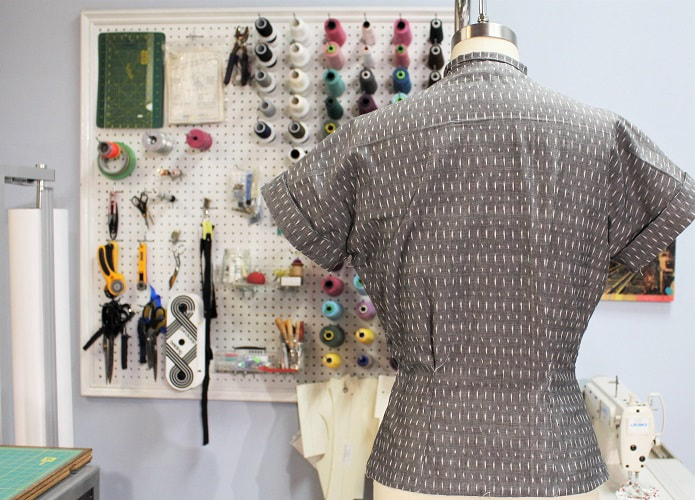 Sign up for private couture hand sewing lessons with us today. Just click on our CONTACT page. We look forward to having you in studio.
Happy Sewing! Designed, photographed and written by Sheila Wong Studios.
0 Comments
This skirts name is Split Personality Skirt (AKA- Split P Skirt). With designing this skirt, we wanted to create the illusion of 'are those pants or is that a skirt'?? It is a skirt obviously, but from afar the center back and center front opening creates the illusion of the appearance of pants. This design is full couture, so all stitching was completed by hand! 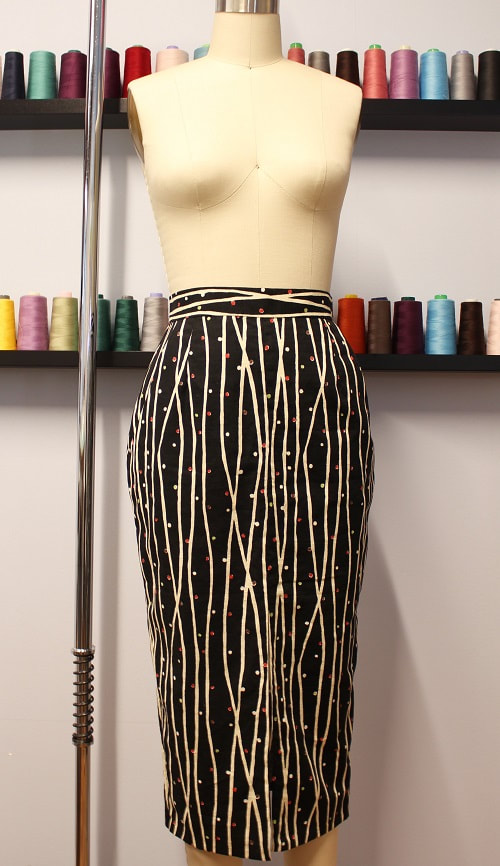 Project Specs
Design ElementsThread MarkingsThis is the stuff nobody gets to see! Temporary yet oh so necessary thread marking and basting thread stitches. Thread marking stitches are inserted in prior to cutting out fabric, as they frame each pattern piece. They are also used to clearly display any notches. These threads get removed after each seam receives their permanent stitches or at the very end of full garment construction. Basting threads hold multiple layers of fabric together prior to putting in permanent stitches.
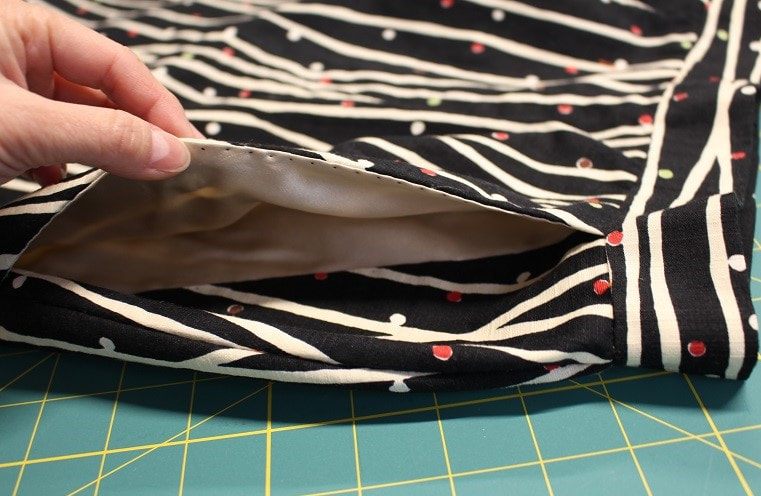
 Slash PocketIf you blink, you will miss the slash pocket element in this skirt design. We carefully lined up the fabric print to ensure the pocket opening was one with the rest of the skirt. Pocket is lined with a buttery silk charmeuse fabric.
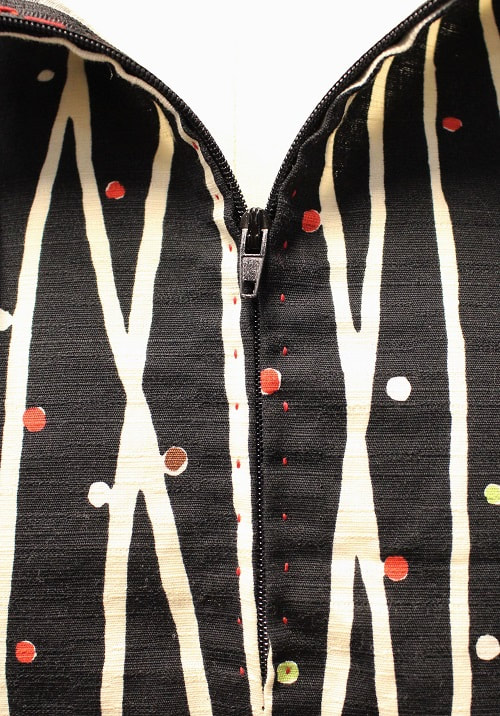
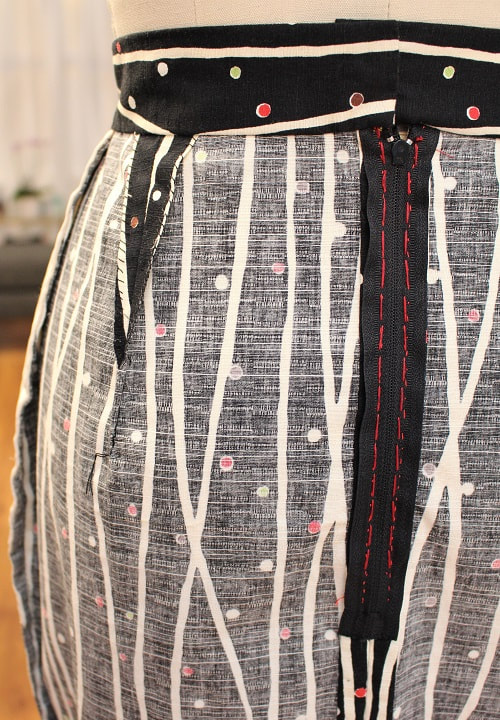
CB ZipperWe hand stitched the center back zipper with a decorative stab stitch finish in contrasting red. Have you tried decorative stitches to highlight a seam? We ended up carrying this decorative stitch further in the garment along the CF and CB seams.
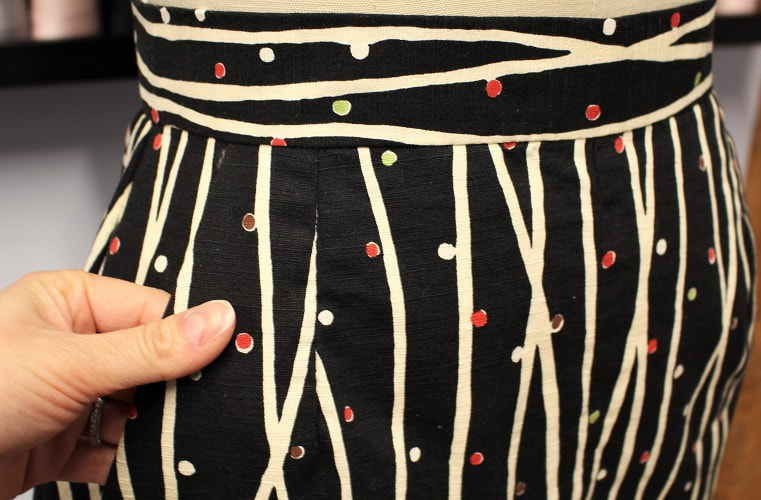
CB and CF SlitsAlong the center back (CB) and center front (CF) we designed high slits for movement and also to create an illusion of pants from afar. 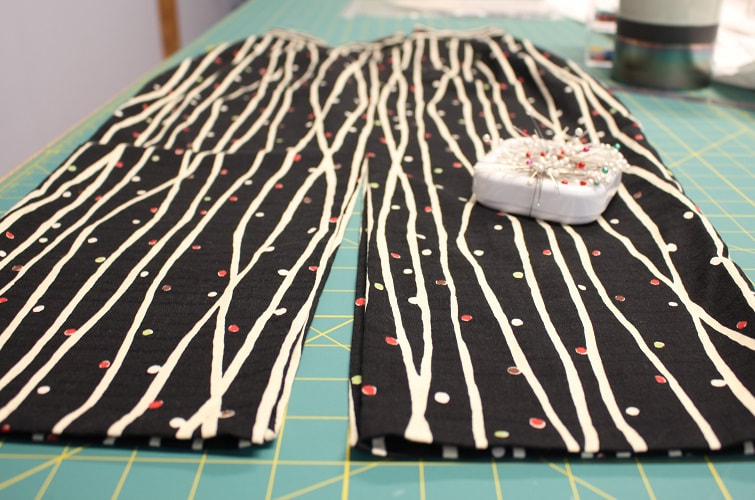 Fabric Covered Snap ClosureElevate the quality of any garment with fabric covered snaps. Often seen on pricier apparel, these snaps only take a few minutes to sew. But, can change the look dramatically. Check out our detailed blog post on "How To Sew Fabric Covered Snaps". 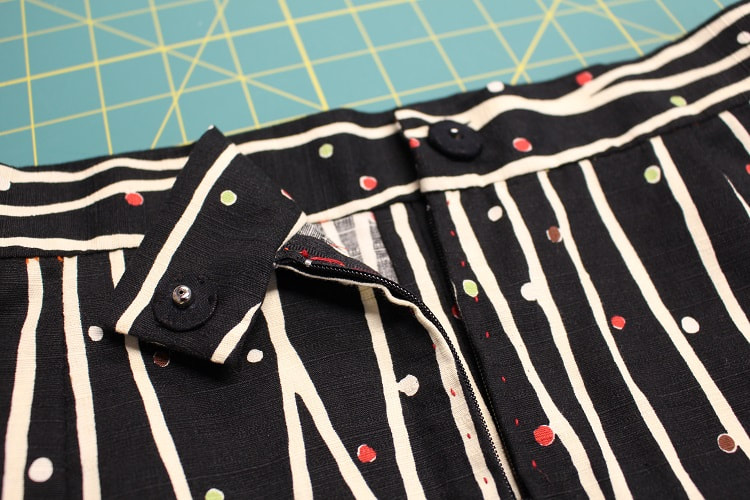 Final DesignChanging our perspective can make life beautiful! Here is the completed Split P Skirt flipped inside out. To all the designers out there, do you ever just wanna show the insides of the design first? 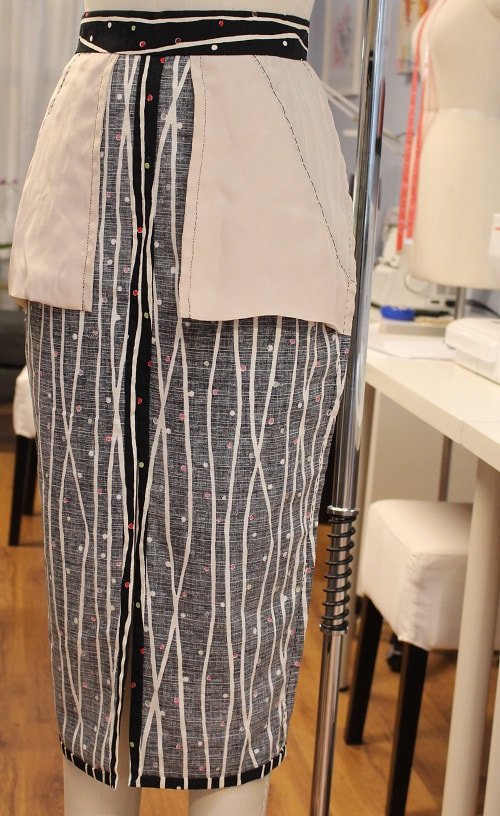 If you want to learn how to inject hand sewing techniques into your next project, come take take lessons with us. CONTACT us today.
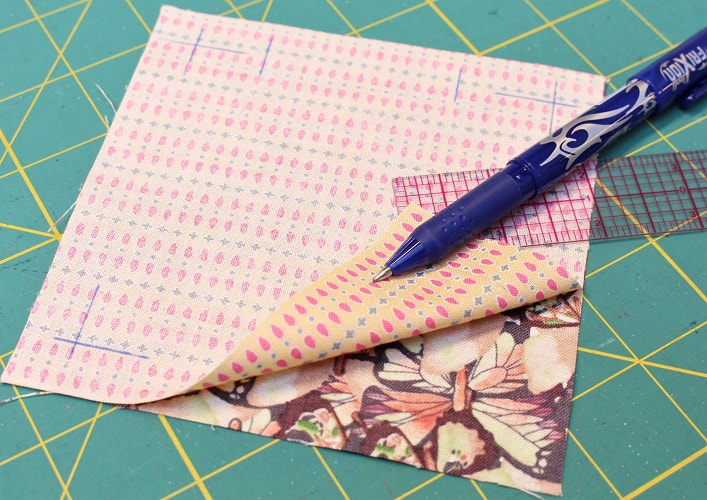
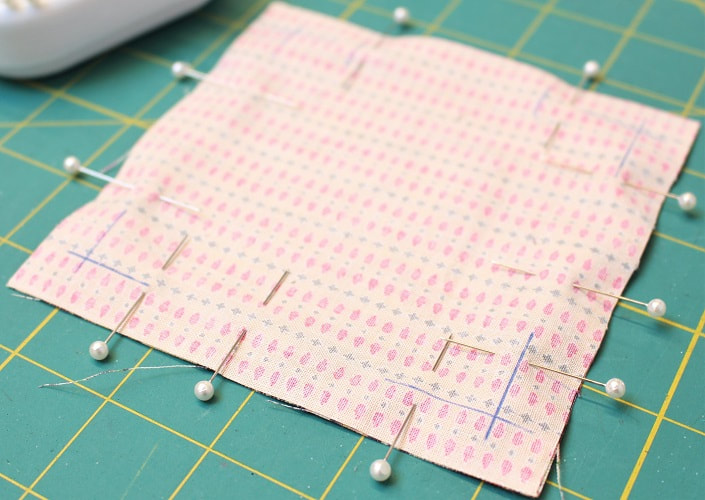
Happy Sewing! Designed, photographed and written by Sheila Wong Studios. It is time for a quick and easy sew-a-long with Sheila Wong! Every year our scrap fabric pile hits a level that we gotta do something about it. So this year we are making reversible coasters. 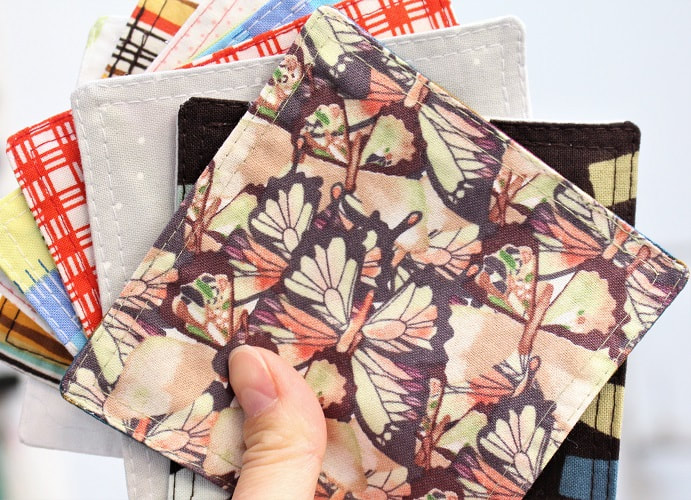 MaterialsTo make one coaster you will need 2 pieces of fabric that are 5" x 5" in dimension. If you would like the coaster to be reversible, choose two different fabric prints. 100% cotton works best. 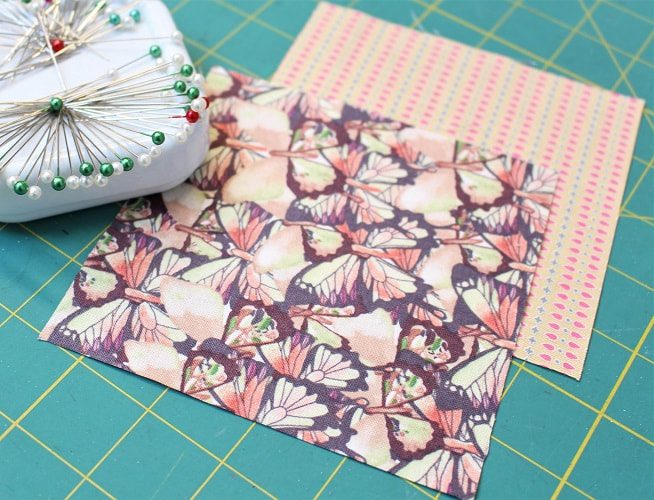 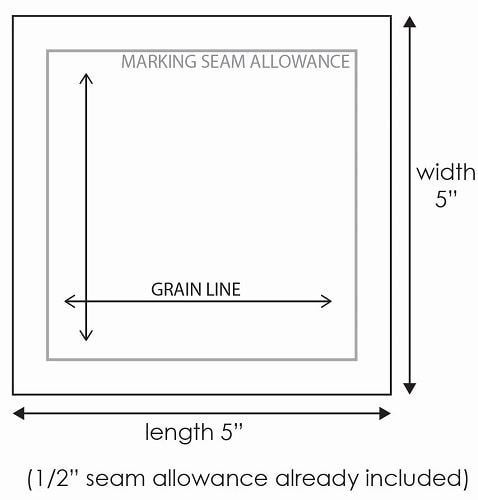 Step 1With right sides of fabric facing, pin and stitch a box all the way around 4 edges. Leave an opening on one side approx 2" in width.
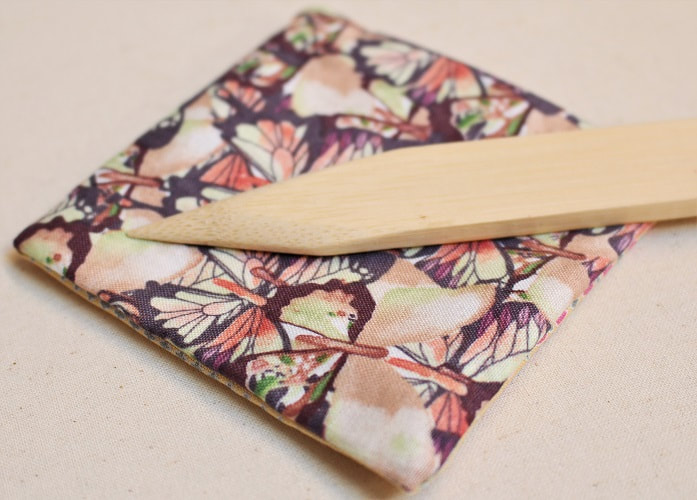
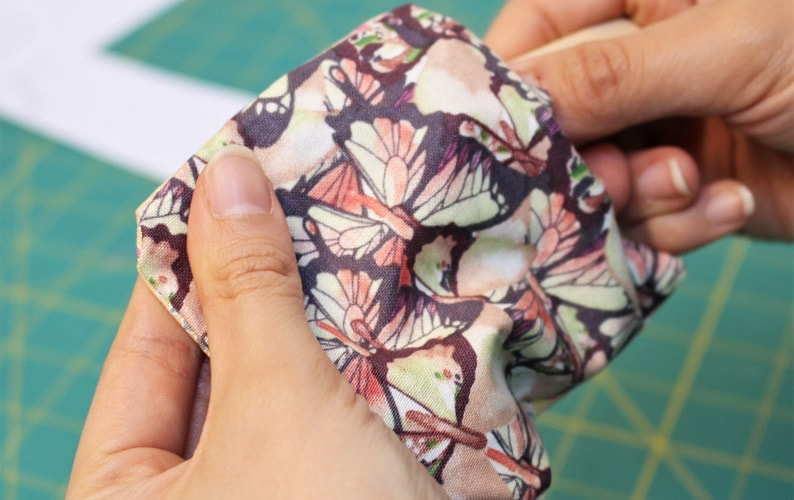
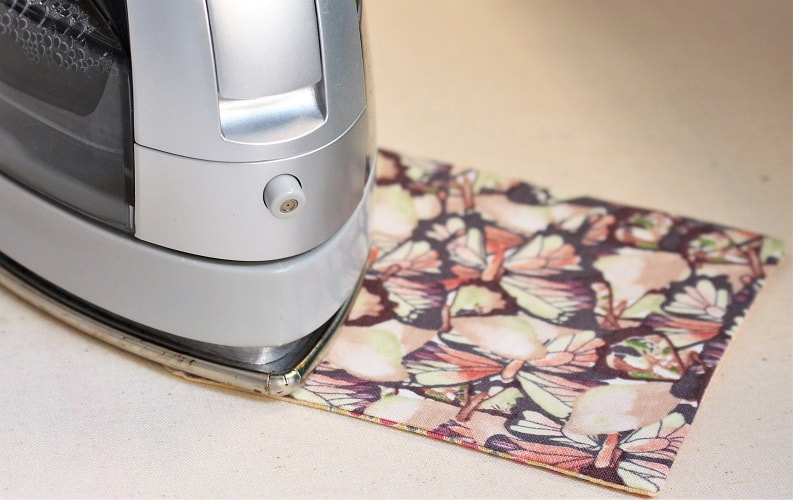
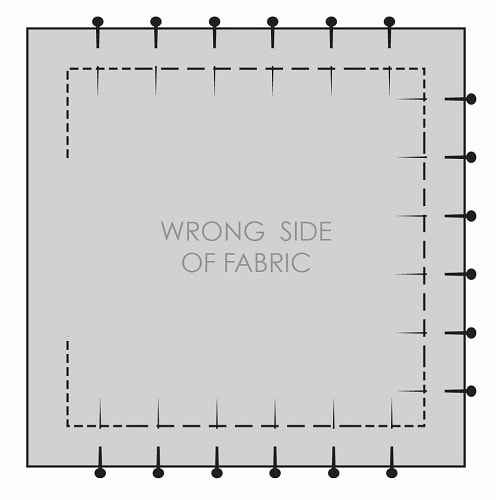 Back stitch at the beginning and end of your stitch line to secure the opening while flipping it inside out tomorrow. Feel free to mark your corner pivot points and use a smaller stitch length in the corners for strength. 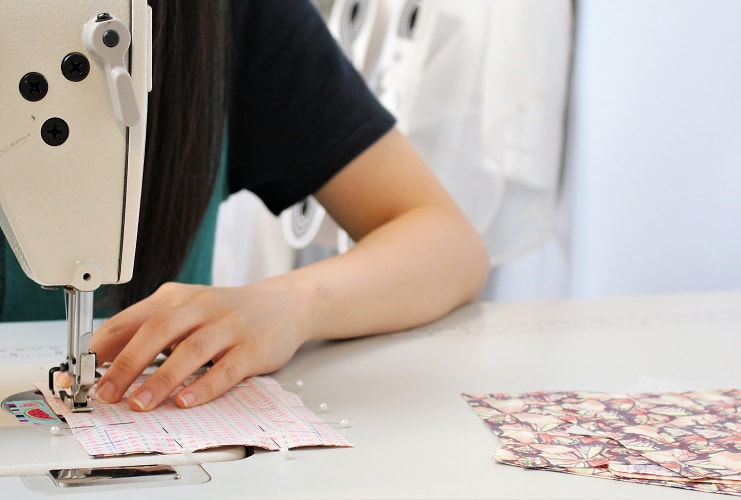 Step 2Remove bulk by trimming excess at corners. Stay approx 1/8" away from stitch-line (pivot point). 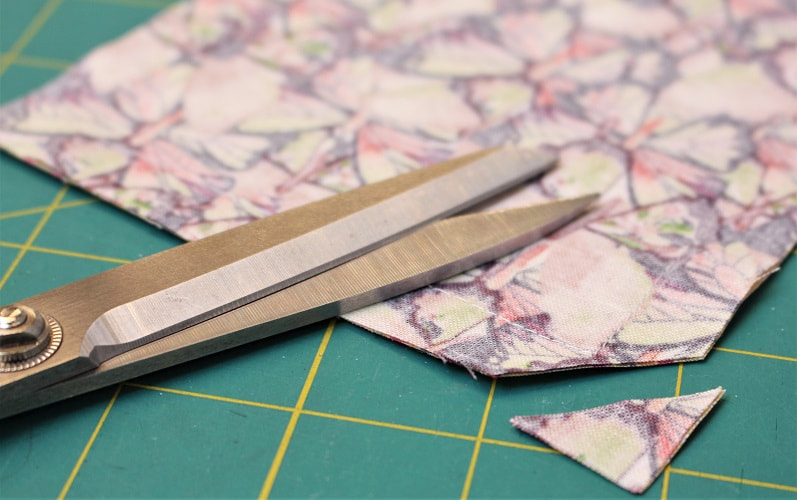 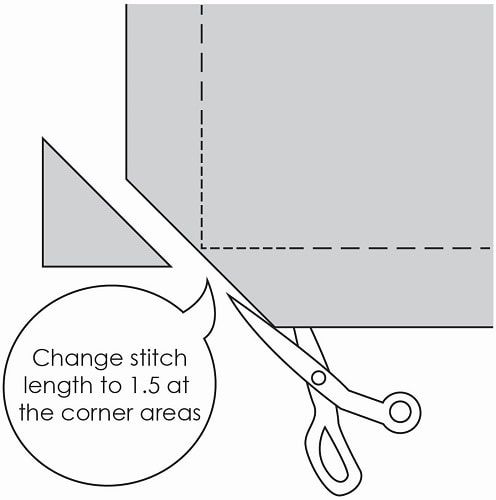 Step 3Flip out and press flat. Use a point turner to help bring out corners.
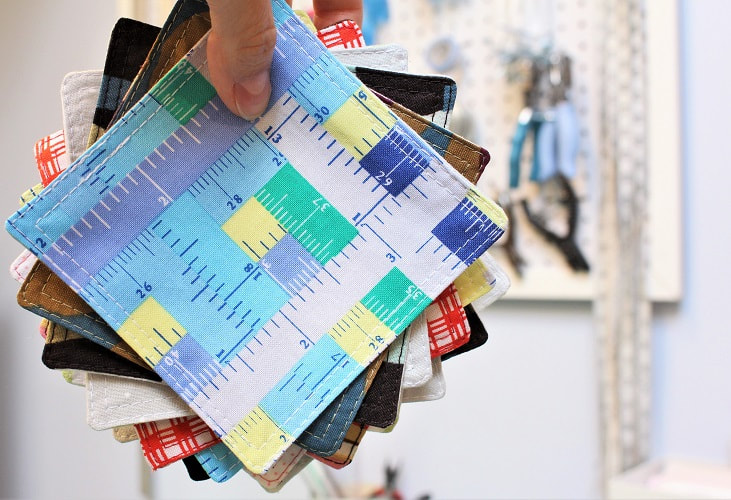
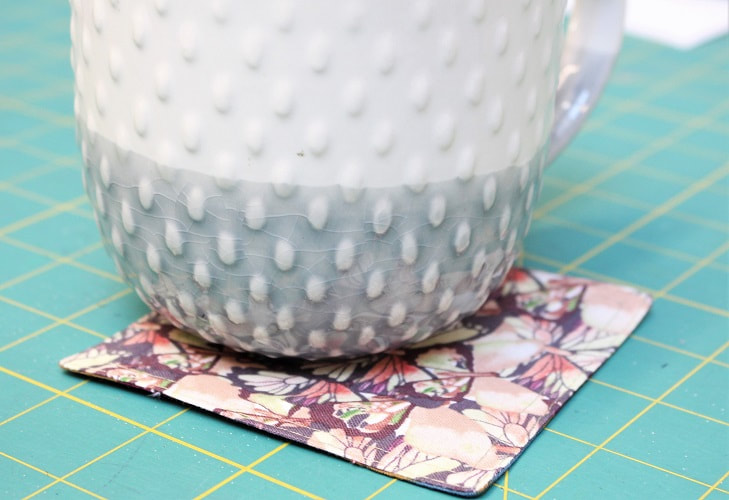
 Step 4Top stitch around square to close. Feel free to do a double top stitch. 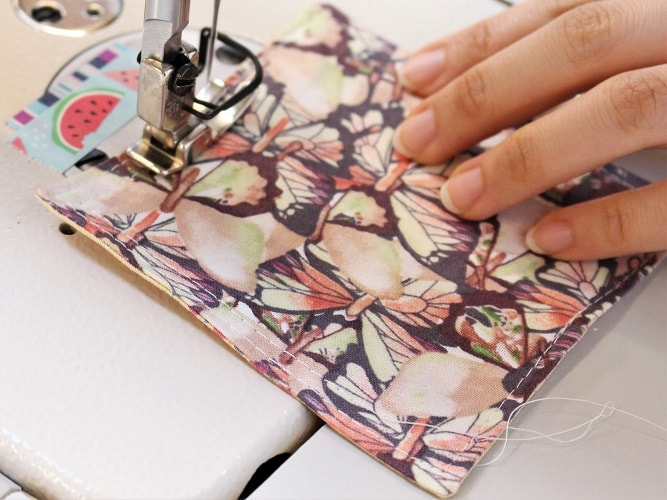 Final DesignHow many are you making? We ended up making 2 dozen with all our scrap bits of fabric. Tag us in a pic on Instagram to show us your final coasters.
Happy Sewing!
Designed, photographed and written by Sheila Wong Studios. |
Archives
November 2022
|

 RSS Feed
|
|
Copyright © 2024 Sheila Wong Fashion Design Studio Ltd. All rights reserved.