|
Welcome to part 2 of 2 on creating a tie knot bag. In our previous blog post "Draft-a-Long: Tie Knot Bag", we taught you how to draft the pattern for this design. In this blog post, we give you the step-by-step instructions on sewing your very own tie knot bag!
Learn more about tie knot bags by reading: Draft-a-Long: Tie Knot Bag (Part 1 of 2) Fabric ShoppingIn late Feb, I visited Maiwa Supply Store on Granville Island, after having taught a "Pattern Drafting: Make your Own Blocks" workshop at their School of Textiles. While browsing the store, three separate black and ivory hand blocked fabrics caught my eye. Each were so different and yet they complimented each other well. I felt inspired to create something that combined these fun prints. For this particular design, we did just that! Keep reading to see how we incorporated all three fabrics. 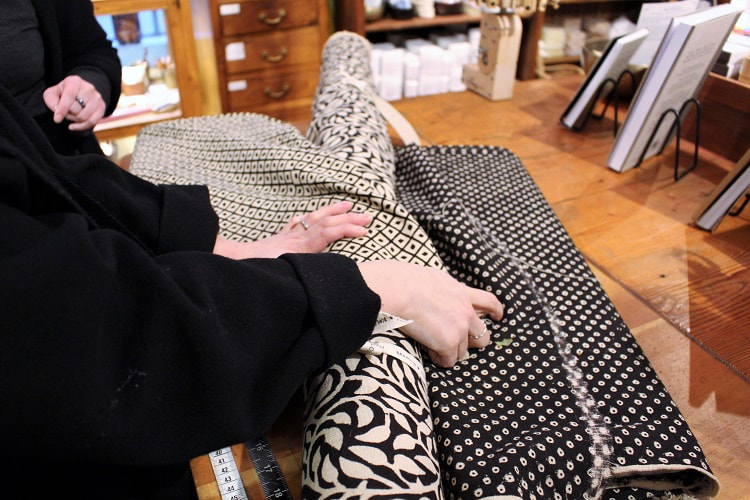 Unfortunately, the rest of my 2020 workshops were cancelled due to COVID-19, but that doesn't mean we have to stop designing during this time. We hope this Sew-a-Long will provide you with some creative inspiration. If you are just joining us, see the pattern drafting instructions for the tie knot bag, found on our Draft-a-Long: Tie Knot Bag (Part 1 of 2) blog post. Sewing Supplies
MaterialsYou will require the following materials to sew our Tie Knot Bag. This is for the 13” width version.
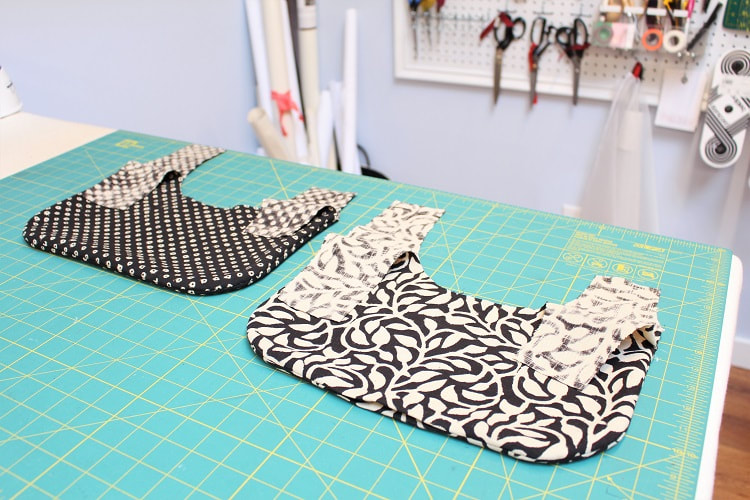
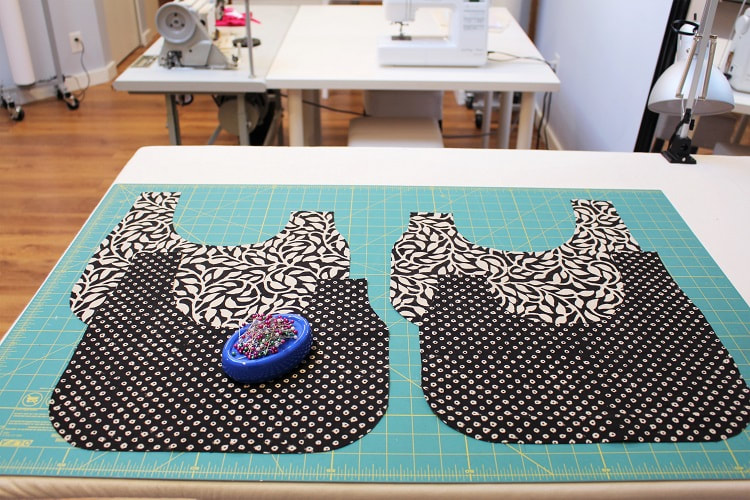
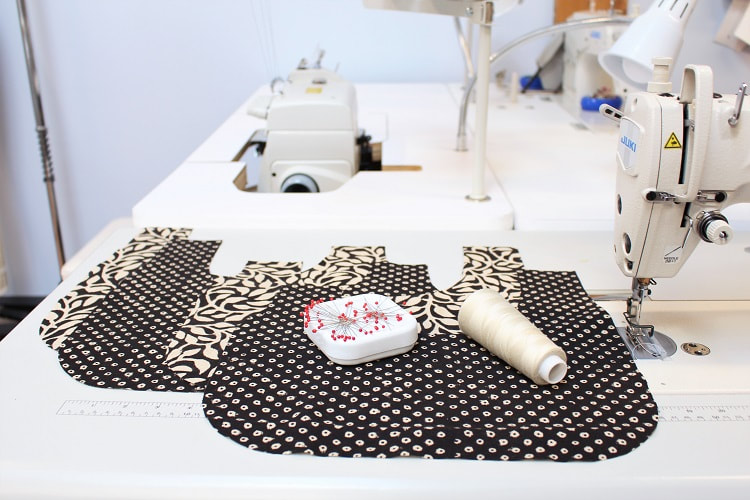 Cutting FabricThis bag is fully reversible to allow for a SIDE A (MAIN/SELF fabric) and a SIDE B (CONTRASTING fabric). You will essentially be sewing two bags and having them come together around the openings. This is an asymmetrical bag. One strap is longer than the other so before you begin sewing, ensure you have four cut bag pieces. Each SIDE option should have mirror image pattern pieces of each other. Mark all notches on the wrong side of the fabric. A reminder that notches are points E, F, N and U from your drafting.
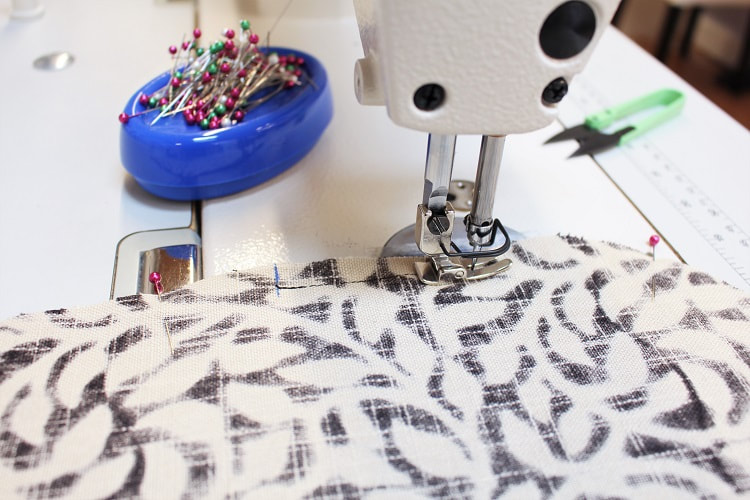
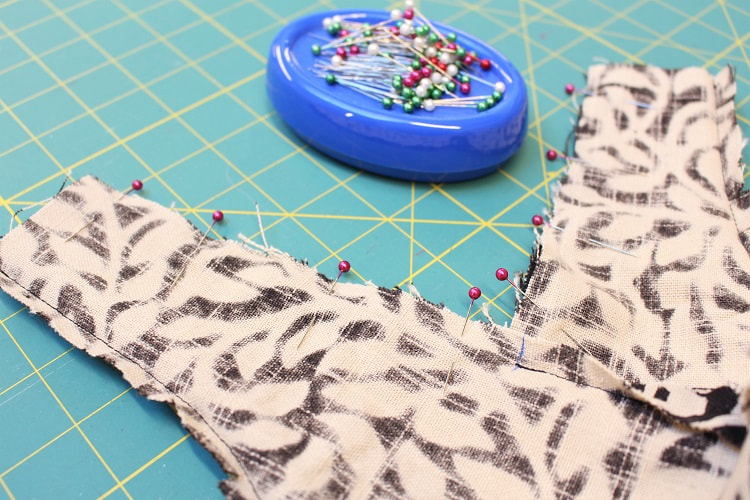
Sewing StepsStep 1With right sides of the fabric facing, line up SIDE A pieces, pin and sew from strap notch (Point E from drafting) around the bottom of bag to other strap notch (Point F). Ensure you back stitch at the beginning and end of the stitch line. Repeat the same step to SIDE B pieces. 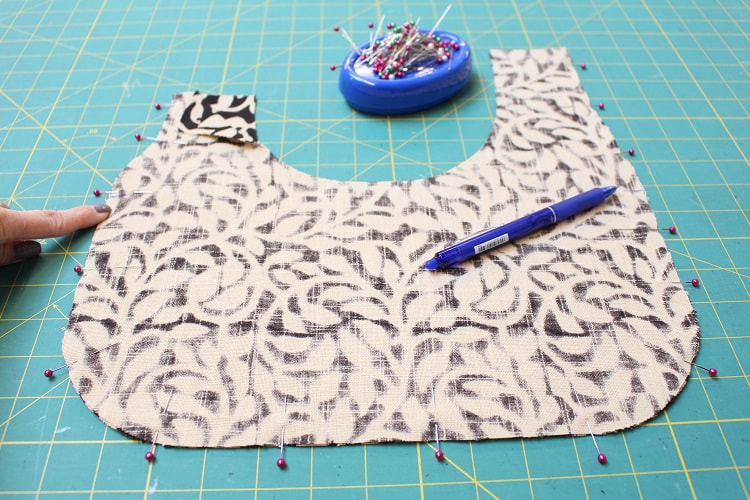
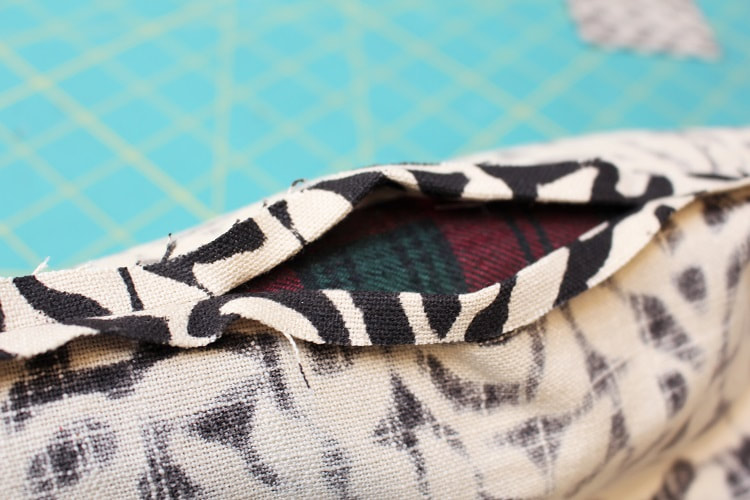
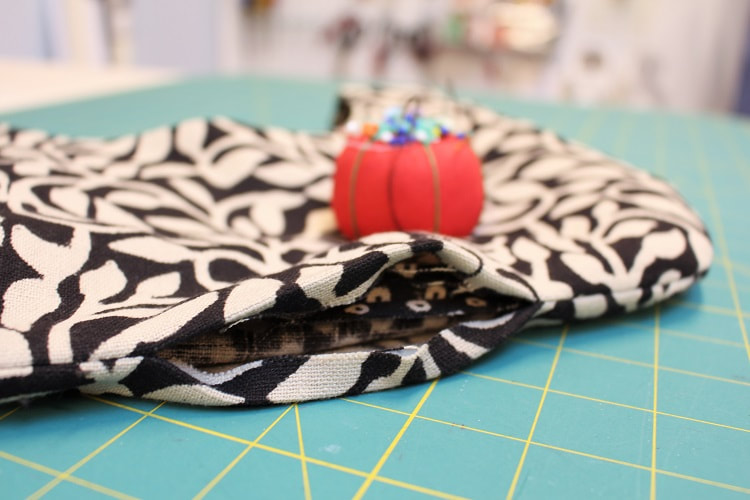
Leave a 2-3” opening at the bottom of one of the bags. In the end, this opening will allow you to create a fully reversible option bag. 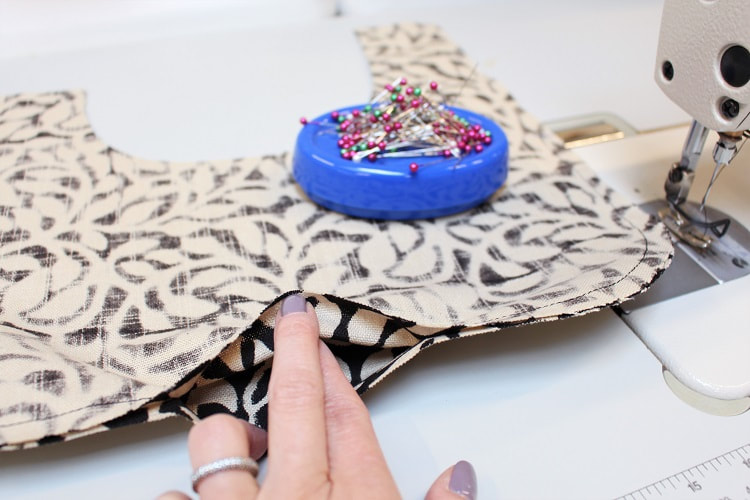 A reminder to sew at your chosen seam allowance. We are using ⅜” seam allowance.
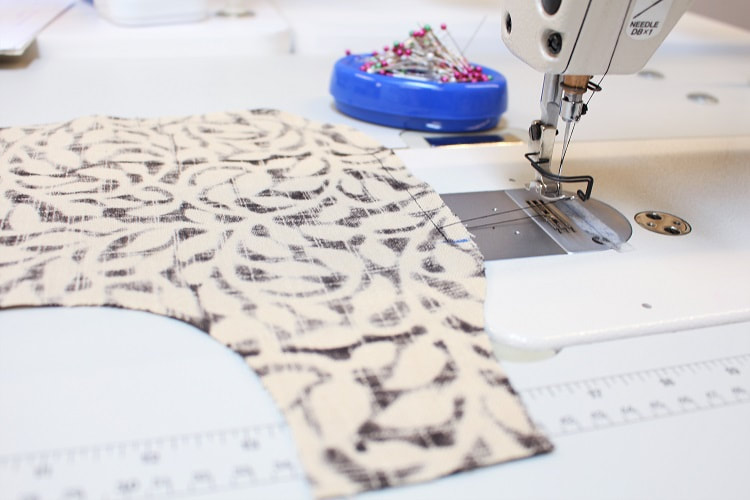
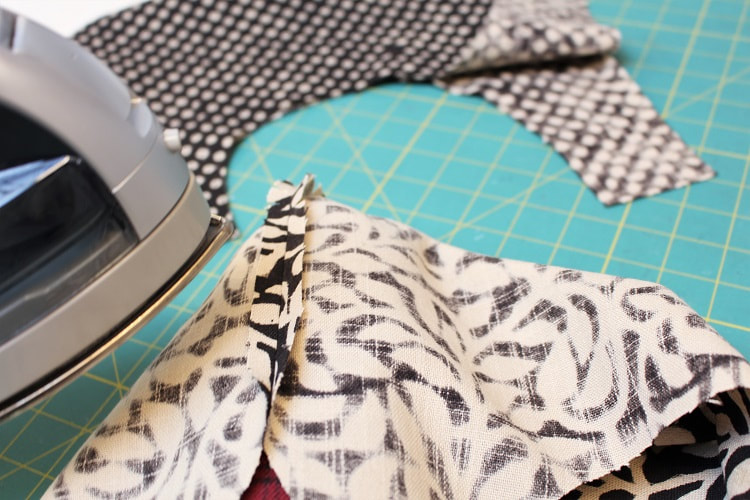
Step 2Along the curved section of the seam allowance, create straight clips from the raw edge towards the stitch line. Stop the clippings approximately 1/16” away from the stitch line. Have each clippings ½” away from the next and feel free to stagger the clippings from the upper and lower seam allowance layers to decrease weakness along stitchline. 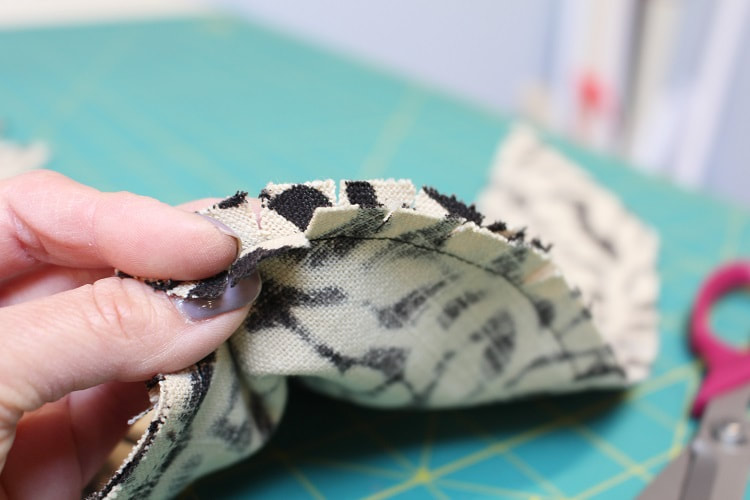 Step 3Press seam allowances open all along the stitch line. Do not press above your beginning and end areas of the stitch line (into straps). Pre-press in place the 2-3” opening at the bottom of one of the bags. This will help you later when you need to hand sew the opening shut.
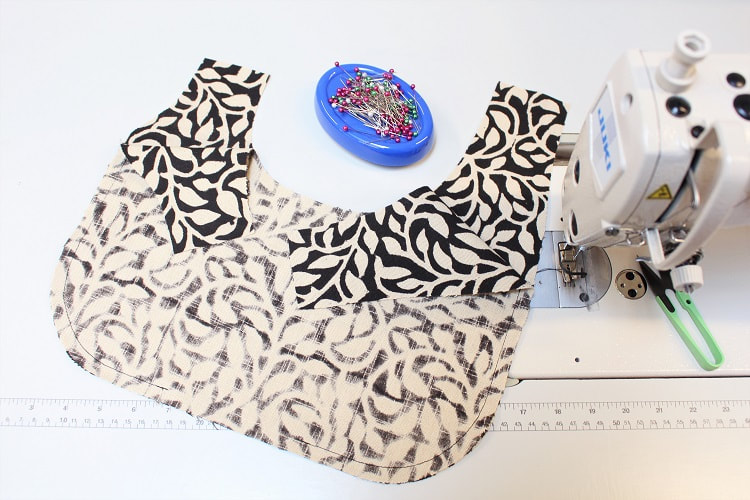
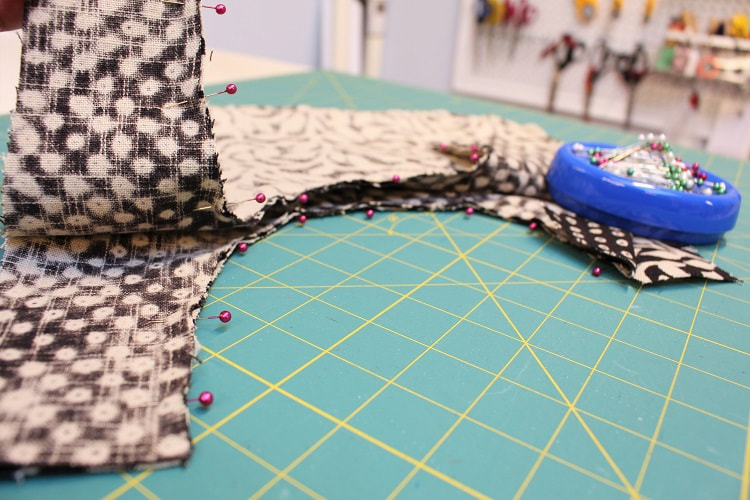
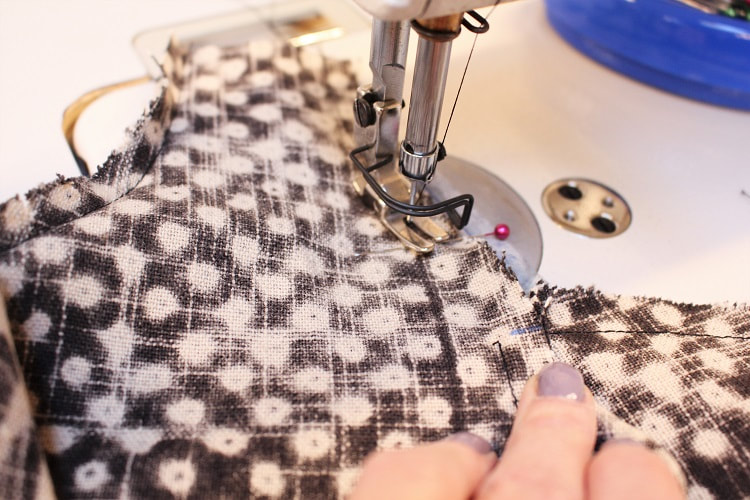
 Step 4Slide one of the bags inside the other. Ensure the right sides of SIDE A and SIDE B fabric are facing each other. 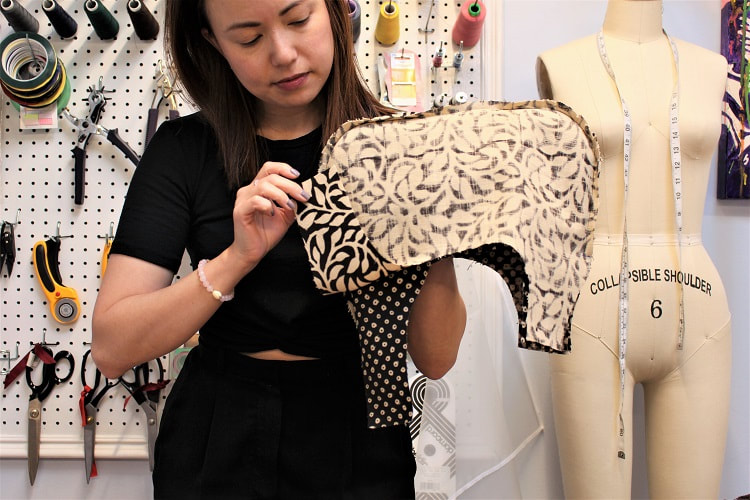 Pin and sew the interior bag opening curve from the top of the handle strap, around the curve, to the top of the other handle strap. Line up your center notch (Point N). You should have two seams to sew. They each separately sew SIDE A (SELF/MAIN fabric) to SIDE B (CONTRASTING fabric). Ensure you back stitch at the beginning and end of the stitch line.
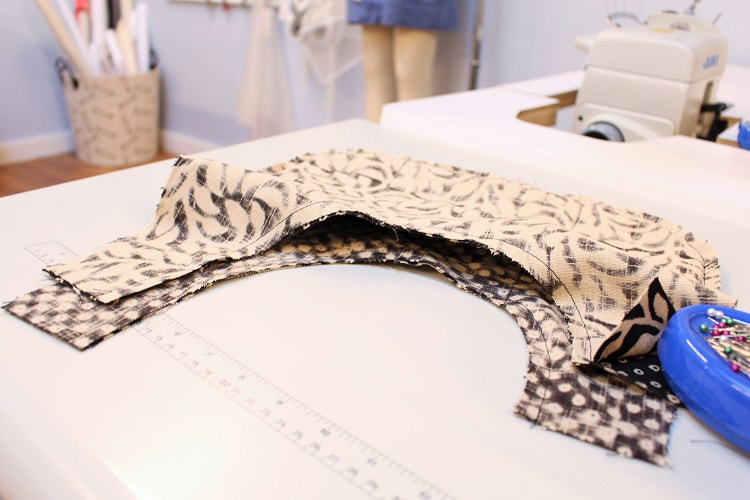
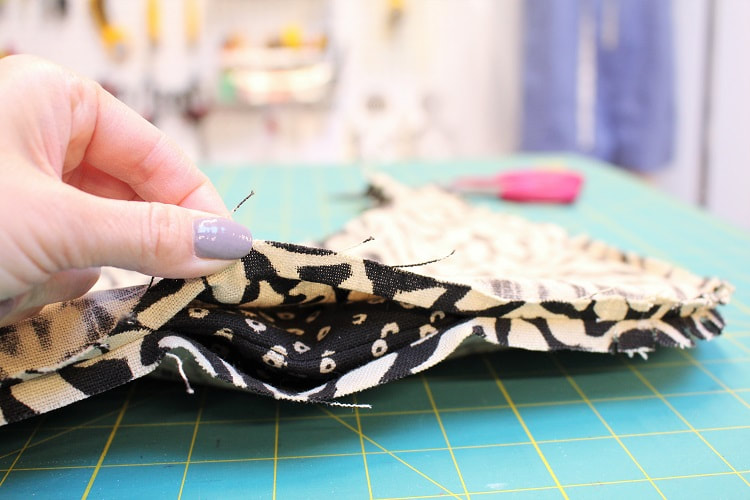
Step 5Create straight clips along the curved sections of the seam allowance. Same concept as Step 2. This will help the curved shape of the bag sit smoothly when flipped right side out. 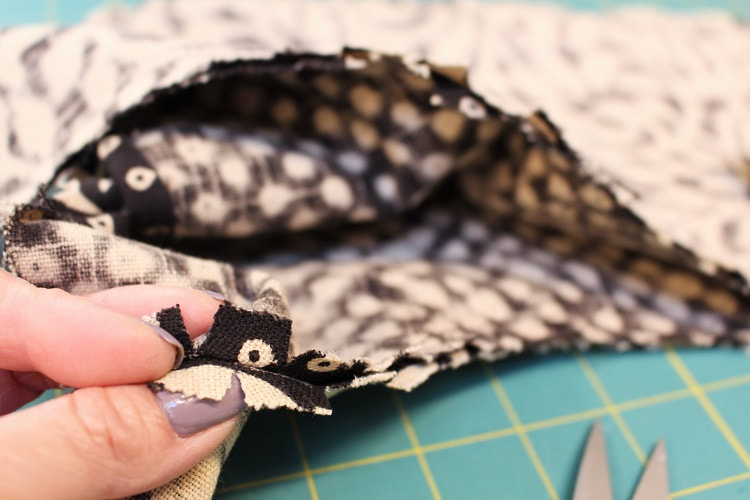 Step 6Press seam allowances along the interior bag opening, open. Feel free to pop a seam roll or the edge of your ironing board under the seam to help with pressing. Refrain from flipping the bag right side out just yet! We need to keep the bag as is for the next step-- sewing the exterior edges of the handle straps.  Step 7Using the same concept as Step 4, where the right sides of SIDE A and SIDE B fabric are facing each other, pin and sew the exterior handle straps from the top of the strap down to just before the exterior side seam stitch line. Hold back any pesky seam allowances that try to creep in as you get closer to the top of the side seam stitching line. Back stitch at the beginning and end of the stitch line. You should have four seams to sew. They each separately sew SIDE A (SELF/MAIN fabric) to SIDE B (CONTRASTING fabric).
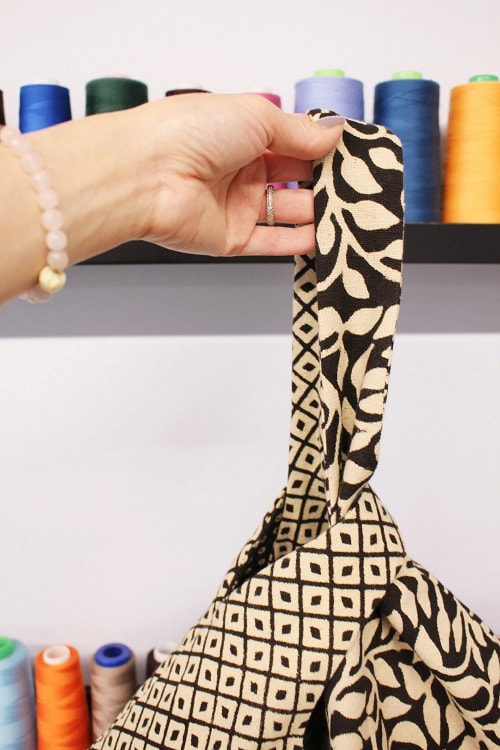
Step 8Create straight clips along the curved sections of the seam allowance. Same concept as Step 2 and 5. This will help the curved shape of the bag sit smoothly when flipped right side out. Step 9Flip the bag so that all layers are right sides of fabric facing or how the bag would sit when complete. Press exterior sides of the handle straps and interior bag openings flat.
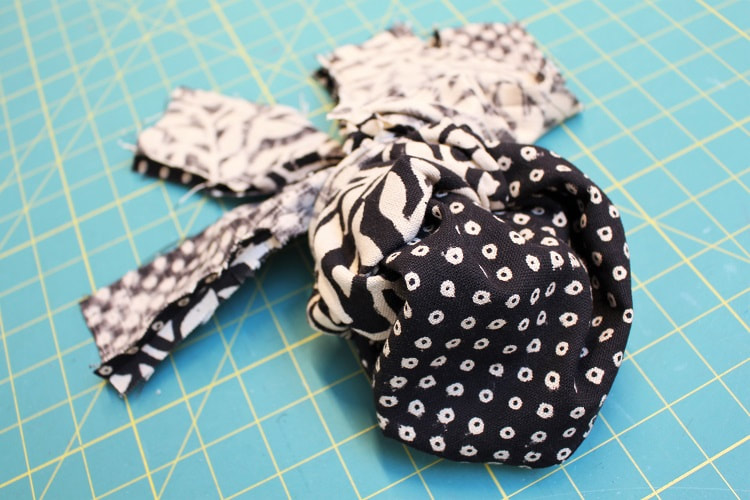
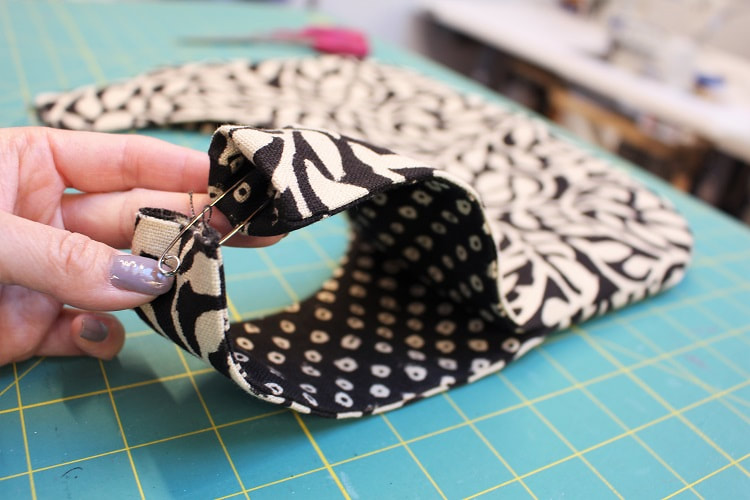
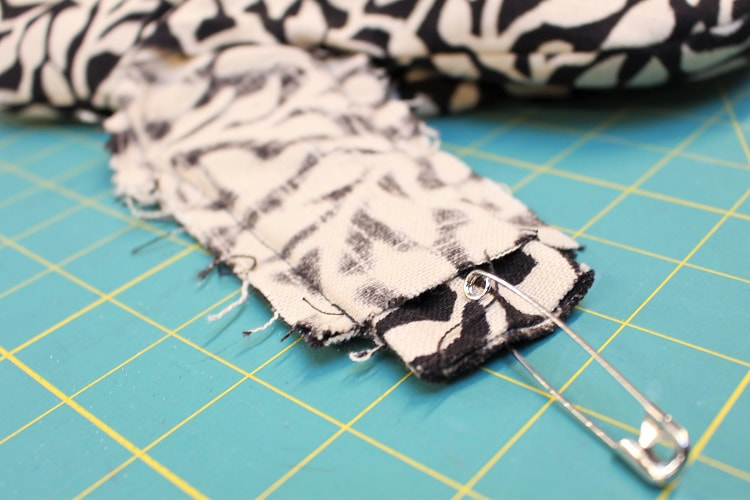
Step 10At the moment we have four unfinished strap ends hanging freely. We need to create a left and a right handle strap. We can organize the four ends as follows: left front, left back, right front, and right back. 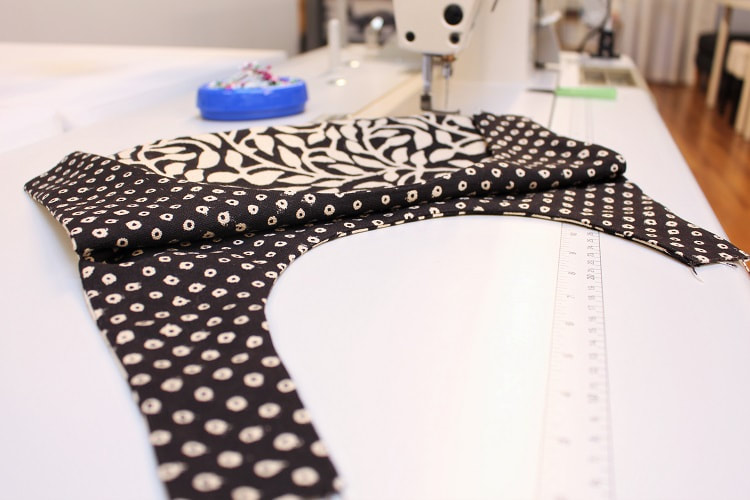 Starting with the left handle strap, feed the back strap into the front strap with right sides of fabric facing each other. You will need to gently start turning in some of the front strap raw edge fabric inside itself. Using our 2-3” opening at the bottom of the bag, pull through front/back strap ends. Feel free to use a safety pin attached to the back strap edge to help feed into the front strap.
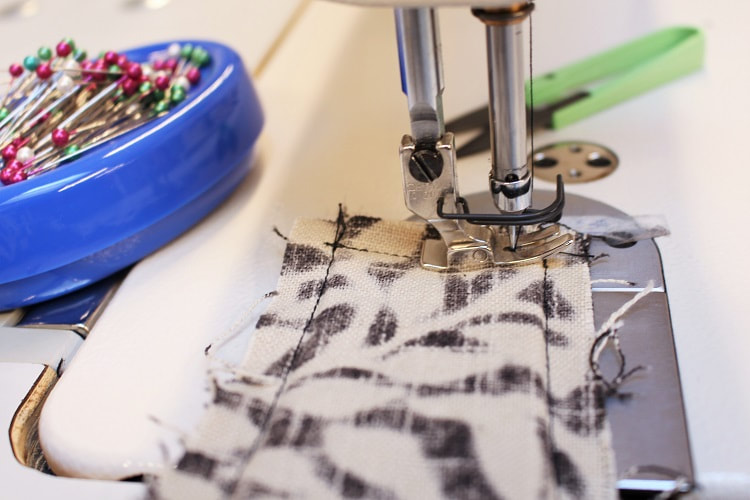
Line up the interior and exterior vertical seams of the front and back strap, pin and sew across through all four layers in between the vertical seams. Back stitch at the beginning and end of the stitch line.
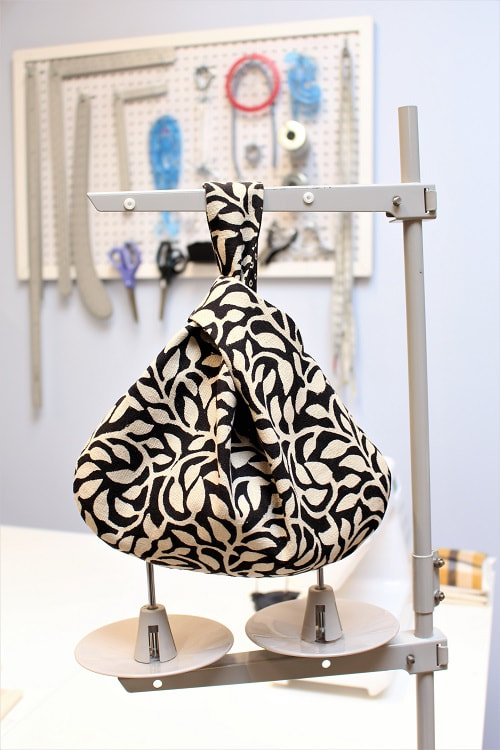
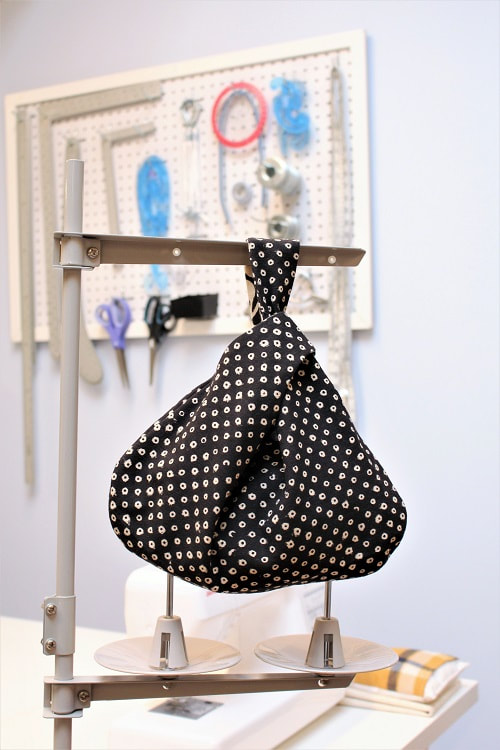
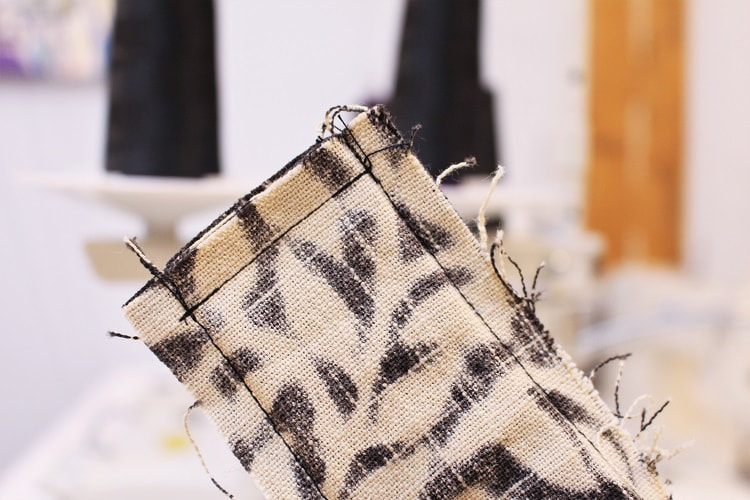
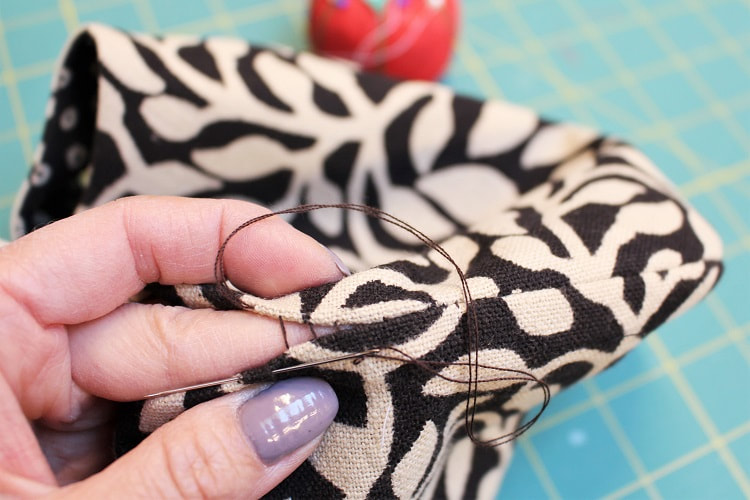
Step 11To reduce bulk along the top strap seam, trim seam allowance down to ¼”. To ensure straps lay flat front to back, trim away a diagonal piece of the seam allowance starting approximately 1” down from top of strap seam tapering to ⅛” away from strap seam. Repeat steps 10 and 11 to right handle strap. Flip bag right sides out and press the top of the strap seam. 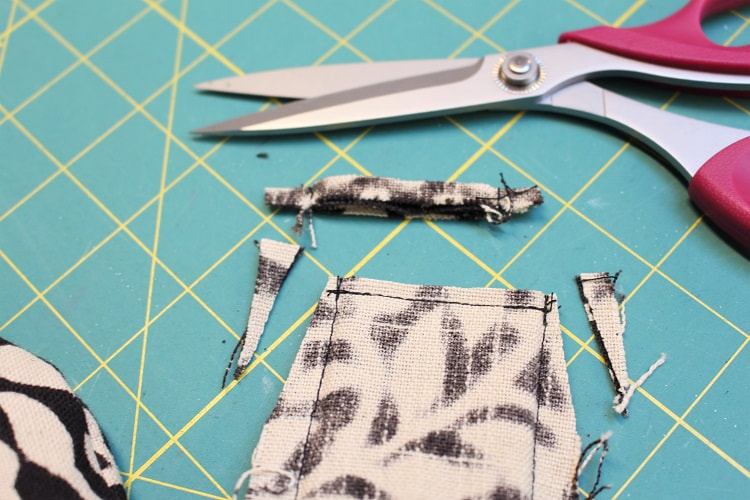 Step 12By hand, draw-stitch closed the 2-3”opening at the bottom of the bag. A draw-stitch is an invisible hand sewn stitch that “draws” together two layers of fabric seamlessly. Sewing Tip: Go through one side at a time for each stitch and when going across to the other side enter directly across where your thread exited. This will ensure no threads are visible. Tie your knot and voila! Tie knot bag complete!!!
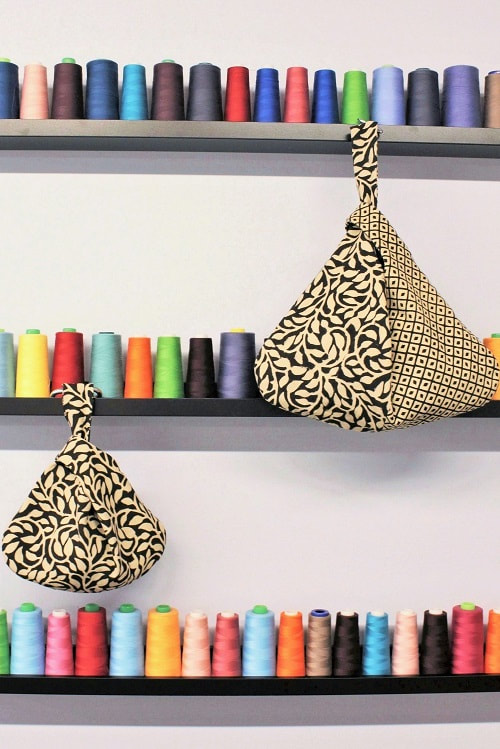
Final Design/ Size Variations2 bags are better than 1! We wanted to test out the larger size (17” x 17”) as per our previous blog post, Draft-a-Long: Tie Knot Bag (Part 1 of 2). BUT...we didn't stop there! As mentioned above, we wanted to combine all three hand blocked printed fabrics. So for our larger bag, we went with a patchwork design. Even the interior side is patchwork! Combing different prints and/or color combos is a great way to use up household scraps! Especially, if you're unable to buy fabric at the moment.
We can't decide which version we love more! Do you prefer the small or large tie knot bag? Tell us in the comment section below.  Isn't it so cute?! Tag us in your final make on Instagram! If you want to get booked in for a digital live streaming lessons during this time CONTACT us. Happy Sewing!
Designed, photographed and written by Sheila Wong Studios.
3 Comments
Thank you for teaching us how to make this bag! If you are saving money but still wanting to have your own new bag, then you must learn how to make one for you. This might be full off processes, but I am sure that making your own bag would be a fulfilling experience. Imagine making stuff for your own use? I can just smell a 100% fulfillment from that!
marilyn r
9/11/2020 08:41:47 am
This is amazing. However, part 2 seams a little complicated. Will you have a mini video on sewing the two parts together and with turning it inside out.
Kim
9/12/2020 03:50:55 pm
Hi Sheila, I understand what your bag is all about without making one. One comment I would make is, show clearly how the strap sections go together, maybe through more photo’s. It gets a bit confusing. Leave a Reply. |
Archives
November 2022
|


 RSS Feed
|
|
Copyright © 2024 Sheila Wong Fashion Design Studio Ltd. All rights reserved.