|
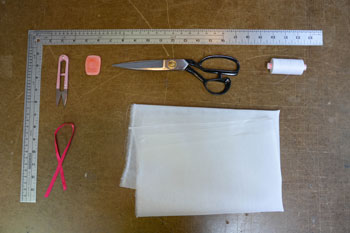
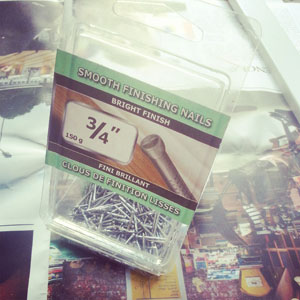
A press cloth acts as a guard between a hot iron and a your beautiful design through the construction steps of a garment. Here you will learn how to make your own press cloth. 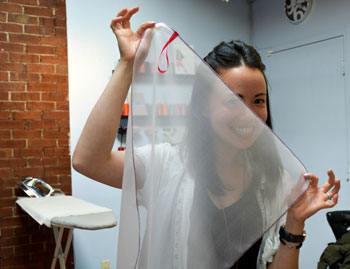 A press cloth in fabric stores can retail $3 to $15. I find this ridiculous as you can make your own easily. It is just a rectangle of fabric! Hence, why I am sharing how to make your own press cloth in about 10 minutes or less. Silk organza material is fantastic for general pressing as it can be used at all heat levels, it is sheer (Woot! It's see through) and the fine weave does not leave any imprints on your project. I will use Silk Organza for this tutorial. Materials
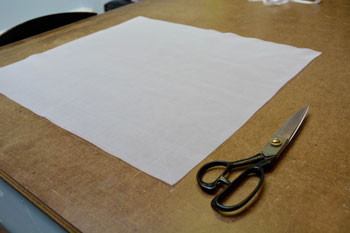
 Step 1Decide upon the dimensions of the guard. I find 22" x 20" works well. These dimensions let a guard cover the depth of an ironing board sufficiently. 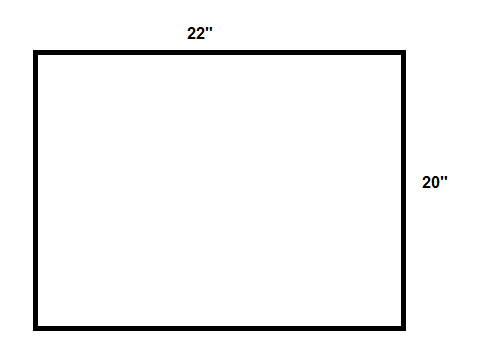 Step 2Cut out your desired dimensions in the silk organza. The rectangle can run on grain or crossgrain.
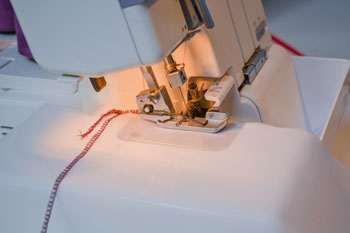
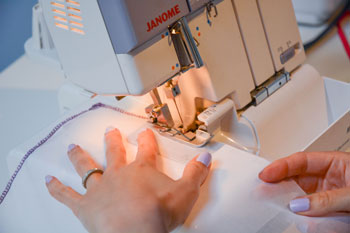
 Step 3Now to finish off the raw edges. You can neaten the edges however you like, I find the quickest way is to serge the raw edges. If you do not have a serger you can zigzag along the edge.
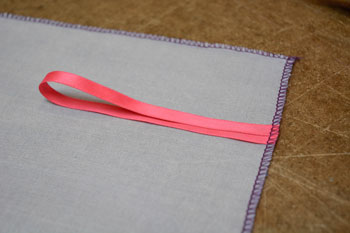
Step 4 (Optional)This step is completely optional. I like to add a ribbon handle to hang my guard when not in use. I appreciate an organized studio and hate not having all my tools handy. Basically, I am a neat freak.
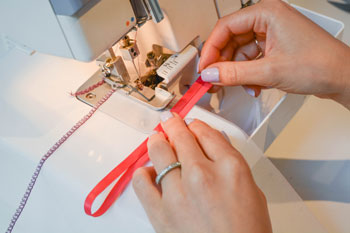
The best way to attach on a ribbon handle is to fold over ribbon with raw edges lined up to a raw edge of the organza. Feed through the serger and/or sewing machine at the same time as Step 3. 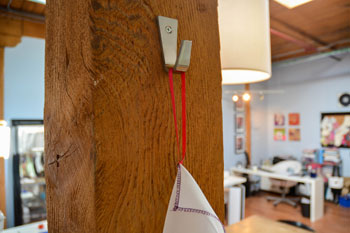 Final DesignVoilà! You now have an all purpose press cloth. 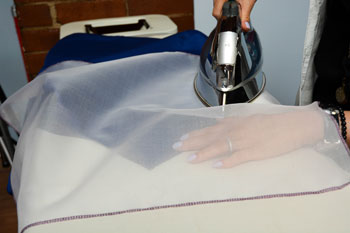 Happy Sewing!
Designed, photographed and written by Sheila Wong Studios
3 Comments
A sewing/design area needs an organized space. The best way in my opinion, is to create a wall organizer to keep things in their proper places. This really should not surprise you, but I am fairly handy in my wood working skills. Follow this step by step non-sewing tutorial to build yourself a sewing wall organizer.  Materials
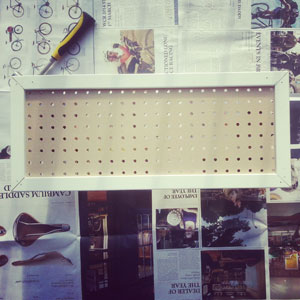
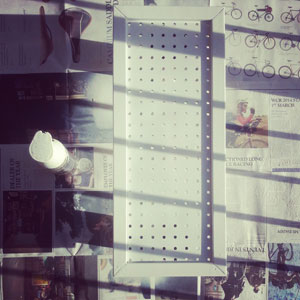
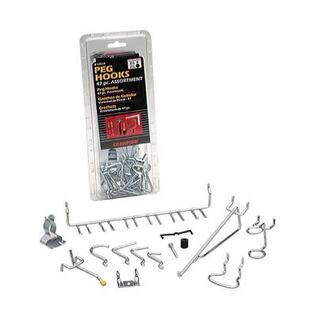
 Step 1Decide the dimensions of your wall organizer. Consider what items you would like to hang and how much space each on will take up. If you have the necessary wall space, I found 30" x 30" works well in organizing almost all design supplies. If provides a good space to hang drafting rulers. I have made this pegboard several times so have decided to create a smaller one to hold small spools. Once you have confirmed desired dimensions, its time to head to your local lumber store. I went to Home Depot, as I find they are helpful and provide complimentary straight cuts.  Step 2At Home Depot, there are two options for pegboards. You can purchase the 4 x 8 feet pegboard and have that trimmed down or purchase the 2 x 4 feet pegboard and have that trimmed down (Click on THIS to see options on-line). 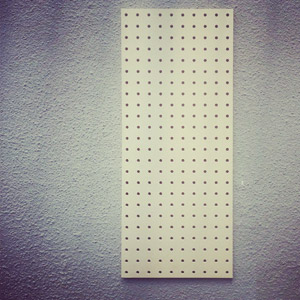 Step 3Now comes in my opinion the most strenuous part. But if you know any construction people perhaps they can assist in this step. Its time to pick out the frame for the organizer. I just use baseboards, which can be purchase by the foot for this. Each end needs to be cut on a 45 degree angle. Unfortunately Home Depot does not offer this cut complimentary. But they do provide a DIY cutting area to complete this step, in which I made use of. The outer edge of your baseboards should match the dimensions of your pegboard.  Step 4Time to put everything together! Place a thin layer of wood glue behind one baseboard and place in appropriate edge on pegboard. Have someone hold baseboard in place while you nail in wood nails. I suggest nails close to the ends and a nail every 5 inches to hold in place. Wipe away any excess glue that has peeked through the edges.
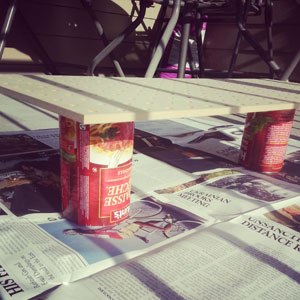
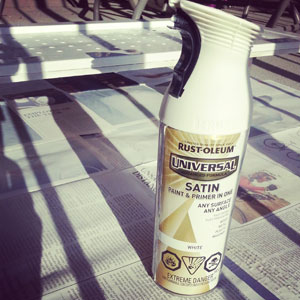
 Complete the same steps above for the remaining baseboards. Before painting organizer, give time for the glue to set. Step 5Pegboard only comes in a natural light brown color. I decided to paint mine white to make the items pop! I have used a matte white spray paint to match the already white baseboards for the frame. Make sure you paint in a well ventilated area and use a mask if possible. Lay down newspaper and balance a few empty food cans under the board to create a raised level. This ensures as the paint dries it does not stick to the newspaper. Depending on your paint, give at least 24 hours for paint to set.
 Step 6Time to hang the organizer. A few suggestions for this step:
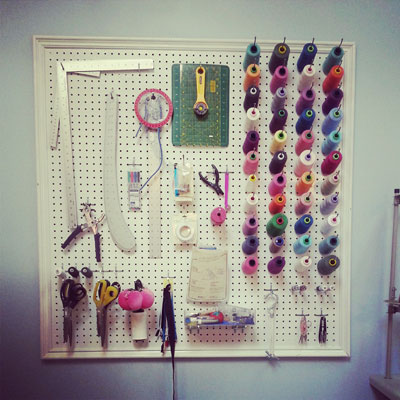
Step 7It is time to get organized! Place hooks in desired spots. 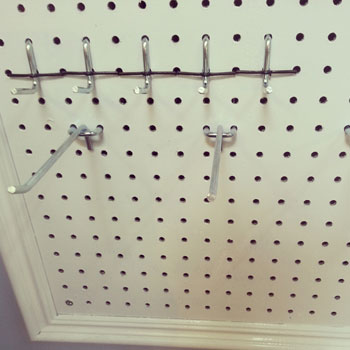 Organizers Made by MeOK...so created by me but with help from my husband. Just thought I would clear that up. No way I could lift some of these and screw them to the wall straight. 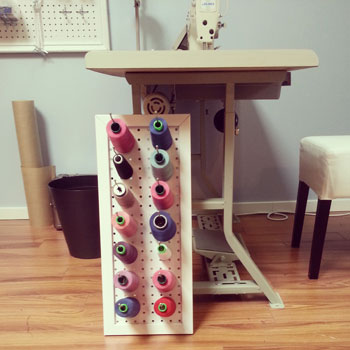 Above is the blog demo organizer. Below are two organizers currently in the studio.
Happy wood working...then sewing!
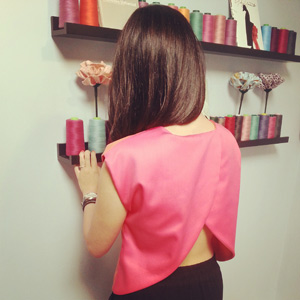
Photographed, created and written by Sheila Wong Studios My home girl Lena doesn't know it yet, but this top is for her. Get an insider look at my latest design from creating the pattern to putting together this 2 in 1 top. PS- I totally made one for myself. I could not resist the vibrant hues.
Project Specs
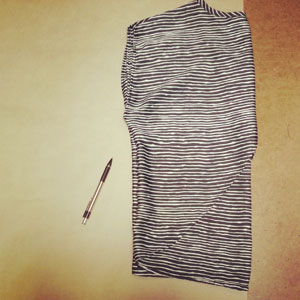
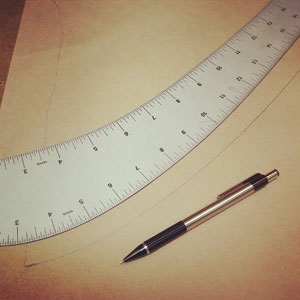
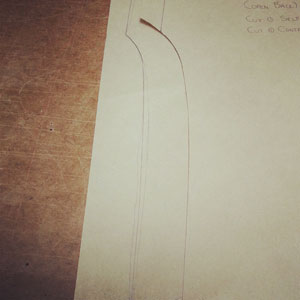
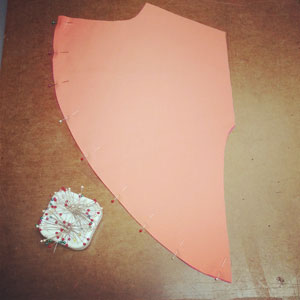
FabricI picked the fabric up from Gala Fabrics on South Granville Street. Typically I do not like to work with Polyester, but this fabric only had 30% Polyester. Cotton fiber content being the majority I gave in. More like the pop of colors made me buy them...  InspirationMy inspiration is two fold. My best friend Lena is celebrating her Birthday this month, and I wanted to make her something special. Lena loves color (especially pink, hello kitty obsessed) and she loves any clothing with an open back.  With the perfect fabric in tow from Gala, I searched my closet for an easy garment with an open back to replicate. Top is from Winners several years back for $14.99! Pattern DraftingThe garment I want to replicate is 2 dimensional, so easy to trace out FRONT and BACK pieces. For the FRONT, I placed garment in half as it will be cut on fold. For the BACK I need the shape including the split back hem, so I opened up the garment. You just need to carefully trace out what you see, we can clean it up later with drafting rulers.
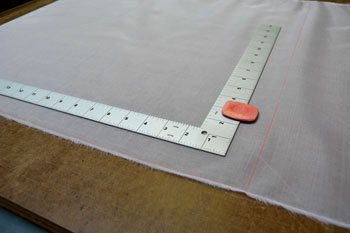
For areas that have fabric under it, use a tracing wheel to mark the paper. I used the tracing wheel to mark the split back hem and the front neckline. 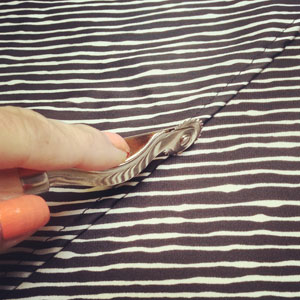 Once FRONT and BACK are traced, I used straight rulers and a french curve to clean up lines. Before finalizing the pattern pieces, you need to ensure certain seams match. These include the shoulder seams and the side seams. This is imperative as they need to be sewn together.
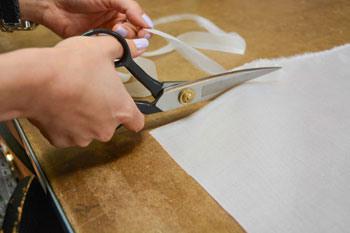
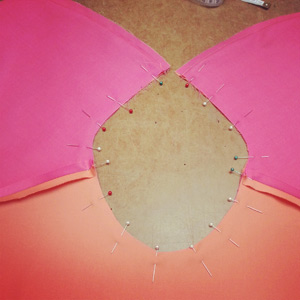
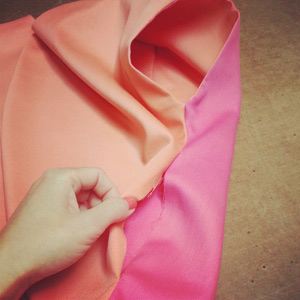
Once all your appropriate seams match, seam allowance, notches, grain-lines and titles are marked. 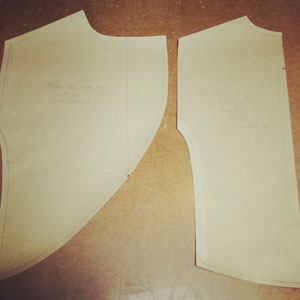 Design ElementsNow its time to sew! I will have to admit, I stood for several minutes trying to figure out what seams to sew first and what order I need to sew the seams to ensure the top was fully reversible with no raw edges exposed. This section will cover the important elements to make this top reversible. Reversible GarmentI could have kept this top super simple by not offering a reversible element, but that would be very much unlike moi, so hence the difficulty level increased dramatically. 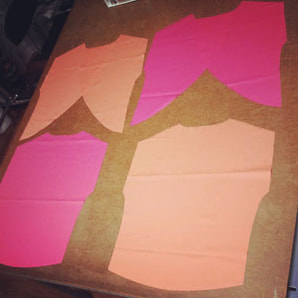 Sequence of sewing steps went as follows:
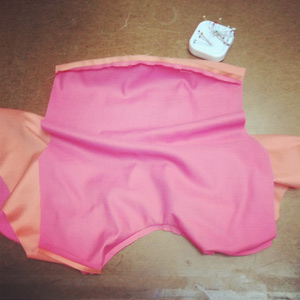
Here is a close up shot of what the reversible element looks like along a seam. How beautiful! 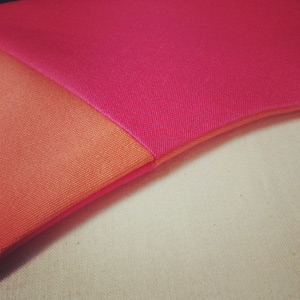 Open BackI already covered sequence of sewing steps earlier. But I wanted to share that it is important to sew the split back hem prior to putting together the rest of the garment.
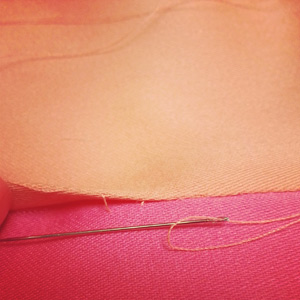
Hand Sewn FinishesAny fully enclosed (fully lined) garments require an opening to flip the garment back to right side out. I left my opening on the side seam. WHY? Because its the straightest seam and doesn't alter the smooth curves of the hem, that's why. Opening was slip-stitched to ensure a smooth finish.
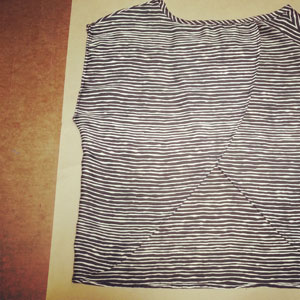
Final DesignHope you have enjoyed the inside look into my reversible split-back top. By the way, I loved it so much I had to make one for myself! 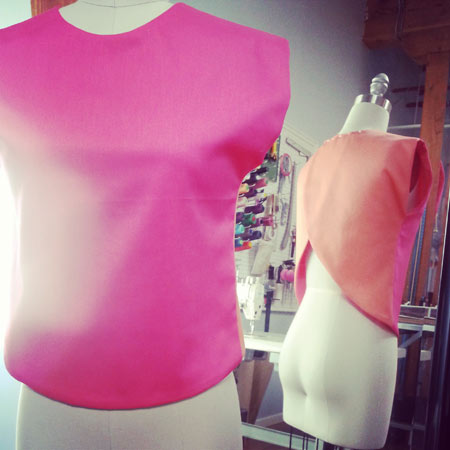 If you would like to learn how to make this top, BOOK a lesson with me.
Happy Sewing! Designed, photographed and written by Sheila Wong Studios |
Archives
November 2022
|


 RSS Feed
|
|
Copyright © 2024 Sheila Wong Fashion Design Studio Ltd. All rights reserved.