|
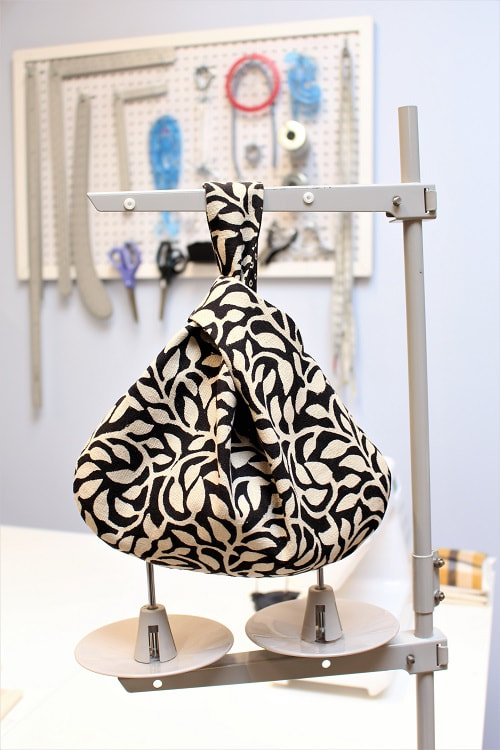
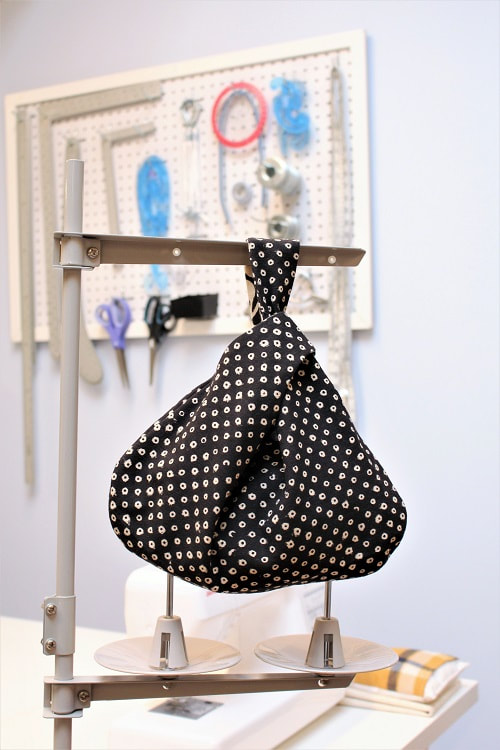
The tie knot bag is a small open tote that is meant to be carried over your wrist. The name comes from its unique design. Tie knot bags consist of one long handle strap and one short handle strap. The short handle strap slides over the long handle strap, creating a knot-like closure. You then slide your hand through the long handle strap and voila! Cutest accessory ever! Tie knot bags can be reusable/washable and come in a variety of sizes. They are often used as grocery and lunch bags. In this two-part blog series, we will share the step-by-step pattern drafting and sewing instructions to help you create your own tie knot bag. Welcome to part one, the draft-a-long.
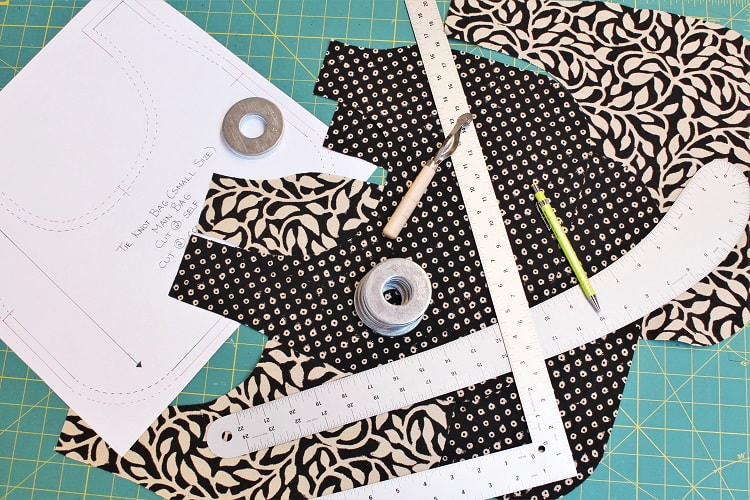
Drafting Supplies
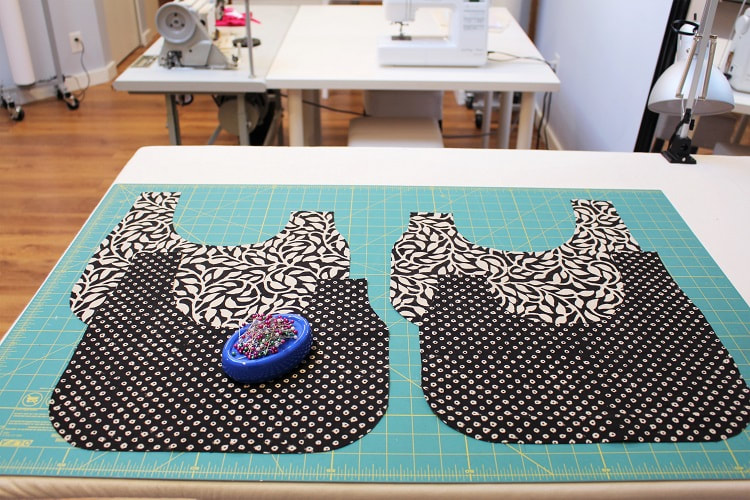
 In these instructions, we will use the starting size for a small bag which is 13” x 13”. This size yields a final bag size of 13” x 6 ½” in the main body area. For a larger size try 17” x 17” as your starting size. 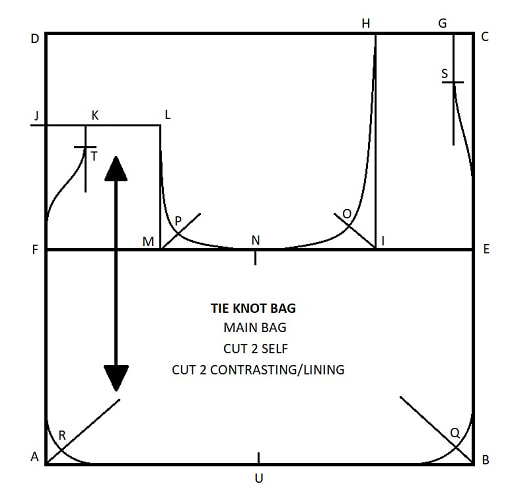 Drafting StepsA to B to C to D= Create a perfect rectangle (our example is 13” x 13”). Label each corner with A, B, C and D as illustrated. E= Midway of B to C (13” divided by 2= 6 1/2") F= Midway of A to D (13” divided by 2= 6 1/2") C to G= ½” G to H= Measure in 1 ¾”. From H, square down a guideline to E to F line, label I. F to J= Midway of D to F plus ¾” (6 ½” divided by 2= 3 ¼” plus ¾”= 4”). From J, square in a 3 to 4” guideline J to K= 1” K to L= Measure in 1 ¾”. From L, square down a guideline to E to F line, label M. N= Midway between E to F (13” divided by 2= 6 1/2") I to O= Draw a 45 degree guideline in the NW direction from I. Measure along guideline 1 ¾”, label O. M to P= Draw a 45 degree guideline in the NE direction from M. Measure along guideline 1 ¼”, label P. Draw a curved line connecting L – P – N – O – H. Stay on guidelines at L for approximately ½” and at H for approximately 1”. Level off at the center of the bag opening (M) for approximately 1”. B to Q= Draw a 45 degree guideline in the NW direction of B. Measure along guideline 1 1/8”, label Q. Draw in bottom corners of the bag with a curve. Use any circular item in your home like a pot lid or round plate. A to R= Draw a 45 degree guideline in the NE direction of A. Measure along guideline 1 1/8”, label R. Draw in bottom corners of the bag with a curve. Mimic a similar curve you used on the other corner. You can also fold the paper along the N to S line later and use a tracing wheel to transfer the same curve. G to S= Square a guideline down from G. Measure down a quarter of the C to E measurement. (6 ½” divided by 4= 1 5/8”), label S. Draw a slightly curved line from S to E. You will need to draw an S style curve for a natural look. S style curve incorporates a concave and a convex curve together. K to T= Square a guideline down from K. Measure down a quarter of the F to J measurement. (4” divided by 4= 1”), label T. Draw a slightly curved S style curve connecting F to T. U= Midway of A to B (13” divided by 2= 6 ½”) Mark Sewing Notches= Using a colored pen/pencil highlight points E, F, N and U Draw in Grain-line= Parallel to A to D line This completes your working pattern! To create your final pattern to use for sewing, place a blank piece of paper under your working pattern, weight it down and transfer your pattern using a tracing wheel. Ensure that you transfer not only the shape of the pattern but also the highlighted notches and grain-line. Add your desired seam allowance to the final pattern. We suggest using a 3/8” seam allowance. Draw in notches, grain-line and label as follows: TIE KNOT BAG (SMALL SIZE OPTION) MAIN BAG CUT 2 SELF (MAIN) CUT 2 CONTRASTING Ready to cut your fabric? Click this link: Sew-a-long: Tie Knot Bag (Part 2 of 2).
Happy Drafting!
Designed, photographed and written by Sheila Wong Studios
3 Comments
Kahleen
9/11/2020 11:57:26 am
this looks interesting and doable
Athena
9/12/2020 01:47:21 am
Love this idea. Can't wait for the next instructions. Leave a Reply. |
Archives
November 2022
|

 RSS Feed
|
|
Copyright © 2024 Sheila Wong Fashion Design Studio Ltd. All rights reserved.