|
Holiday season is approaching and as usual I try to create most of my gifts. This particular gift is perfect for anyone who hand sews. It uses materials that can be found at home or in my case the studio. Follow along in this step by step tutorial on how to make a needle book. 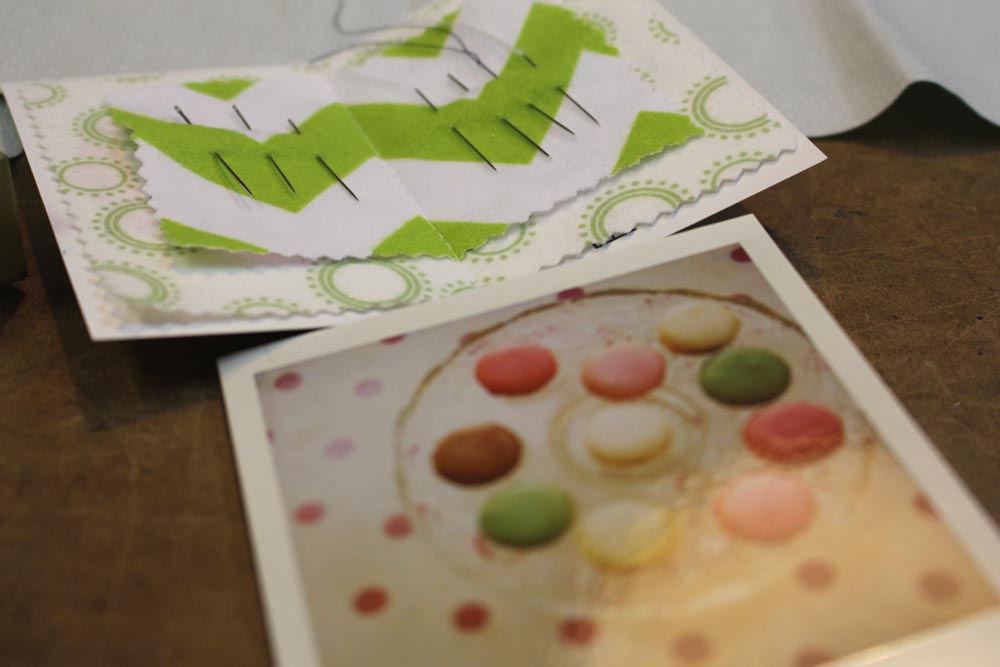 Materials & Supplies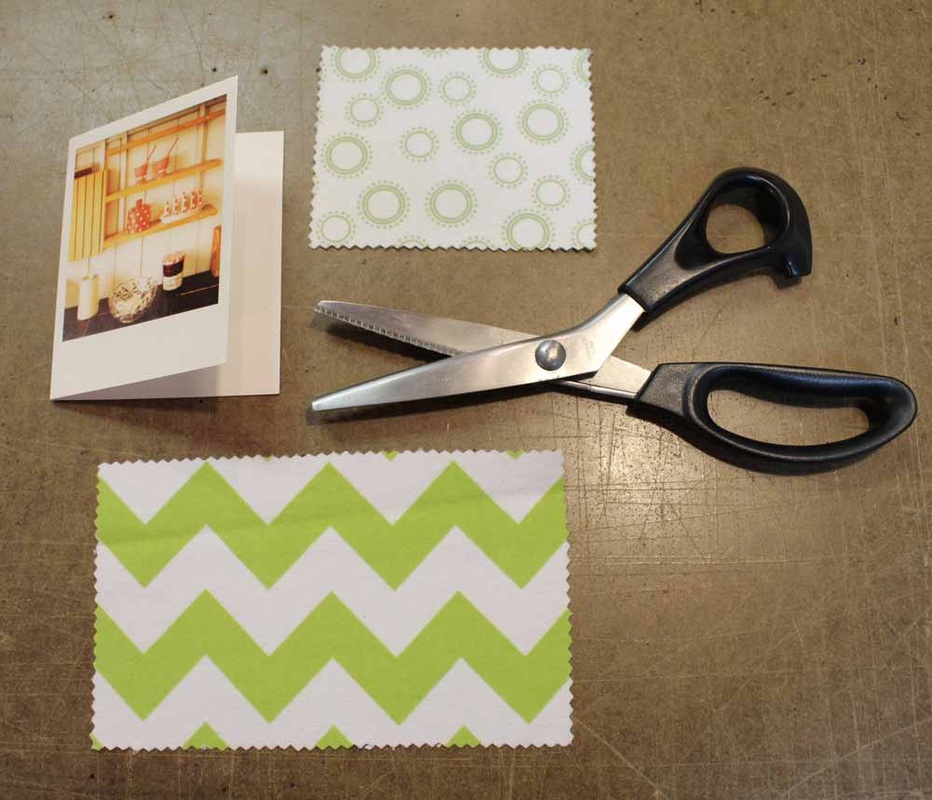
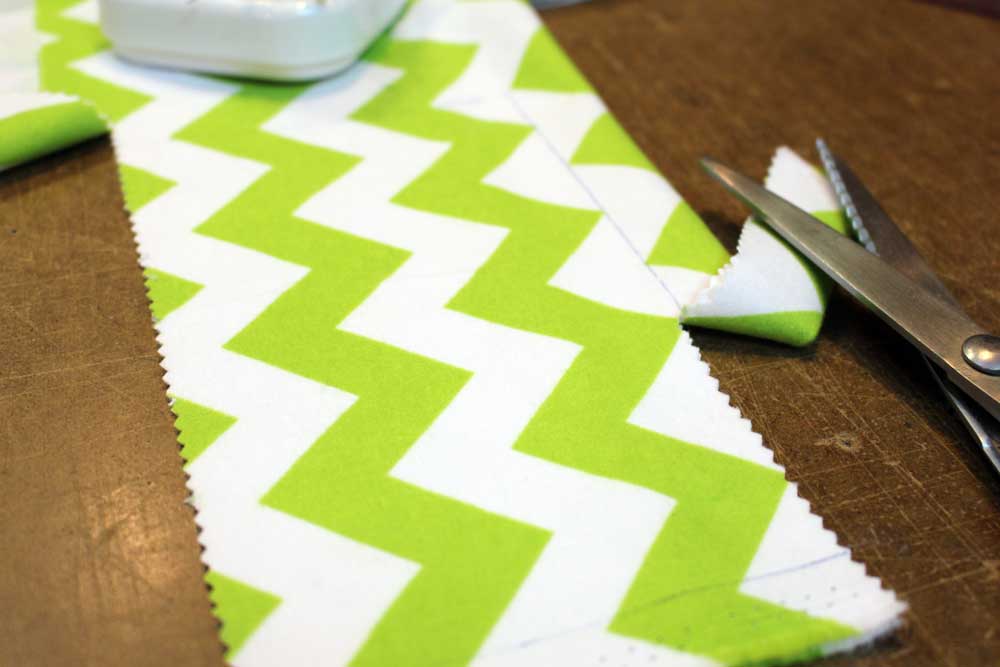
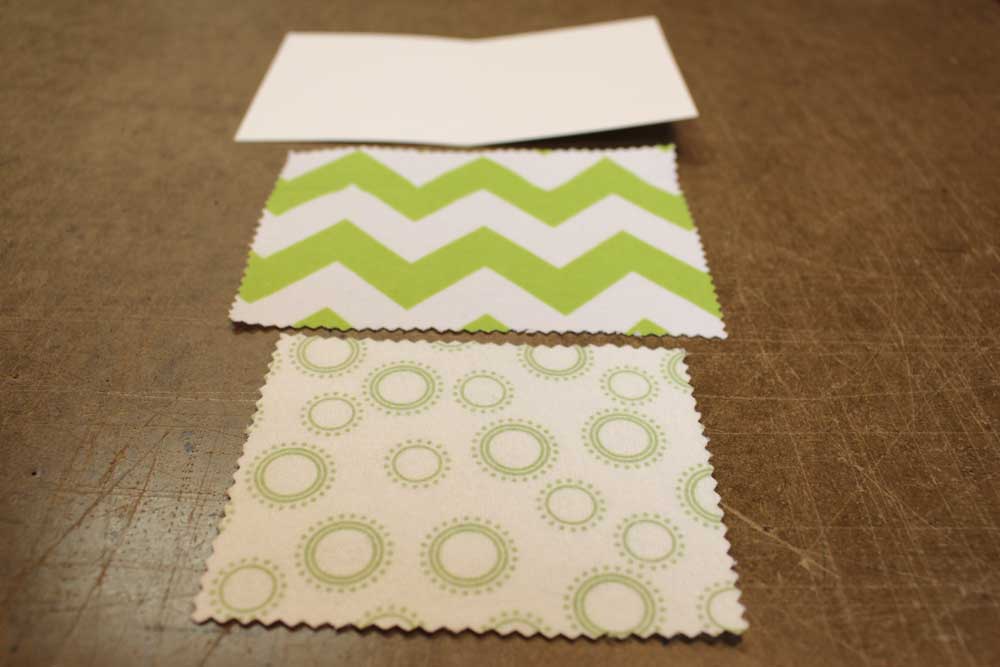
Step 1To begin cut out a series of rectangle fabric pieces that are smaller than the greeting card interior dimensions. You can add as many layers of fabric as you wish. I kept this example simple with only two layers of fabric.
The raw edges are finished with pinking scissors to avoid fraying, so you really can use any fabric in your stash bins. I used 100% cotton flannelette. Felt would work fabulous too! Step 2Layer your pages ( fabric pieces) on the inside of the greeting card. Try to center pages down the fold of the card. 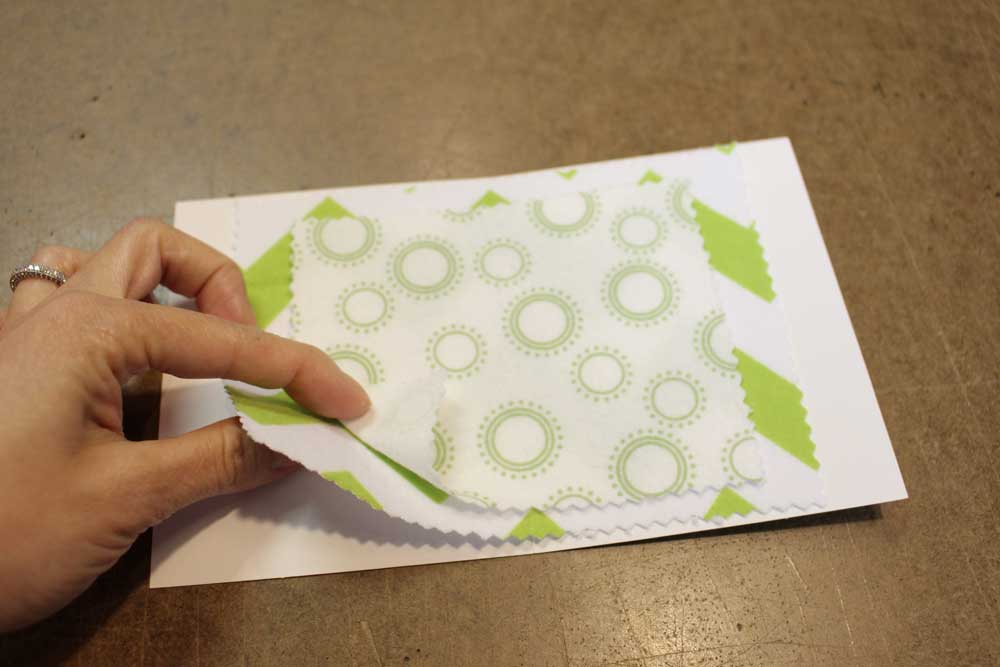 Step 3Sew right down the book spine, remember to back stitch. If you wish to mark the sew line, go ahead. I recommend keep a dull machine needle kicking around to do projects like this. The cardboard of the greeting card will dull any new machine needle. 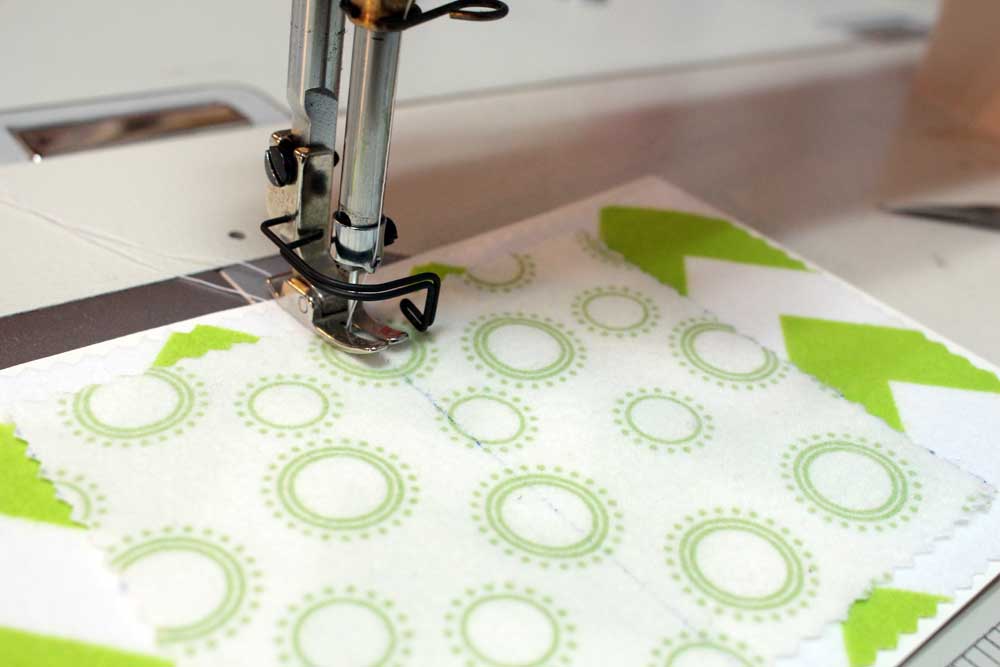 Complete Needle BookInsert your hand sewing needles and voilà the needle book is ready to use. It is just too adorable! 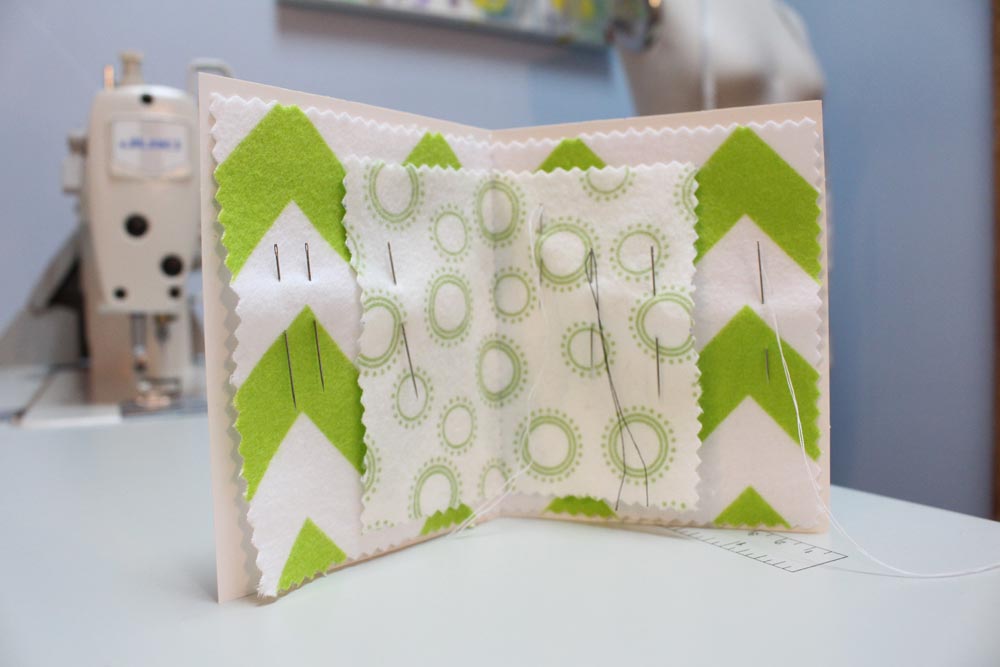  Written & created by Sheila Wong,
Happy Sewing!
2 Comments
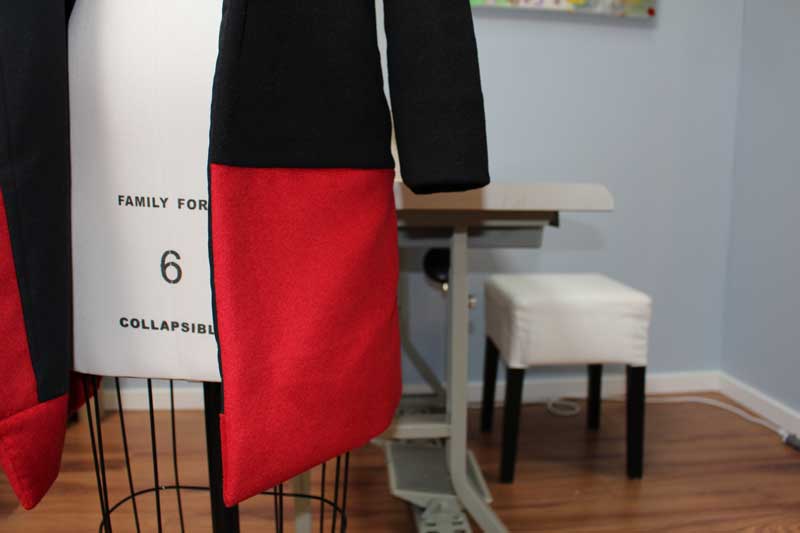
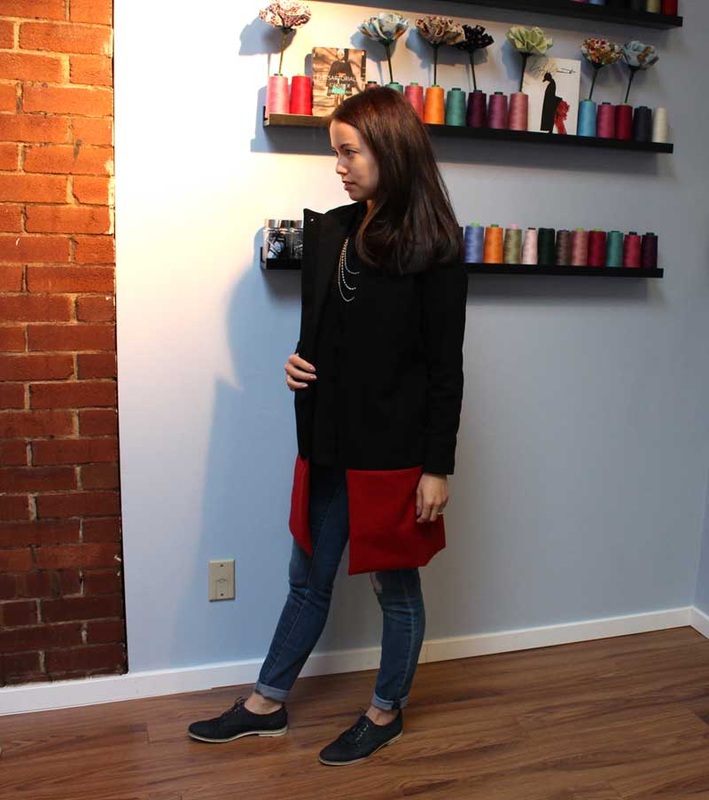
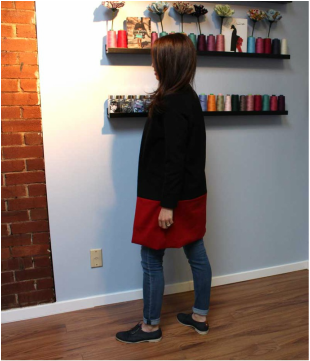
Luxurious Italian wool, lining and several hand sewn details. These are what make up my latest design. Introducing, the color block coat for Fall 2014. 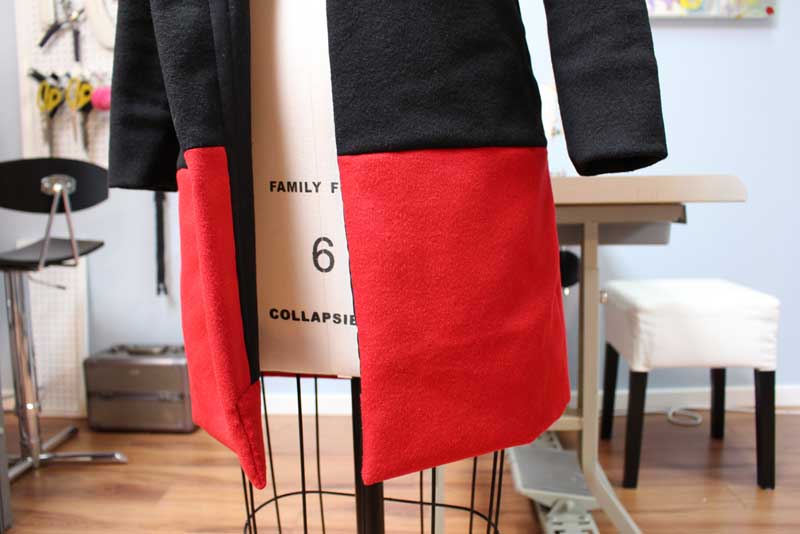 Project Specs
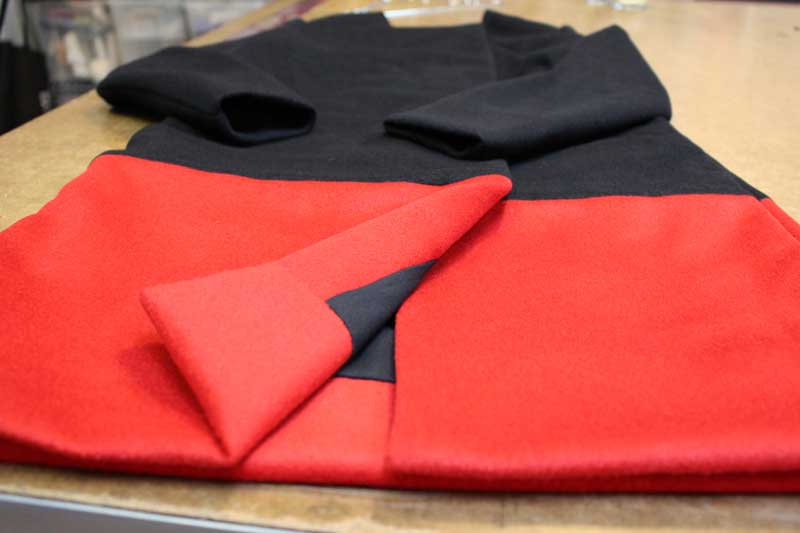
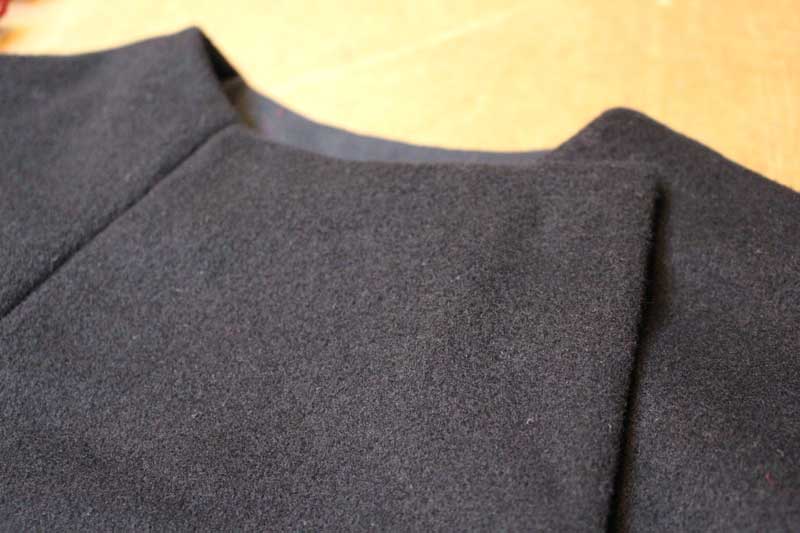
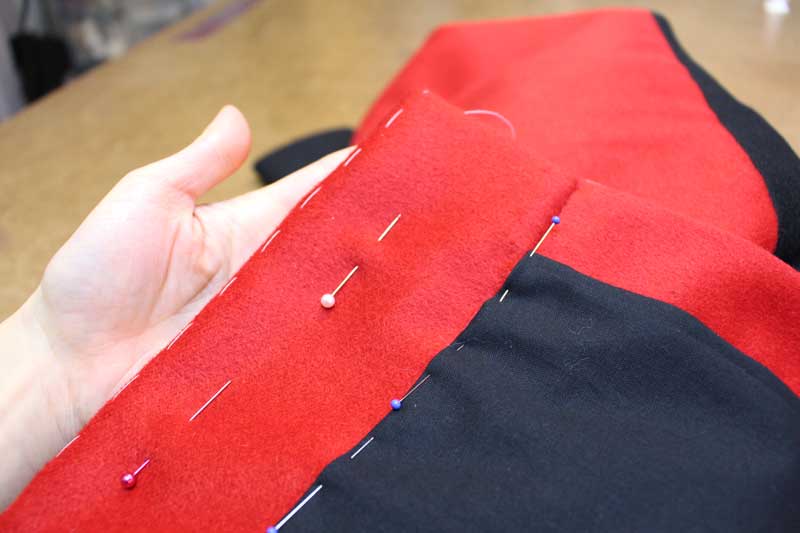
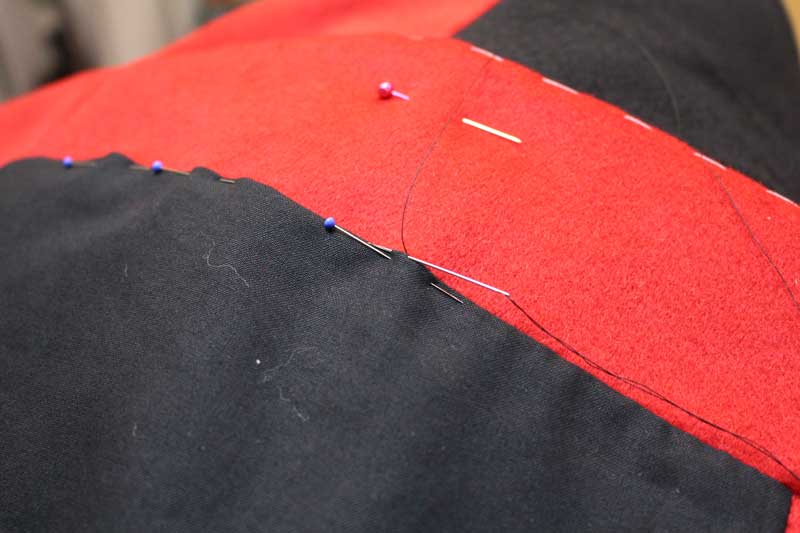
FabricDiving into my fabric bins, I found black and red Italian wool. To my excitement, enough to make a coat and some. It is hard to tell from the photo, but it is soft and buttery. 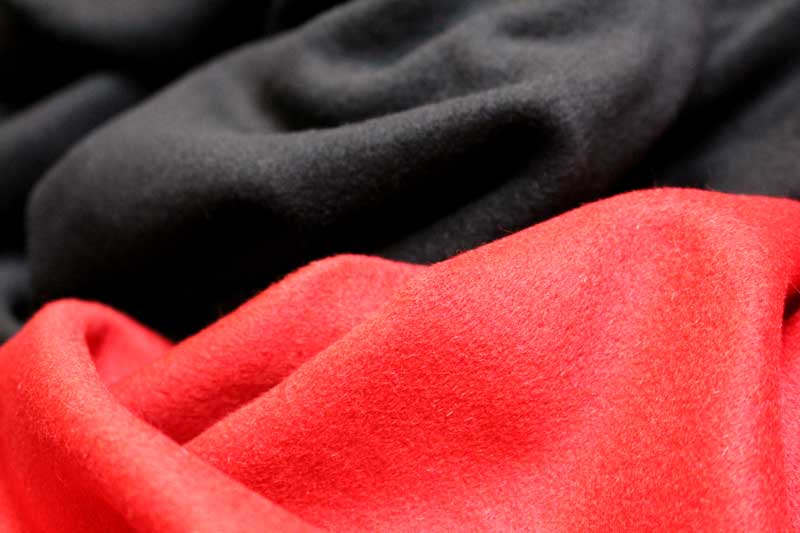 Pattern DraftingTen months ago I designed a two toned waist coat in wool. I used that pattern as my base. I added set-in sleeves, front facing, lining and created an asymmetrical CF opening. 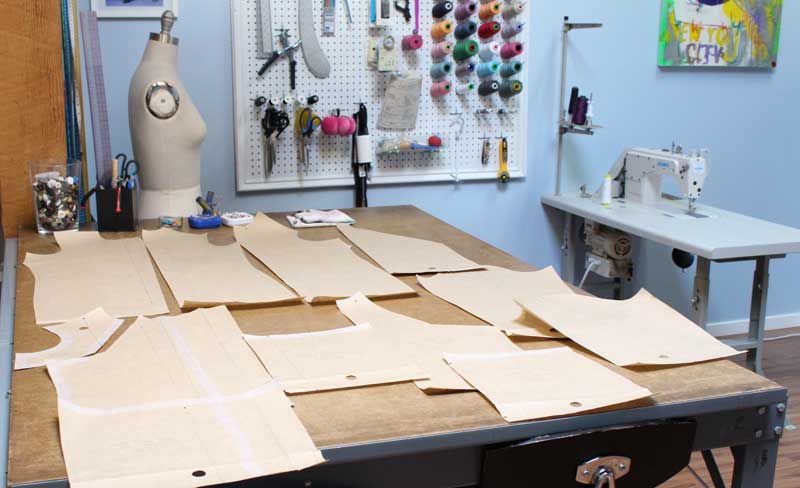 Construction DetailsA coat has several techniques and design details involved. In this section I will go through my top details that make up this coat, and some that I was frustrated with. Color BlockThis was the most important design detail and basically what inspired the coat. I have always wanted a topper coat with a color block bottom in a contrasting color. Red definitely provides a nice contrast with the black.
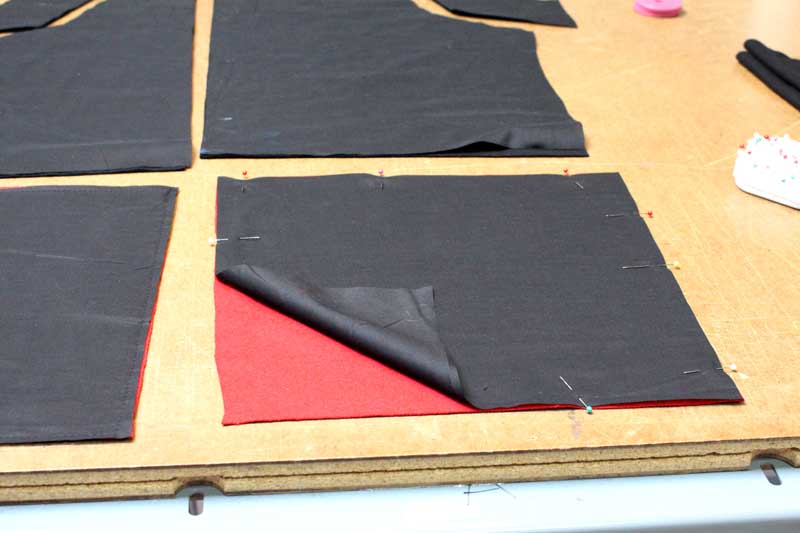
Inter-liningNot to be confused with the lining, the inter-lining is an additional layer sewn onto the exterior pattern pieces that allow for extra warmth and structure. It is a good alternative to fusible interfacing.
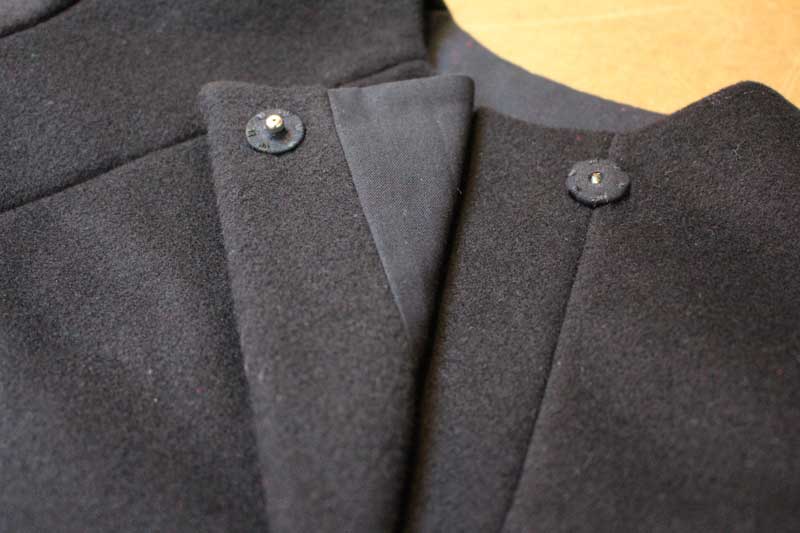
Fabric Covered SnapsSnaps in general I adore, fabric covered snaps, I really adore them. I wanted a clean look to the front of the coat so snaps where ideal.
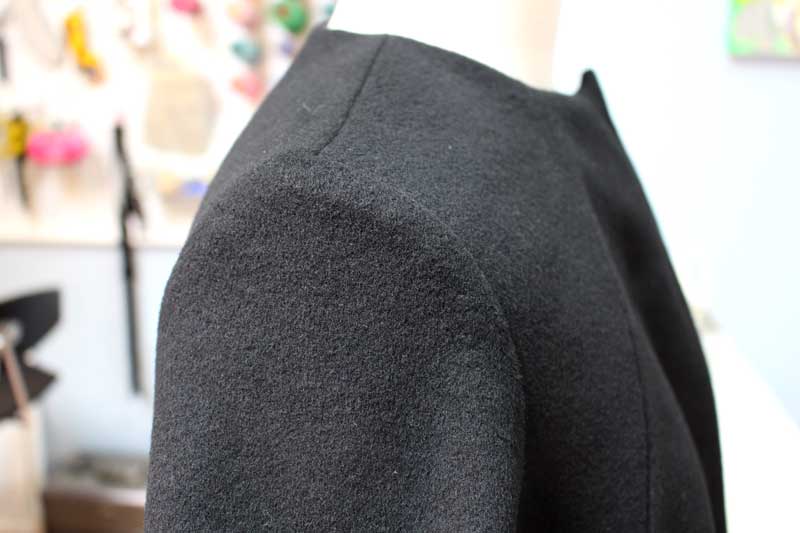
You can learn how to create fabric covered snaps HERE in my sewing tutorial. 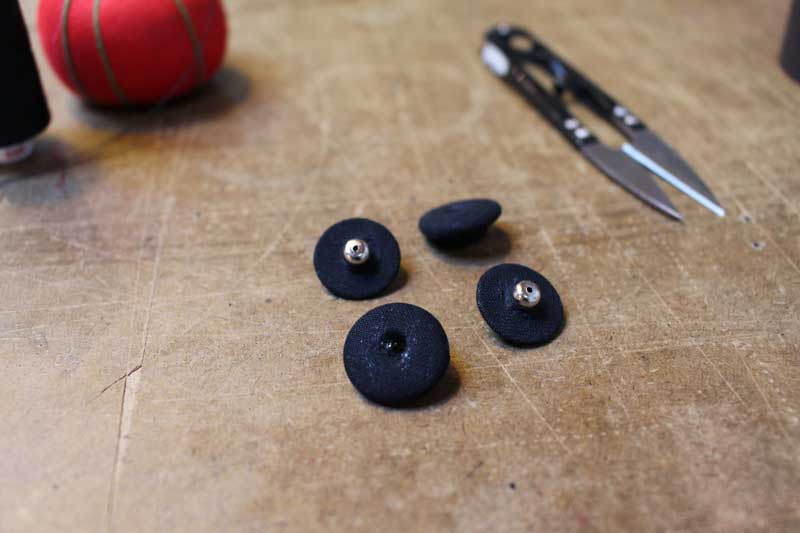 Set-in SleevesProbably not my favorite part of sewing a coat. Set-in sleeves can be tricky as there is extra ease in the sleeve to allow for movement in our shoulder cap. Creating a gathering stitch and using several pins controlled the sewing process for me. If you have ever sewn a set-in sleeve you know it goes like this: sew a few stitches, adjust layers, flatted everything out, evenly distribute excess and repeat.
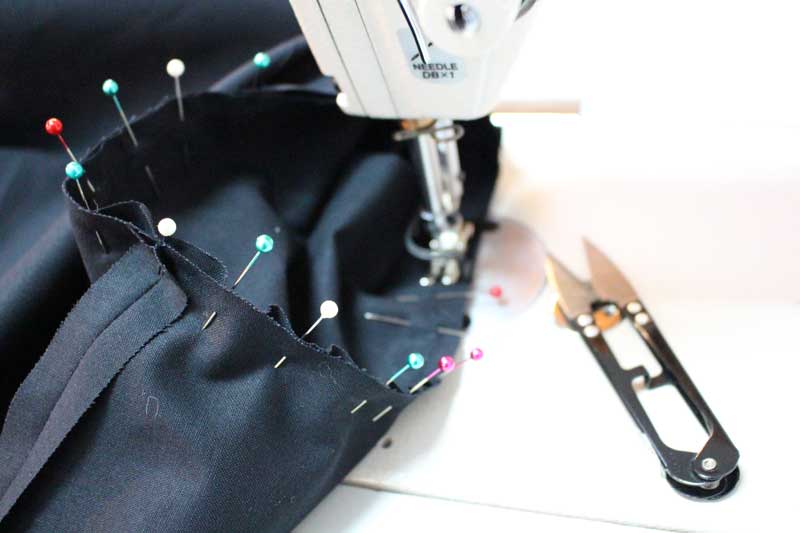
Lining & Hand Sewn DetailsI am not a fan of exposed seams, especially raw edges, so fully lining the coat was a priority. When you fully line a garment, you are essentially creating two coats and bringing them together near the end. I opted for a cotton lining for warmth. 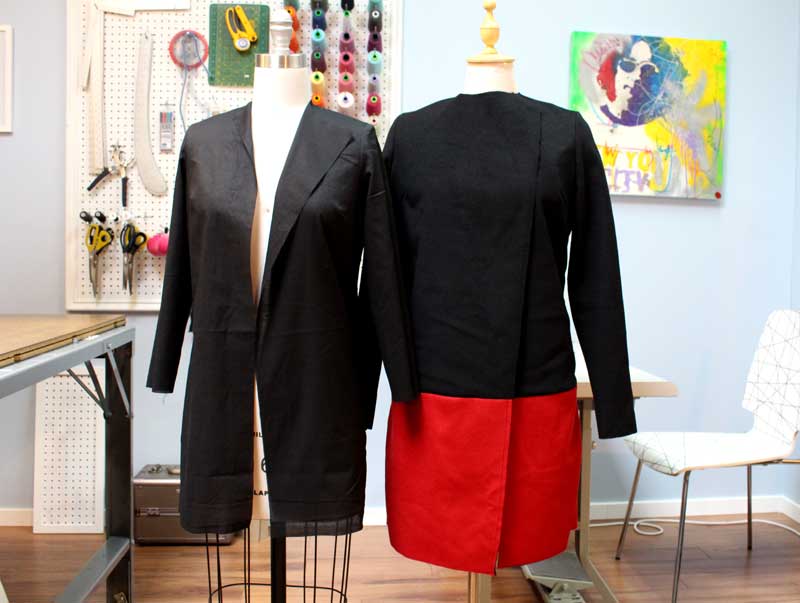 With a lining comes hand sewing. You need to leave an opening somewhere to flip the garment inside out. I left the opening at the hem where the lining and exterior meet. You may also notice I thread marked the hem and CF fold lines for accuracy and to avoid chalk markings on the beautiful wool.
Complete CoatI'll be honest, I am in a love-hate relationship with this coat at the moment. I love the design and the warmth but I am not happy with the way the side seams lay due to the wool stretching with the interlining. UGH! Next time I will take more time in steaming the wool prior to working with it. I am still going to wear this bad boy!
Created and written by Sheila Wong.
Happy Sewing! |
Archives
November 2022
|

 RSS Feed
|
|
Copyright © 2024 Sheila Wong Fashion Design Studio Ltd. All rights reserved.