|
Not all designs are loud and complex at first glance. In fact, some of the best ones are subtle in design - as you explore their construction, you discover the complexities unfolding right in front of you, much like a good book. Our latest design follows this path. 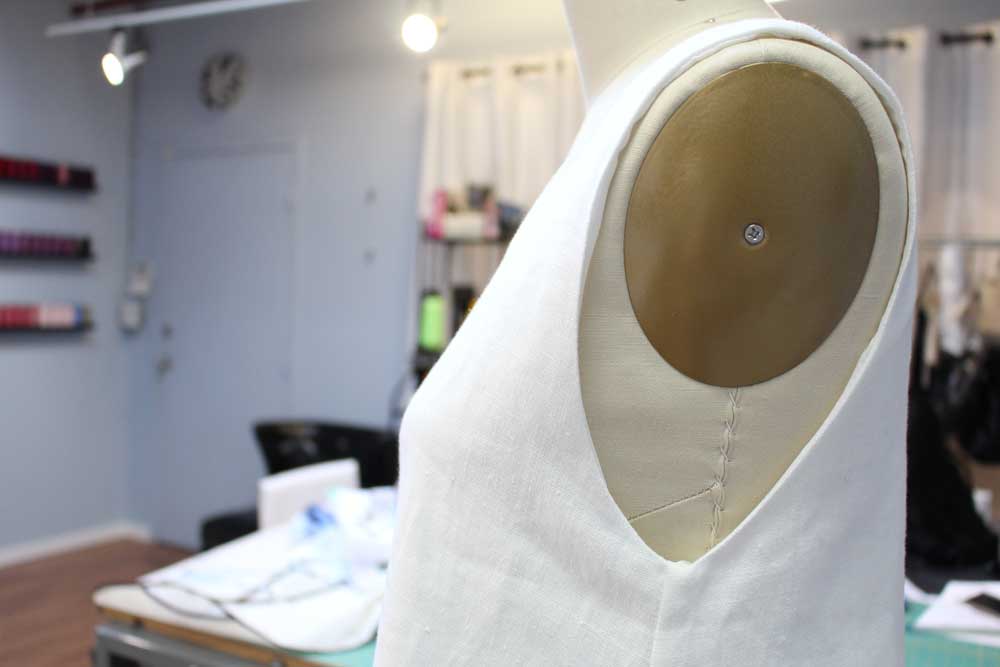 Project Specs
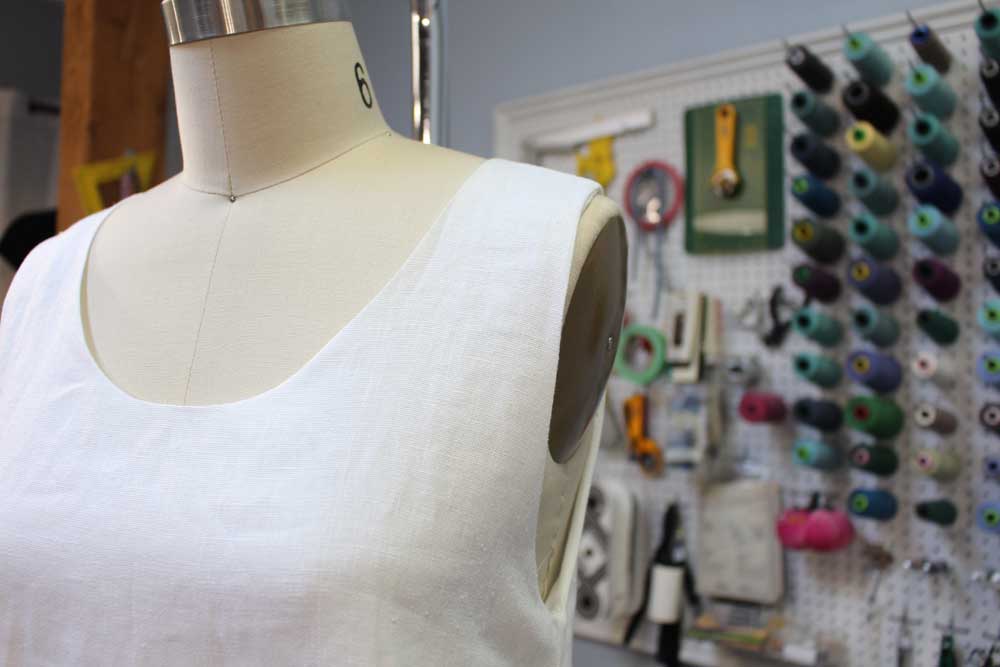
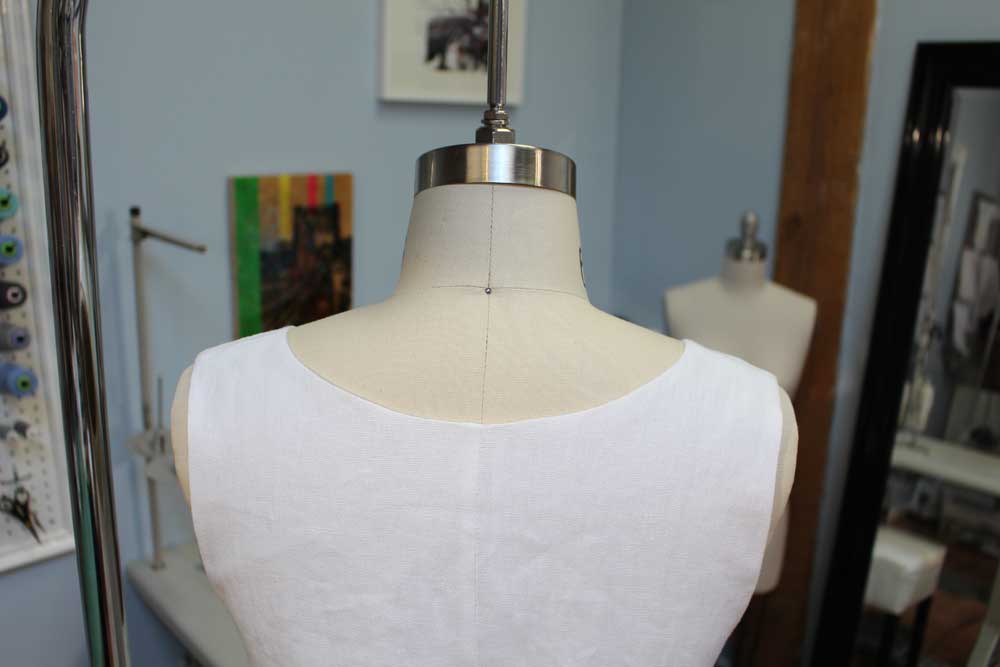
InspirationThis design was for my Mother-in-law, Josefina. She needed a dress for a family beach wedding in February 2017. Do you know how challenging it is to find a white dress in the middle of winter??? Extremely challenging from what I was told. I threw on my superhero sewing cape and got to work (so to speak). 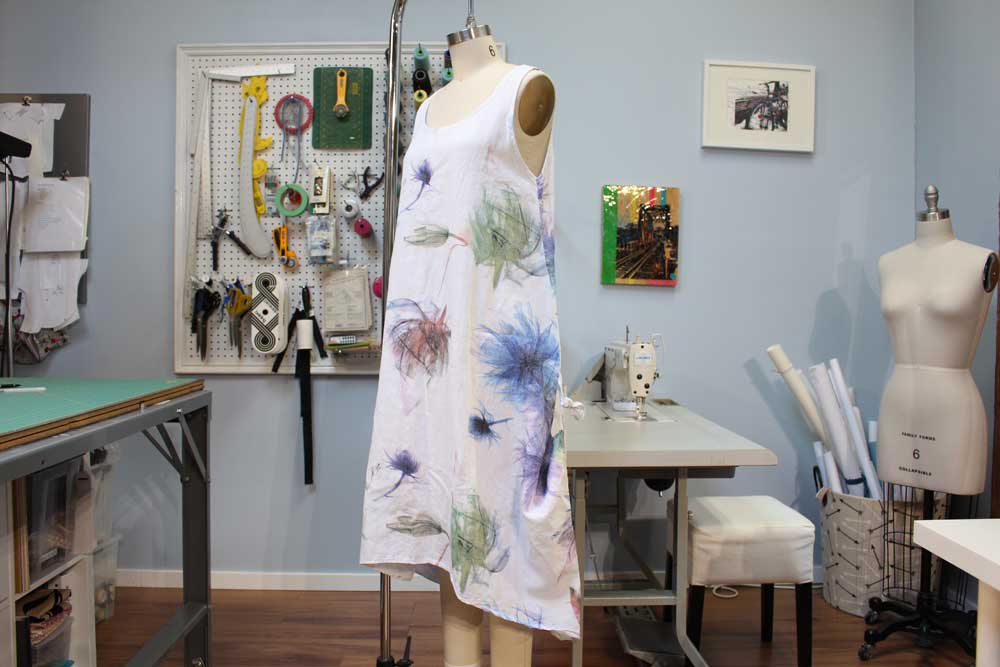 Side note: Caitlyn and I loved this design so much we will be making it in black (of course!). Stay tuned for that release sometime during the summer. Reverse DraftingTo extract patterns from a two dimensional garment, try your best to lay the specific section of the garment flat. In this case, we needed to extract the FRONT DRESS and BACK DRESS. You can extract with a pencil and/or tracing wheel onto pattern paper. Remove garment and clean up all lines and curves. True seams and make any design adjustments as you wish. 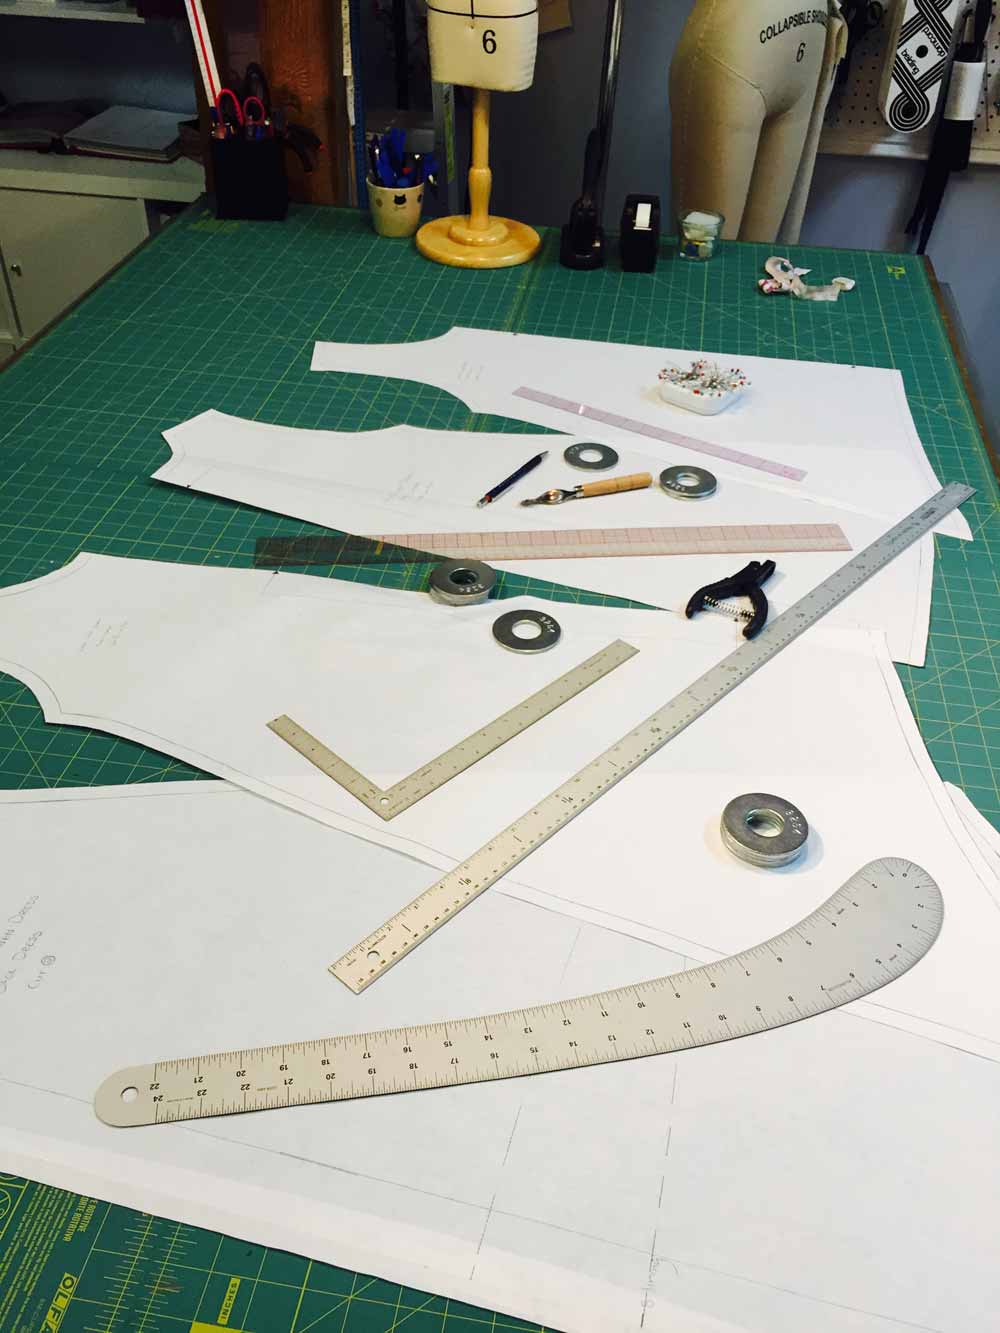 Sahar (Studio Development Manager) assisted me through this process. She is PRO at reverse drafting! We changed the neckline, centre back seam, hemline, and cleaned up the side seams to be more flattering. FabricFabric for this dress was purchased at Fabricana in Richmond. I find they have the best variety of linens and linings. Recently I have been exploring linen in more depth, so I did not realize that there are blended varieties. I was always under the assumption that linen was 100% linen cotton. I think I am still correct in thinking this, but there are a few varieties available, depending on your needs. The linen we purchased was 100% linen at the widest width to allow for the huge flared hem in our design. It was called Vivaldi Linen and cost $21.98 per meter (see picture below). 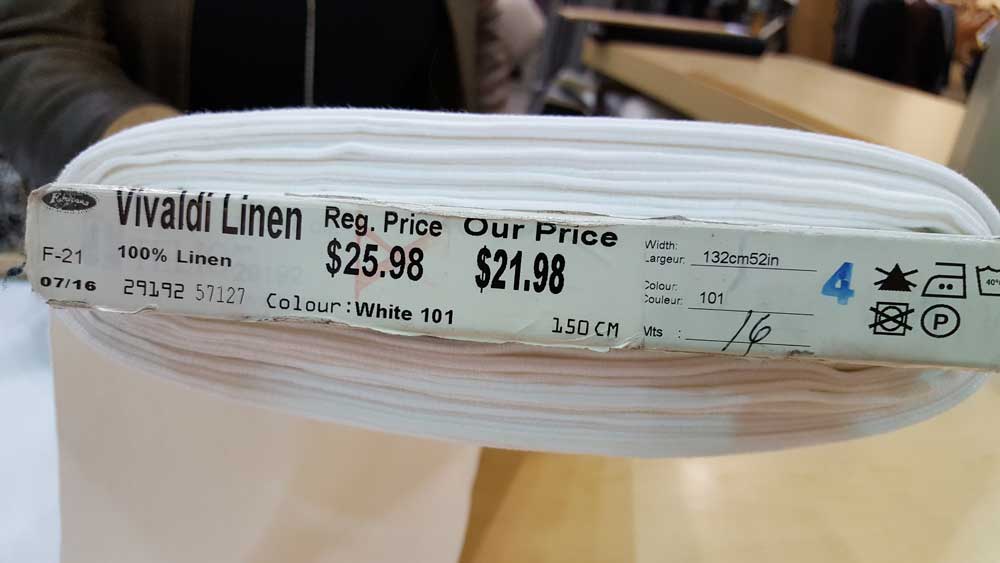 The lining fabric we used was the ONLY 100% silk fabric in the entire lining section at Fabricana. I was looking for an extremely light weight fabric in ivory. Keep reading on to find out why I wanted ivory instead of white coloured lining. By the way, do not feel like you have to stick to a specific section in a fabric store. If you are looking for lining, explore light weight fabrics in other sections. There are no rules - remember, you are the designer. Design ElementsThe beauty of being able to design your own clothing is making a design your own, even if the pattern is extracted from an already made garment. For this dress we adjust a number of design elements. We changed the shape of the neckline, added lining, raised the hemline, and made a smoother and flatter side seam. NecklineThe inspiration garment had a wide neckline that would sometimes show your bra, so we wanted to create a no fuss neckline. We tightened the neckline at the centre front and shoulder by 3/4". Enough for you to still fit your head through the neckline- kinda important.
The silk lining acts like a facing around the neckline. After numerous clippings around the curve of the necking line, edge-stitching was applied to the lining side to keep the neckline sitting flat. Centre Back SeamA centre back seam was designed to add weight and structure to the back of the garment. This helps flared dresses look immaculate during a summer wind gust. This was only applied to the exterior linen layer, not the silk lining. 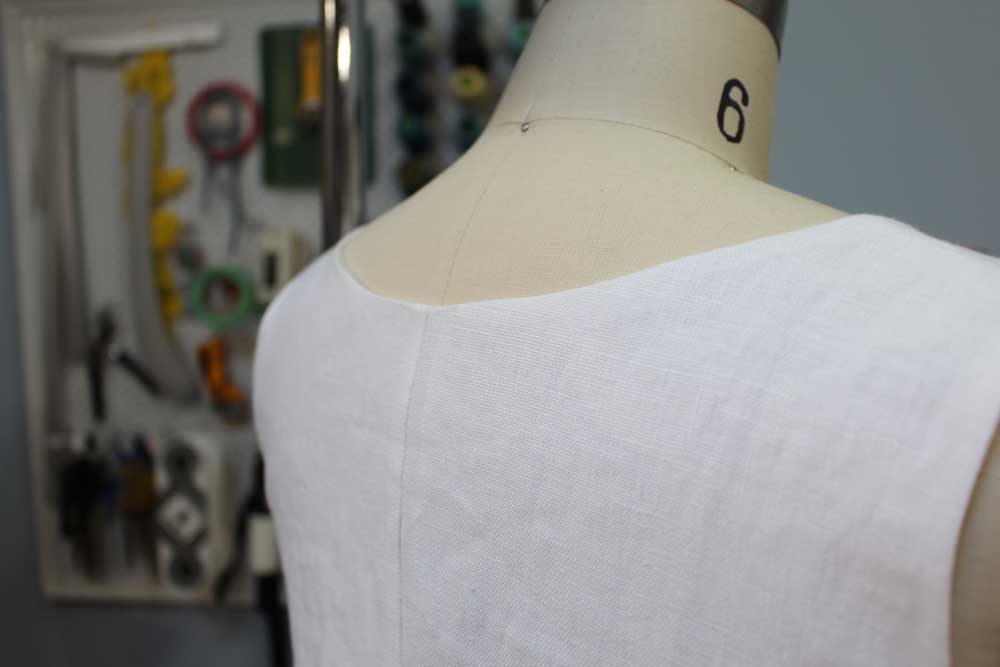 Regular French seams were applied to all vertical seams including the centre back seam (click HERE for our regular French seam tutorial). Silk LiningThe inspiration garment had no lining. We added lining to provide a more luxurious feel and to provide a layer of coverage under white linen. Why is white linen so see-through?! A trick we like to do in the studio, when working with a white design, is to line the garment using a skin-coloured fabric, and not a white-coloured one. Why? It provides any garment with a lining BUT makes it invisible. You can use this same theory with your undergarments. When wearing a white shirt, wear a skin-coloured bra instead of a white one. 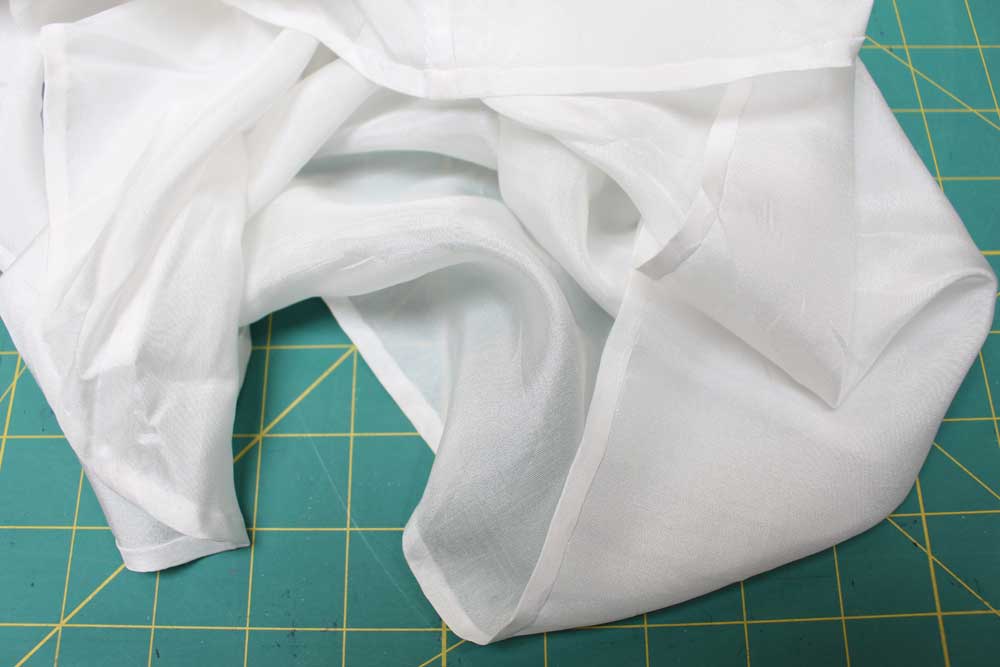 French Seam FinishAll side seams and centre back seams in both layers were made with a French seam finish. This seam finish works well with straight seams and the light weight fabric. Also, who doesn't appreciate the peak of a French seam while you walk. People will take notice! 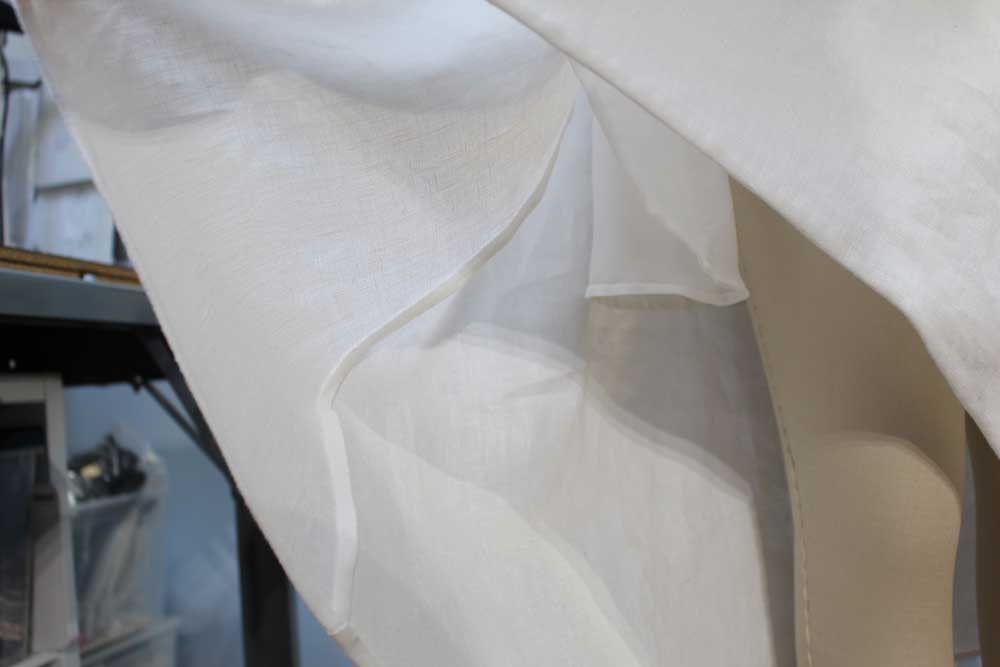 Asymmetrical Hand Sewn Hem FinishWe kept the asymmetrical hem element from the inspirational garment but raised it so it's more flattering for a petite individual. You will also notice we removed the weird side seam tie thang...we are not that hippie, so cleaned up that seam. 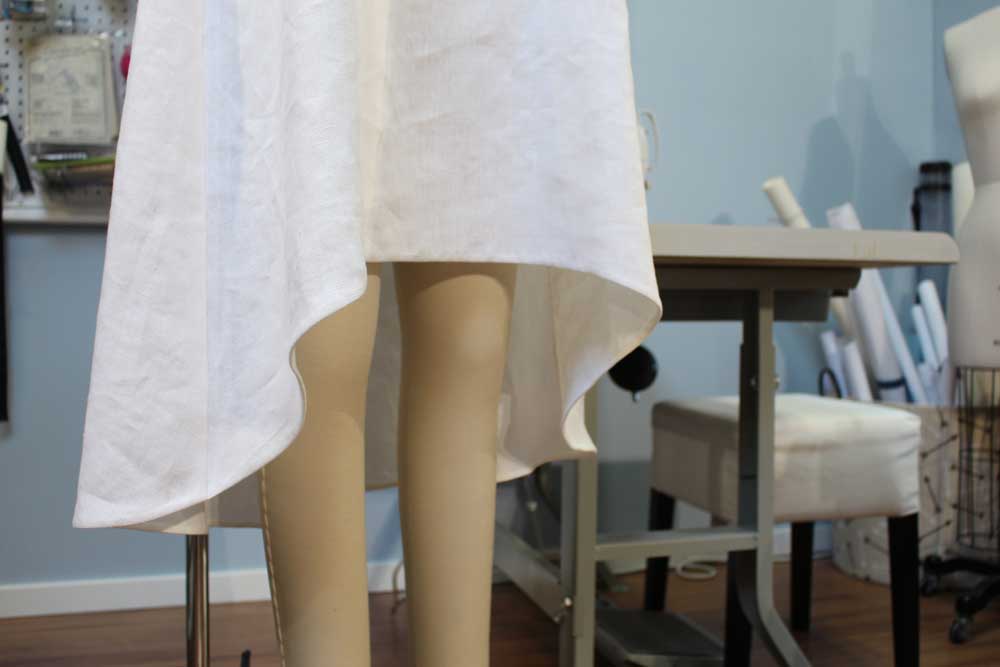 Both exterior and lining hems were folded up twice and slip-stitched closed. This step was the most time intensive due to the width of the flared hem. Final DesignNow that you read all about our insides, it's time to appreciate the dress from the outside. This design seems simple at first glance but is truly unique when you explore its insides. 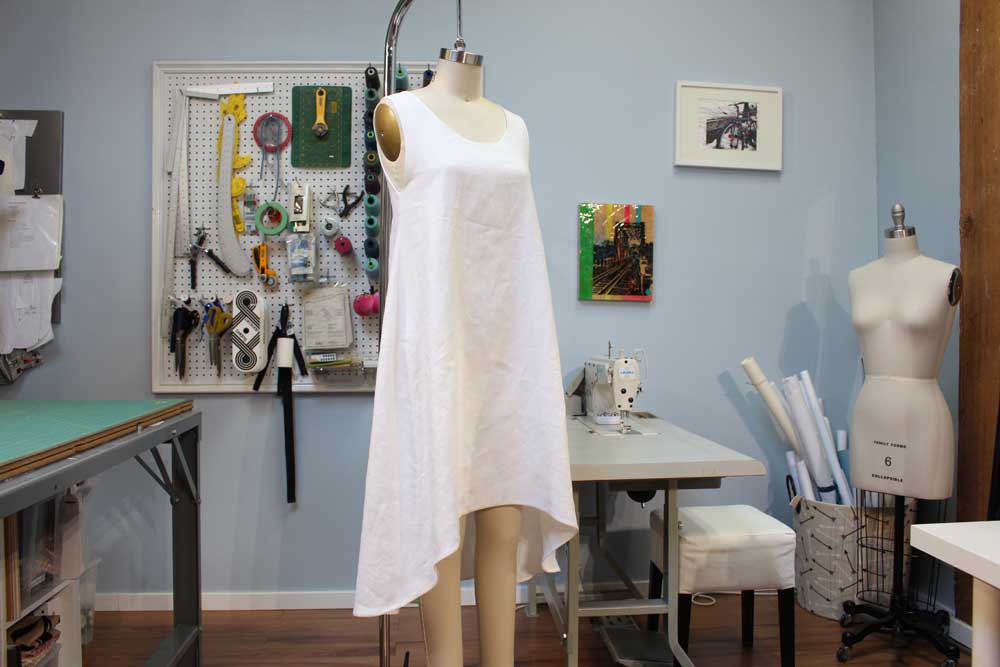  If you would like to learn more about reverse pattern drafting or about any of the sewing techniques in this post, book in a studio lesson.
Designed and written by Sheila Wong Drafted by Sahar Manavi and Sheila Wong Constructed by Caitlyn Sio and Sheila Wong Edited by Samantha Quon Happy Sewing! Sheila Wong Sewing Team
1 Comment
The first time I ever saw a French seam was at a young age. Inside a pillow case my grandmother sewed, I inspected with awe at how the raw edges seemed to be magically hidden away. It was not until many years later that I realized it was a French seam I was so fascinated with back then. Here is a video tutorial on how to sew a regular French seam. French seams work well with straight to slightly curved seams on fabric that is light- to medium-weight. You'll see it most often used in shirts and blouses. Step 1To begin, place wrong sides of fabric facing each other, and sew at 1/4 inch seam allowance. Step 2Trim away half of the current seam allowance width. This step will ensure that raw edges are peeking out the right side of the seam. Step 3Time to press! This is a two part pressing system. First, press all seam allowances one way to create a flat seam. Second, press seam with right sides of fabric facing each other. Balance seams so that it looks like a book spine. Step 4With right sides of the fabric facing each other, secure your book spine by sewing the second stitch line at 1/4 inch seam allowance. You can ensure the right seam allowance by using the formula below: FIRST SEW LINE (1/4" SA) + SECOND SEW LINE (1/4" SA)= TOTAL GARMENT SEAM ALLOWANCE OF 1/2" Step 5Press seam allowance flat going one way. In a garment, press seam allowance towards the back, or away from the centre front/centre back. Created and written by Sheila Wong
Filmed and edited by Samantha Quon Happy Sewing! Sheila Wong Studio Team |
Archives
November 2022
|
 RSS Feed
|
|
Copyright © 2024 Sheila Wong Fashion Design Studio Ltd. All rights reserved.