|
Our latest demi-couture design is a bit of a tongue twister- Silk Slip Skirt! Inspired by vintage slip skirts, this design features silk charmeuse fabric and Japanese trim. This blog post will show you how to hand sew lace/trim onto silk. Get your wax out for this one, you will want to keep your threads tidy! 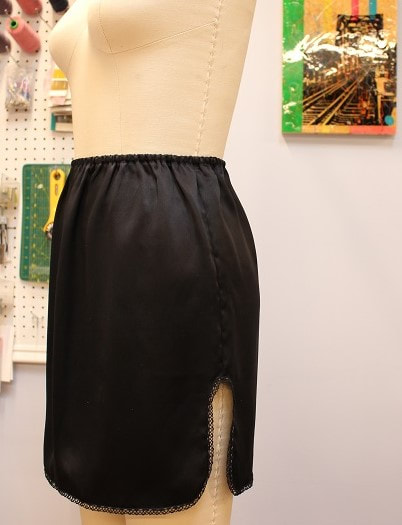 Design ElementsSewing up this sexy silk slip skirt saw some seriously styled seams. See what we did there?? What is your favorite element?
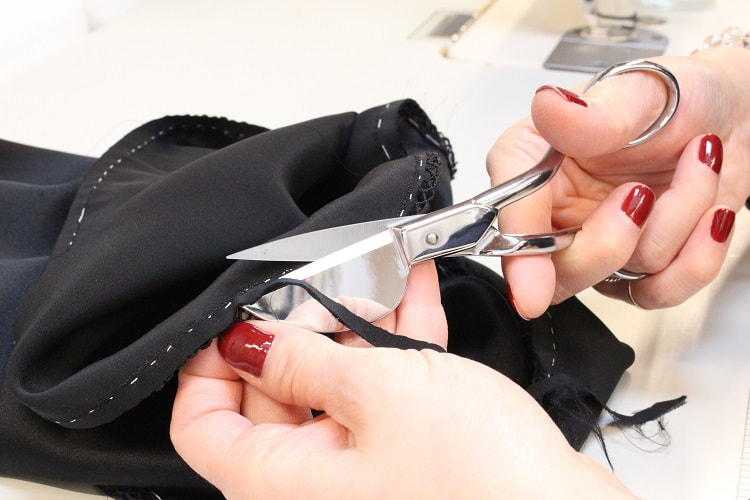
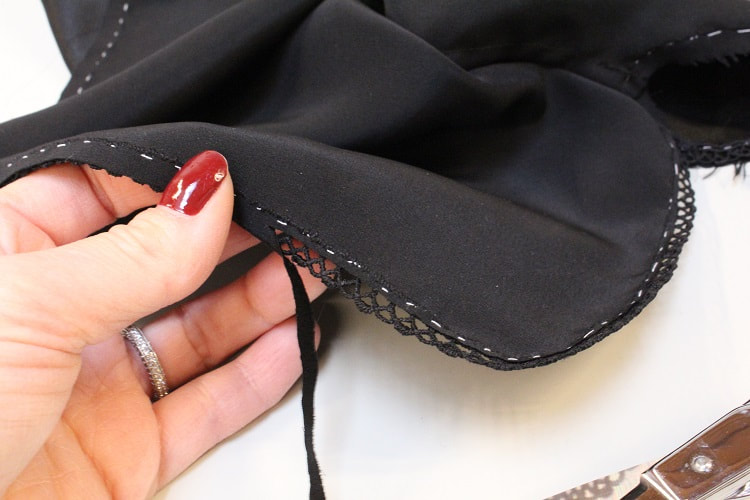
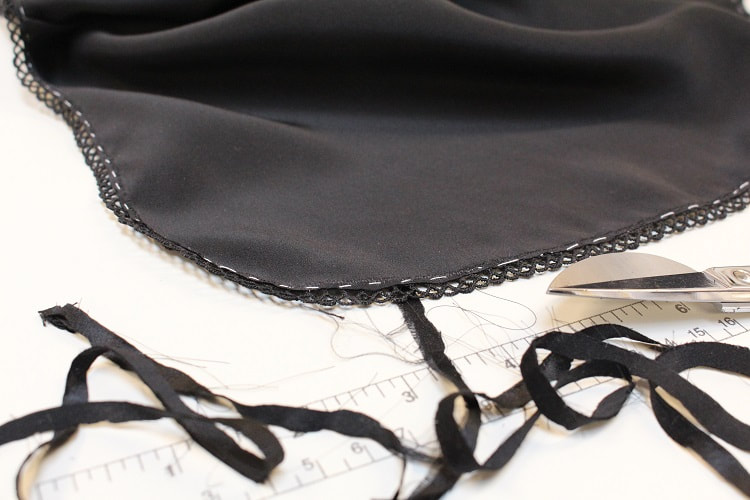
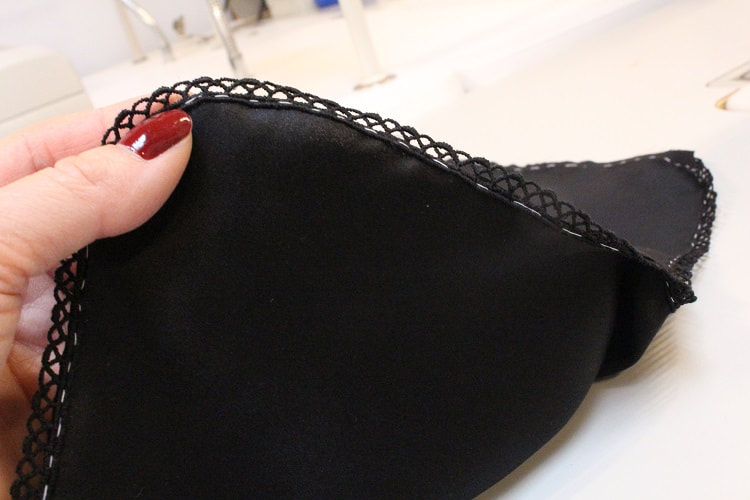
Hand sewn lace trimTo attach the lace trim onto silk, follow the steps below. Step 1Thread baste the lace trim onto main body of fabric allowing for some overlap of lace and silk. In this case, we gave a 3/8" seam allowance (SA) at the skirt hem for the top of the lace to be aligned to. Use a contrasting thread color to make it easily removable later. 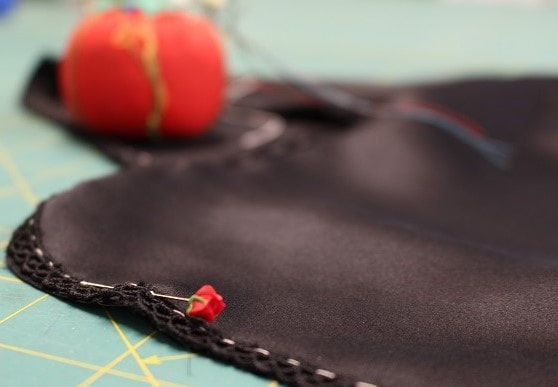 Step 2Overlap approximately 1/4" - 3/4" of the lace. This measurement will be based on the lace repetition present in your trim. Ours is a tiny repetitive shape, so only 1/4" was required. Your goal is that the end overlap lays flush on top of its exact lace shape underneath. Best place to put your overlap is along a side seam. 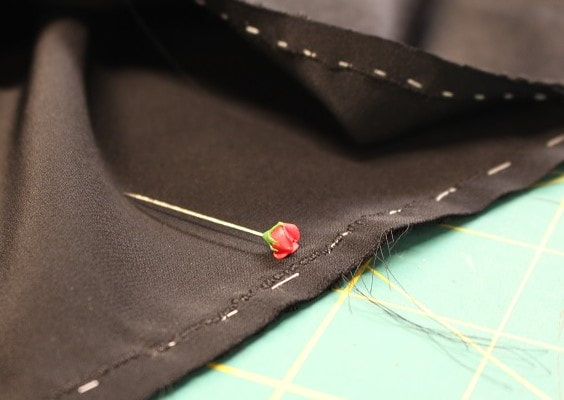 Step 3Whip stitch (aka over-cast stitch) tiny 1/3" - 1/16" width stitches attaching lace to silk. This will allow the lace to become ONE with the silk. The whole concept in the end is to create a flush appearance as if the lace was made with the silk. 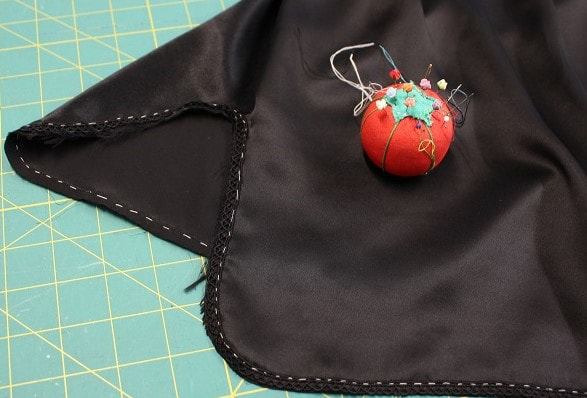 Step 4Continue to whip stitch along the outline of the last overlap lace shape to make the top and bottom lace trim become one. At this point you should only be whip-stitching the lace layers together, no silk. 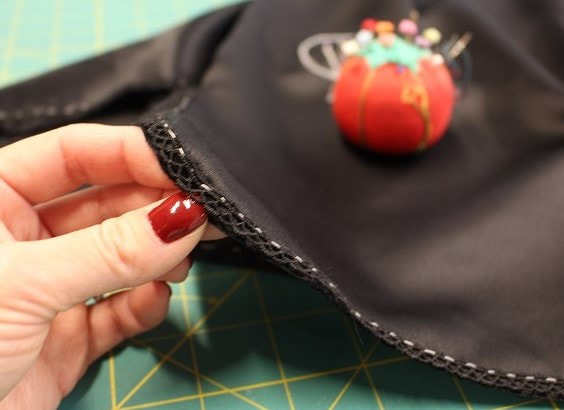 Step 5 Trim away the excess hem seam allowance beneath the lace trim. Stay approximately 1/8" down from whip stitches. We are using applique scissors here.
Step 6Trim the under layer of lace where the overlap of lace occurs.
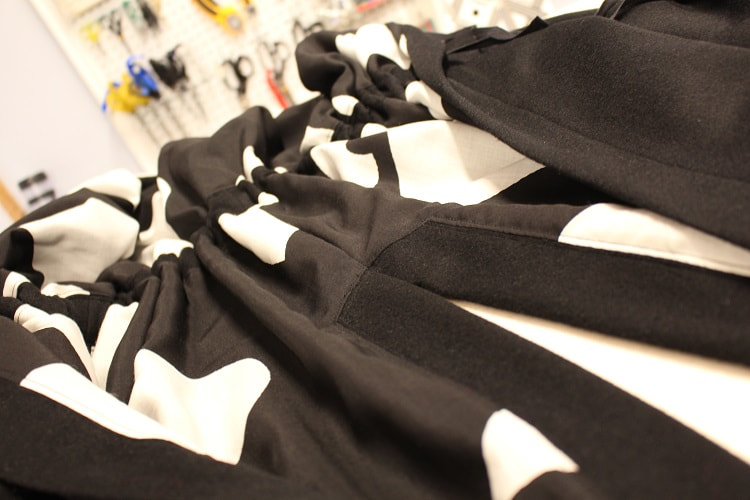
Step 7Remove the basting stitches. FYI: We kept ours in for learning purposes. 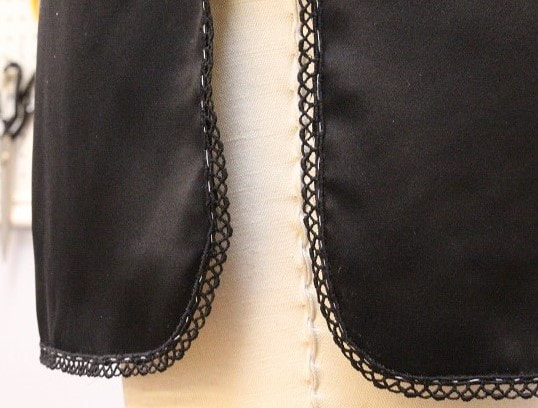 Delicate elastic waistA delicate slim elastic was put into this design. At first glance it looks like a super simple installation, but here are the time intensive steps. Step 1Mark and press in the top of the waist twice. This section will act like a tunnel for the elastic to get fed into. We folded this skirt waist in by 1/4", then 1/2". Step 2Pin and top stitch along the bottom folded edge to create the tunnel. If you look super close, we created a tight double top stitch to emphasize the waist more and for extra security for slipping on and off. Leave a 2" opening close to a side seam but not on it. This is where the elastic will be fed into. 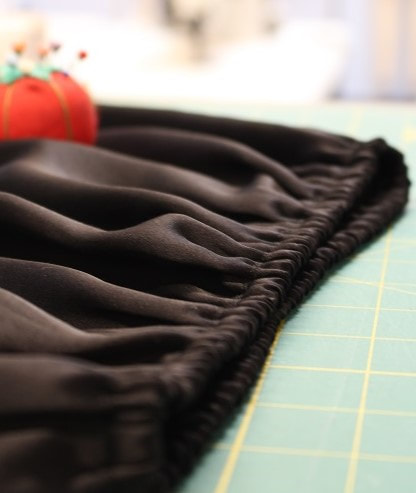 Step 3Fit the elastic to your natural waist measurement but let it be a hair tighter. Cut the elastic and attach a safety pin to the end of the elastic and feed through the tunnel. Step 4Overlap the elastic ends and secure with a strong amount of zig-zag stitching. Push the elastic into its tunnel and close up your top-stitching. Overlap a few stitches from the original line for security. 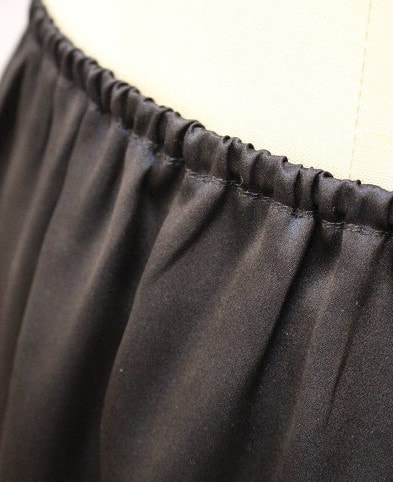 Step 5To get the perfect amount of gathers around the waist, use your two index fingers and expand the waist as far as the elastic will allow. Gently release and allow the elastic to compress back, and voila! Final DesignLook at the side seams on this finished beauty! This design was inspired by our client Natasha who adores vintage undergarments. Thank you for slipping this skirt into our lives! 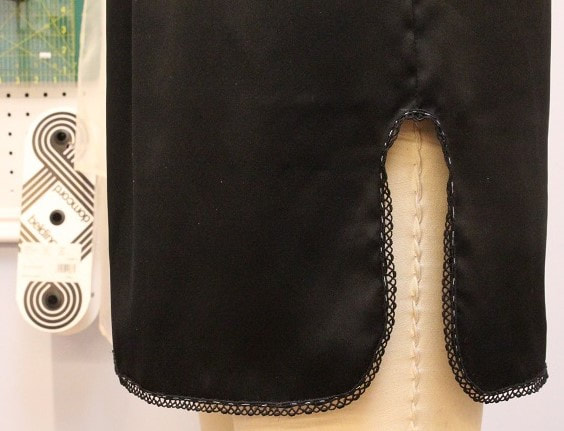 Happy Sewing!
Designed, photographed and written by Sheila Wong Studios
1 Comment
Our latest design took over 2.5 months to draft and stitch up. This is actually quite quick compared to many of our lengthy couture designs. This coat is made up of over 25 pattern pieces and features scrumptious materials from Kyoto and Tokyo. The silhouette is even inspired from the streets of Tokyo.  Project Specs
 Design ElementsLittle red riding hood knew exactly what she was doing with that over-sized hood in the woods. In the city, it lets us escape the crazy world around us and keeps us warm. Features in our over-sized, fully lined hood includes a drawstring opening and a faced opening that creates weight to sit perfectly on your head. Over-Sized Hood with Drawstring Pulls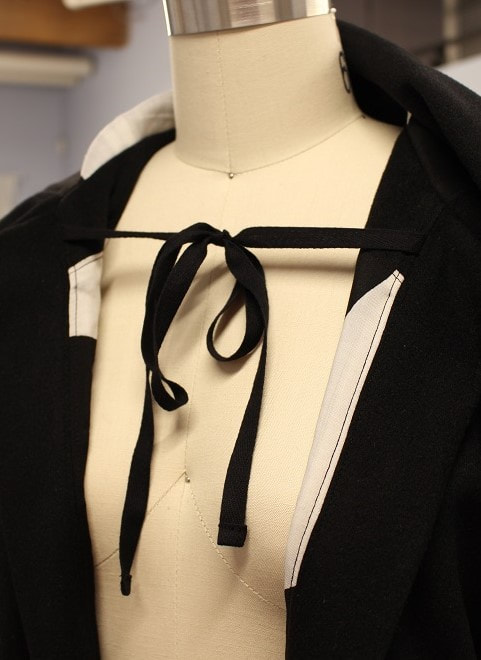 Back CinchesThe back cinches in just enough to let the world know you have a waist and the CB opens up just enough to show off a sneak of your booty. 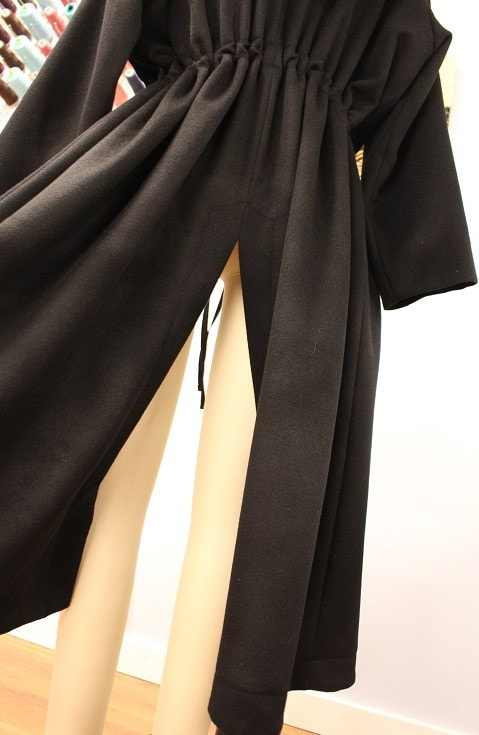 Fully LinedWe can't stop gushing over the lining of this design! The fabric was picked up in Kyoto, Japan at a shop called SouSou. I (Sheila) make it a point to visit SouSou each time I visit Kyoto. This type of cotton is called Ise-Momen and according to SouSou, "the manufacturing process has not changed from the old days. Ise-Momen is woven by the looms made in Meji Period (1868-1912)". What charm! Here you can see the interior view of the waist tie. We faced the waist tie area to create a division of upper and lower lining.
ButtonsBy placing buttons along the CB close to the hem and button holes along the CF close to the hem, it allows you to wear a coat in two different ways. UnbuttonedThis option allows for full coverage around the body to protect you against the environment. Also, you look pretty rad crossing the street with the likes of a cape following you. Buttoned UpThis option allows you to create a different silhouette and structural vibe, meaning you can show off your outfit underneath on a nicer day. 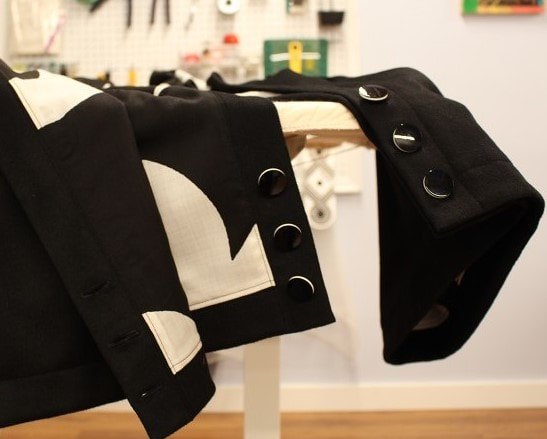 Final DesignHere's an interior look at the finished design! Would you wear this? Tell us what element you love the most! 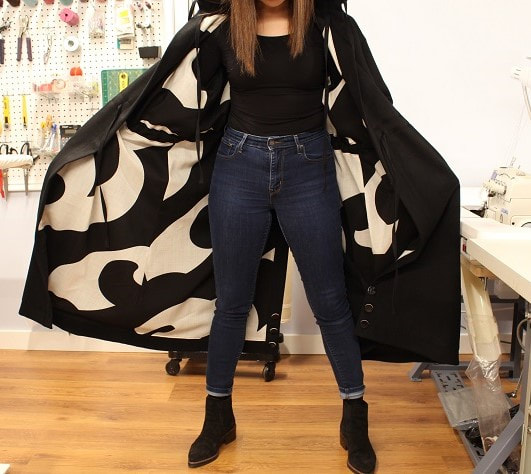 Happy Sewing!
Designed, photographed and written by Sheila Wong Studios |
Archives
November 2022
|

 RSS Feed
|
|
Copyright © 2024 Sheila Wong Fashion Design Studio Ltd. All rights reserved.