|
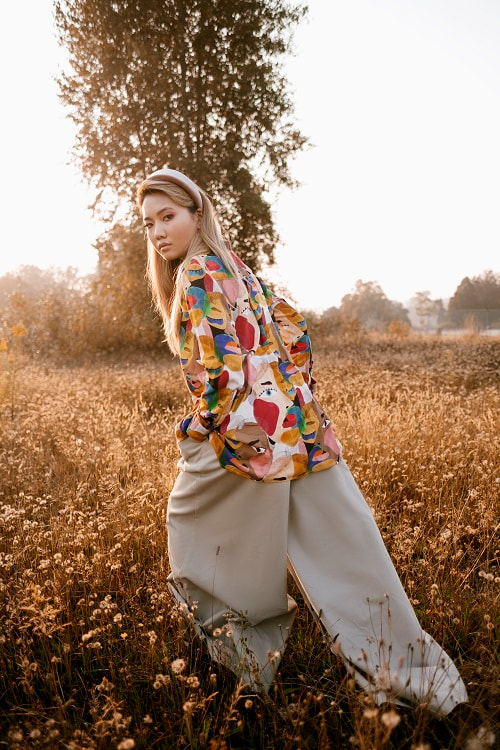
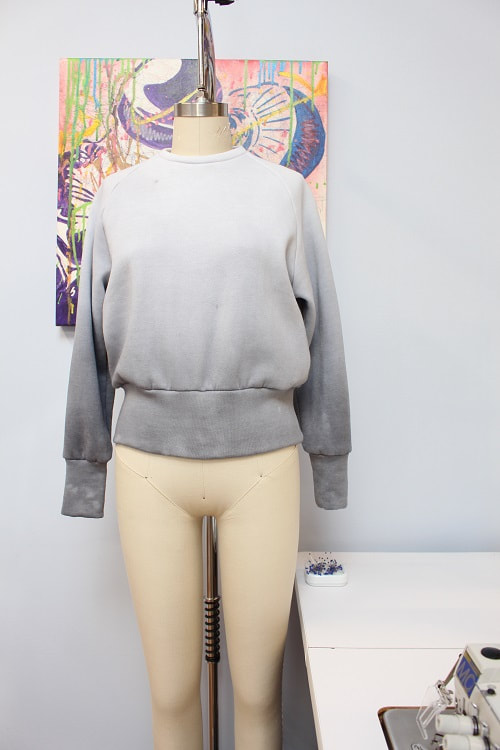
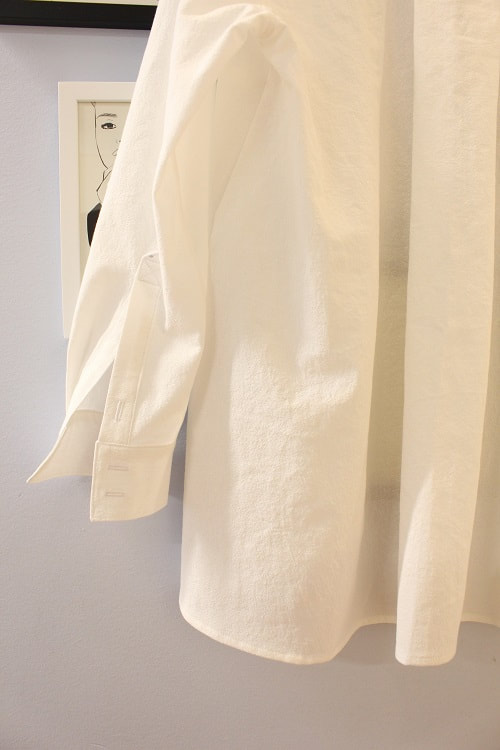
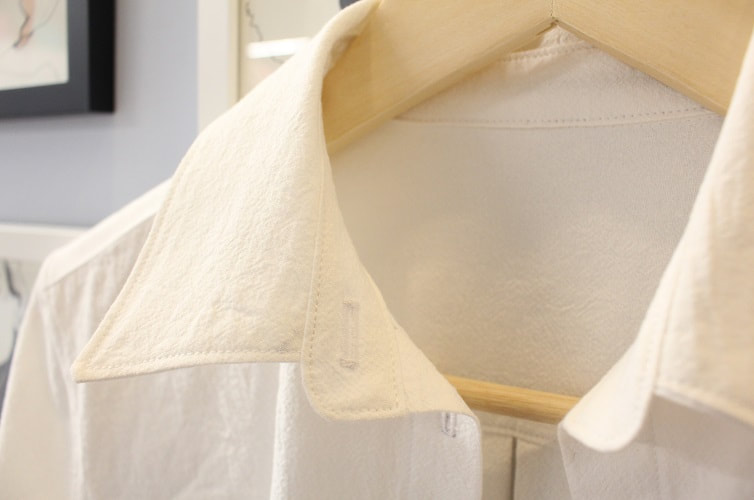
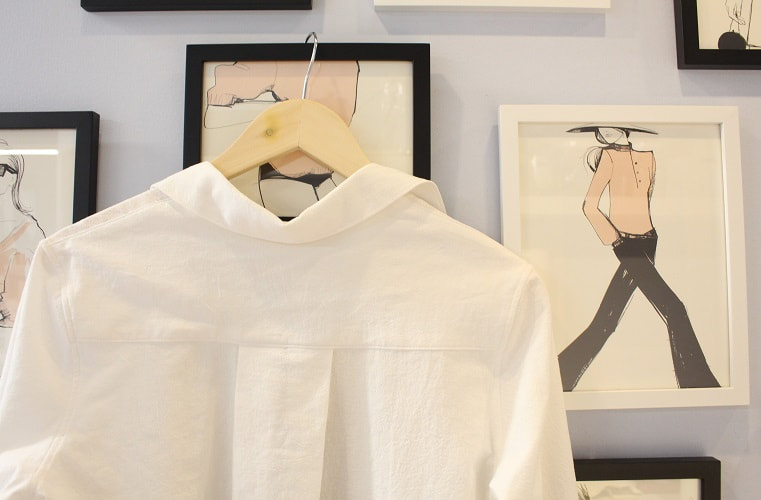
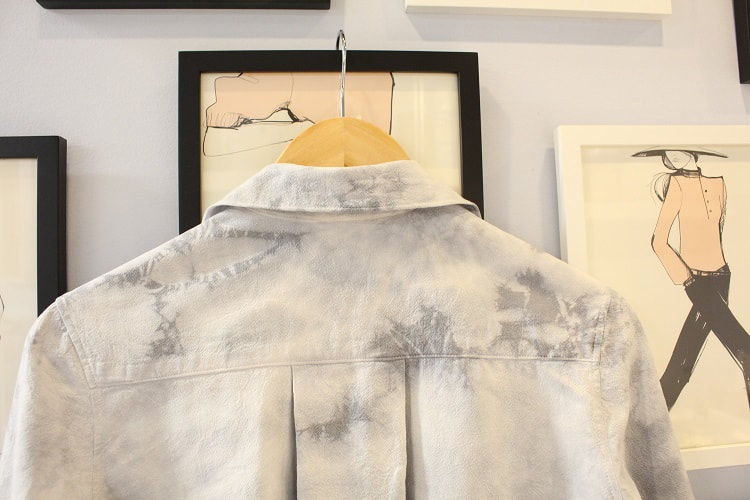
I have absolutely no recollection of tie-dyeing anything as a youth. I started sewing at a very early age. From the get-go, I was in awe of the variety of fabrics one could design with. It was my mission to feel, cut, sew, and understand the nature of textiles and how they could be manipulated into a 3D form. It is only in the past few years, I have slowly started taking an interest in using paint or dye to manipulate textiles. 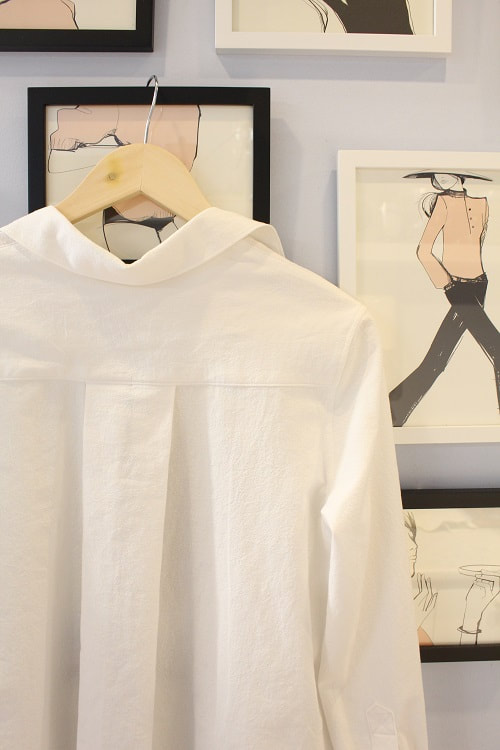 I have always wanted to stitch up a complex design and chuck it in a dye bath. So let's do it! I had some leftover black stock solution from my Ciba Washfast Acid Dye. Obviously, I am not going all tie-dye rainbow colors on you. I’m sticking to more subtle colors, or in this case, lack of color. Read on to learn more about my inspiration, tie-dye process, before and after shots, and what I will be dyeing or painting next. InspirationThis tailored shirt design comes full circle for a number of reasons. First, the pattern/silhouette is the same as our Rainbow Faces Tailored Shirt. I love the way that the original shirt sits when worn, but the colors were too much for me to wear often. 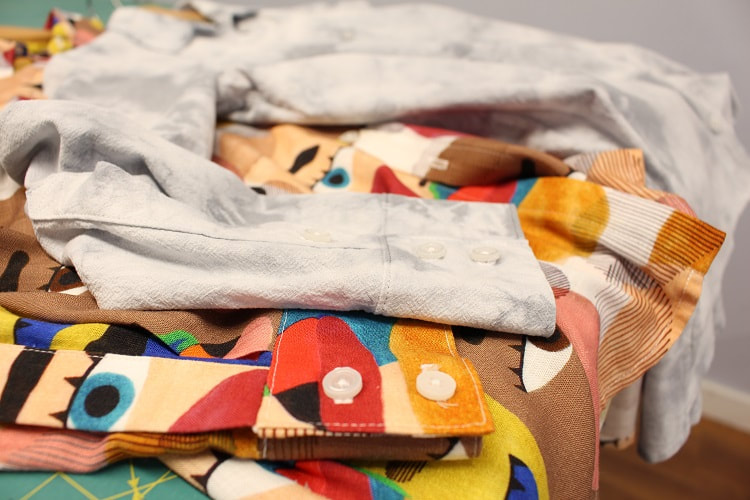 The white and grey vibes may feel familiar to you because back in October 2020, our team experimented with a White Sweatshirt Dye Project. My sweater was inspired by rainy days in Vancouver. That sweater was very time consuming to achieve the ombre dye. As I mentioned earlier, I am all about chucking this tailored shirt into a dye bath. So if the Rainbow Faces Tailored Shirt and the Rainy Day Sweatshirt had a baby...VOILA! I present the baby.
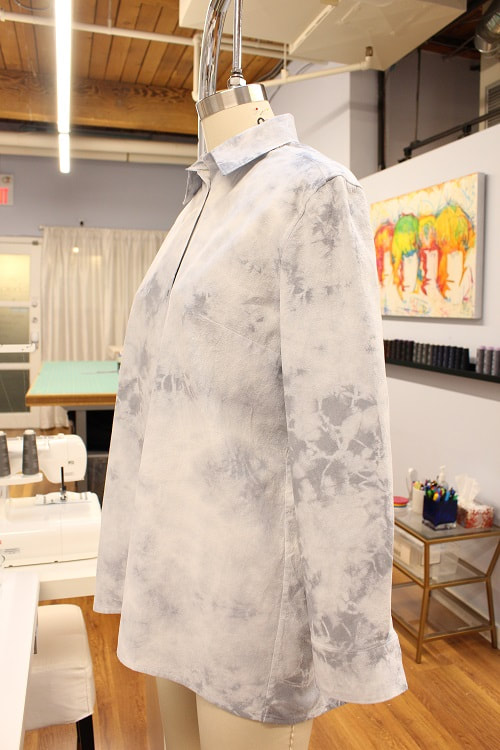
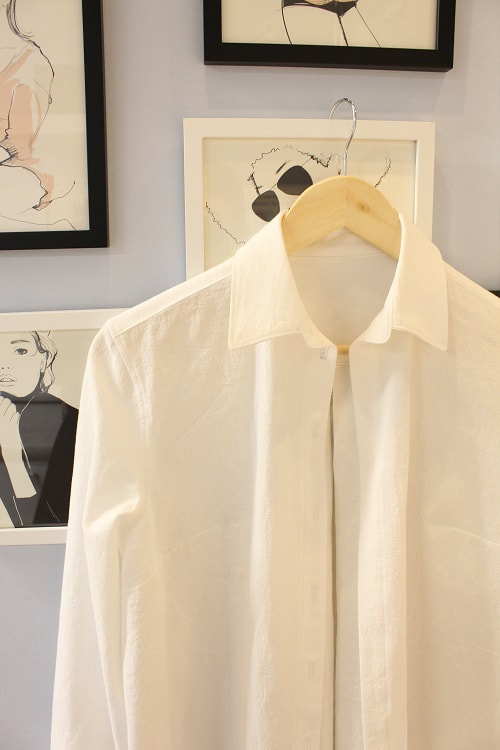
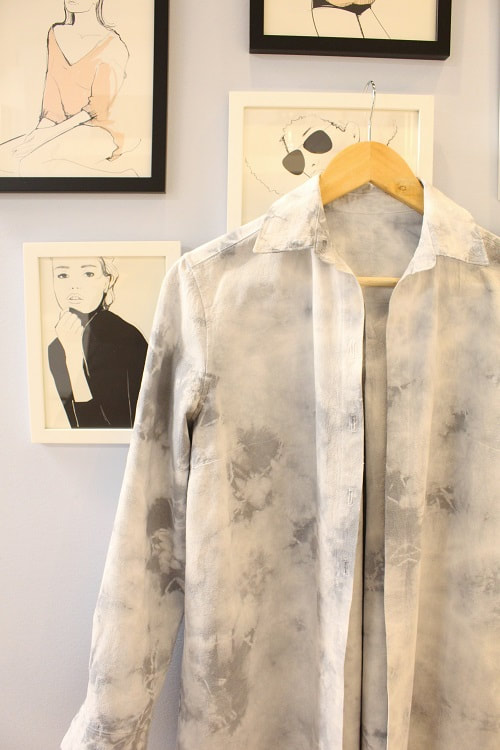
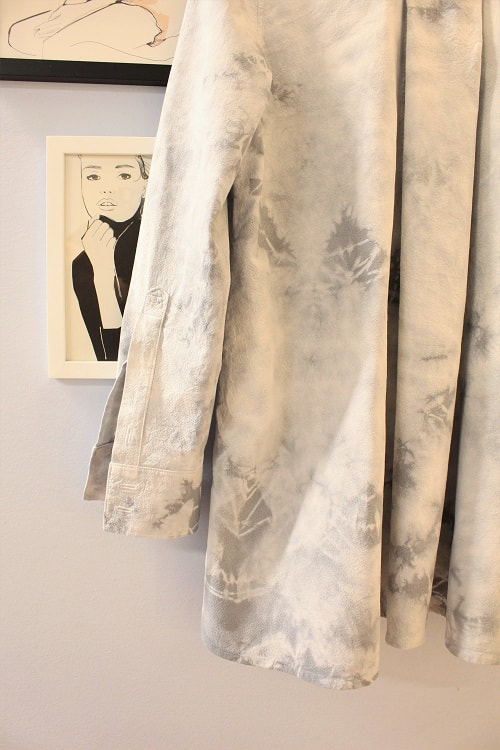
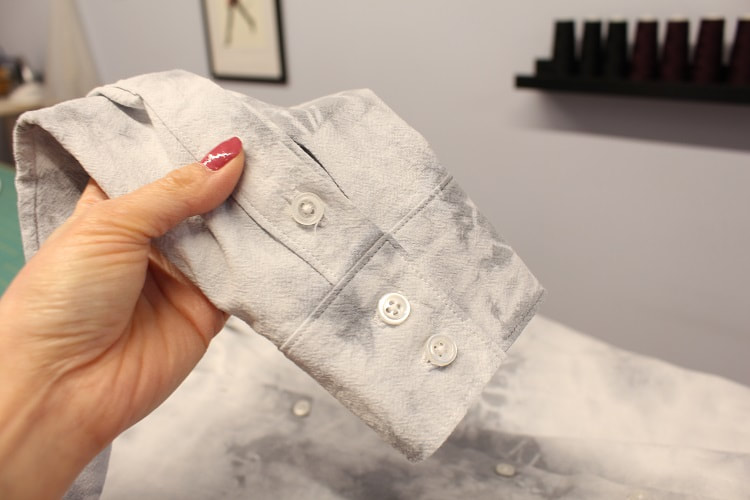
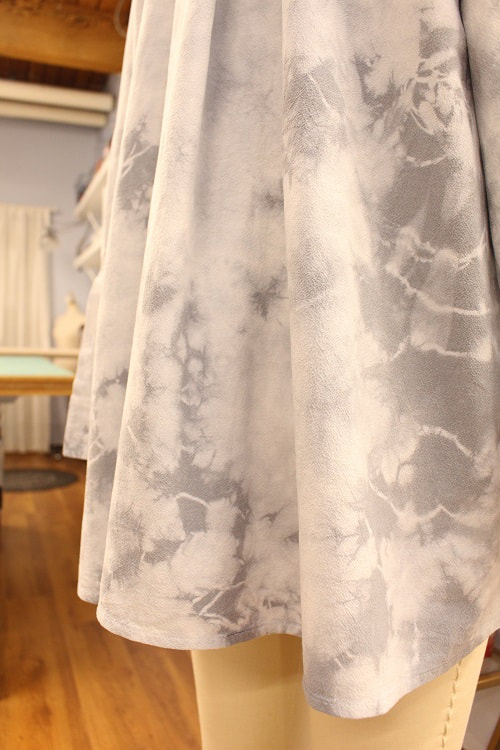
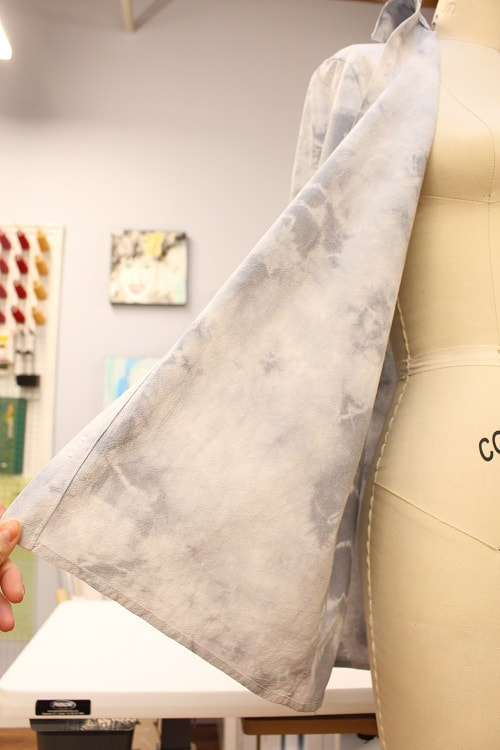
Tie-Dye ProcessMy experience with resist dyeing is limited to shibori. Shibori is the art of folding, clamping, or manipulating fabric in either a calculated or organic way to resist dye. The outcome of shibori is beautiful. Check out Ombre Slip Top Post to see the outcome of my shibori dyed slip dress. 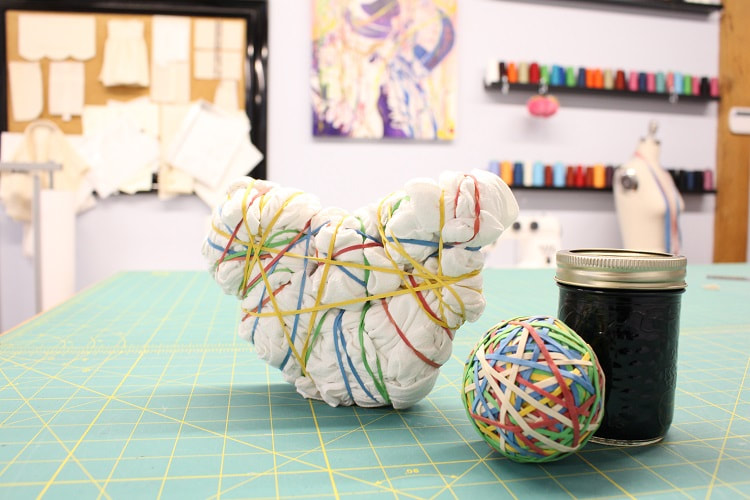 The only thing I had in the studio to create dye resistance on the fabric was a ball of elastics. So tie-dye it had to be! I had no rhyme or reason when wrapping this white tailored shirt with elastics. I started scrunching up the sleeves tightly, then slowly worked towards the middle of the garment and up to the collar. I wanted the collar to be darker if possible, so I left this area last so it could potentially have the most exposure in the dye pot. 27 elastics were used to tie this shirt. Unexpected was the heart shape created in the end. The tops of the heart were made by the sleeves being tied in. Perhaps this was a gentle reminder that beauty can be found anywhere. After approximately 1 hour in the dye pot with my black Ciba Washfast Acid Dye from Maiwa, what emerged was a very subtle tie-dye result. Here are some before and after shots for you.
Project Stats
Final Thoughts I still have one more jar of the black stock solution. I know that this particular type of dye (Ciba Washfast Acid) works best on wool and silk. So, I am thinking the next project will need to be a wool cropped coat, a silk dress, or a silk skirt. I will continue with the tie-dye technique. Let me know your thoughts below.
Want to keep up to date on how our dye projects evolve? Sign up for our Insider Newsletter.
Happy Sewing! Designed, photographed, and written by Sheila Wong Studios.
2 Comments
8/29/2023 04:30:26 am
The RTX 3080 is capable of handling demanding tasks such as 4K gaming and content creation more effectively than the RTX 3060 Ti. It also supports features like ray tracing and DLSS (Deep Learning Super Sampling) at a higher level, enhancing the visual quality and performance of compatible games.
If budget is not a concern, I would recommend going for the NVIDIA GeForce RTX 3080. The RTX 3080 is a higher-tier graphics card compared to the RTX 3060 Ti and offers significantly more performance. It has more CUDA cores, more VRAM, and a wider memory bus, which translates to better overall gaming and computing performance. Leave a Reply. |
Archives
November 2022
|


 RSS Feed
|
|
Copyright © 2024 Sheila Wong Fashion Design Studio Ltd. All rights reserved.