 My latest design was pretty time intensive. I gained a lot of new knowledge and had fun making mistakes along the way. In this post I take you through the entire journey from shopping at Fabricana to hammering in the final metal snap. I also provide you with step by steps for fraying fabric and sewing a hidden patch pocket. As usual you get tons of helpful tips for drafting and sewing. We all love videos! We filmed the entire process of creating this frayed denim jacket. Check out our YouTube video for the full Fast Forward Edition.
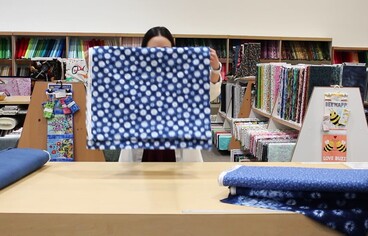
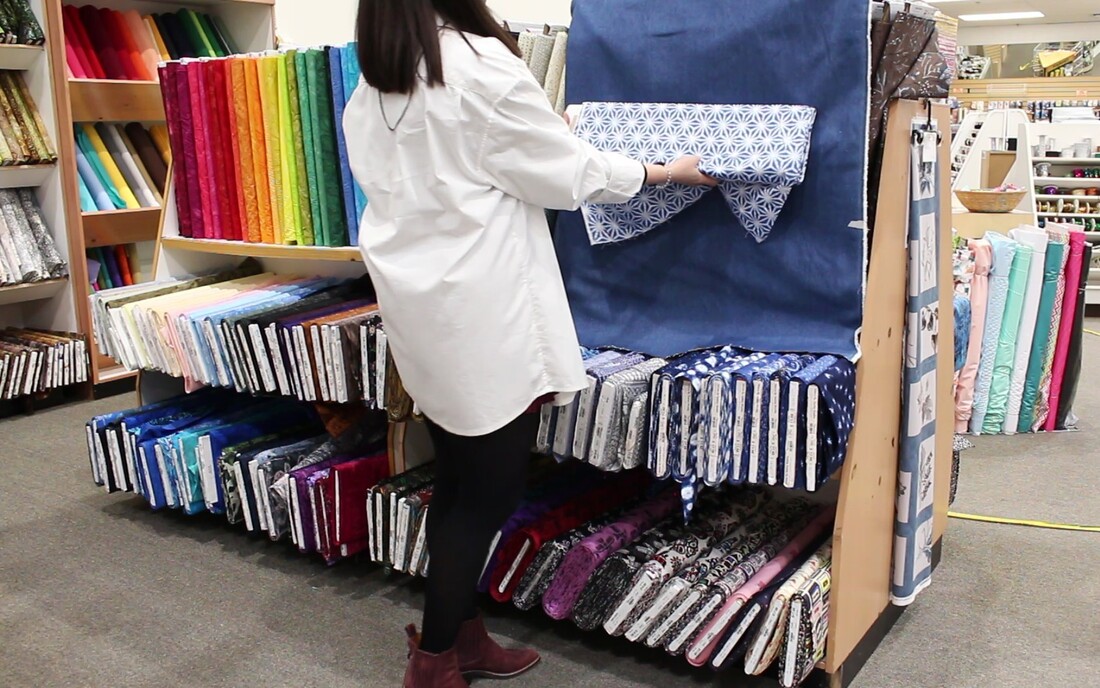
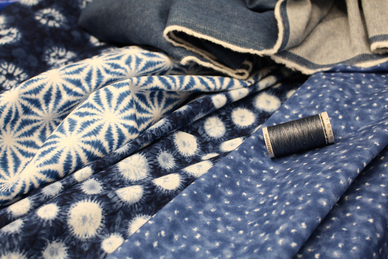
Fabric & InspirationAll fabric, thread and snaps from Fabricana. Click on below fabric links to purchase. Please note the quilting cotton prints may no longer be available. But you could take 3-5 different fabric prints in a similar color palette to create the same vibe of this lining. Fabricana carries some really fun Ruby Star Society prints that would work beautifully! I'm really digging the Stay Gold by Melody Miller series for Ruby Star Society they are selling right now.
Project Stats
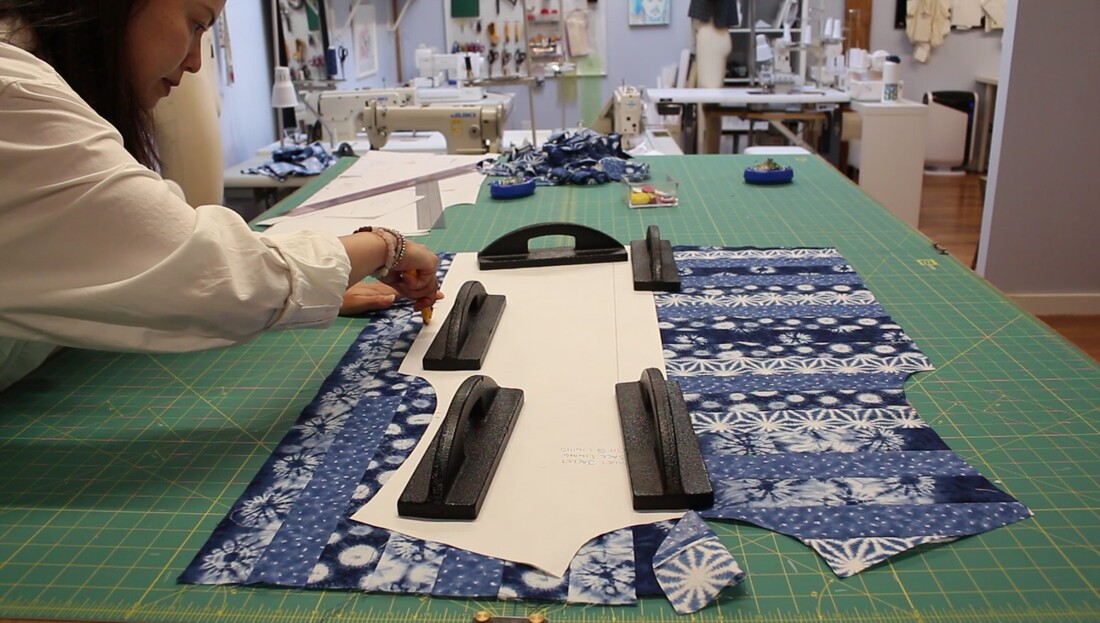
I quite often say to my clients "talk to your fabric" or "what is the fabric telling you?". It sounds crazy but if we listen closely, the fabric will dictate how it wants to be pressed, folded, draped or manipulated. I started first with the lining. The quilting cotton prints made it easy to quilt in any formation I wanted. I really wanted to re-explore subway tile quilting but on a larger scale. We did this in the past with a Valentines Heart Shaped Bag. Initially the concept for the exterior jacket had no fraying element. Just keep it simple and let the lining shine was what I was going for. But the lining was so intricate and cool, that I had to make the exterior just as interesting. I'm sure we have all been there where a design evolves so much from initial concept. Quilting Process
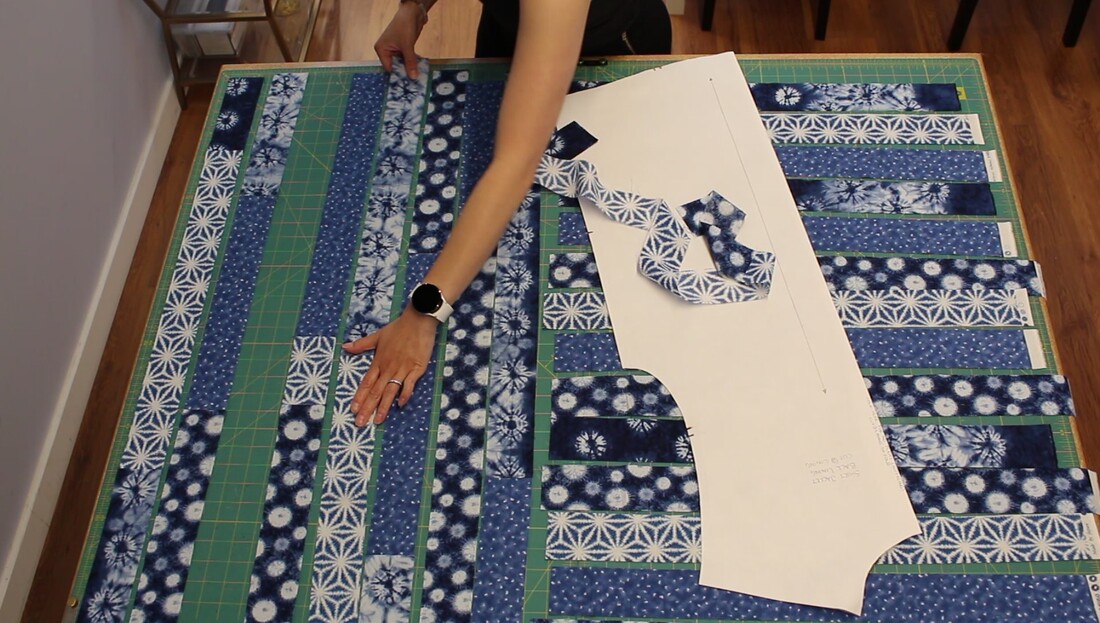
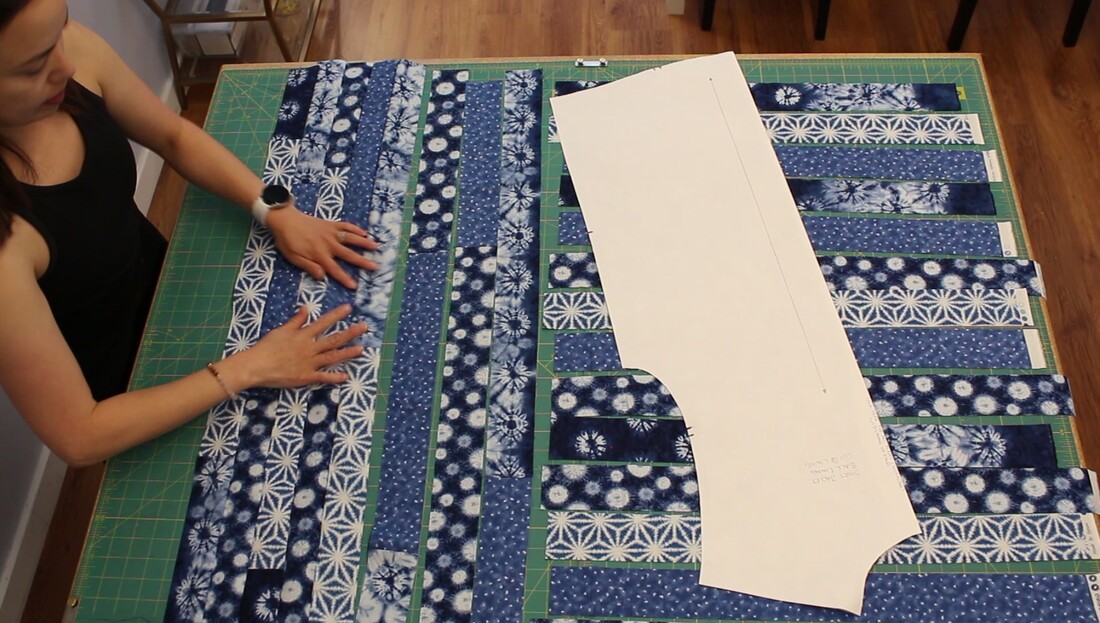
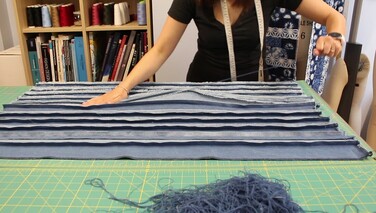
I have said it before, I am by no means a quilter. I just enjoy the visual of a "quilt" within a garment. The lining pattern pieces consisted of a BACK, FRONT x 2, UPPER SLEEVE x 2, LOWER SLEEVE x 2, and POCKET BAG x 4. I first mapped out which pieces I wanted the subway tiles to run vertically or horizontally. I started cutting out many many long strips of fabric. Some on grain and some cross grain (read on below why this is important under tips). I then just started sewing strips together with no particular order. I let the fabric speak to me! I ended up creating an asymmetrical look to the tiles which I love. 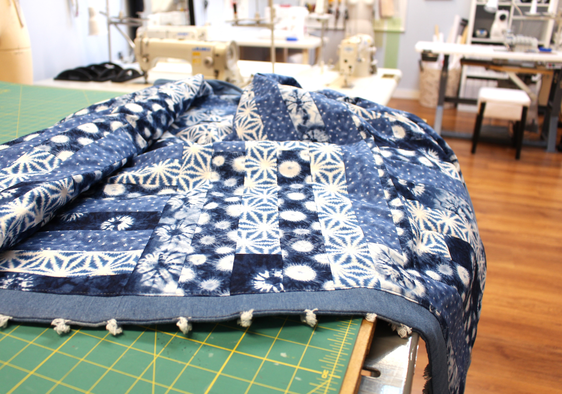 Sewing up the lining of this jacket took up the majority of hours on this project. My guess is between 18-22 hrs. It involved cutting out strips, sewing strips, pressing each seam, cutting out each lining pattern piece, and securing edges. 150 strips in the end. Here are a few things I learn during this process I would love to pass an to you. Subway Tile Quilting Tips
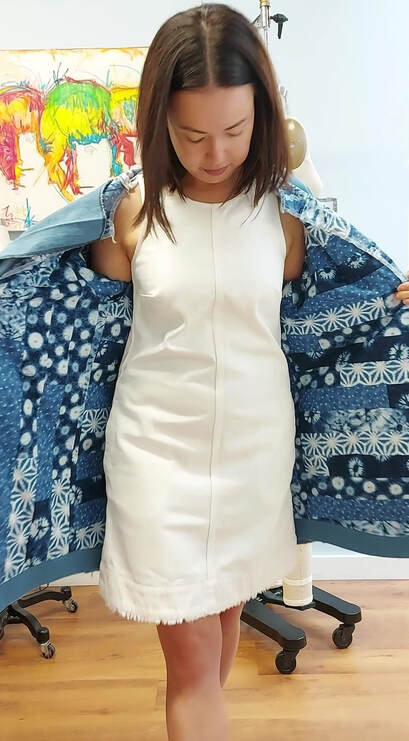
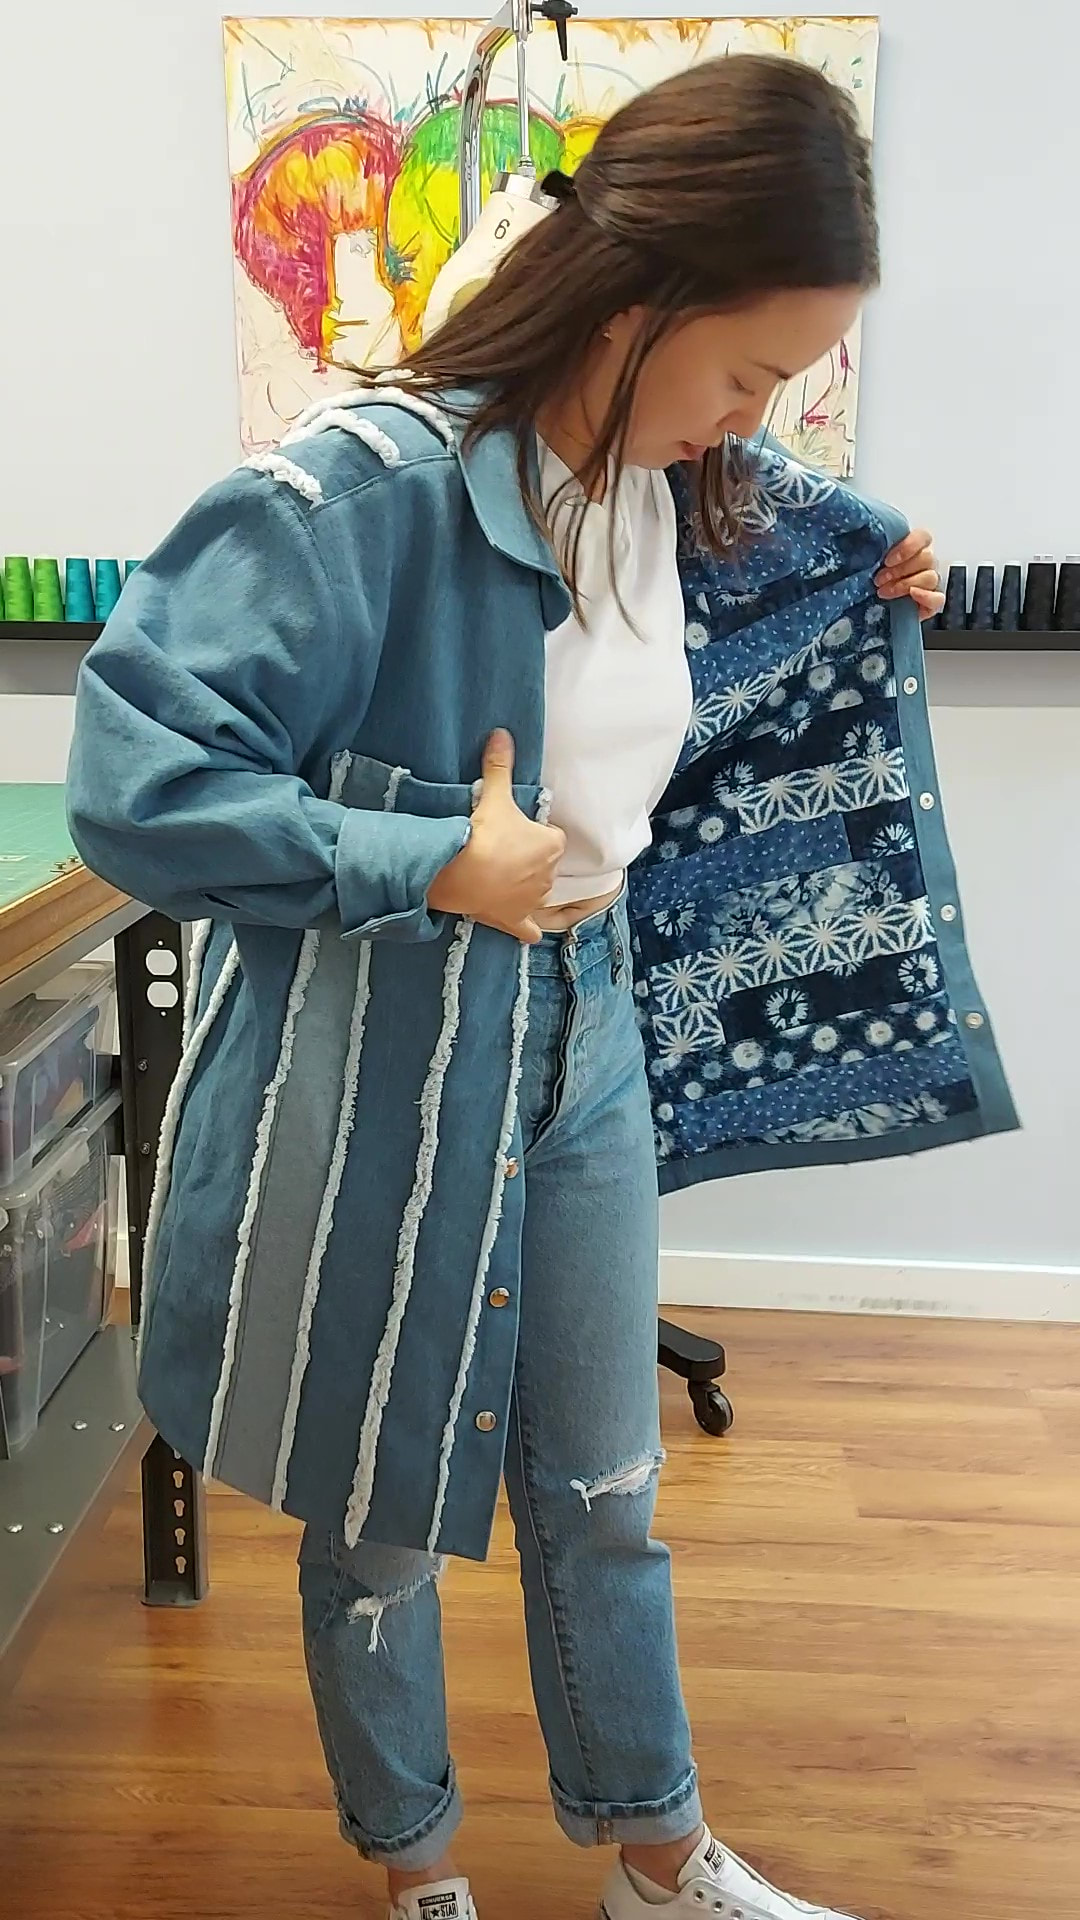
For more quilting tips check out our Quilted Heart Bag blog post. I couldn't resist trying on the layers of the jacket before them came together. Anyone else give in to this?
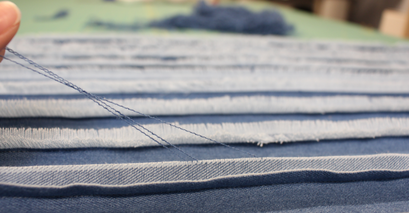
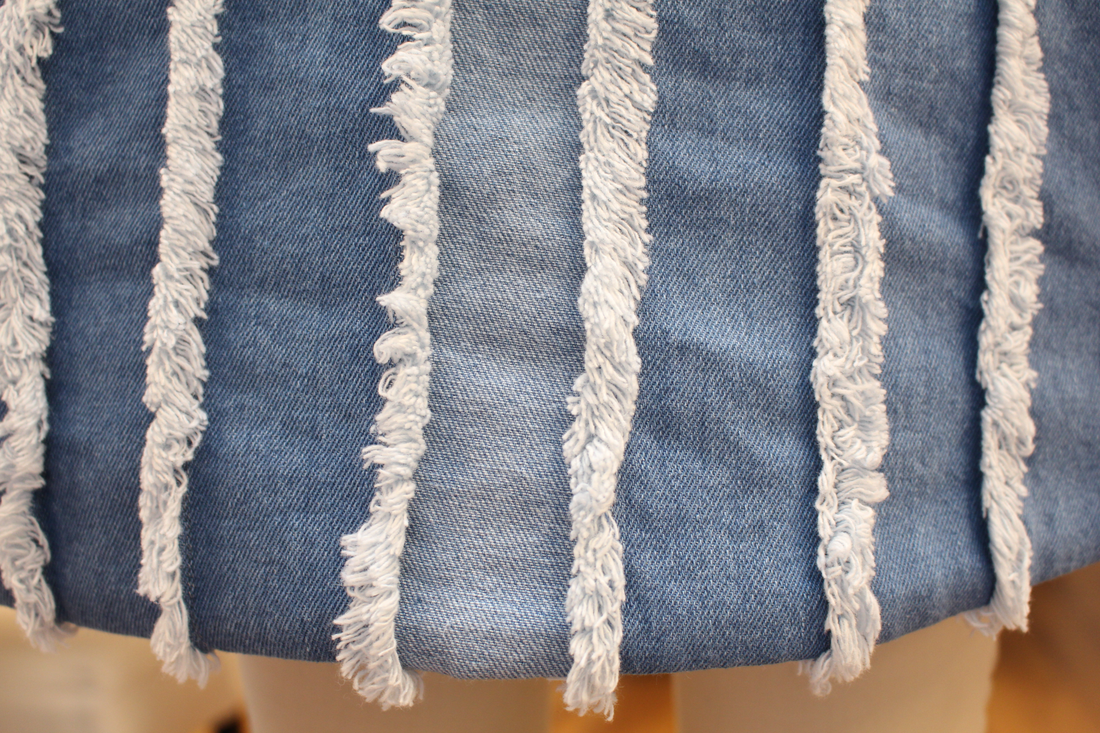
Fraying Process
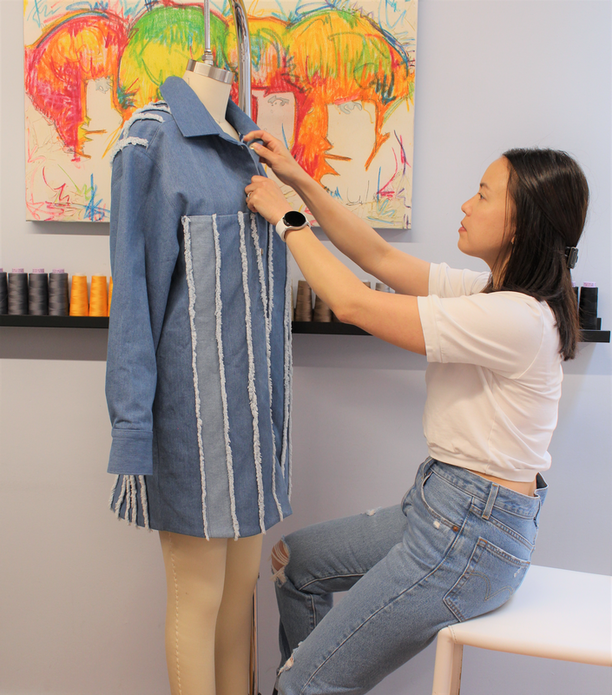
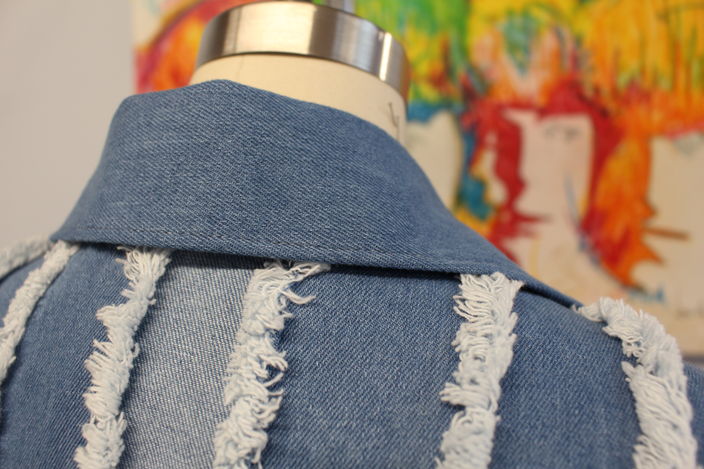
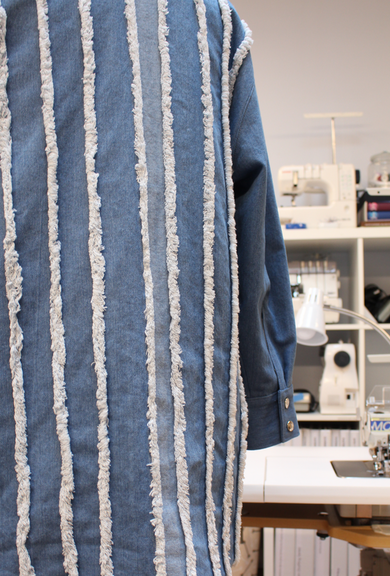
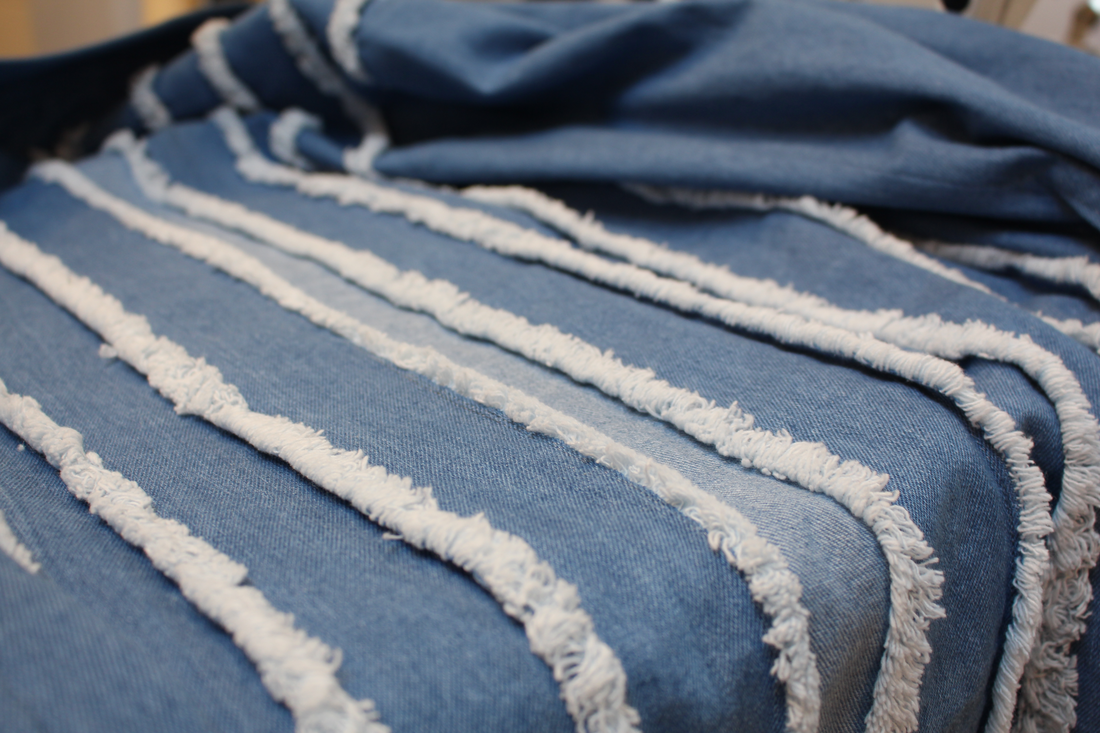
This was my first time intentionally fraying lines into a design. I made so many mistakes, but learned so much that made me wanting to make more designs with frayed seams. As I mentioned earlier, I also had no intention of creating any fabric manipulation to the denim but the lining looked so nice that the denim needed its own special treatment.
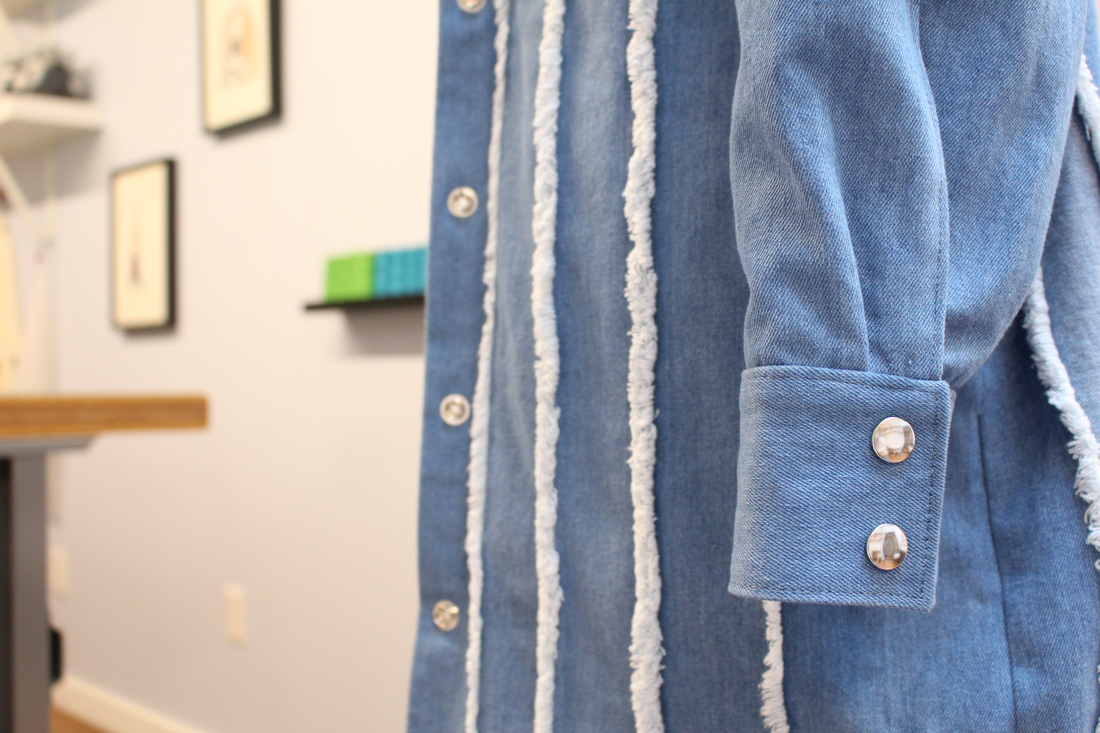
The front pocket panels and the entire back of the jacket had the vertical frayed edges. I took these steps to make it happen. I'm pretty proud of the outcome and look forward to applying this technique again. Step by Step Fraying Denim
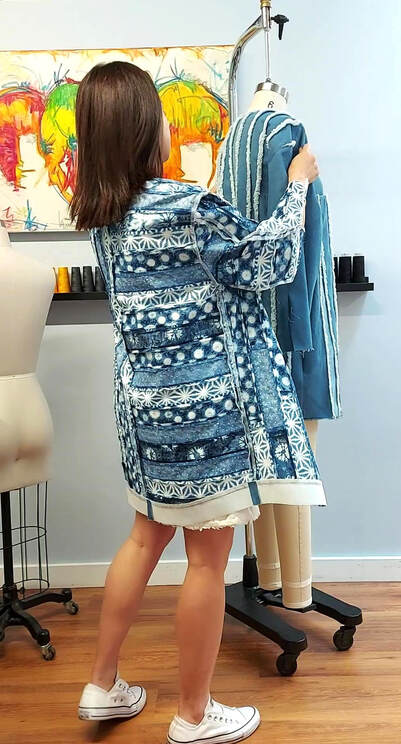
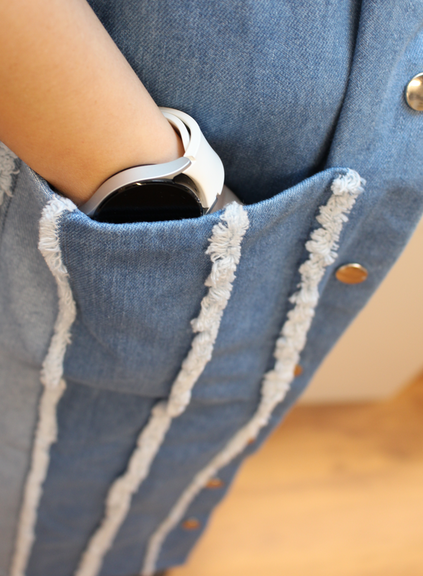
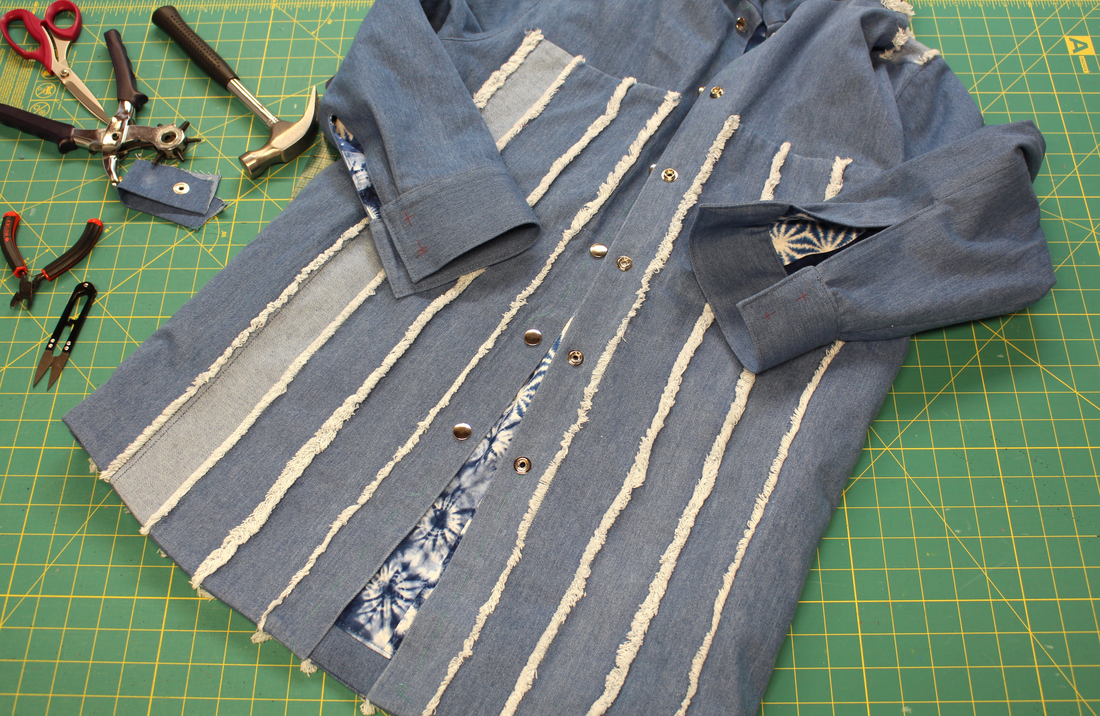
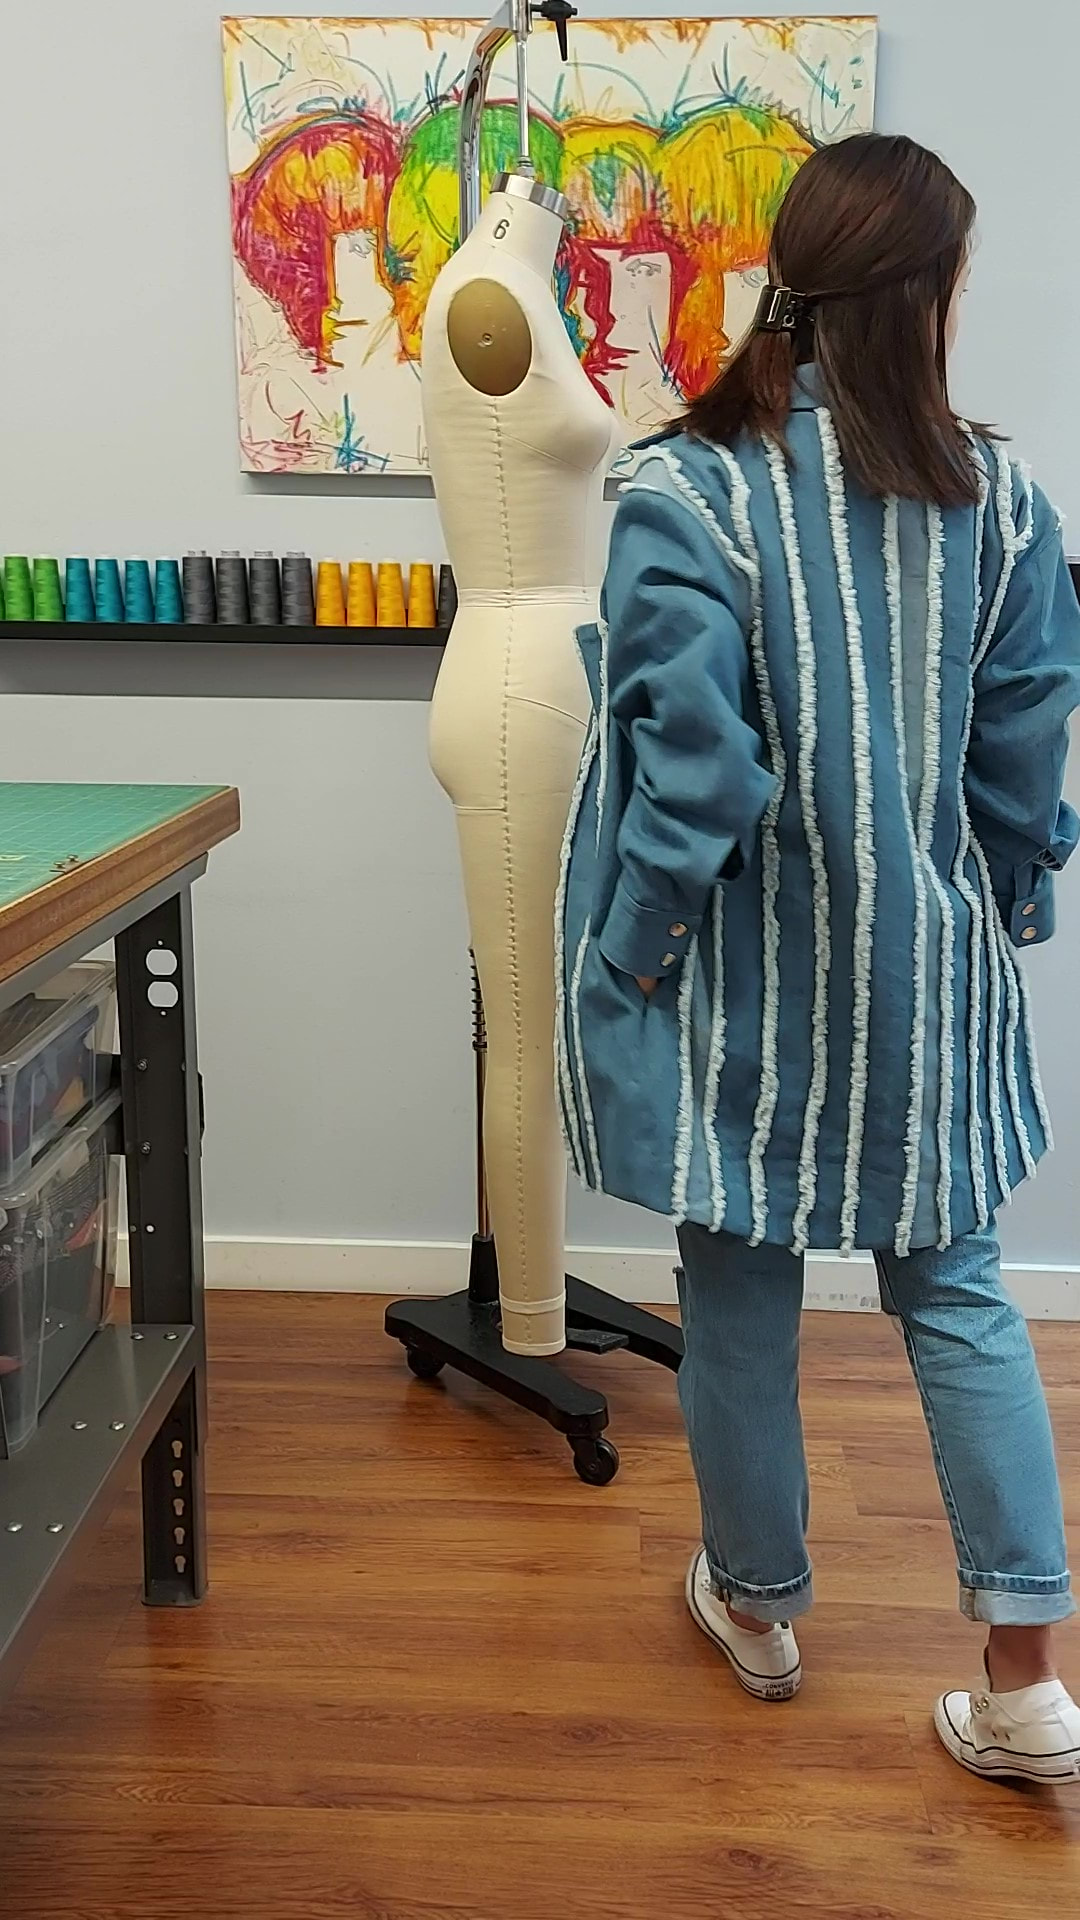
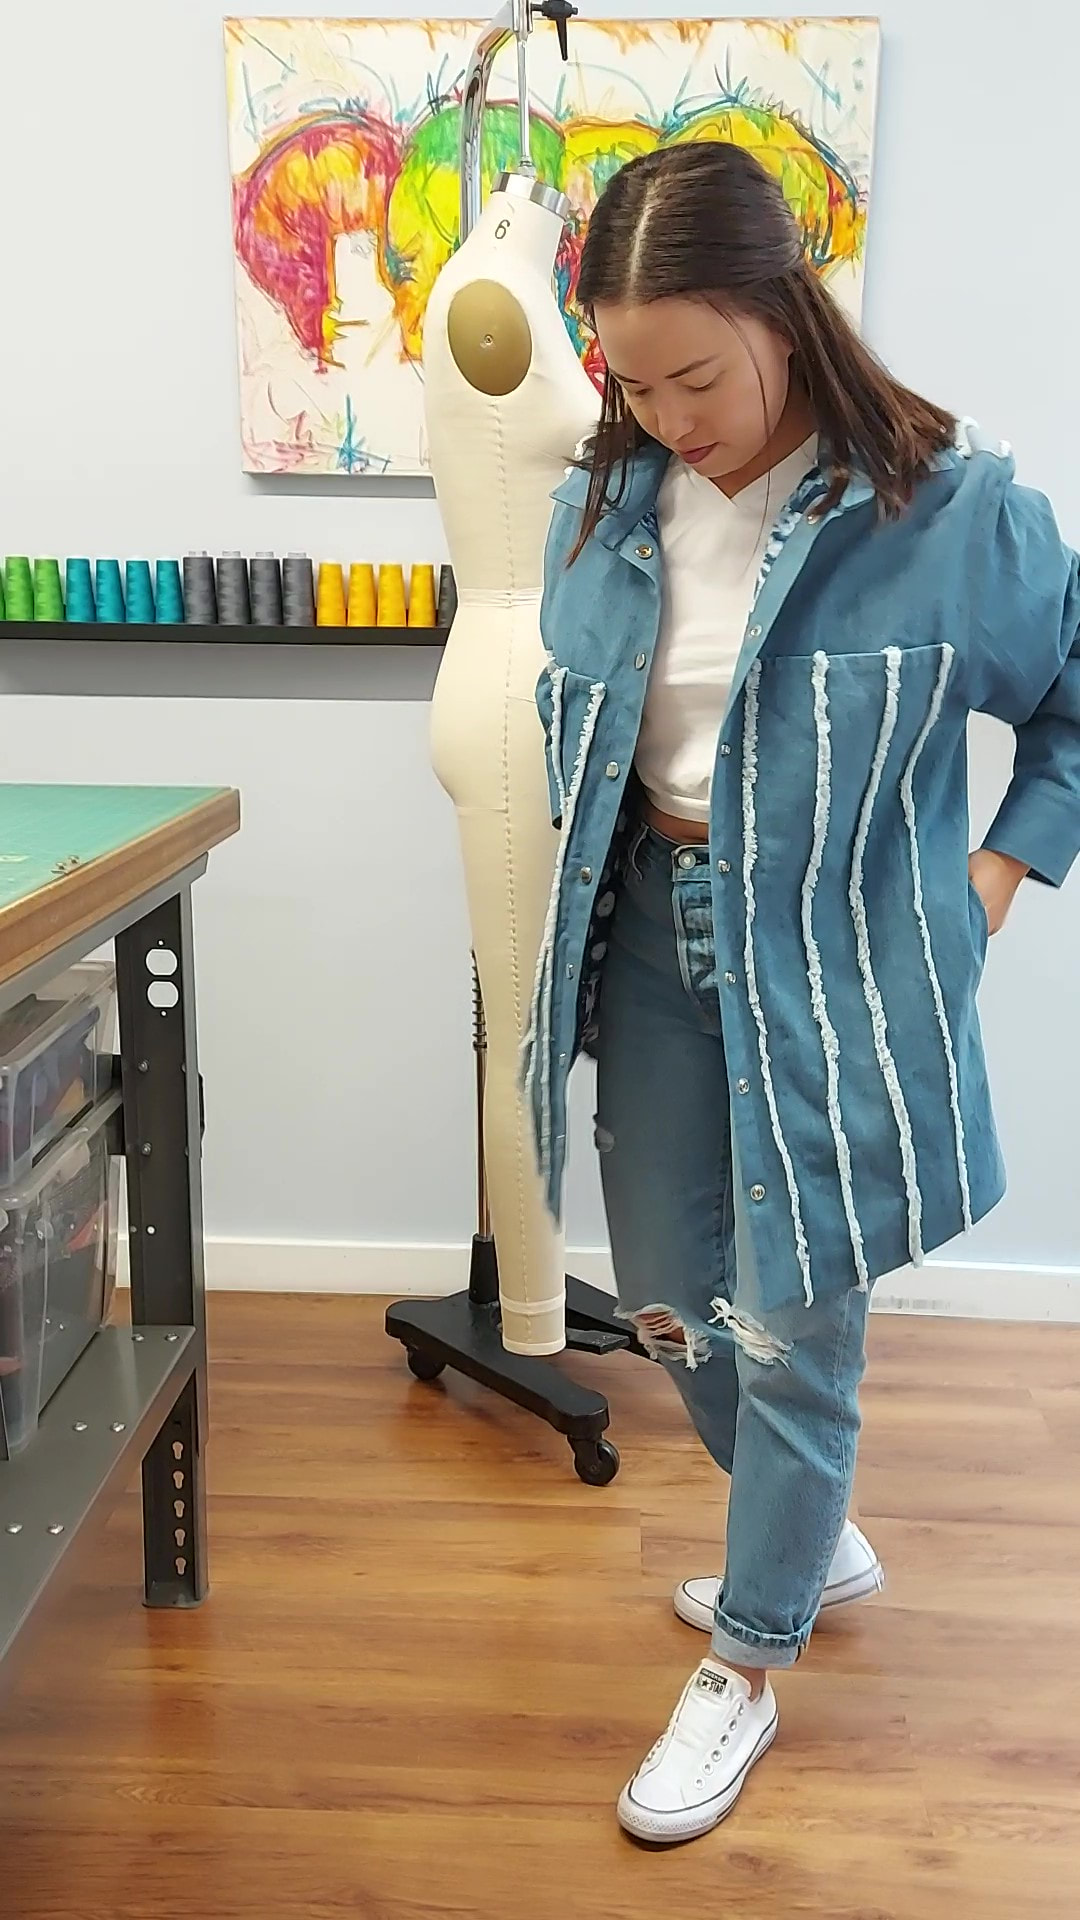
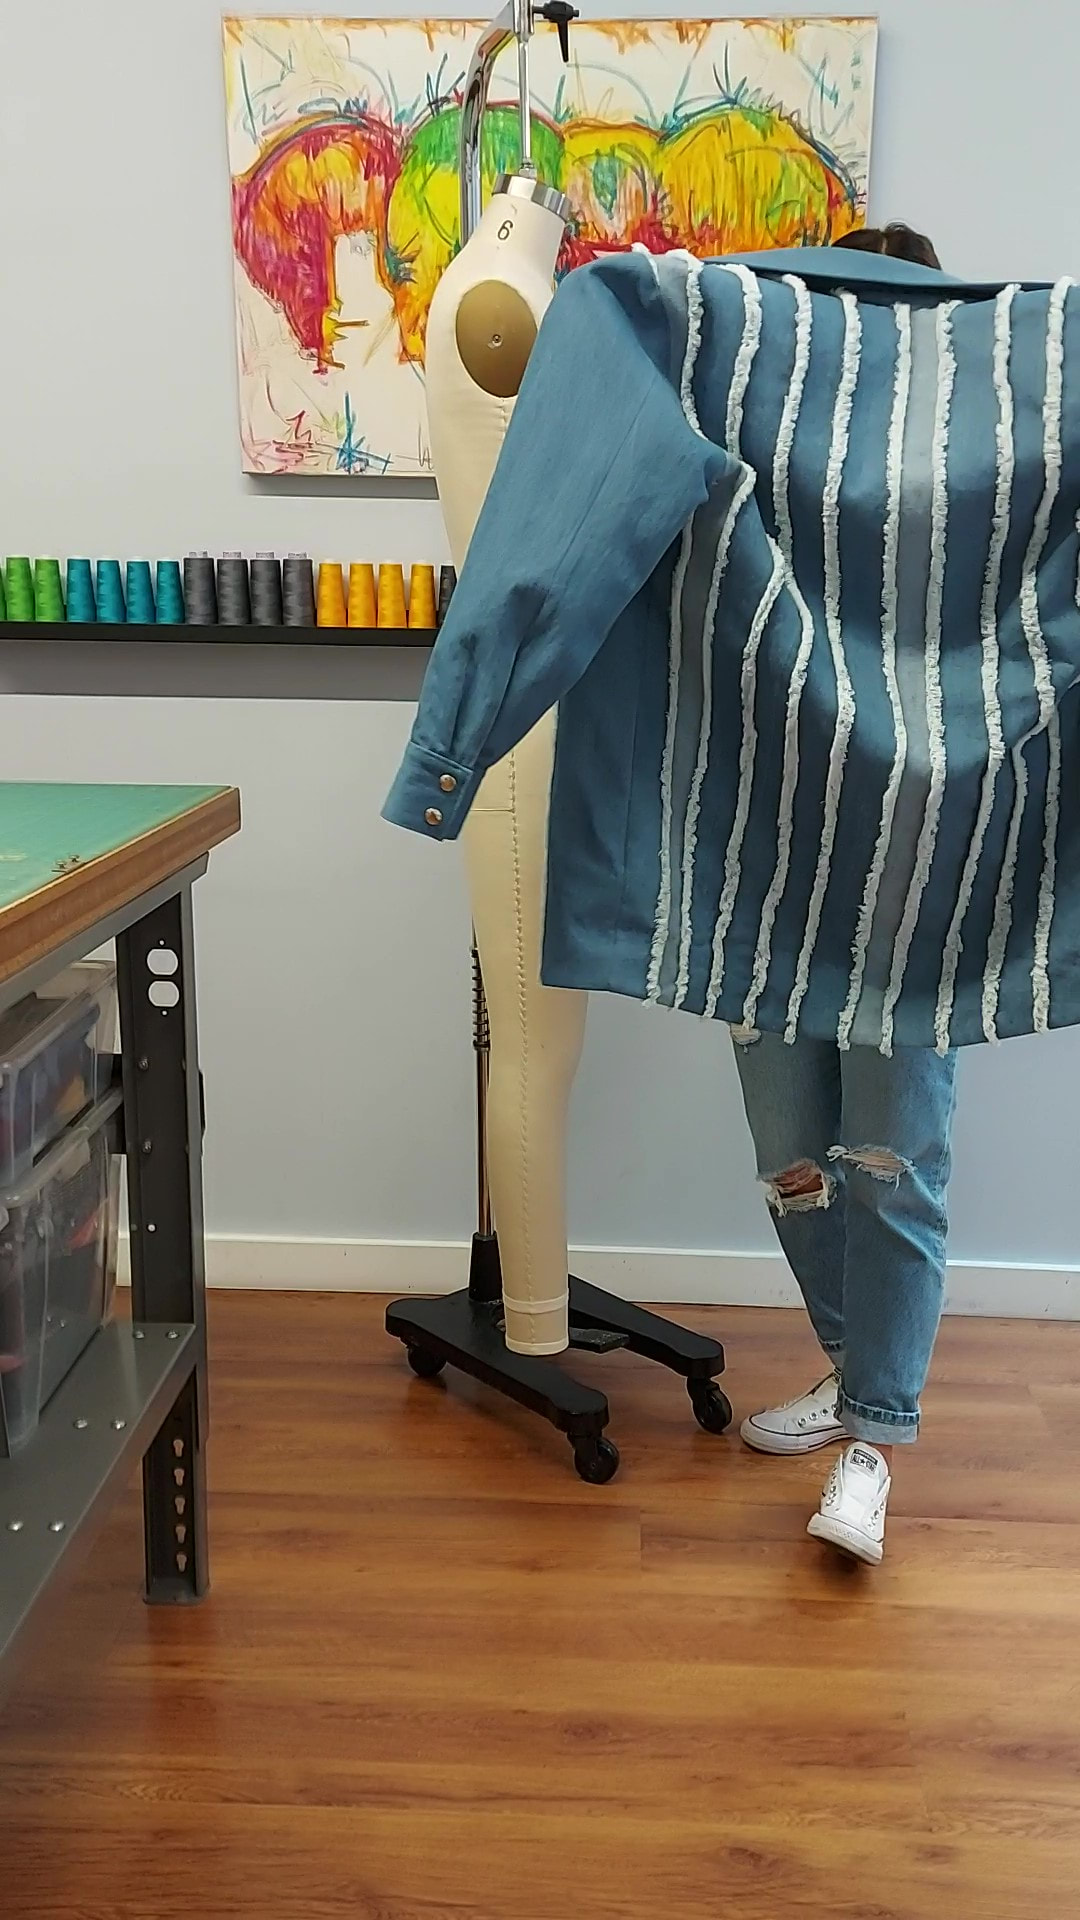
Design ElementsThe quilted lining and the hand frayed edges of the denim are major design elements in this jacket. But elements such as pockets, metal snap closures, topstitching and a hanger hook are so useful. Read on about the unique approach I took to some and things I learned along the way. Pockets This jacket has four not so obvious pockets. Two deep in-seam pockets along the side seams and two patch style pockets at the front chest. I took more of a non traditional approach to the patch pockets. I wanted frayed vertical lines to be present in the front but not the full shoulder to hem length, and I did not want a pocket to interfere or lay on top of the frayed edges. This pocket consists of two major pattern pieces- EXTERIOR POCKET PANEL and a HIDDEN PATCH POCKET. If you want to create a hidden pocket like I did, here is a step by step.
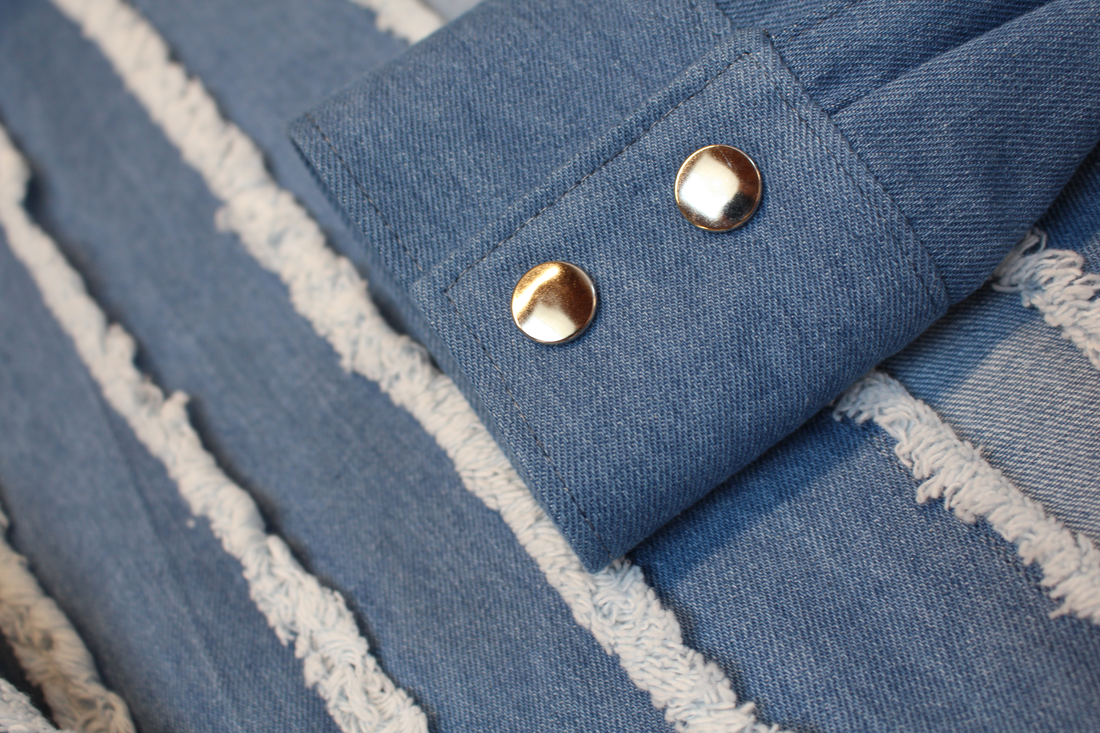
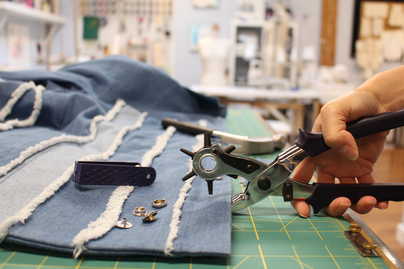
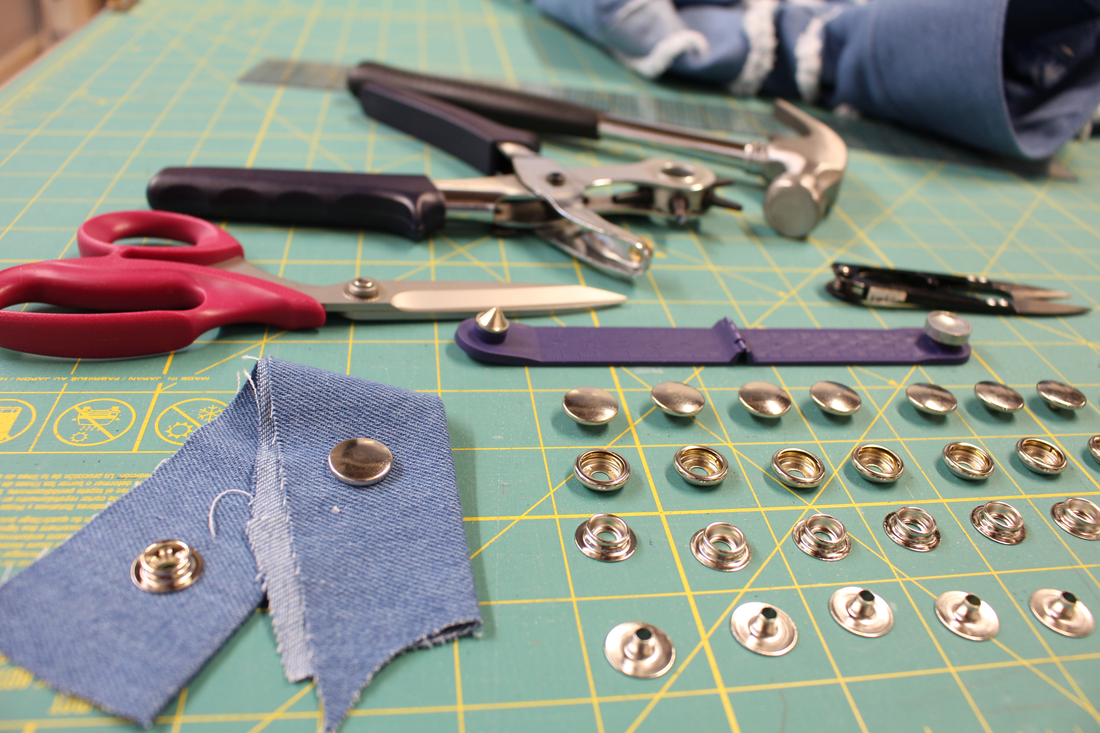
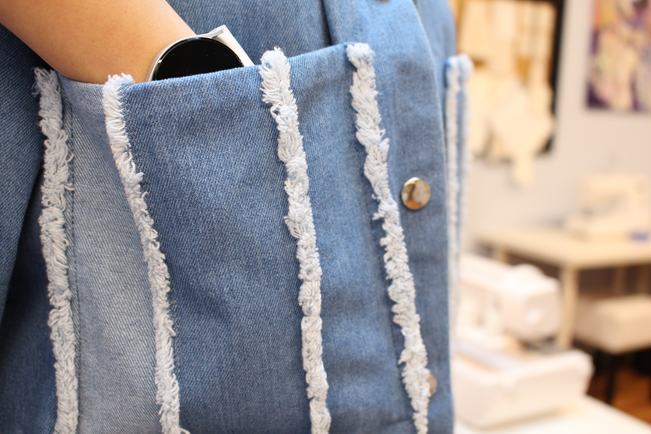 Metal Snap Closures In my opinion, metal hardware like snaps are suited for denim over traditional buttons. I initially had darker colored snaps. But as I have learned, designs evolve and it is best to go with it. The frayed edges of the denim seams needed a lighter colored snap to balance the white of the fray. Honestly, if there was a way to make invisible closures for this jacket that would have been my preference. I wanted the frayed edges to be the star. I could experiment with magnets, but I am afraid of how the laundering process would effect the fabric.
Tips for Installing Metal Snaps
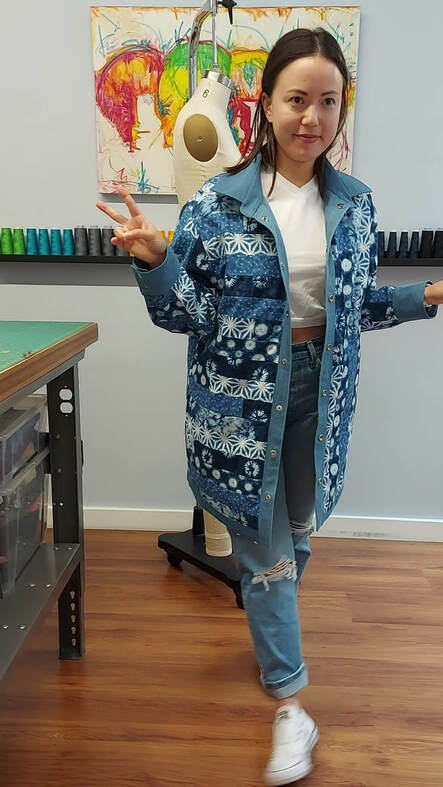
Top Stitching Super underrated element in most garments. Top stitching makes garment seams sit flat, provides extra stability, allows layers to launder easily and looks damn good when done well. I've made this jacket in the past, and the hem was always top stitched. I proceeded to top stitch this hem as well, but took it out the same day. It interfered with the vertical lines made by the frayed edges. A lesson that you don't always need to follow traditional rules. 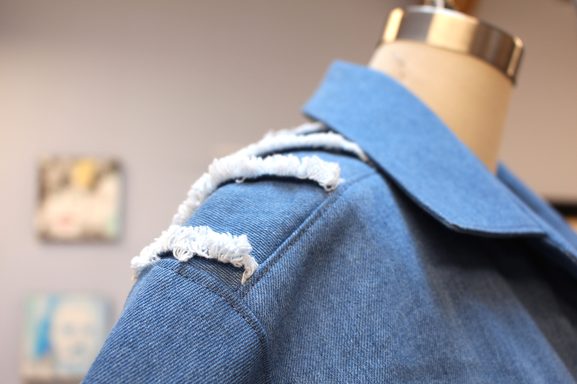 Hanger Hook Hand downs the most useful element in the jacket. Hooks are not in enough jackets. I am making it my mission to put them in all designs going forward. The only issue is if I want to make this a fully reversible jacket in the future, how can I incorporate a hook? Let me know in the comments if you have any ideas please. 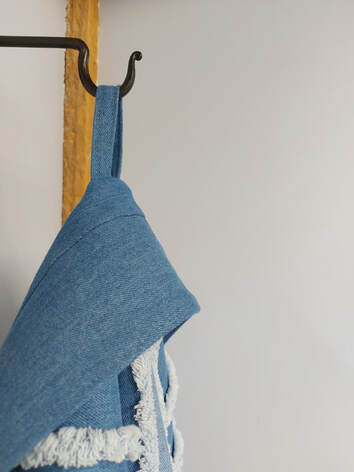 Trying on the JacketI absolutely love the weight of this jacket. It feels heavy without being weighed down. I attribute that to the many many seams involved in the creation of it. This was also my first time (that I can recall) creating 3D with the fabric. It is not going to be my last. I already have another jacket cut in a darker denim color. The fraying I played around with vertical and horizontal lines and not lining! I will share that jacket soon.
I know we are all wondering what the jacket would look like inside out right?! So yup, I tried it on that way out of curiosity. It is nice with exception of the snaps being backwards and the hook being exposed. I think in the future I will try this design again, but with the intention of it being fully reversible. Let me know in the comments if you would wear this inside out.
1 Comment
Annette Adam
11/22/2022 06:21:03 pm
Impressive combination, quilting and fraying material, layering gives a nice result Leave a Reply. |
Archives
November 2022
|
 RSS Feed
|
|
Copyright © 2024 Sheila Wong Fashion Design Studio Ltd. All rights reserved.