|
Welcome to the latest installment of Sheila-Wong-Sew-a-Long! Har Har, see what we did there? This tutorial is a step by step guide to creating a 3D zip organizer bag in ANY dimension you desire. We will provide the detailed drafting and construction steps below. 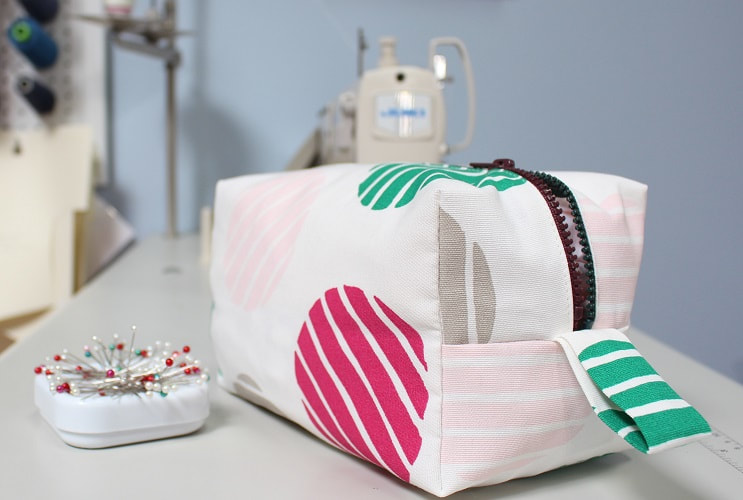 Materials
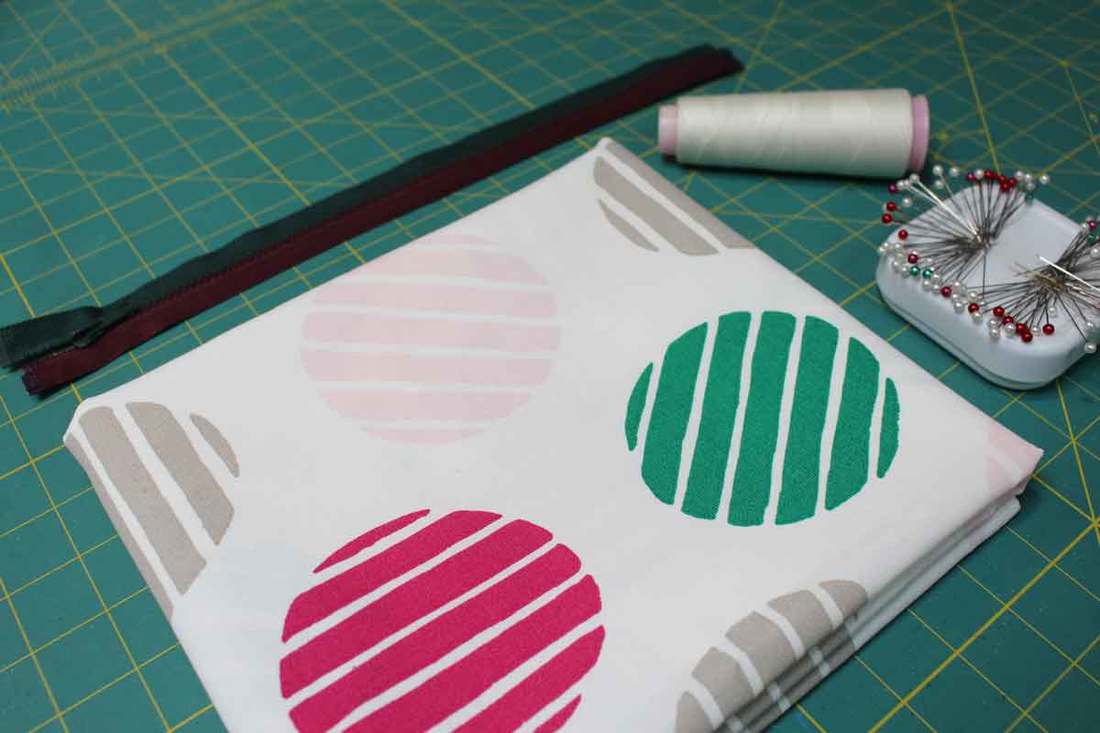 Step 1Measure. Decide on the height, width and length you would like your final bag to be. 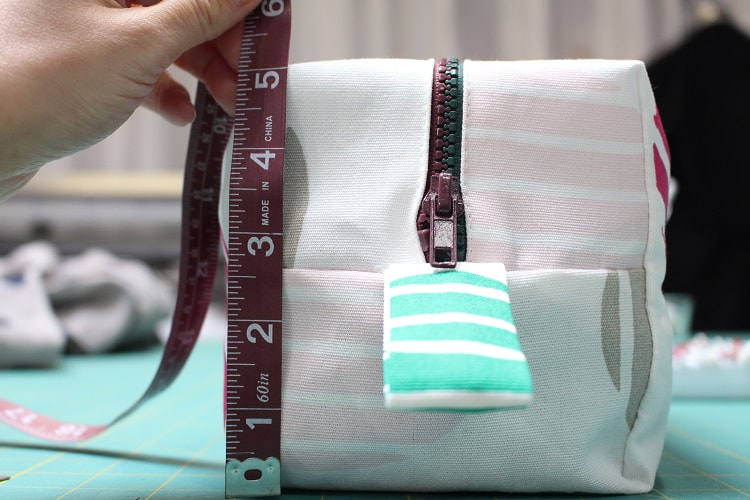 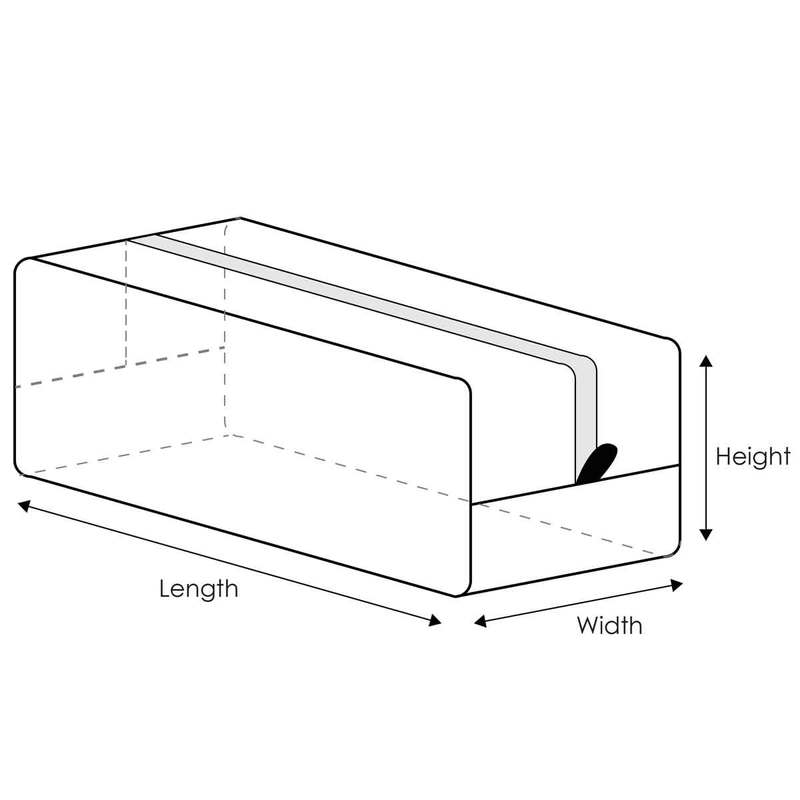 Step 2Create a pattern using the desired dimensions.  Step 3Mark the important landmarks with notches. The interior circle notch is marked in from each letter at a ‘half of width’ measurement. Add a ½” seam allowance around the entire pattern. Label and add the grain-line. 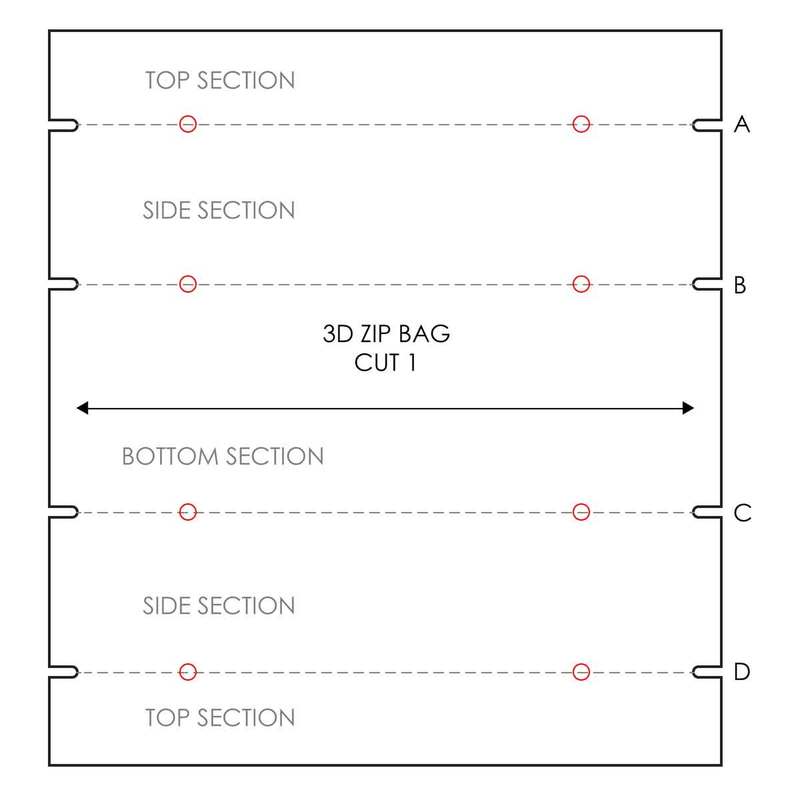 Step 4Place the pattern on grain. Pin, cut and mark all notches. 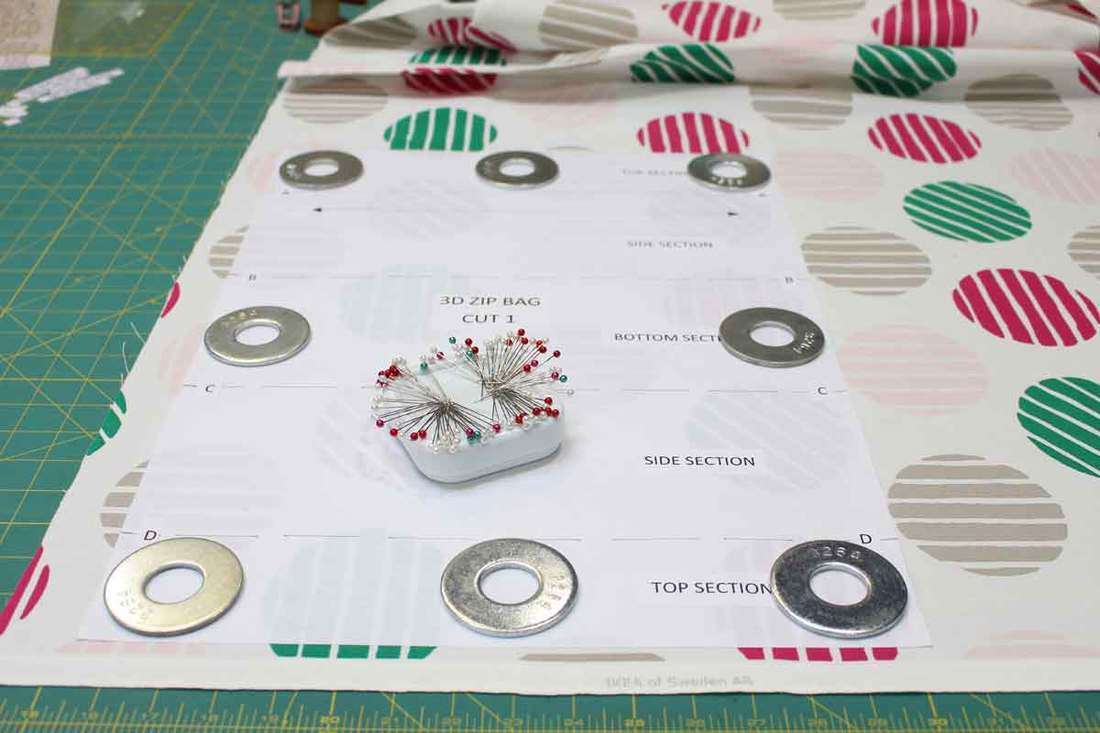 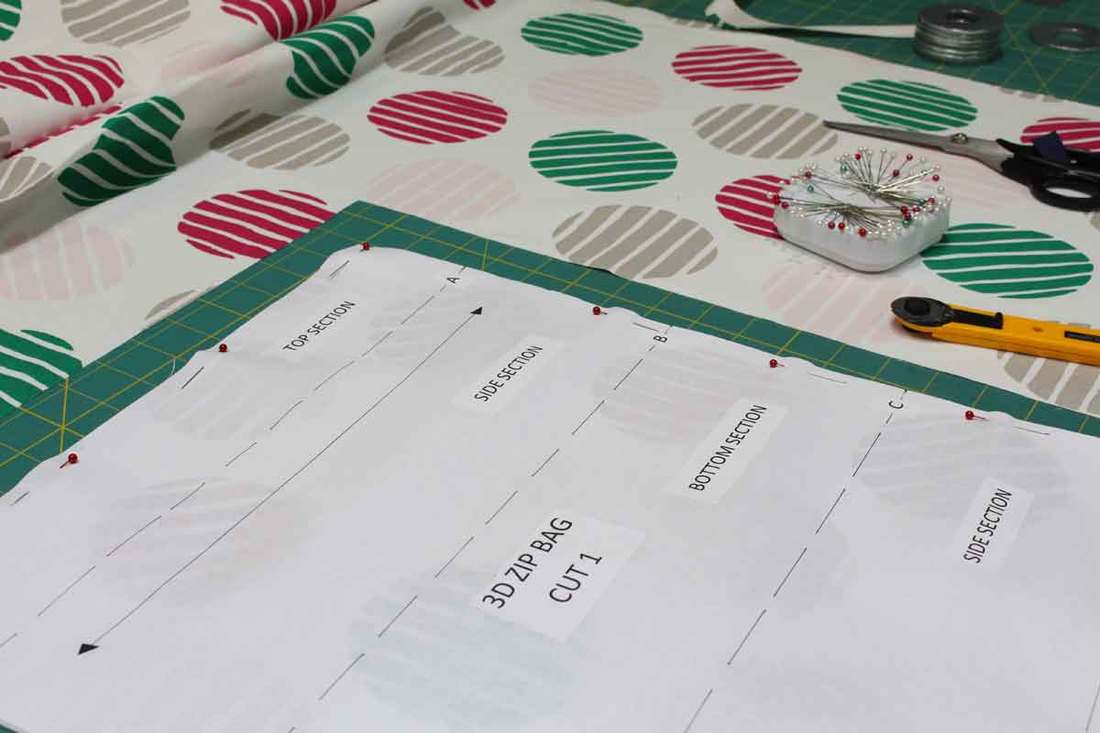 Step 5Over-lock the raw edges of entire piece. Use a zig-zag stitch if you do not have an over-lock machine. 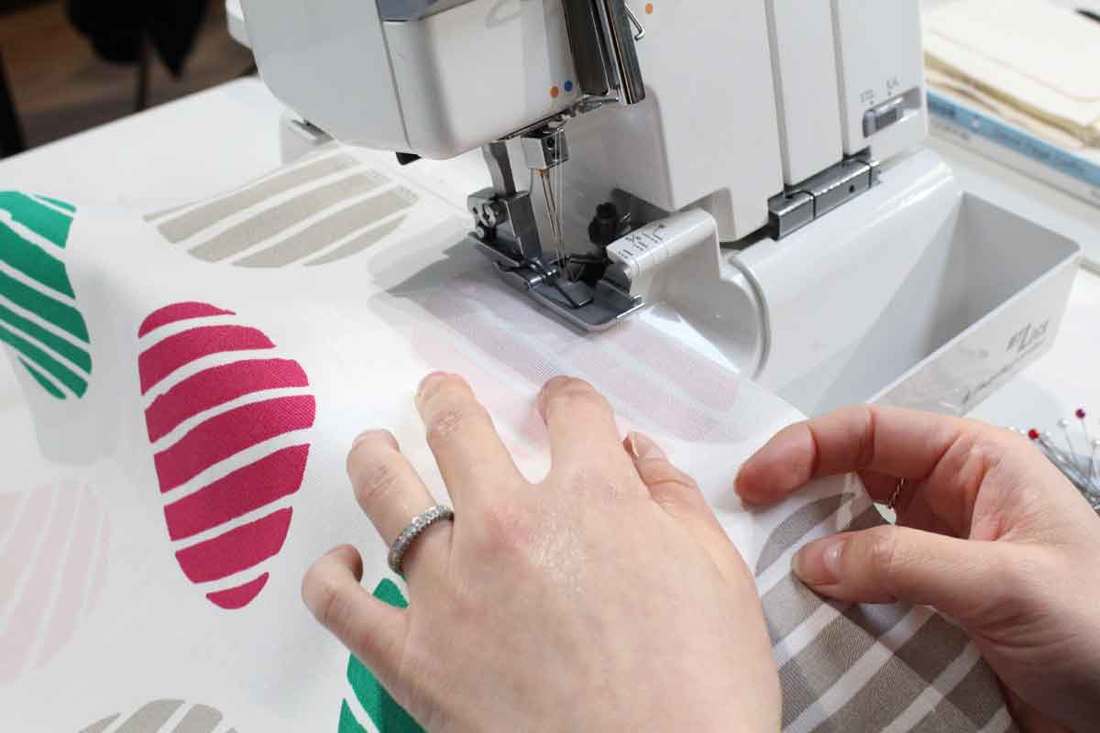 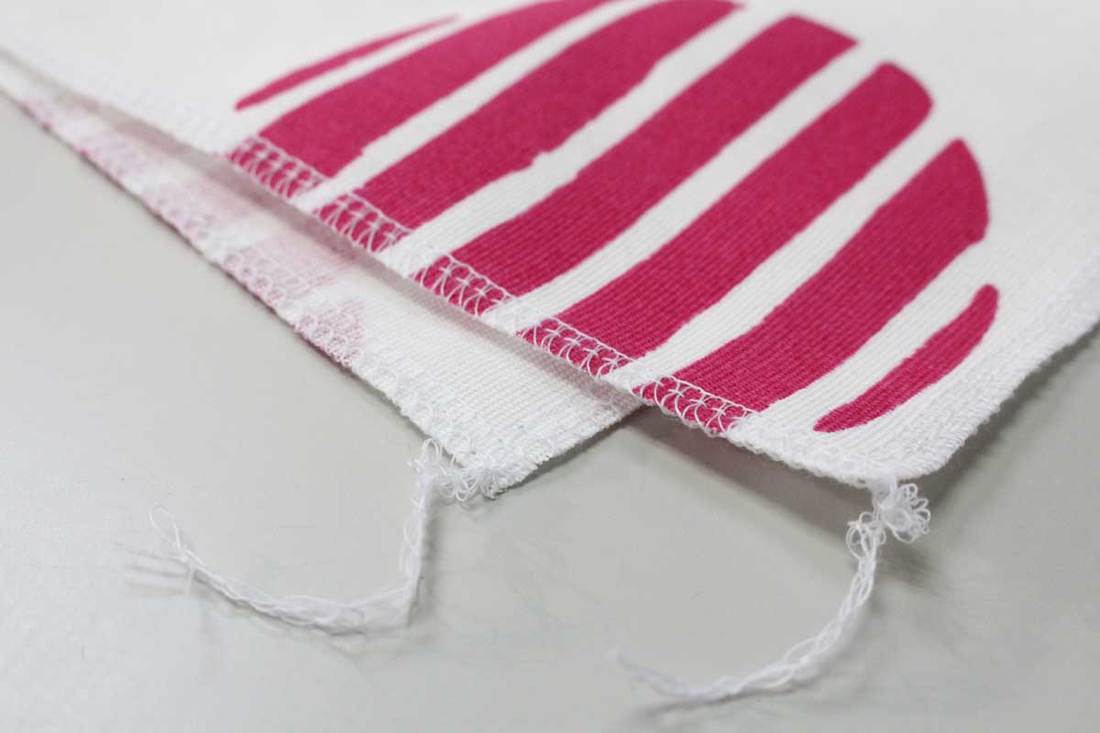 Step 6Change the sewing machine presser foot to a zipper foot. Lay one side of the zipper tape facing down on the right side of the shorter edge of the fabric. Pin and stitch at ¼” seam allowance. Repeat on opposite side of zipper. 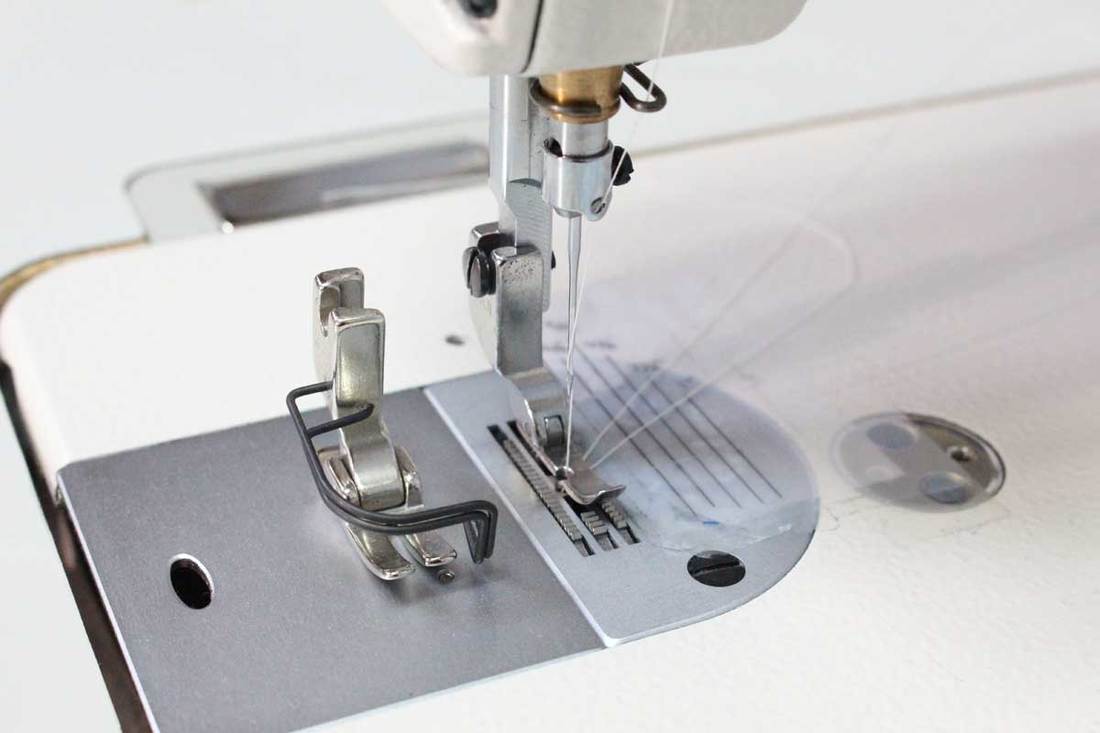 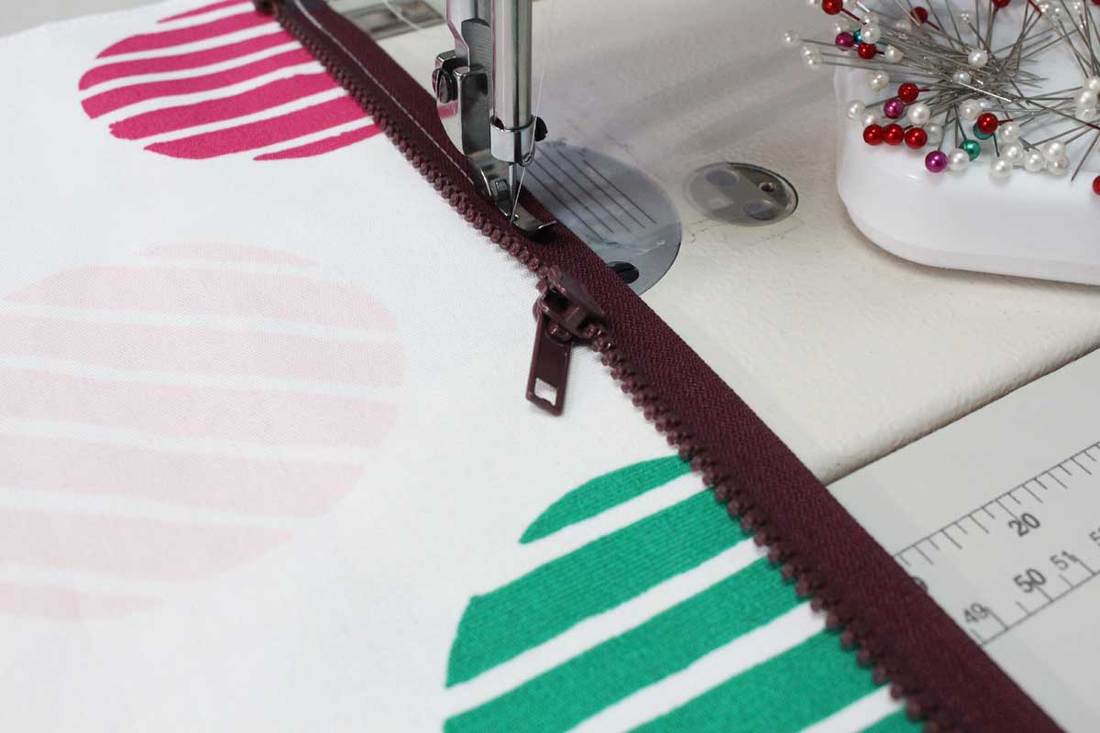 Step 7Press fabric back to create a fold on the right side of the fabric along the zipper coils. Leave sufficient space for the slider to zip freely past fold of fabric. 1/16” to 1/8” space works well. 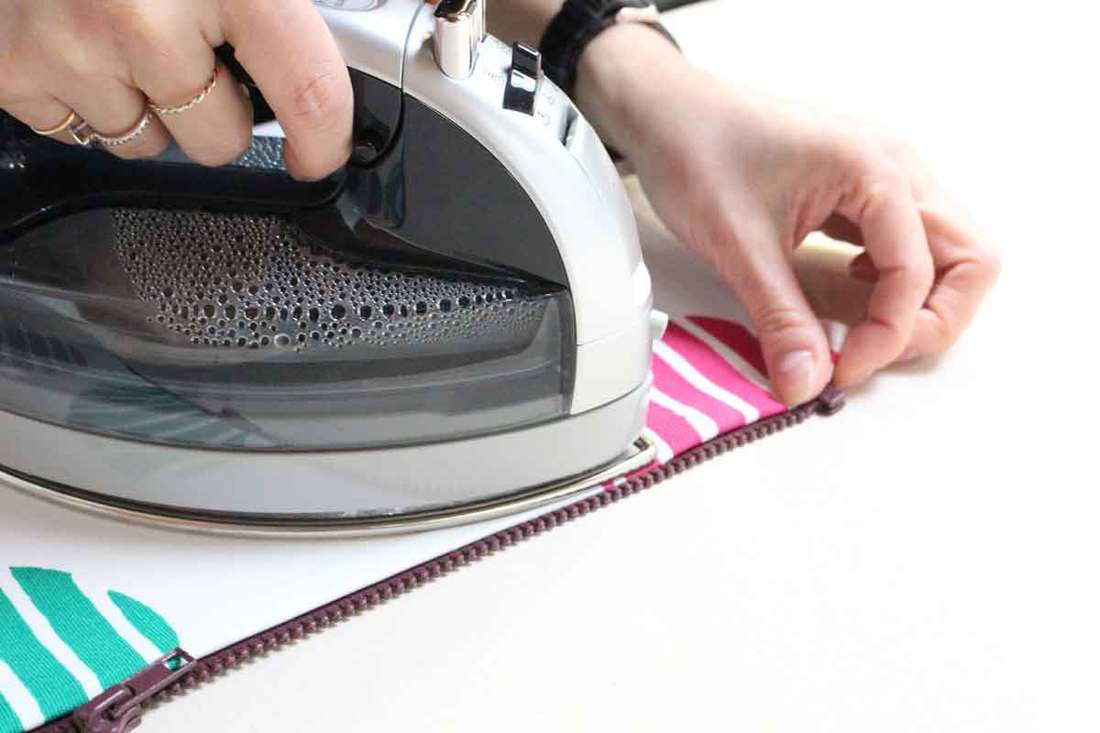 Step 8Edge stitch the pressed seam at 1/16” from folded edge. 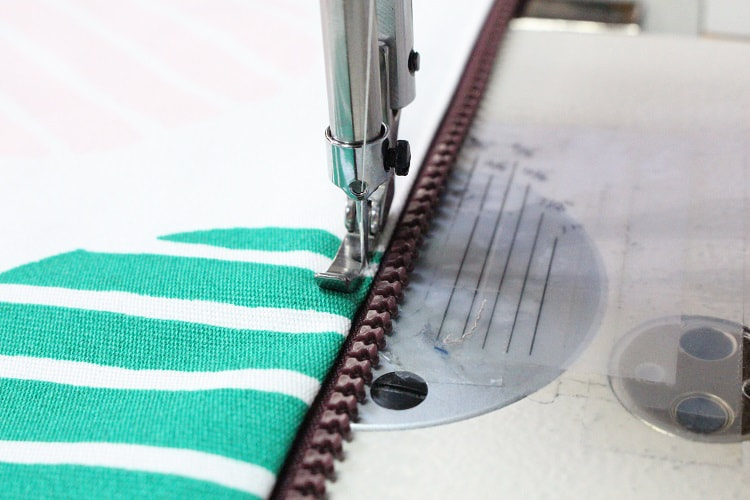 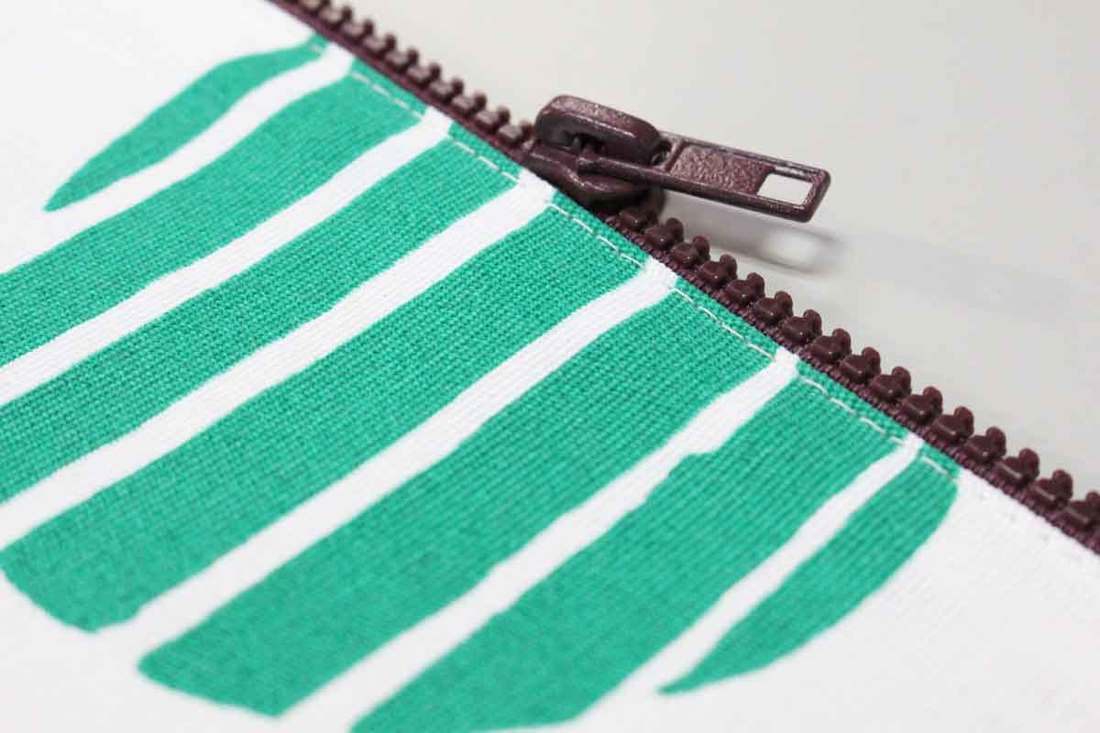 Step 9 (Optional)To create a tab, cut out a piece of fabric that is 3” x 7”. With right sides of the fabric facing each other, stitch on the longer edge at ½” seam allowance. Flip inside out and press. Fold the tab and center it on top of one end of the zipper with raw edges lined up to the raw edges of the side seam of the bag. Stay-stitch in place. 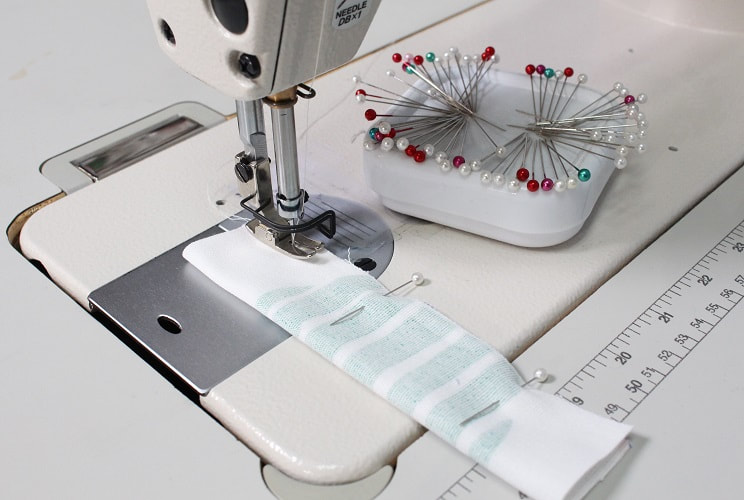 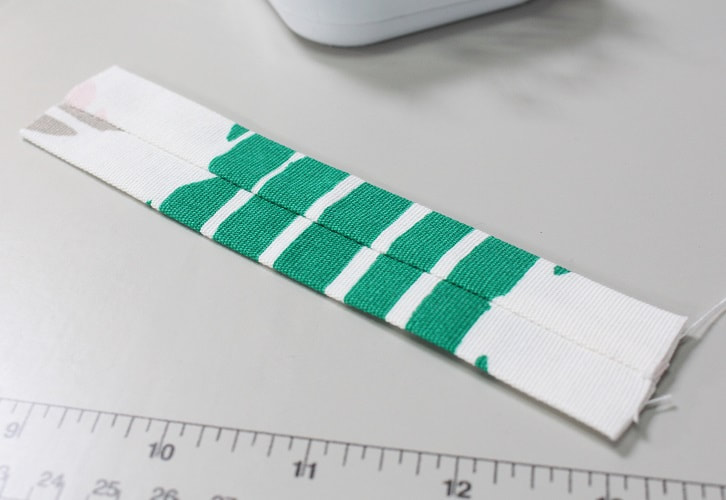 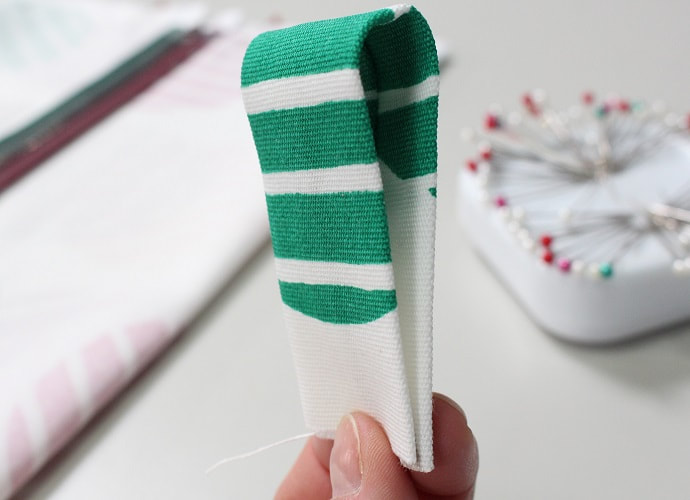 Step 10With right sides of the fabric facing each other, pin and stitch the side seams at ½” seam allowance. Line up notch A to B and C to D. The zipper should be laying in the center with wrong side facing up. Repeat to opposite side seam. Make sure the zipper is unzipped at least halfway before you stitch the final side seam. 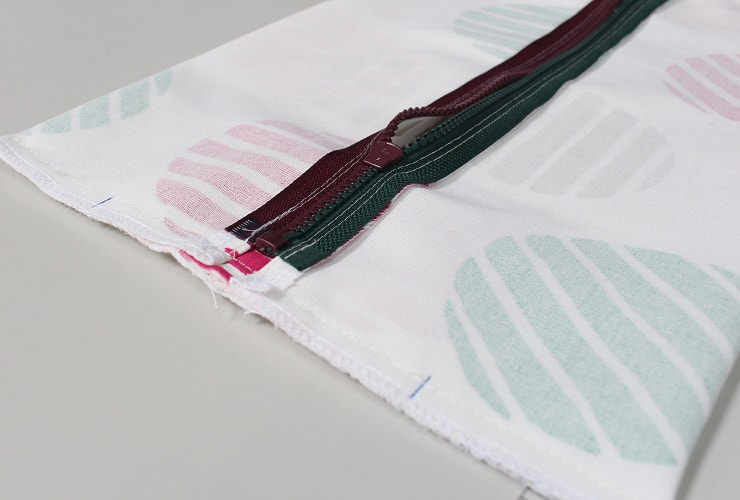 Step 11Stitch vertical side seams at each corner of the bag. Fold your corners at their 45-degree angle. The notches marked in red should lay right at the folds. Stitch from one notch to the other, passing over the side seam. Feel free to draw in a line to help guide you, prior to stitching. Repeat to the remaining 3 corners. 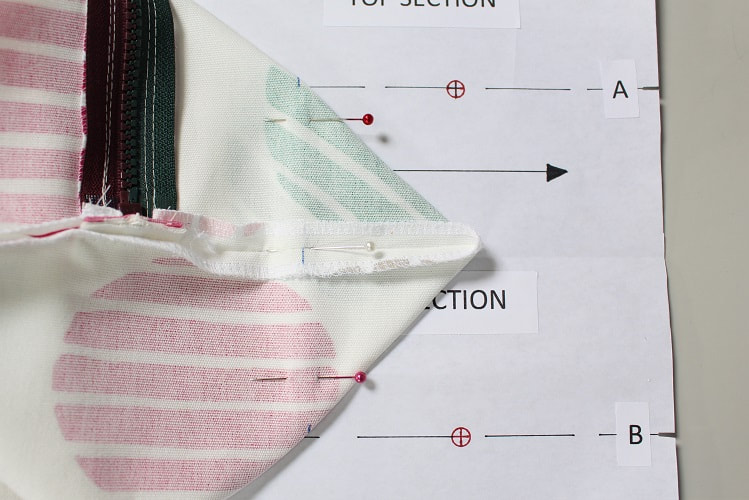 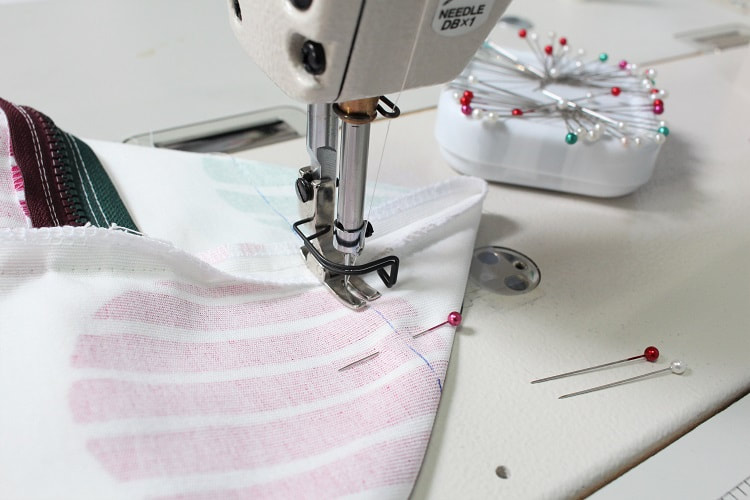 Step 12Over-lock close to above the corner stitch line. 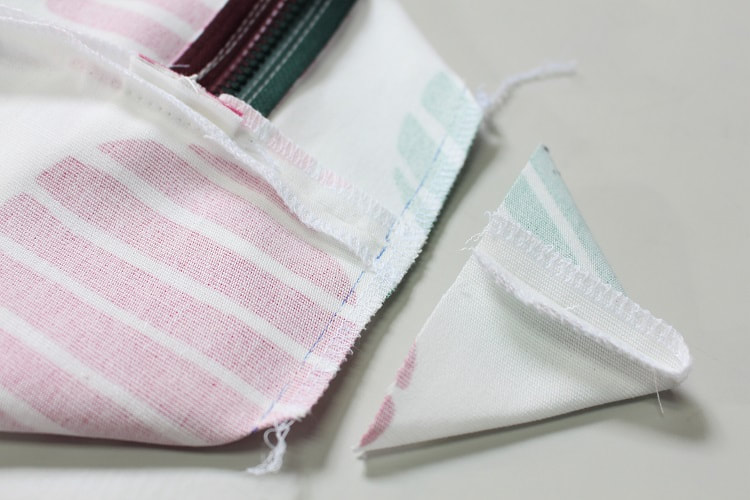 Step 13Flip your project inside out and voila, you are done! 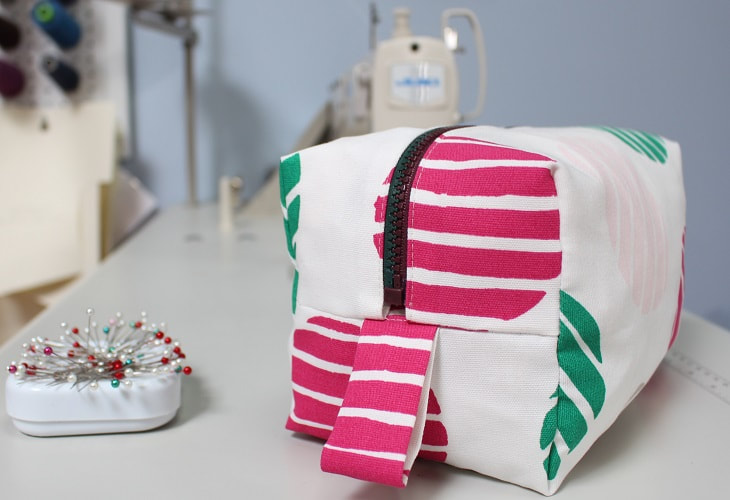 Happy Sewing!
Designed, photographed and written by Sheila Wong Studios.
0 Comments
Leave a Reply. |
Archives
November 2022
|
 RSS Feed
|
|
Copyright © 2024 Sheila Wong Fashion Design Studio Ltd. All rights reserved.