|
Feeling inspired by my last split-back top design and the heat, it was only natural this top would be created. I removed the reversible element, but that meant adding several other techniques that involve hand sewing. 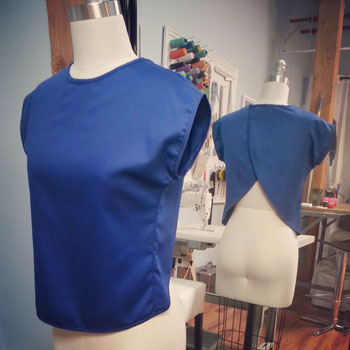 Hopefully you will see me sporting this design soon. This particular top is going to my friend Daphne for her birthday. Enjoy! Project Specs
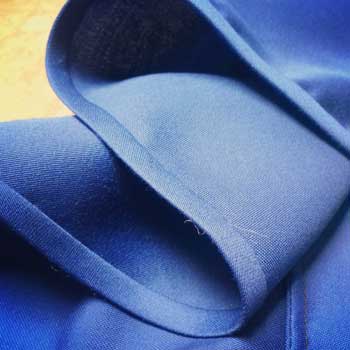
FabricThis is the exact same fabric I used for the reversible split-back top, but different color. Picked up from Gala Fabrics on South Granville for only $2/meter. It is a cotton/polyester blend. 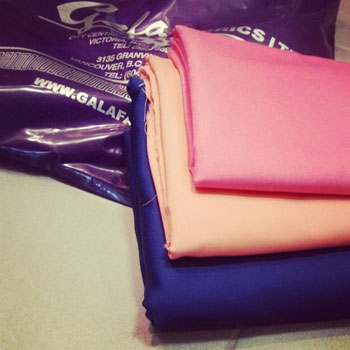 Construction DetailsThere are three major techniques used on this top. Bound hem, narrow French seams and hand sewn snaps. I will go through where they where applied in the garment and the challenges I encountered. Bound HemA bound hem finish was applied to all openings on this top. I used the same pattern that was applied to the initial reversible design which only allotted for a 1/4" seam allowance around all openings. I did not want to adjust the pattern, so applying a bound seam was the easiest solution. Bias strips where cut out, pressed, machine sewn then slip stitched finished. The slip-stitching took up majority of the sewing time but well worth the clean look. Looking back, I wish that I pressed the sew line flat after binding was initially sewn on. I think this would decrease the amount of puckering along the sleeve.
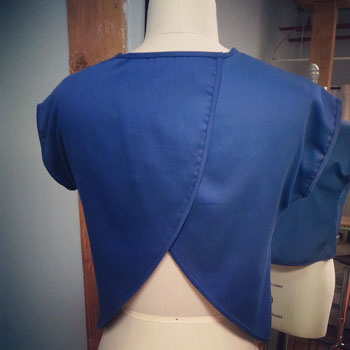
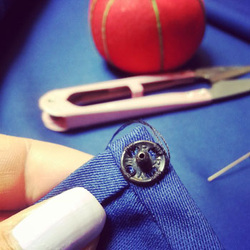
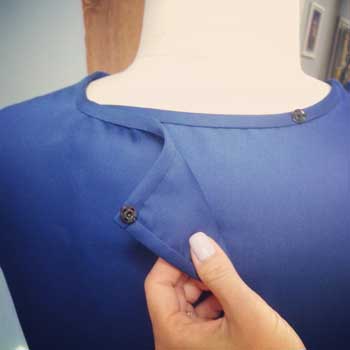
Narrow French SeamsNarrow French seams fully enclose any raw edges for a clean seam inside and out. Learn how to sew a Narrow French seam HERE. This type of seam was applied to the side seams and shoulder seams.  Hand Sewn Snap ClosureI adore snaps, small or big, metal or fabric covered, snaps are for me. Something just satisfies me to hand sew these beauties onto garments. For this top I installed two sets of snaps at the back neckline. They appear hidden when snapped up to give a clean look. One of my biggest tips when hand sewing snaps- keep the amount of stitches you apply per hole the same. Creates a uniformed look.
Happy Sewing!
Written & created by Sheila Wong
0 Comments
Leave a Reply. |
Archives
November 2022
|
 RSS Feed
|
|
Copyright © 2024 Sheila Wong Fashion Design Studio Ltd. All rights reserved.