|
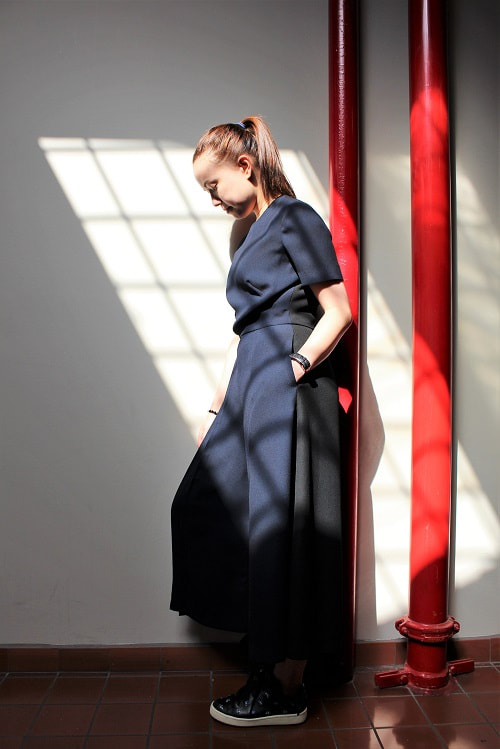
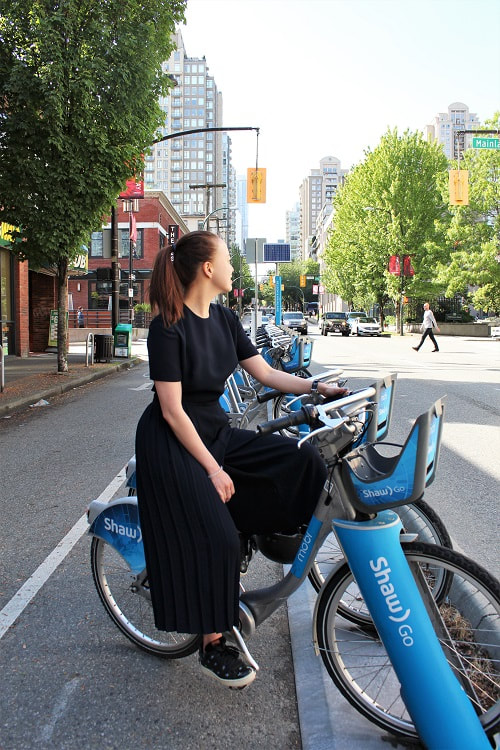
Jumpsuits are so popular right now and pleats can be found popping up in the most interesting areas of garments. This jumpsuit was designed for a specific reason- to attend a Japanese Shinto Wedding in Osaka, Japan. Respectable elements had to include subdued colors, non-exposed shoulders/arms, and the ability to wear sheer stockings with closed toe shoes. Inspired by my last trip to Japan, pleats and color blocking were the biggest design elements included. As you will come to learn, I did not have time to create a toile (fit sample), I drafted and cut straight into my good fabric! Keep reading to learn about some of my process and the things I learned! 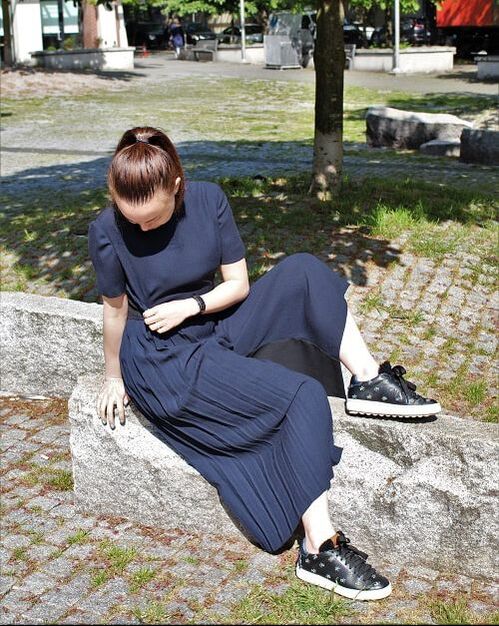 Project Specs
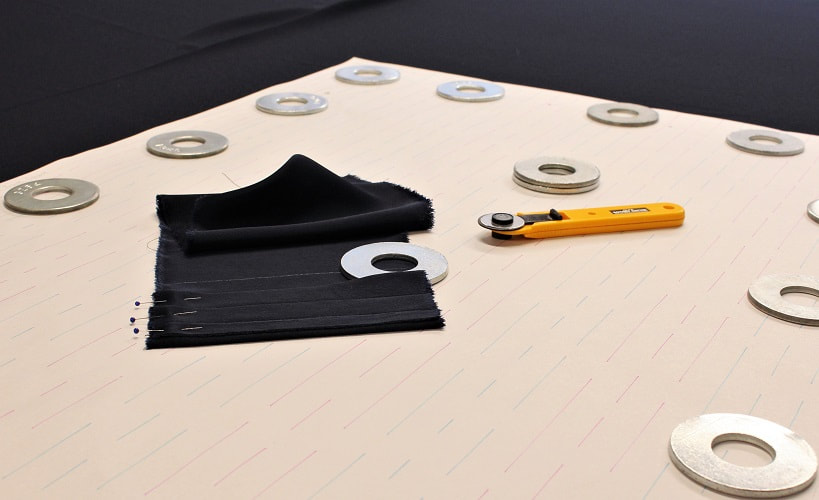
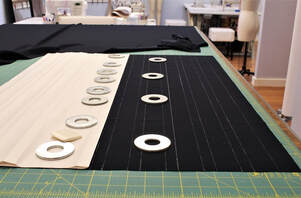
Design ElementsThis jumpsuit was flat pattern drafted from size 6 bodice, sleeve and culotte blocks. The major visual design elements include a pleated panel on the right leg and color blocking of dark blue in the front and black in the back. Other essential elements include french darts on the front bodice, CB (center back) invisible zipper, in-seam pocket on the left pant only, fully lined bodice, over-locked seam finishes and hand stitched hem finishes. Looking back, this is quite the complex garment. PleatsIn 2018, pleats caught my eye in Tokyo, Japan. Pleats were everywhere! Repetitive knife pleats were so popular. But the placement in garments were key I noticed. They were inserted either in panel(s) or by layers and mixed with other fabrics and colors. Hence the inspiration for this jumpsuit. Before I started drafting the pleats for the side panel, I tested a series of 4 small pleats on a sample fabric. This gave me an idea of the proportions and if the fabric I had in mind could even be pressed into my ideal pleat formation. I would recommend testing out your intended pleats on your correct fabric prior to drafting and cutting your pattern pieces. 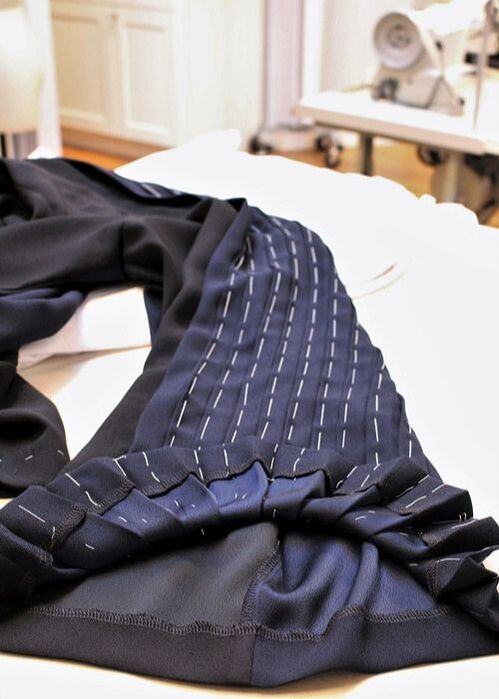 When pleating, you need to keep the fold/press lines organized. With knife pleats, I mark the fold/press line in the same color as the fold-to-here line. I then alternate each pleat in a different color so that I don't mix pleats beside each other. I promise this will keep you sane! You can mark your lines on the fabric with either chalk or thread mark. A total of 10 pleats were involved in the side panel. It took approximately 5 hours to mark, press and thread baste each pleat into place. The pleats needed to be basted into place because they where travelling across the world.
Color BlockingHands down, the color blocking is the BEST thing about this jumpsuit. I am super indecisive, so the ability to inject multiple visual looks within one garment is ideal. From the back it looks like a classic black jumpsuit, from the front it is blue, and from the side it is a combo. Depending on whether you see it from the left profile or right profile will present a whole other vibe. When color blocking, I found it was essential to maintain the same fabric. 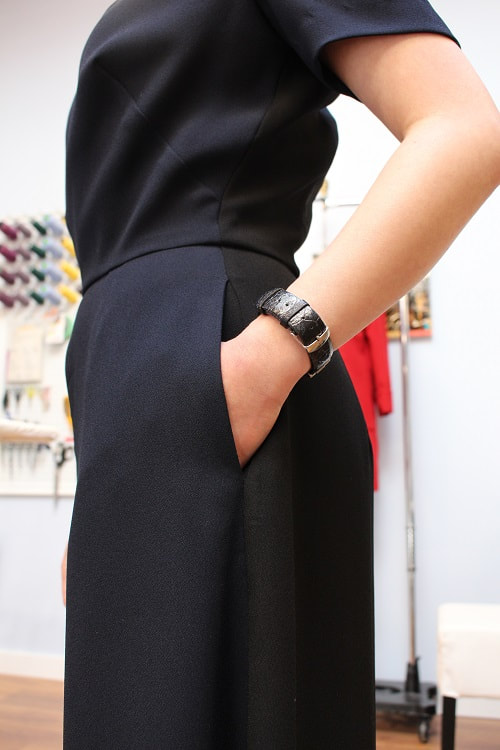 Final Design
What We Learned!This was a rushed design so... that means several design, fit and drafting changes must be made for jumpsuit number two. Essentially this became a wearable toile.
 Happy Sewing!
Designed, photographed and written by Sheila Wong Studios
0 Comments
Leave a Reply. |
Archives
November 2022
|
 RSS Feed
|
|
Copyright © 2024 Sheila Wong Fashion Design Studio Ltd. All rights reserved.