|
As many of you know, my studio offers fashion design instruction. I assist my clients in creating many beautiful designs. I rarely have time to create personal designs for either myself or a loved one. It has been at least 8 years since I last created a Halloween costume. My last one was Sailor Jupiter if you are curious. My niece recently got into Japanese Anime, in particular Demon Slayer. There where no 'great' costumes online, so I did what any Aunt who could design would do. Create a custom cosplay outfit from scratch. In my late teens, I was obsessed with creating costumes for dancewear. So to be pulled back into creating a costume was a really nice treat this year. This was by far my favorite design project this year.
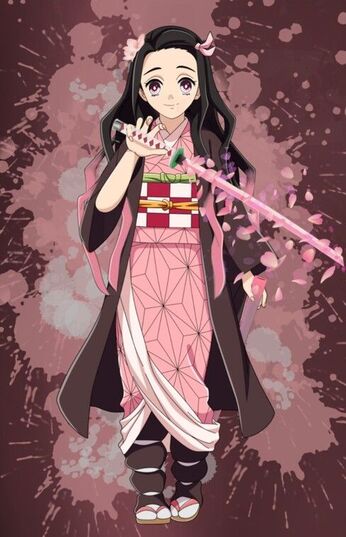
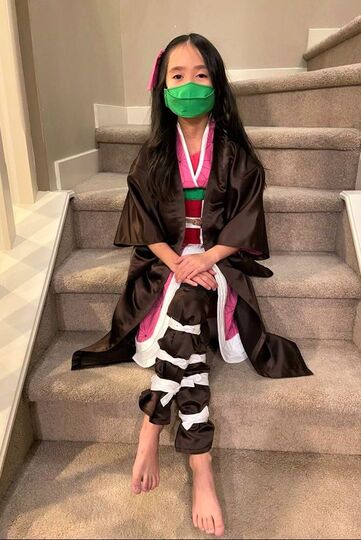
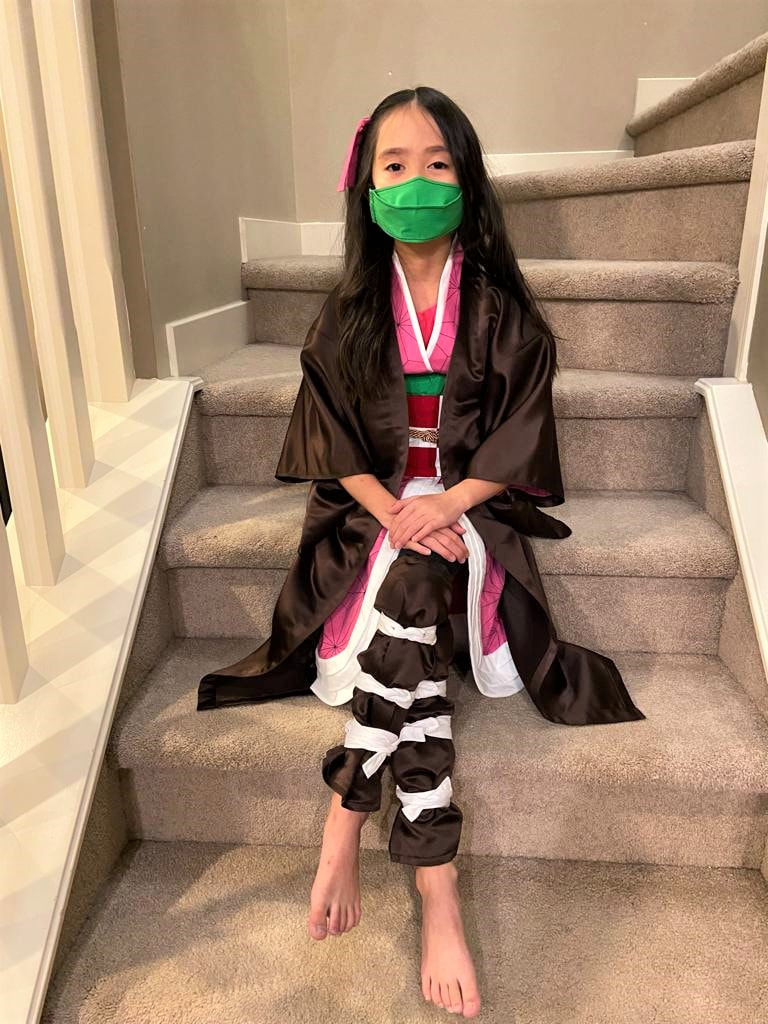
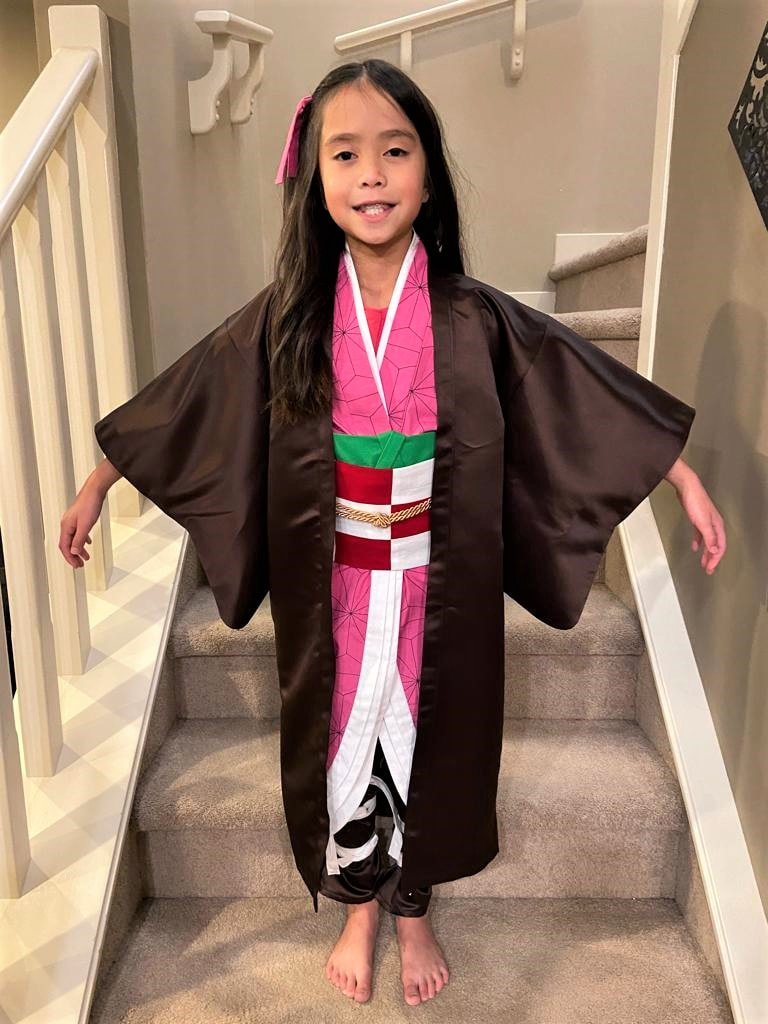
The Demon Slayer character I was venturing out to design was Nezuko Kamado. Her outfit consists of a pink geometric printed kimono, a haori style coat, a checkered obi, a corded obijime, a green obiage, leg coverings (aka kyahan), a pink hair ribbon, and a face mask. Nezuko normally wears a bamboo muzzle, but I thought a face mask would be more appropriate. Above is the inspiration photo taken from Reddit website. It seems like a lot of elements to create, but I have constructed haori style kimonos in the past so was up for the challenge. In this blog post, I'm going to show you each element of Nezuko's outfit and insight into how I created them. I hope you enjoy! Project StatsIn early Sept I was able to take full body measurements of my niece. So set with her measurements and an inspiration image of Nezuko I got to work. I was unable to do any fittings during this process, so guessed a bit in regards to ease and proportions. All fabric purchased from Fabricana in Richmond.
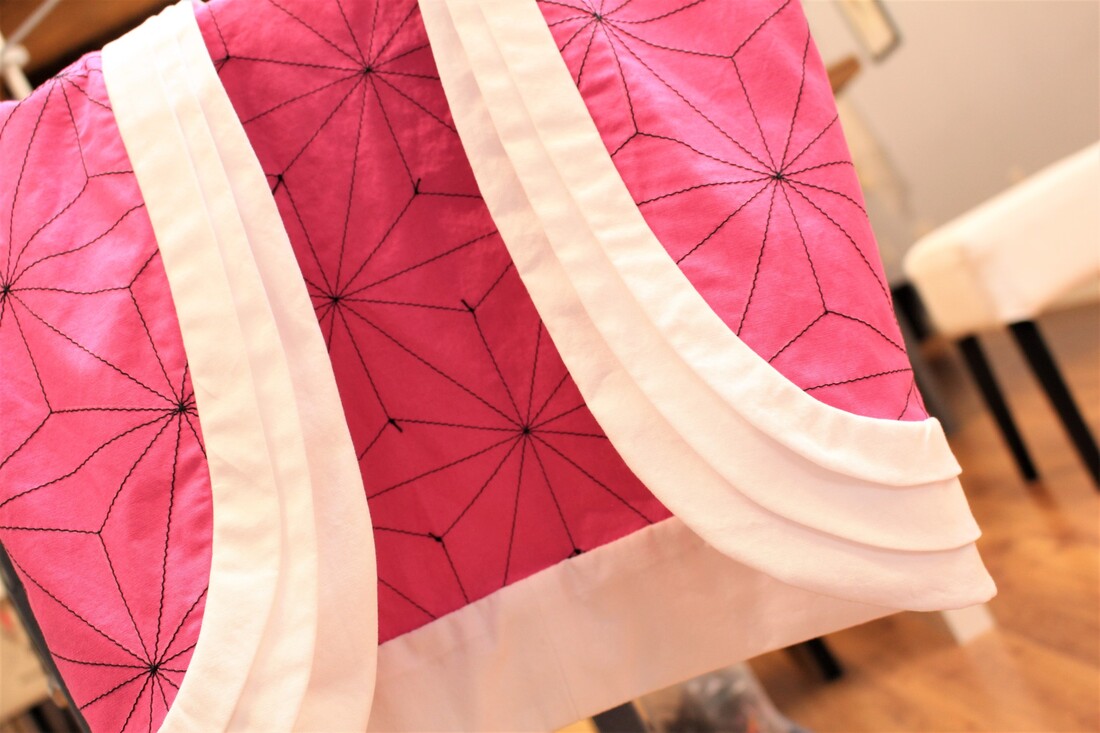
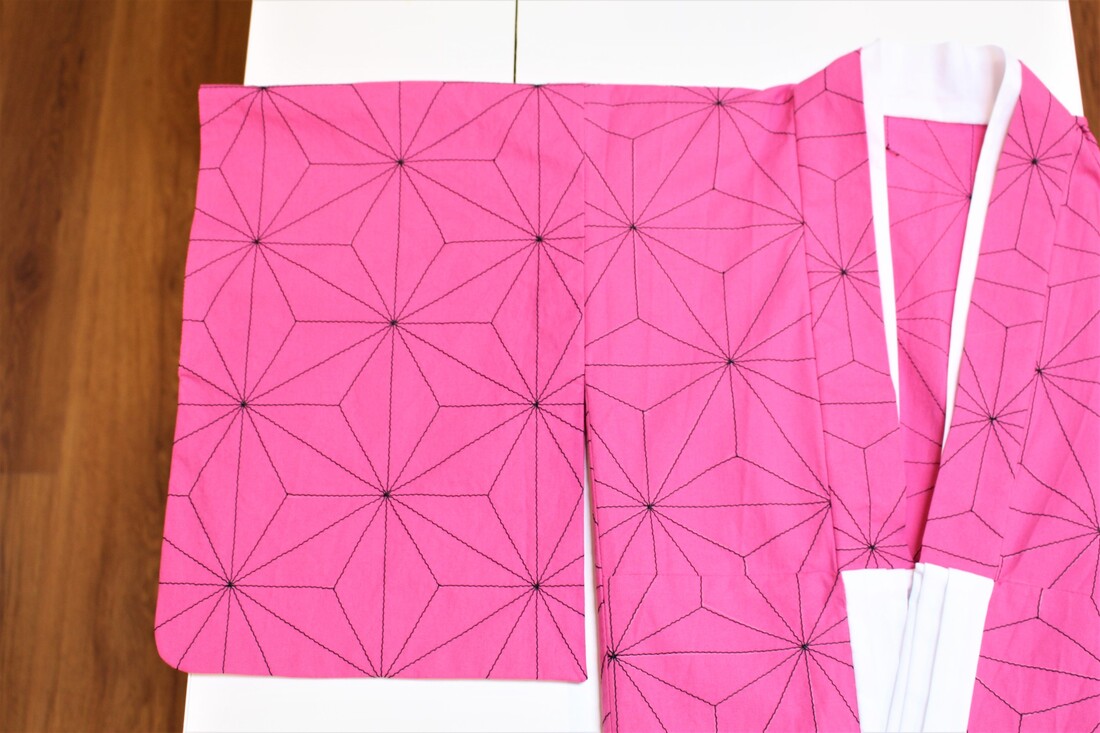
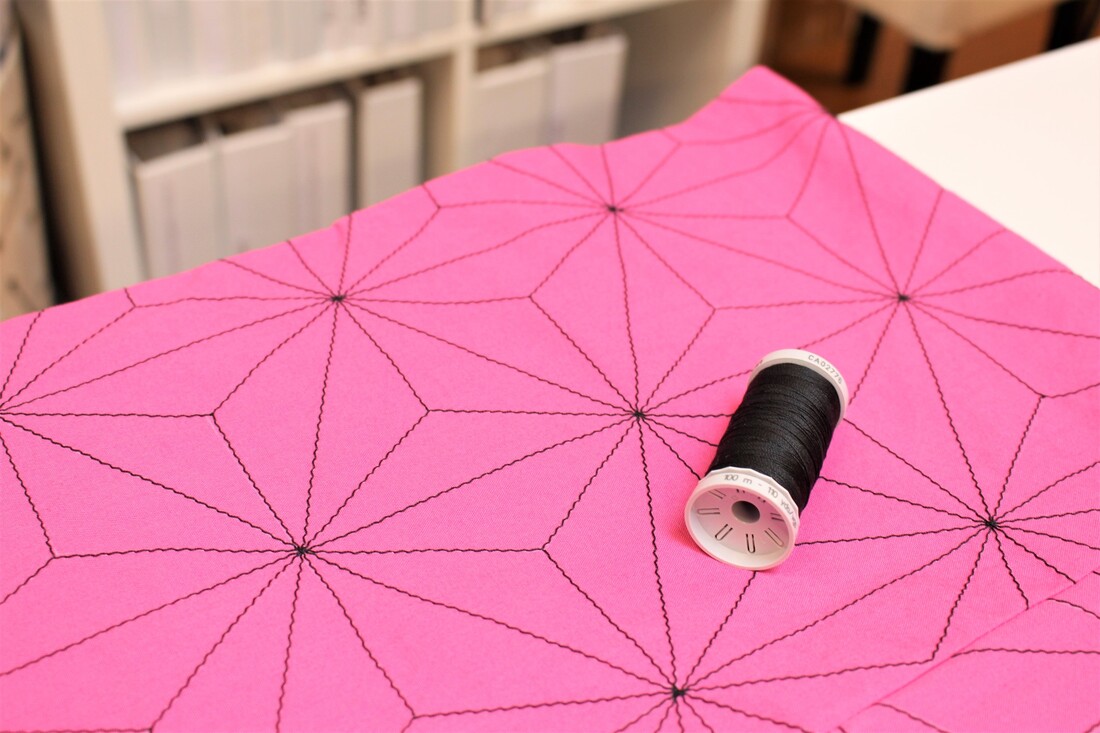
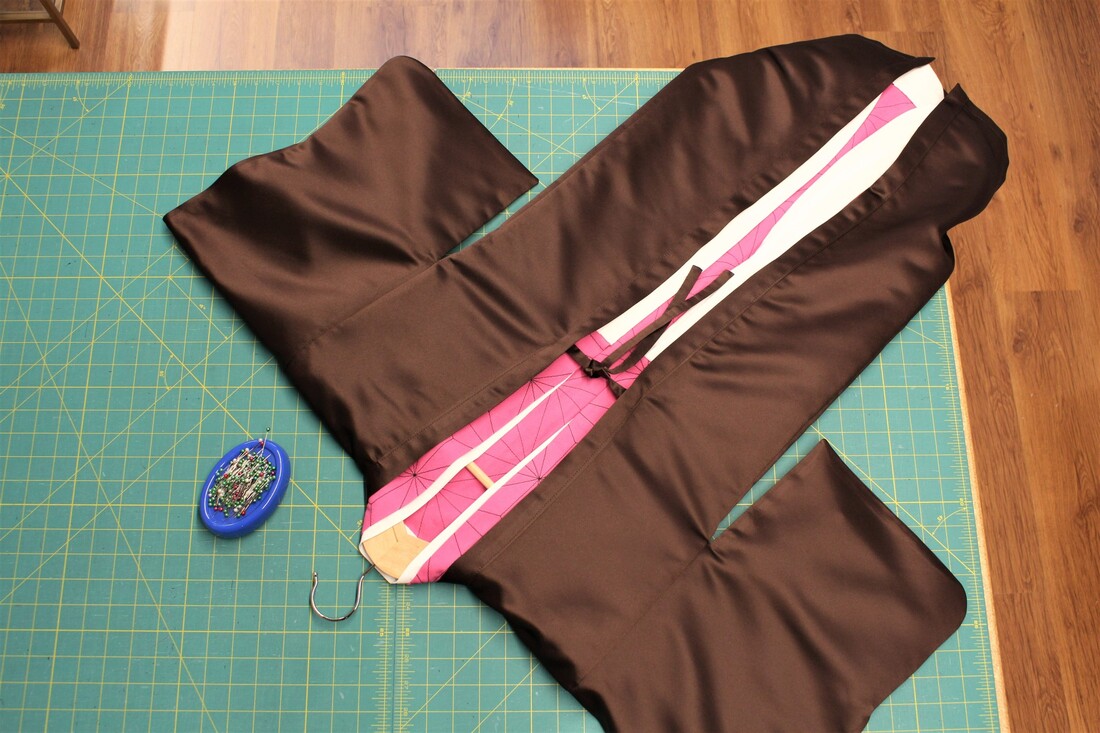
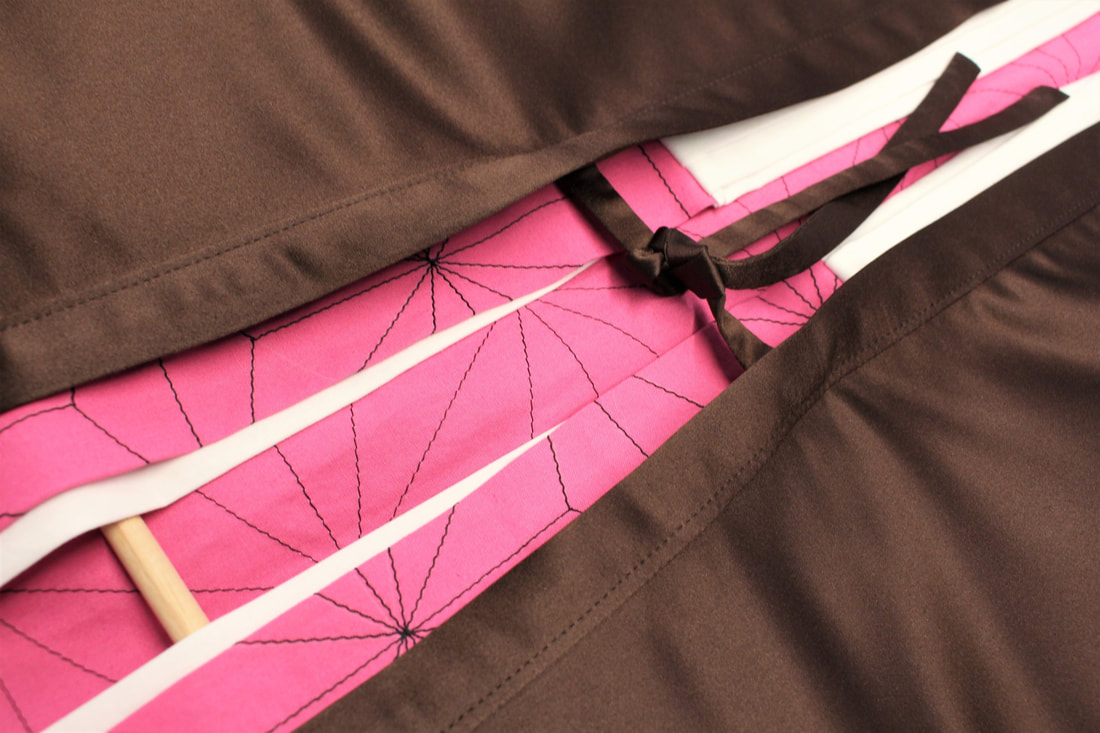
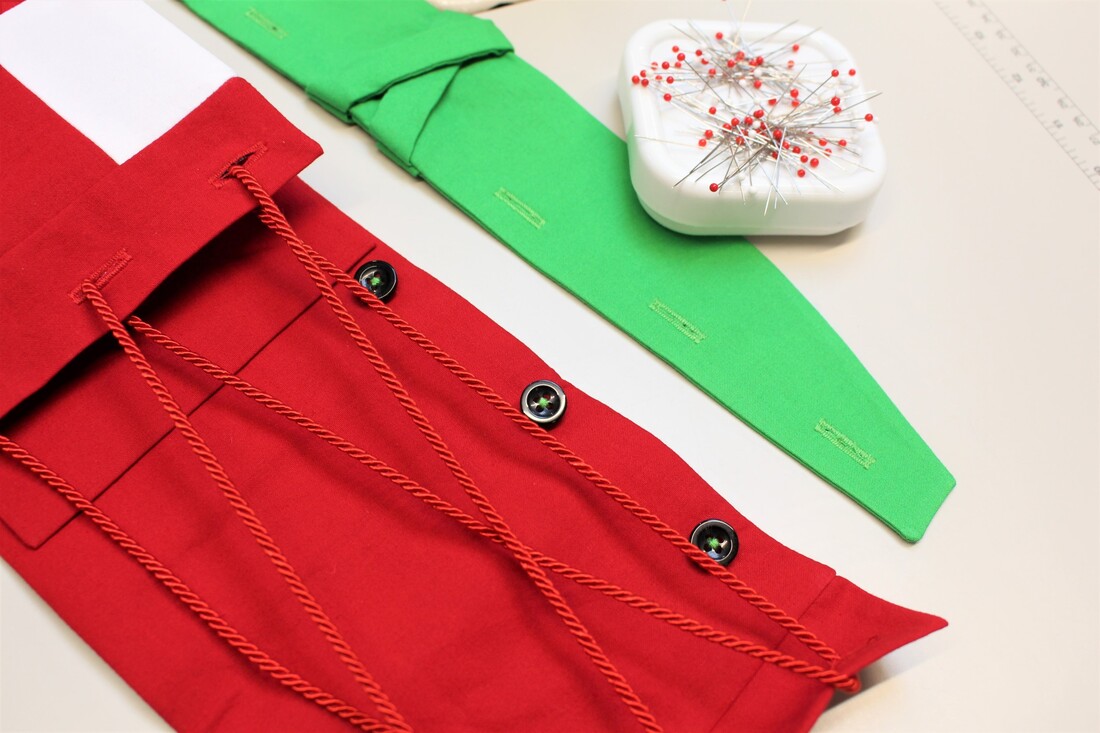
Pink Interior KimonoHands down the pink kimono was my favorite part of the Nezuko costume to design. It was also the most challenging part. I have made similar kimono's in the past, but in adult size. I had to guess the amount of ease, length and proportions. I used my experience with drafting past ones. I had to imagine my niece beside me as I drafted the armhole depths and collar widths. Good thing I just spent a good chunk of time with her recently (we live in separate provinces). For the most part, the pattern pieces where rectangles, with exception of the back neckline, front hem and sleeve hem. 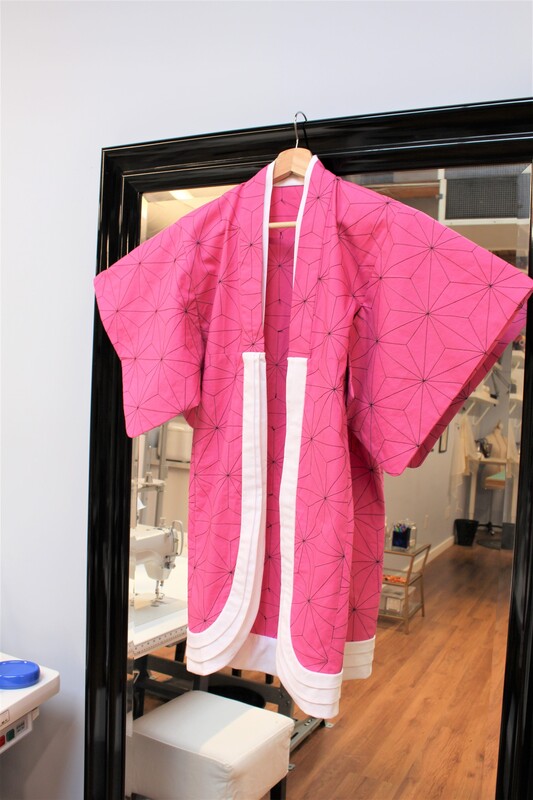 I was confident in my calculated guesses for the drafting of this kimono, but when it came down to the geometric print I had to really think the process through. Do I paint the lines, top stitch the lines, or just find fabric already pre-printed with this exact geometric star lines? I initially was going to paint, but if you know me well I like things extremely precise. In fact, it was a client who prompted me to stitch the lines. First, I had to draw out a template for the star. It is a repetitive print, which made it rather eye boggling while trying to transfer those repetitive lines on the fabric with chalk. I had to really take my time with this step. 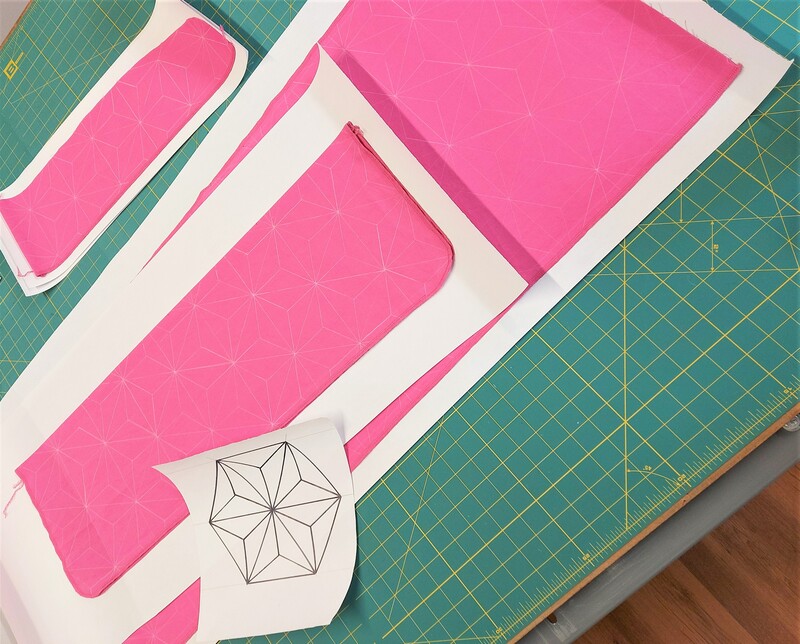 I spent a full three days (long weekend) top stitching the lines and stitching the kimono together. Most of the lines could run into a raw edge thus avoiding backstitching but in the center of each star there was a line that forced me to have to reinforce the ends. I could either have visible backstitching or leave long tails and hand knot at the back of each of these lines. I chose to work the tails to the inside and hand tie each. There where over 60 hand tied knots. It was so worth it!
Brown Haori KimonoThe brown overcoat (aka haori) was designed to fit perfectly on top of the pink kimono. I drafted the sleeves and body to be 3/4" larger all around to have the pink kimono sit inside with out any pulling or peeking through. On a traditional haori, waist ties can be found at the front facing to hold the jacket closed. I hand stitched the ties to avoid top stitching and maintain softness. Even though this was just a Halloween costume, maintaining some tradition and quality is always important to me while designing.
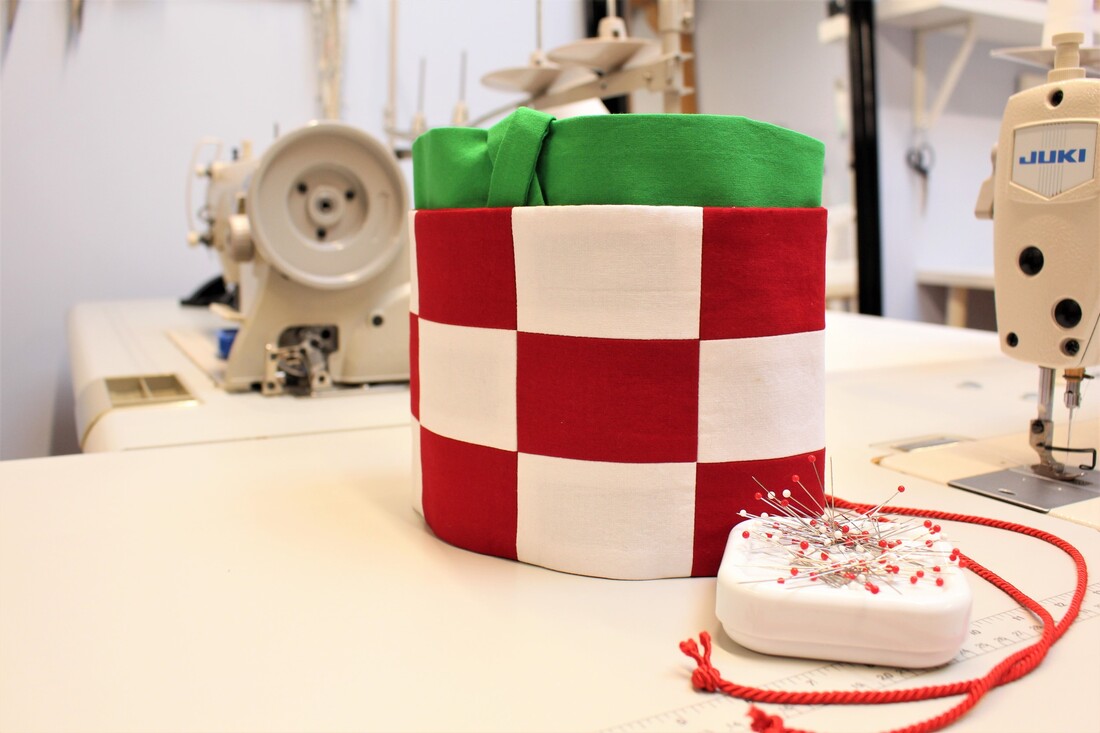
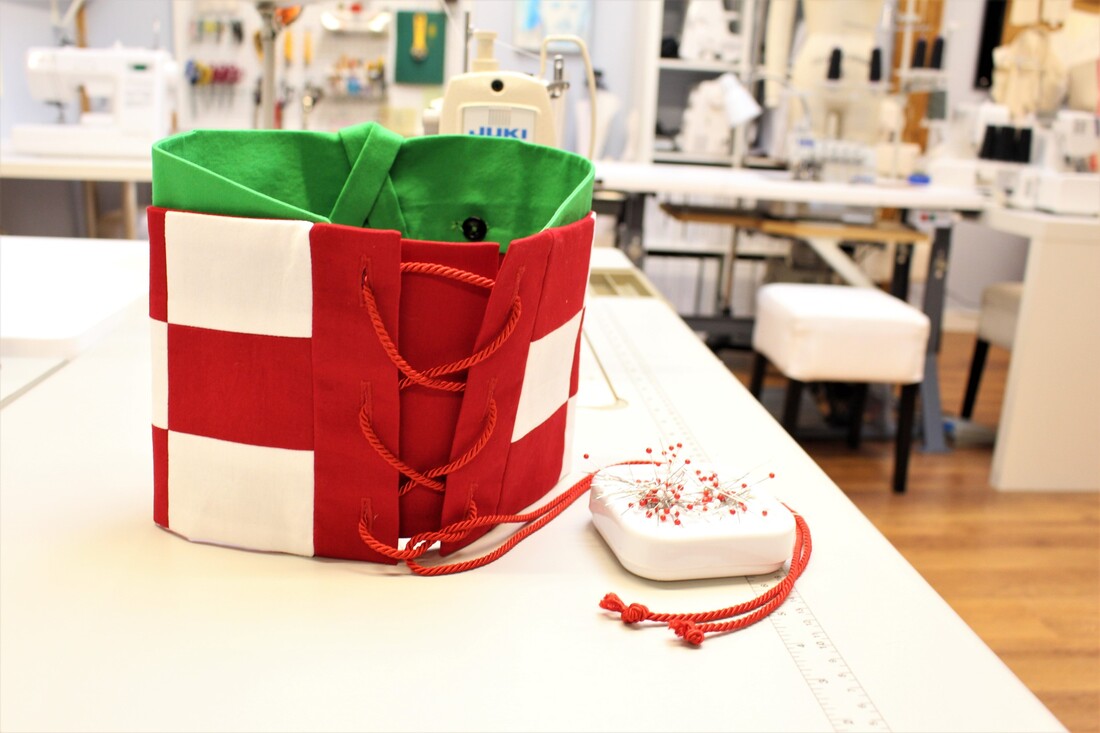
This was simple to design in comparison to the pink kimono. In fact, I find it kind of a shame that it is covering up all the hard work put into the pink kimono. Obi Belt with Obiage and ObijimieFor some reason the checkered obi spoke to me first. It was the first thing I designed. I have designed an obi similar to this one back in 2006 for my fashion design grad collection. I decided to take a similar approach, but used a tie back closure instead of snaps to allow my niece to tighten at her own comfort level. I also included a discreet panel along one side of the center back to allow her to still wear it beyond this year. Cutting out the rectangles and quilting them together was so satisfying. A few tips for this checkered obi.
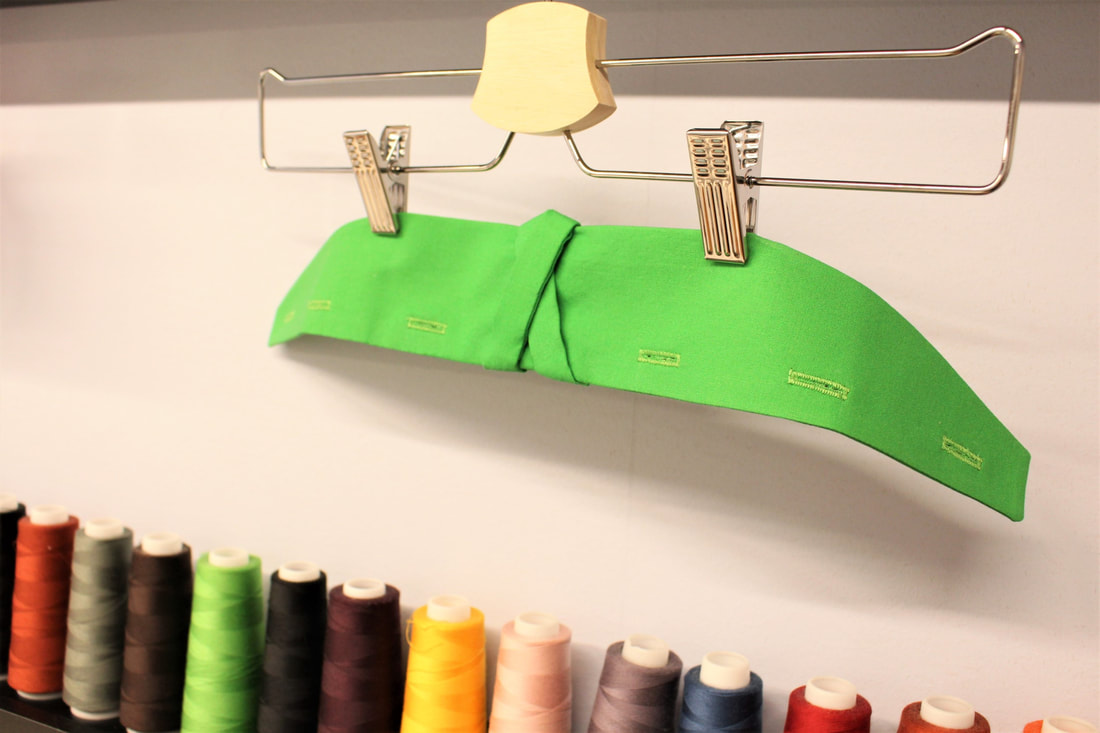
The upper obi section called the obiage was quite simple in design. Having it button on is far from traditional. But traditionally it is a separate element to the main obi. I wanted my niece to have the ability to wear the obi alone or with the obiage. The entire obiage was interfaced to maintain the structure of the entire obi section. To keep a clean appearance (no top stitching), the small front knots, where hand stitched. I applied this same hand stitched technique in a variety of spots in this costume.
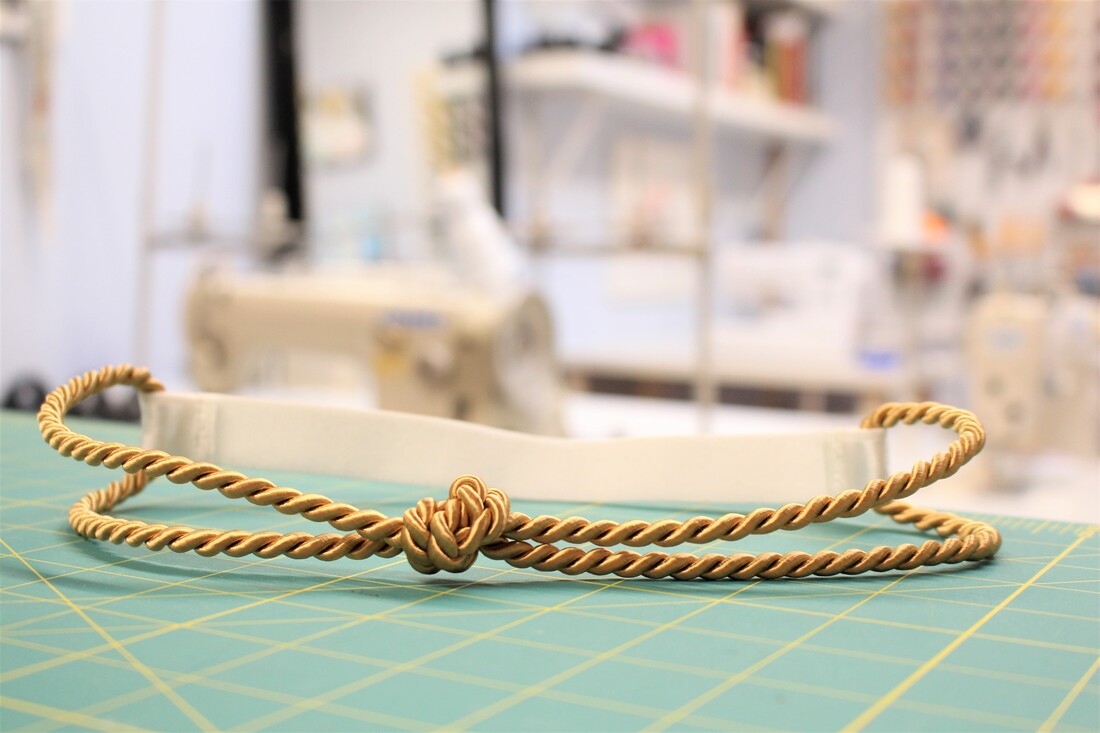
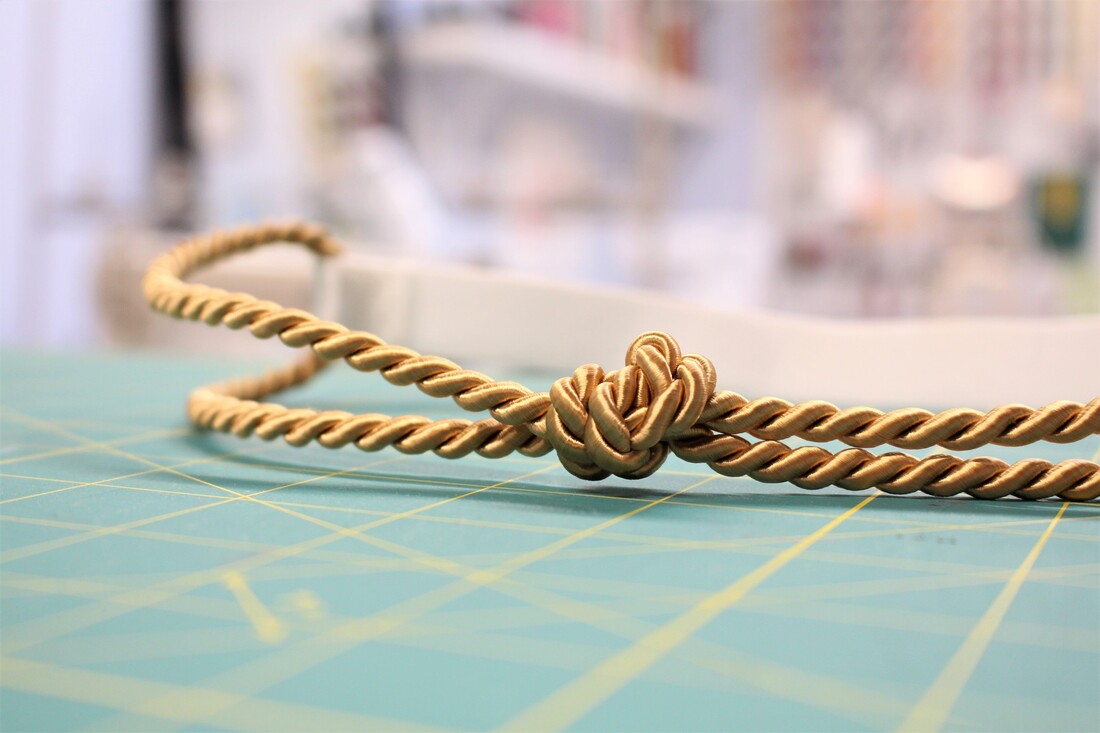
The gold obijimie was the very last thing I created. Initially I thought it could just be tied around the body. But for a 10 year old, that would be extremely uncomfortable. I carefully looped the gold rope into a white glittery elastic to create a belt that could be worn right over the obi. Looking back it would have made more sense to have the gold cord stitched into the back seam of the obi. I figure now my niece has a pretty cool belt she can wear with another costume in the future.
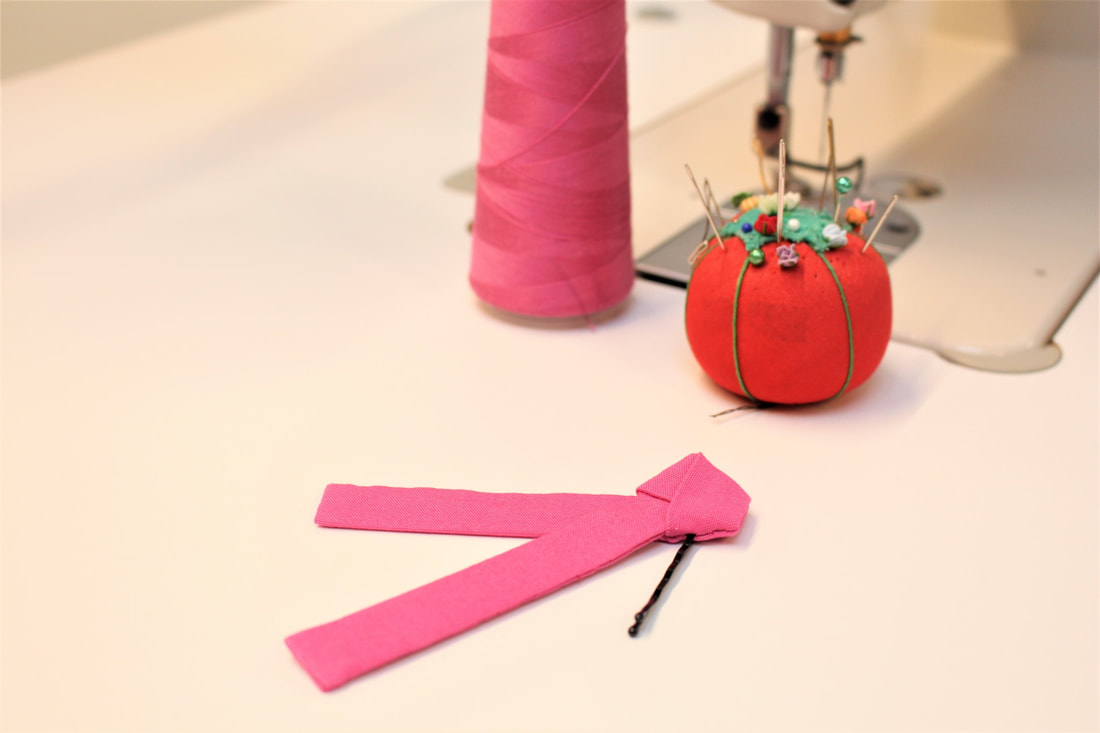
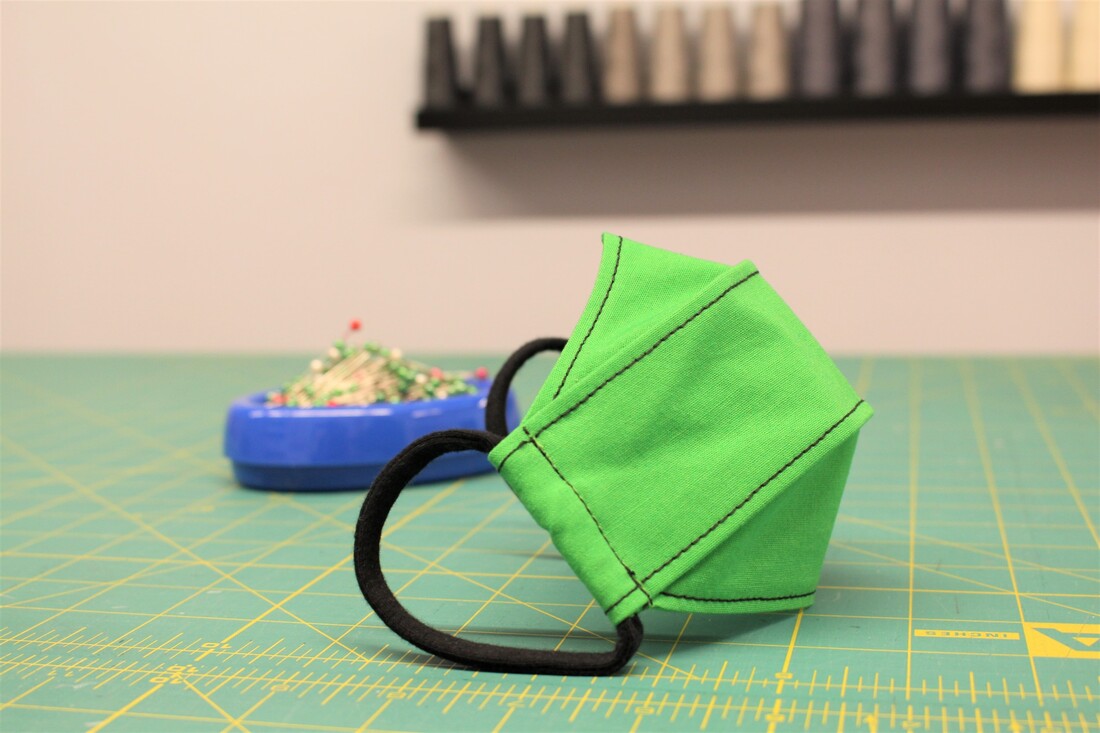
Leg Coverings (aka Kyahan)The leg coverings where the least interesting part of this entire costume for me to design, but I knew it pulled the entire look together. I learned that kyahan are cloth leggings worn by the samurai class. Fitting as Nezuko is a demon slayer. The leg coverings are traditionally padded for extra protection. I decided not to pad them. I figured this was more cosplay than a functional kyahan. To keep the kyahan sitting properly on the legs, I placed a hidden elastic at the top. The ties essential just became decoration. The 12 ties where cut, pressed into place then top stitched prior to sewing into the center back seam. This was rather time consuming, but hey I already spent days top stitching the pink kimono! This was a breeze in comparison. 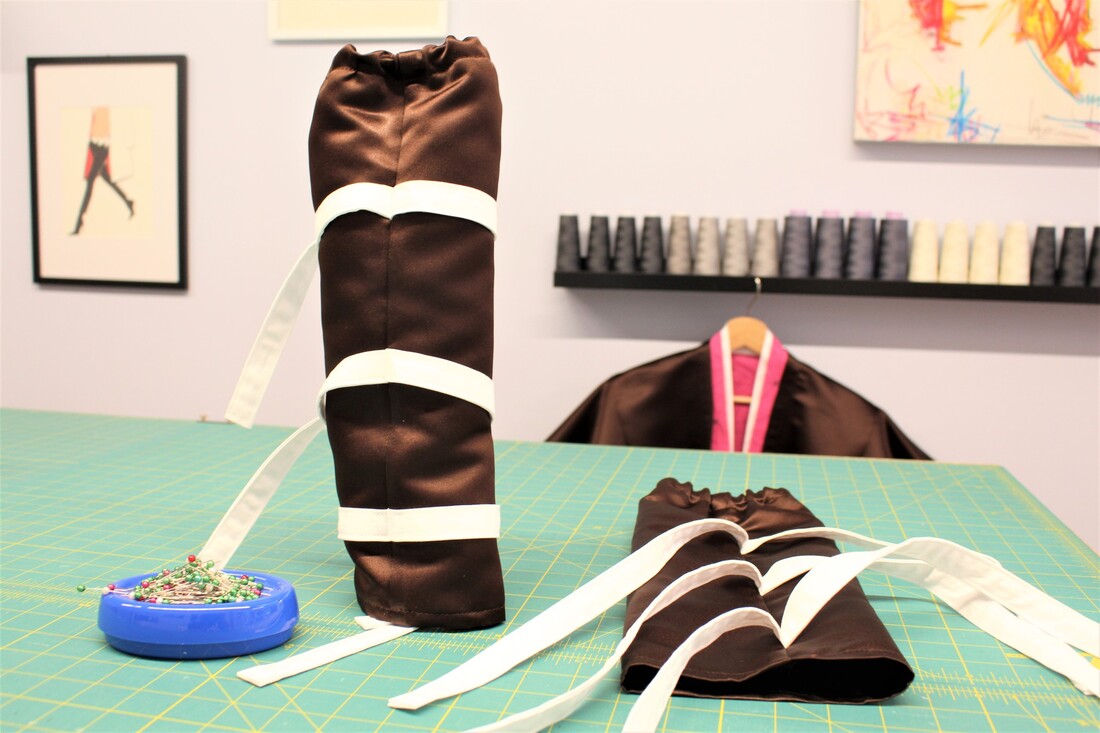 AccessoriesFinal touches included a distinct pink hair ribbon and a face mask. I hand stitched the hair ribbon to ensure no top stitching was visible. Nezuko technically wears a bamboo muzzle. I opted for a face mask with the same colors so my niece could wear the costume to school.
Final LookI started this project on Sept 24 and finished it on Oct 20. Just in time to have it shipped out to my niece for Halloween. I am happy to report that it fit perfectly! When she wore it to school, kids would yell out "Nezuko!" in the hallways. This melted my heart.
A big shout out to my amazing sister in law for taking the final look shots. Let us know in the comments if you want to see more costume related posts.
Happy Sewing! Created by Sheila Wong Studios.
2 Comments
12/10/2022 08:12:42 pm
If this doesn't work, you can try herbal and natural remedies. 12/10/2022 08:13:07 pm
For frequent trouble with mucus, change your diet to avoid foods that can increase mucus. Leave a Reply. |
Archives
November 2022
|

 RSS Feed
|
|
Copyright © 2024 Sheila Wong Fashion Design Studio Ltd. All rights reserved.