|
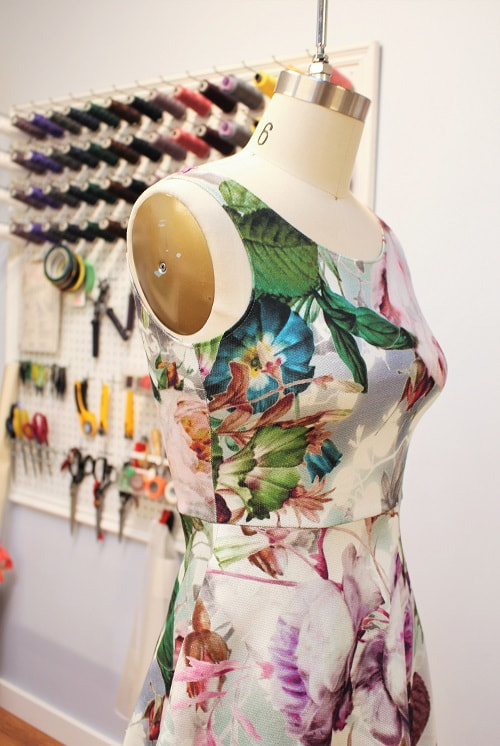
Inspiring others to push their creative boundaries has always been a driving core value in our studio. If you know me well, I frequently say "Why not?!". If you want to push your design techniques further, learning how to pattern draft is essential. Reverse pattern drafting is a good place to begin. For those of you new to the term reverse pattern drafting, it is the technique of taking an already made garment and extracting out the 2D shapes to create a paper pattern. It sounds quite simplistic but the basics of pattern drafting and understanding how fabric can be manipulated is still very important. Our latest design was reverse drafted from a black dress I borrowed from a dear friend Alisa. Typically black is my go-to color of choice, but my heart gravitated towards floral right now. 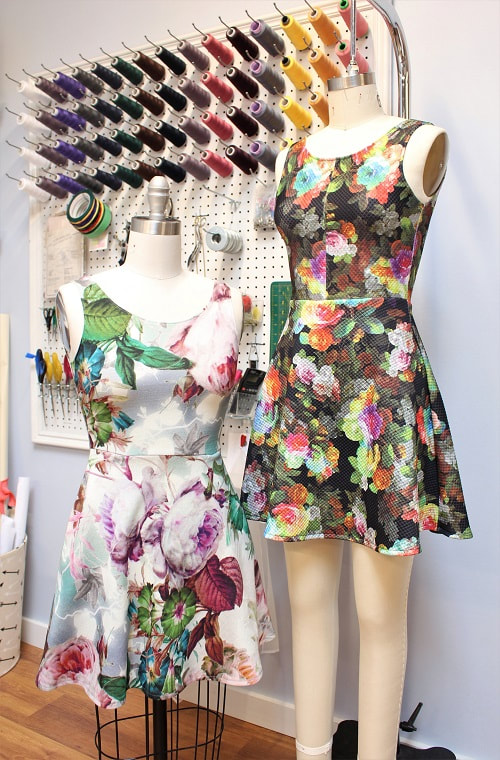 Four pattern pieces make up this dress. The front and back bodice are almost identical with exception of the neckline. The front and back skirt are identical so the exact same pattern piece could be used to cut out front and back. The original garment had no side seam in-seam pockets, but of course we made ours have pockets!
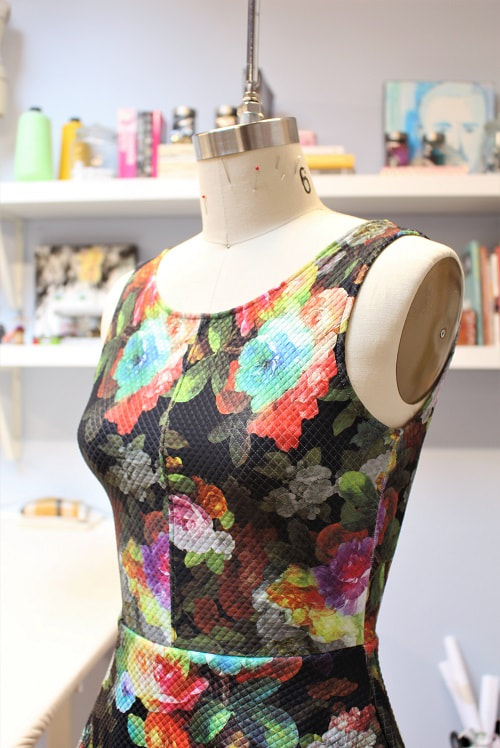
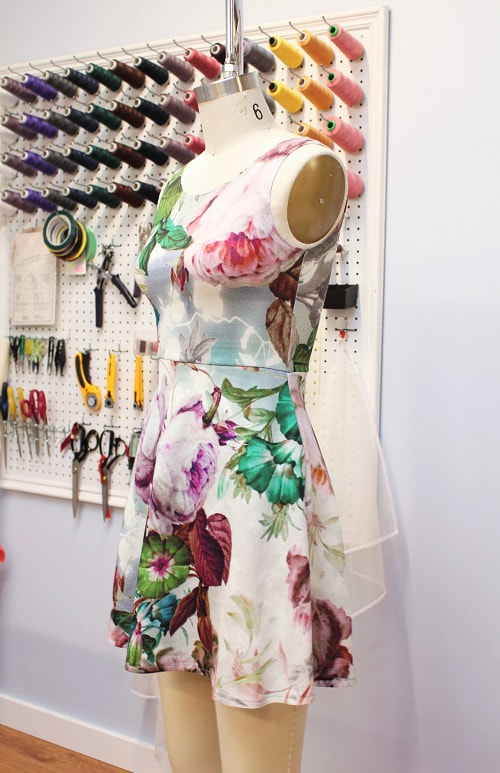
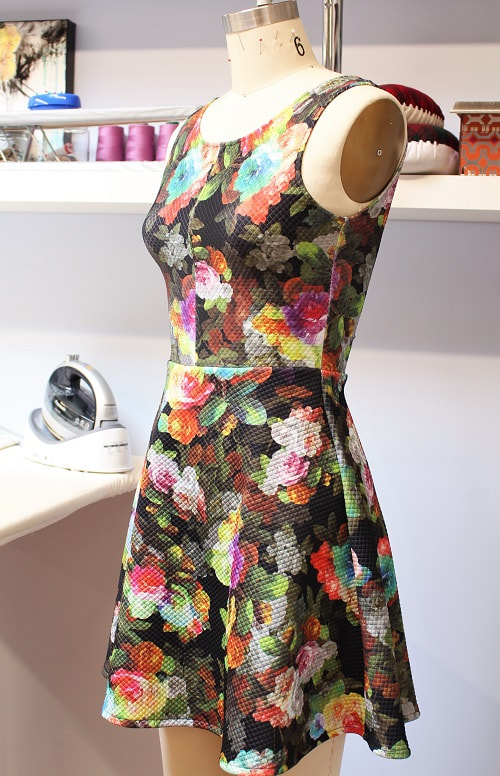
FabricThe day time floral print was purchased from Fabricland, enough to make a sleeveless top and this dress! The nightshade floral print fabric was picked up from Fabricana several years back for a completely different dress design. In both cases there was just-enough fabric left-over to make two versions of this dress. You may notice a center front seam in the front bodice of the night shade version. This is because there was not enough fabric to cut out the front bodice in full. I know we have all been there where we have to "make it work" to get it done. I liked the simplicity of this sleeveless dress so much, so we made 2 versions! Which one would you wear? The day time or nightshade floral version. As you can see, I was really feeling the floral and fauna! 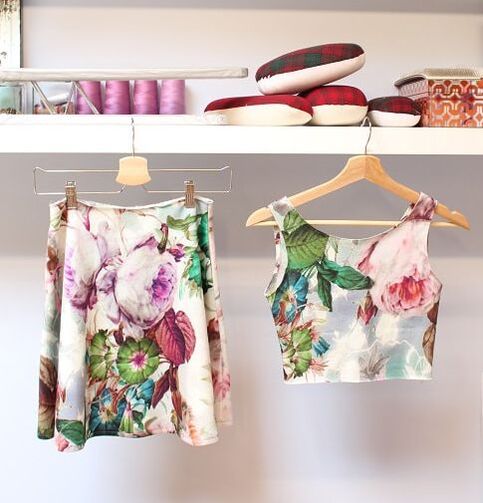 Project Specs
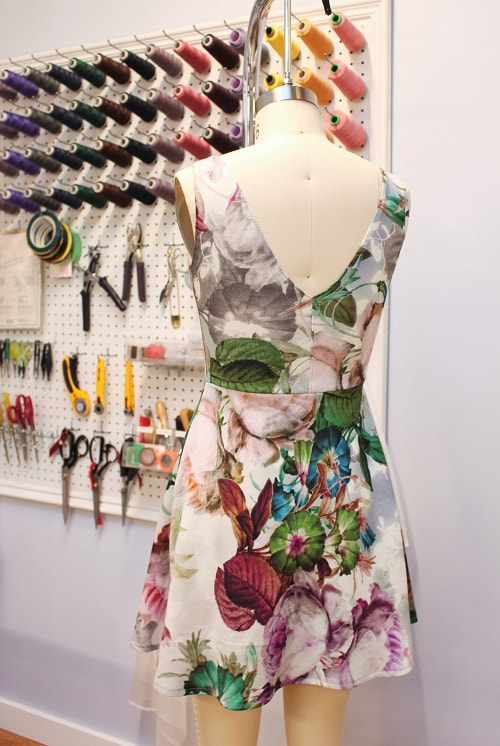
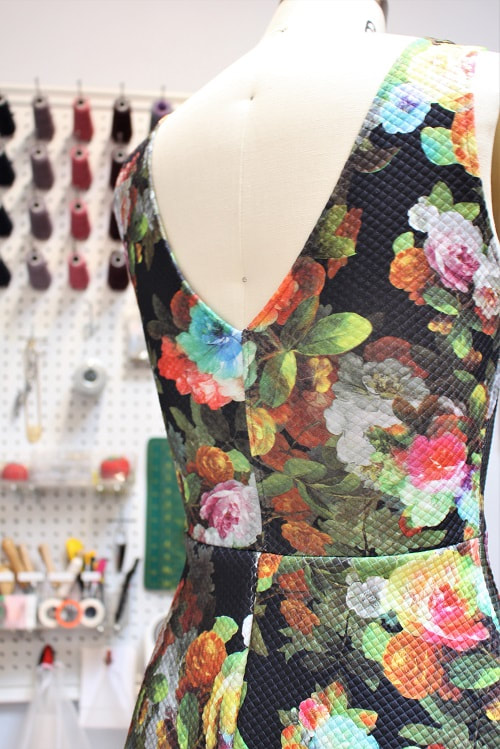
 Sewing Tip: Thread ColorPicking out matching thread color on solids is fairly straight forward. Main goal is to ensure the thread color disappears with its corresponding fabric. Back in 2017, I even wrote a post and created a YouTube video all about Picking the Right Thread Color. When picking out matching thread for an all over print with mixed colors, it is always best to match with the background color. If there is no distinct background color, medium grey is a magical color. Medium grey even works well as the constant thread color in your serger that goes with multiple fabric colors when you are too lazy to change up the color. 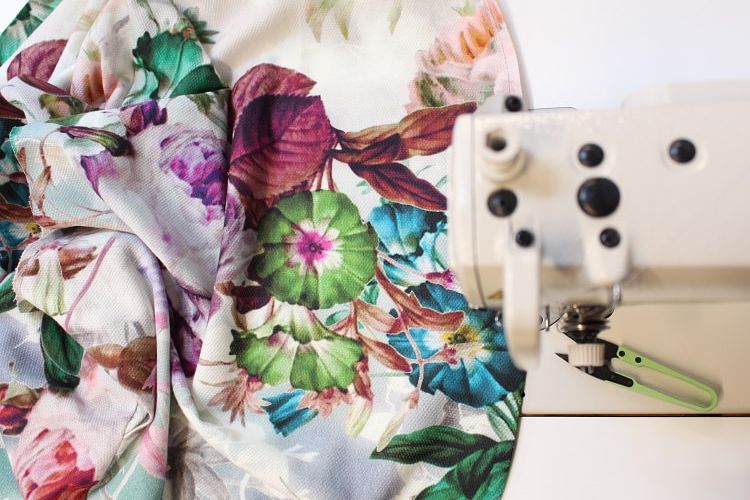 Design ElementsI have always felt creating balance within a design is essential. When designing with a loud print (in this case the colorful floral print), it is important to let the fabric shine. Too many design elements would take away from the floral print. If you have been hesitant to design with prints, begin with designing something simple like a sleeveless top or pairing the print with a solid fabric as a panel in garment. Two in One NecklinesSometimes you just cannot decide what kind of neckline you want. Round or V neck. Which one do you prefer? In this case, the front is subtle with a scoop round neckline and the back add more drama with a deep V neckline. If you felt brave enough you could wear this design with the deep V in the front.
In Seam PocketsYou know what a pocket is, you love it as much as us. As mentioned, the original garment we reverse drafted from did not have an in-seam pocket. We have to take the liberty to put one in. There are two different sequence of construction steps in installing an in-seam pocket. A modern version vs a more traditional version. Below I describe both. Which one do you use? I am in the traditional camp. A modern version involves sewing a pocket bag to the front side seam and another pocket bag to the back side seam, essentially creating ears. In one full go, you stitch the front to back together along the side seam, pivoting at the top of the pocket bag, then around the bag, pivoting once again once you hit the side seam, then head down to the hem to finish. Anyone can achieve an in-seam pocket with this version. A traditional version of installing an inseam pocket rather has the two pocket bags stitched to the front panel opening with a series of intricate steps that involve pivoting, edge stitching, pressing, clipping and stay- stitching. At the very end, the side seam is sewn in one straight seam, gently pulling away the pocket opening and carefully hitting the top and bottom opening of the pocket. This version involves more patience and technical skill, but in the end it sits so beautifully and all the raw edges inside can be cleaned up neatly unlike the modern version. 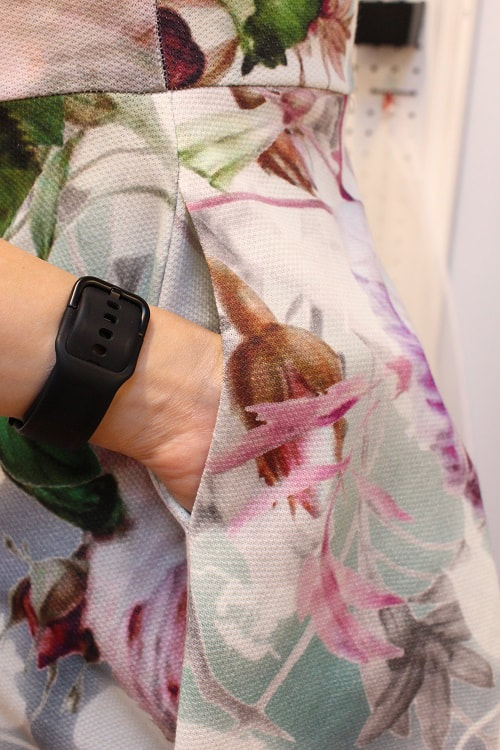 Top-StitchingYou need to look pretty close to see all of the top- stitching on these dresses. Top-stitching can be found along the neckline, armholes, center back seams of the bodice center front seam of the night shade version and the hems. 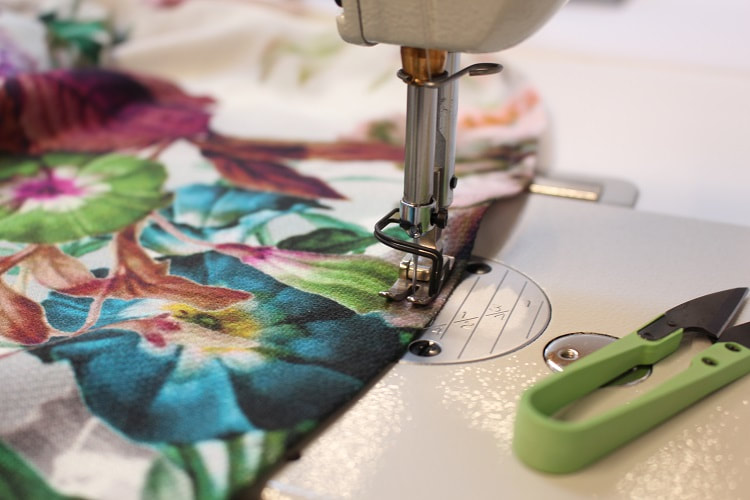 Final DesignWhich print do I prefer? I love the vintage vibe of the daytime version, but the night shade version is where my heart is. It probably helps the spandex content in the night shade is higher, thus making it more comfortable. A reminder that when you are reverse pattern drafting a knit (stretch) garment, the subsequent garments made using that pattern should have the same spandex content or else it will not fit the same. I recommend you take the original garment with you when fabric shopping to help 'feel' the stretch capability. You could also check the spandex percentage in the garment tag and match your fabric accordingly.
If you would like to learn how to reverse draft and sew your favorite garments, contact us to book private lessons.
Happy Sewing! Designed, photographed and written by Sheila Wong Studios.
1 Comment
7/17/2024 03:24:24 am
I wanted to express my gratitude for your insightful and engaging article. Your writing is clear and easy to follow, and I appreciated the way you presented your ideas in a thoughtful and organized manner. Your analysis was both thought-provoking and well-researched, and I enjoyed the real-life examples you used to illustrate your points. Your article has provided me with a fresh perspective on the subject matter and has inspired me to think more deeply about this topic. Leave a Reply. |
Archives
November 2022
|
 RSS Feed
|
|
Copyright © 2024 Sheila Wong Fashion Design Studio Ltd. All rights reserved.