|
This design had us feeling extra nostalgic, so we named it— Tailored Tear-Away Jumpsuit. Although the buttons don’t literally “tear-away”, this jumpsuit still gave us major Spice Girls vibes. I guess you could say we’re paying homage to our favorite 90’s fashion trend. 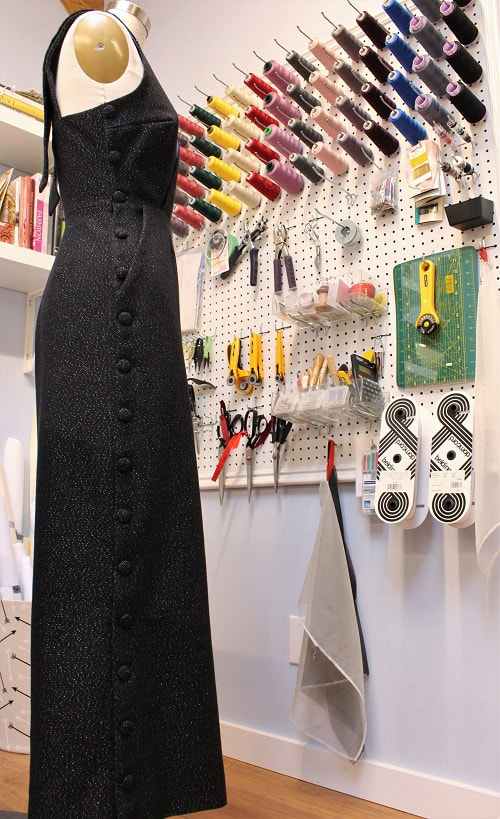 Project Specs
Design ElementsFrom secretly lined silk insides to fabric covered buttons, we will provide some insight on our favorite design elements in this jumpsuit. Fabric Covered ButtonsOur favorite type of buttons are fabric-covered buttons! There are 32 buttons in total (15 along each side seam and 1 on each shoulder strap). We wanted to play around with non traditional openings and alternative closures (ex. no zipper), so fabric-covered buttons only made sense! 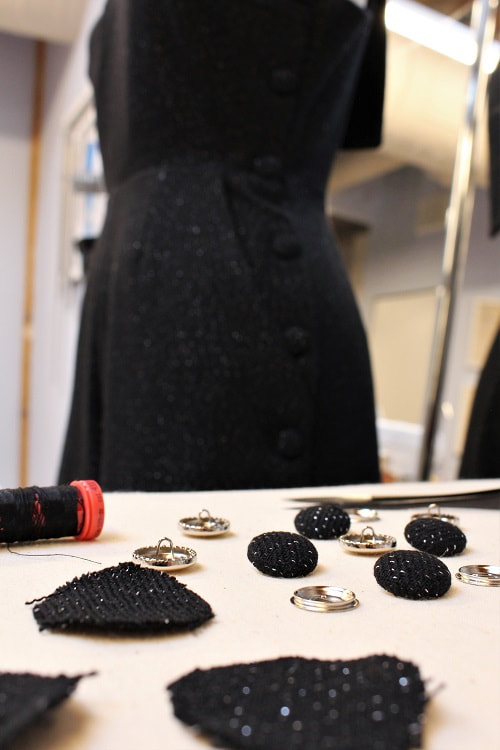 Fabric-covered buttons can add a special touch to any design and are also a great way to use up fabric scraps! You can find a button-covering kit at most fabric and craft stores. 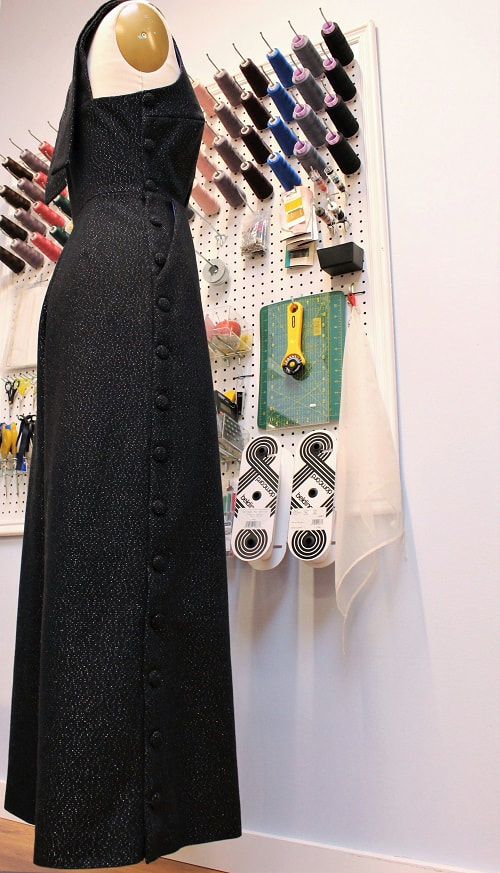 Surplice FrontA faux front cross-over is so in right now! This type of opening is very flattering and allows you to layer with a long sleeve top or blouse underneath. We are thinking about using the surplice top part of this pattern and replacing the pant part with a skirt. What do you think? 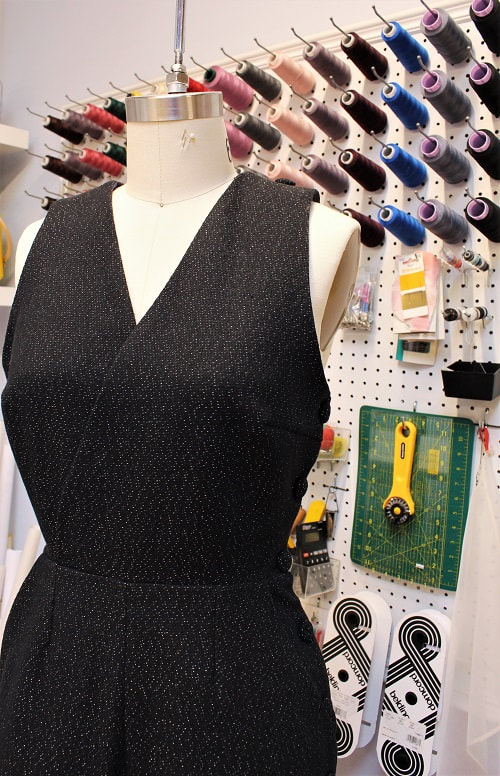 Superhero Shoulder StrapsBaby got back (straps)! Our 90’s inspired jumpsuit features two long shoulder straps that button-up at the shoulder seam and drape down the back of the garment. This visual element is a personal fave! 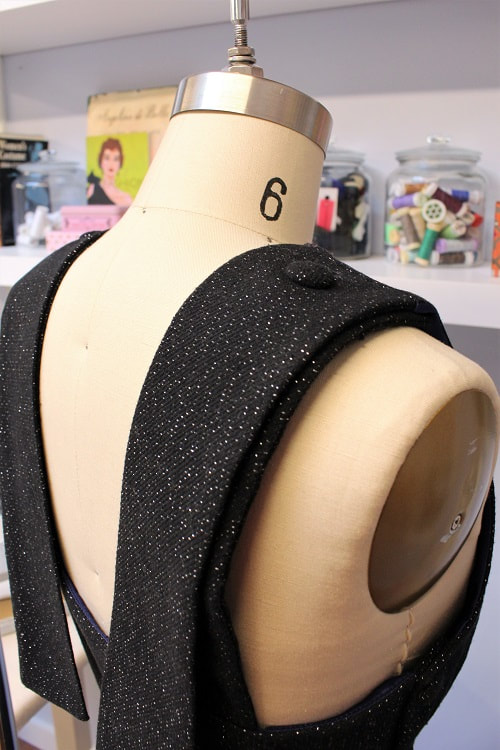  Slash PocketsNo garment is complete without pockets. These slash pockets are fully lined with the same silk charmeuse lining the inside of the bodice and pants. 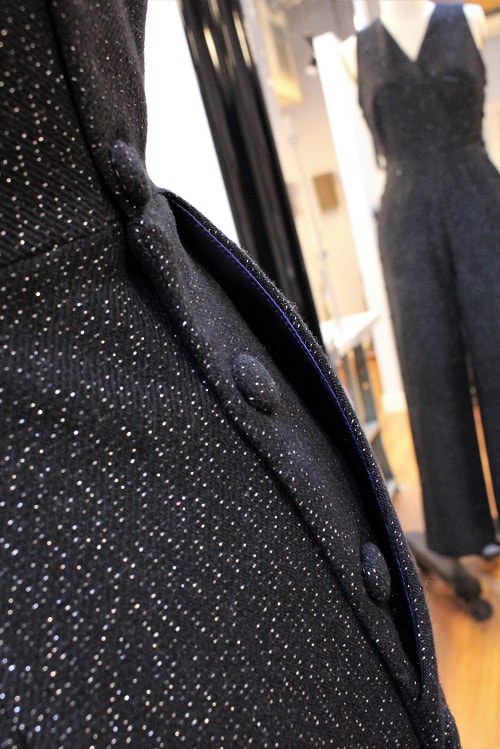 Fully LinedPssst…our insides are showing! We can’t get over the lining in our latest design- Tailored Tear-Away Jumpsuit. 2.5 M of silk charmeuse fabric was picked up from Fabricana. By far, this is one of the comfiest jumpsuits we’ve ever worn. It basically feels like your swimming in silk charmeuse!
Final DesignFun Fact: This version of the jumpsuit is in fact a wearable fit sample! That's right...version 2.0 coming soon. What color would you like to see us make this out of? 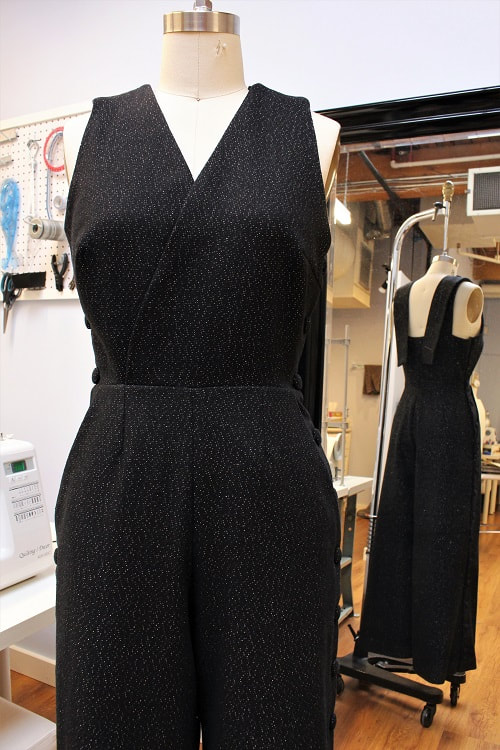 Learning how to pattern draft for your body is empowering and fun! If you want to learn how to pattern draft a jumpsuit, contact us to book lessons.
Happy Sewing! Designed, photographed and written by Sheila Wong Studios
1 Comment
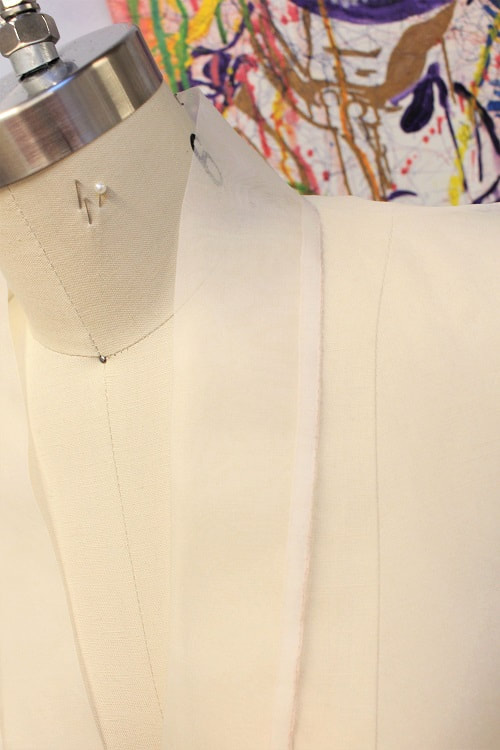
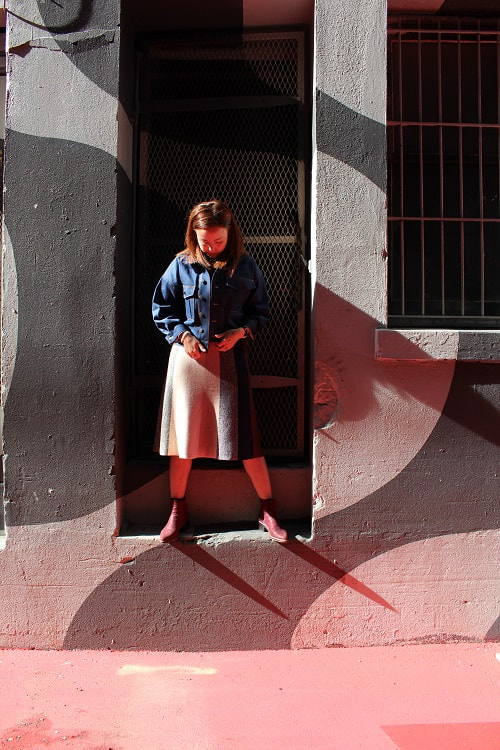
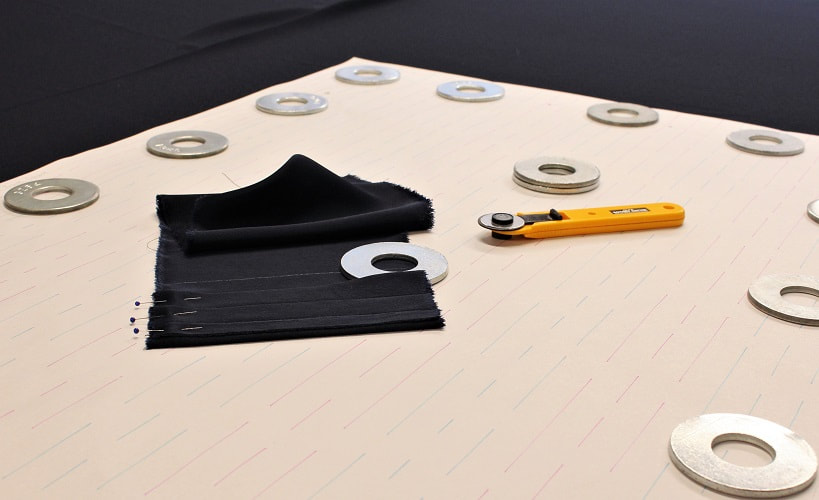
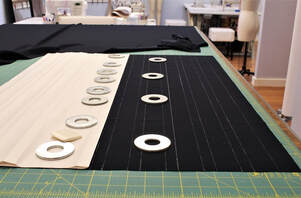
If you have been following the studio on social media or just love reading our blog, you will know I have been regularly travelling to Japan for the last four years. In 2017, I picked up a couple of vintage haori jackets in Tokyo. A haori is a traditional Japanese hip or thigh-length kimono style jacket. This type of kimono is meant to be worn open. Often times has ties mid-way along the center front opening. Traditionally a haori was worn by men until the 1800's, when geisha of Tokyo began to wear haori over their kimonos to appear more stylish. Haori is pronounced "ha-oh-ree". 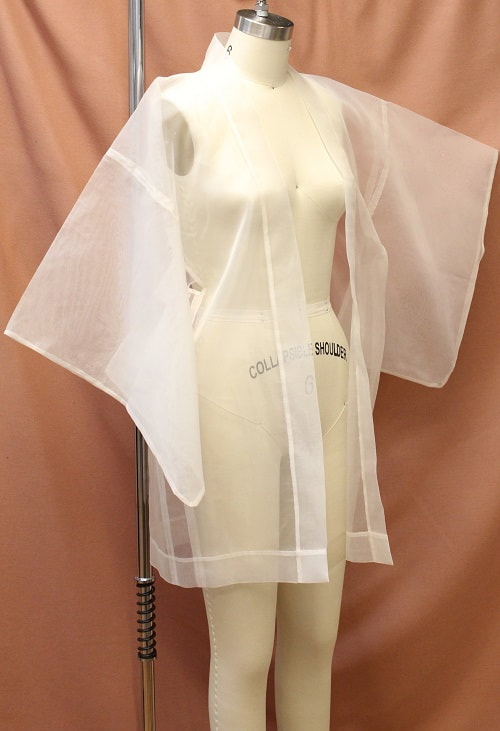 I am not Japanese, nor in anyway do I feel I have the right to say this design is made to be Japanese in its authenticity. But I feel strongly that we live in a connected world that we can and should be inspired by all cultures- regardless of our own culture. It makes us more compassionate humans. By allowing ourselves the opportunity to explore and learn new techniques through the dissection of any clothing, in particular one that is cultural in nature, provides a wealth of hands on education. 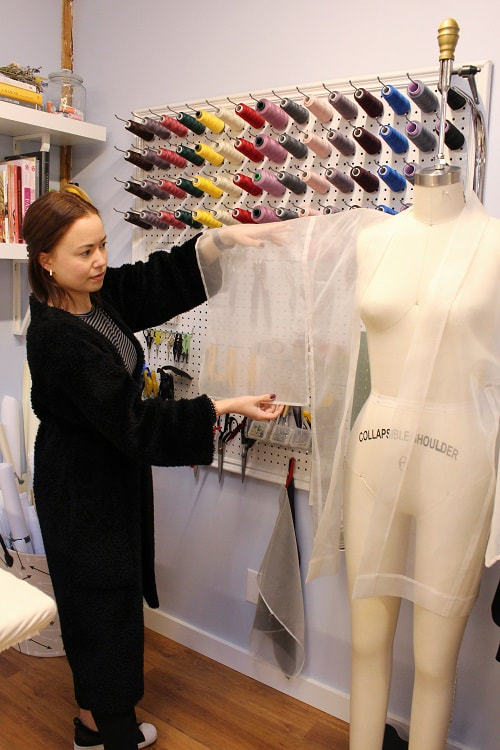 The main purpose of creating a haori was to explore the traditional pattern shapes required to make this type of jacket. I wanted to better understand Japanese philosophy behind avoiding fabric waste in kimono construction. There are a vast array of kimono styles, haori for me was the easiest place to begin as it is shorter in nature but still embodies the shapes of kimonos. Pattern DraftingUsing a haori I already had, we extracted the pattern pieces out (without harming the haori- of course!). A total of four pattern pieces make up an unlined haori jacket. Front, Back, Side Panel and Front Facing. The pattern pieces are shaped long and rectangular for the most part, with the exception of the back neckline and the bottom edge of the sleeve, which has slight curves. These type of shapes ensure little to no fabric is wasted. In modern garment construction, an average of 25% plus fabric is wasted due to their shapes, no matter how much one tries to tetris the pieces on the fabric. 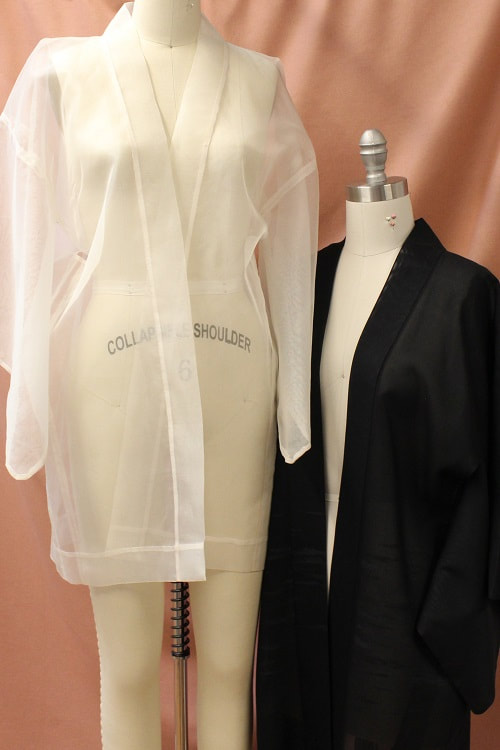 Project Stats
 Inside the DesignFull hand sewing techniques were applied to our haori. To begin, each piece was thread marked with a contrasting thread color to outline the pattern pieces. On purpose, we chose un-dyed silk organza fabric. We wanted to appreciate the hand sewing and seam finishes. Fabric was purchased from Maiwa Supply Shop on Granville Island. We maintained a narrow seam allowance of 1/4", and each stitch we kept at a 1/4" width to create harmony.
We hand stitched seams in the following order.
 A clean seam finish is a great finish for any seams that at any point along the seam, must be opened or worked into an opening. Think of a side seam that has a slit at the hem. You begin by sewing right sides of the fabric facing each other at your required seam allowance. Press your seam fully open. With the interior of the garment facing up, press back the seam allowance on both the left and right side. Then, slip stitch folded edge of the seam allowance to the body of the garment. This creates a really flat interior. 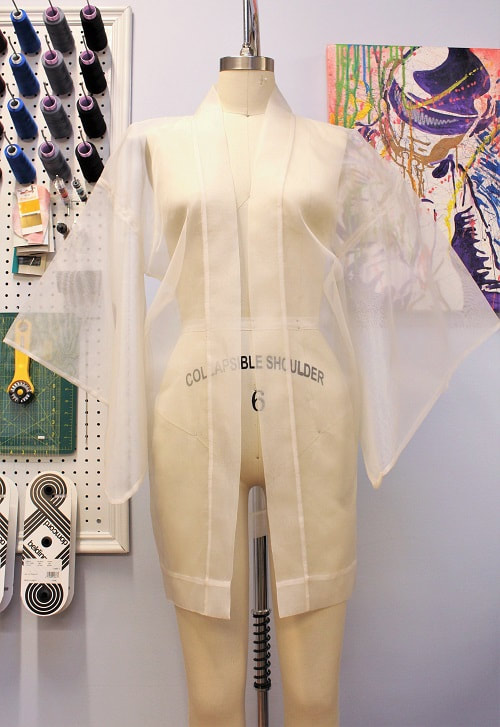 Over the next 12-16 months, we will embroider the entire jacket. My initial thoughts are french knots saturating at the bottom and as you work your way up the garment, the french knots appear less. The color palette will be purple and have an ombre effect. 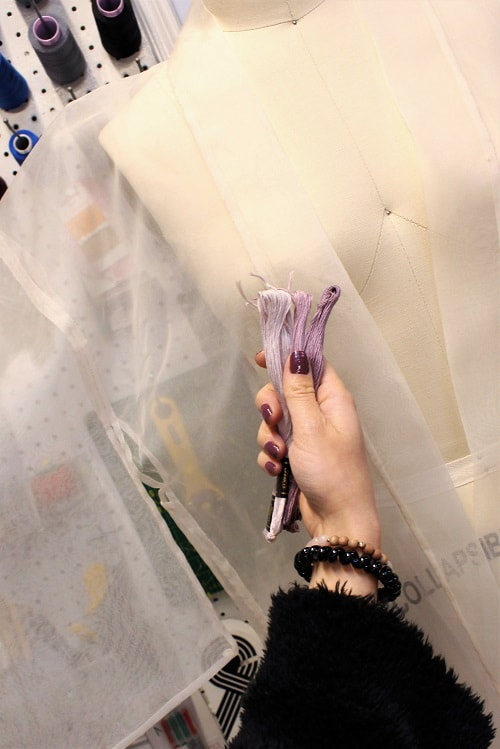 If you would like to learn more about hand sewing techniques or the art of reverse pattern drafting, contact us to book lessons.
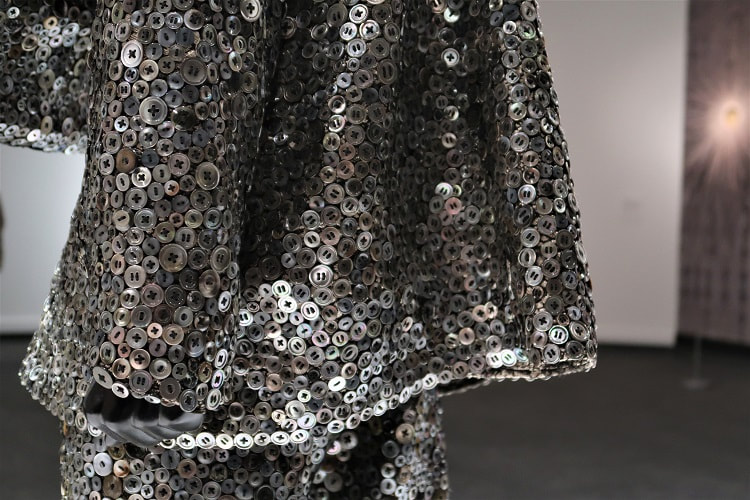
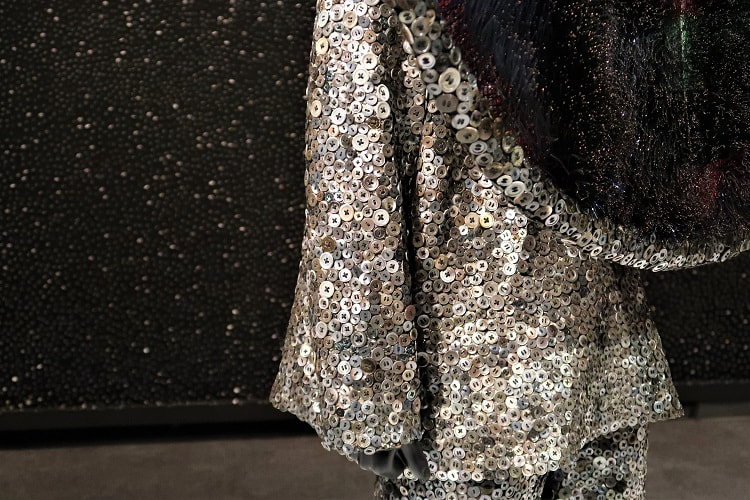
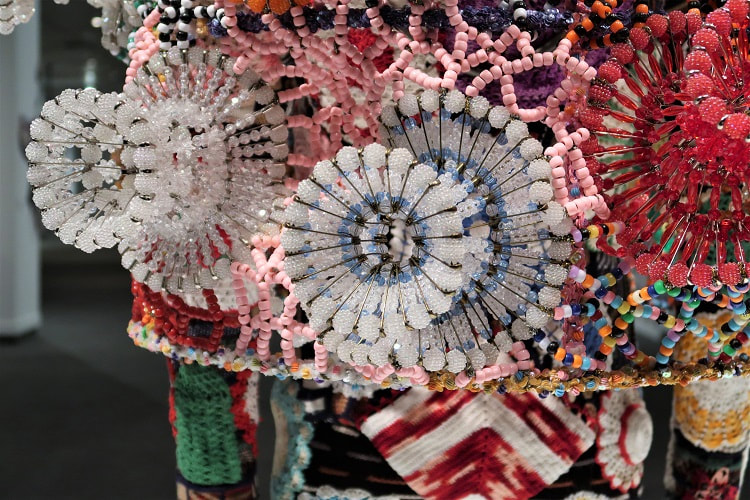
Happy Sewing! Created, photographed and written by Sheila Wong Studios. Lately I've been finding myself drawn back to my hometown of Calgary, Alberta. Glenbow Museum has been showing such inspirational exhibits this year! First Dior, and recently Nick Cave. In this blog post, I will be showing you some of my favorite pieces and close up shots from the exhibit. 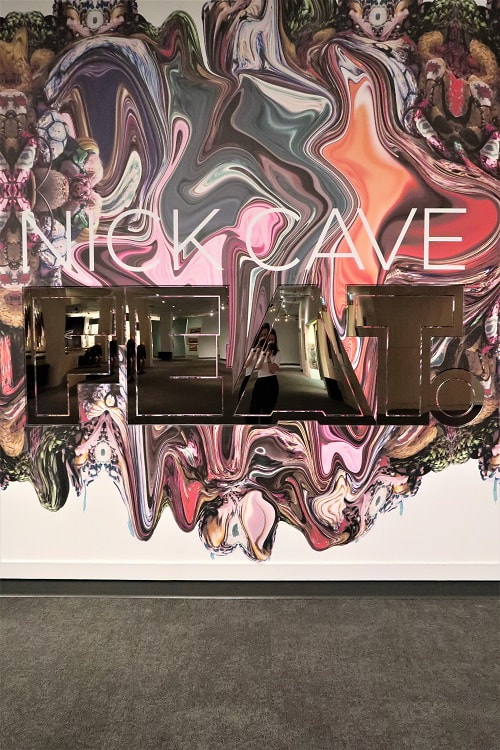 Chicago artist Nick Cave has been on my radar for many years. His creations are straight up mesmerizing, but they have a deep amount of thoughtfulness behind each one. 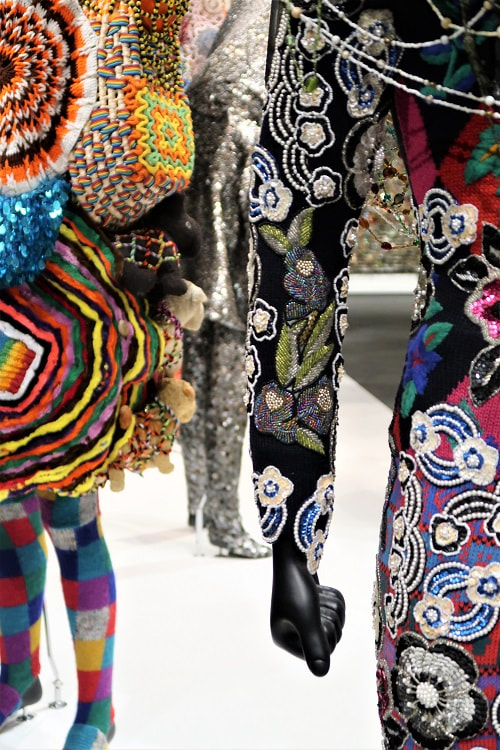 "They speak to issues of identity and social injustice- specifically race, gun violence, and civic responsibility." - Katie Delmez (Curator at Frist Art Museum). 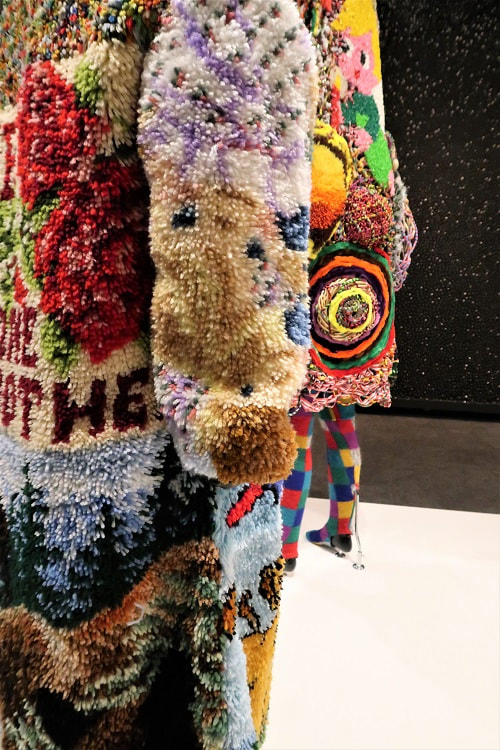 Childhood memories flooded back so delightfully while walking through Nick Caves exhibit. It probably helped that my nieces were smiling ear to ear, as we appreciated each creation together. Who else played with beads as a young child? Put your hands up! 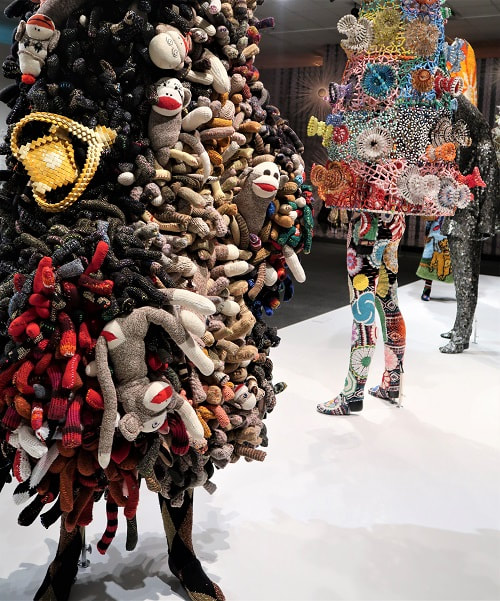 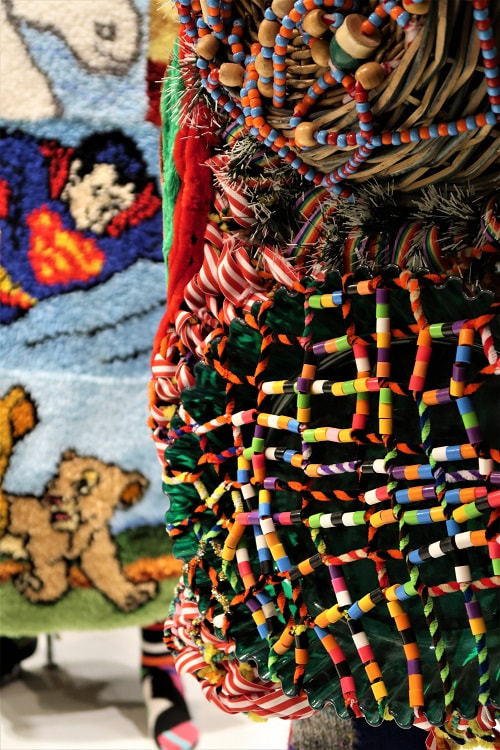 Nick Cave works with up-cycled materials found at garage sales and thrift shops. How beautiful to give meaning to otherwise discarded items. 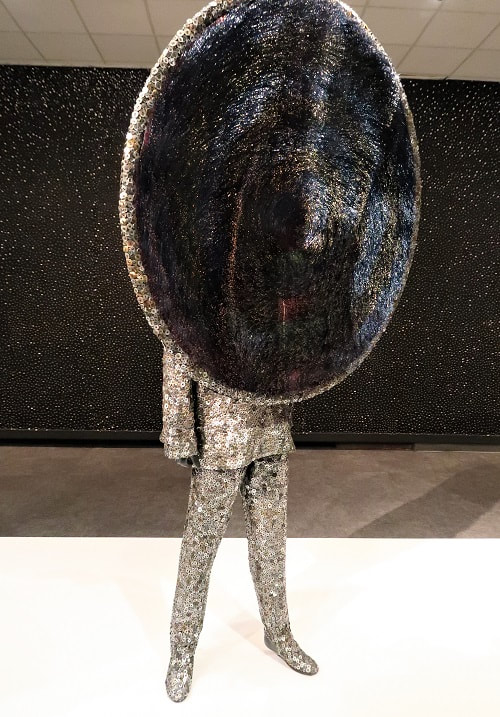 Can we please take a moment to appreciate the amount of buttons!! Look closer and you will see that the wall behind is covered in buttons as well.
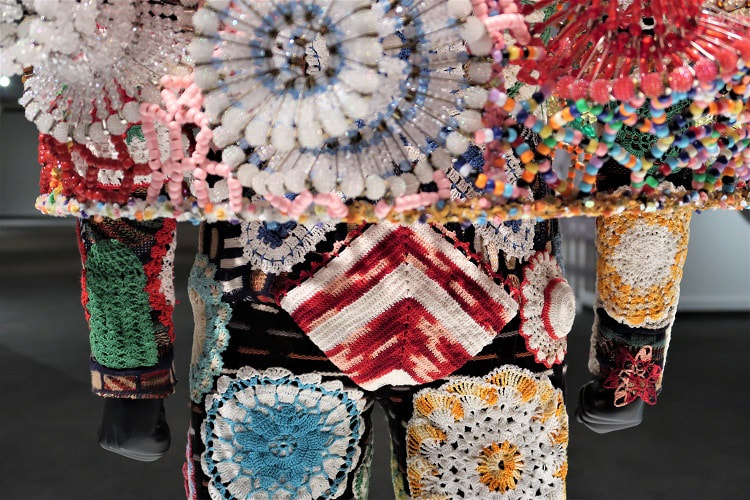
Eye spy with my little eye! Safety pins, doilies and beads. Who remembers learning how to crochet as a youth? I started with doilies and ended with doilies.
Back of this garment says it all "Love one another". 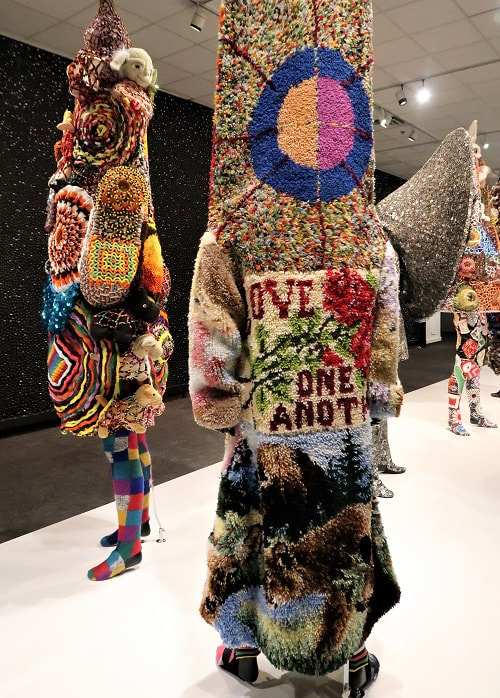 Happy Sewing!
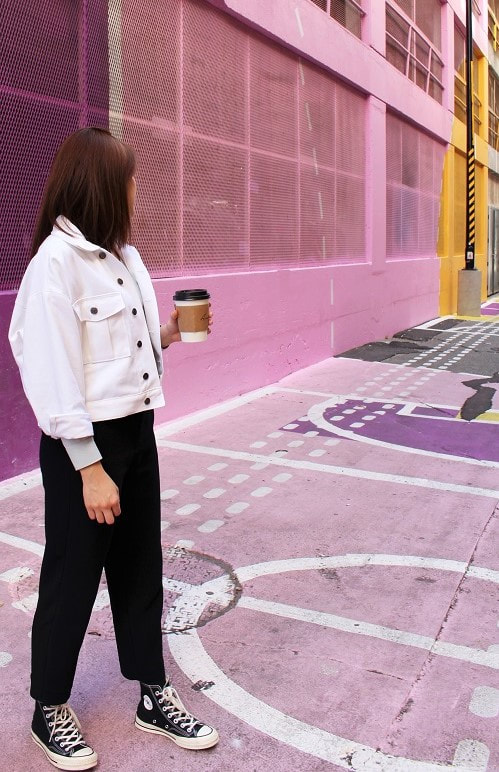
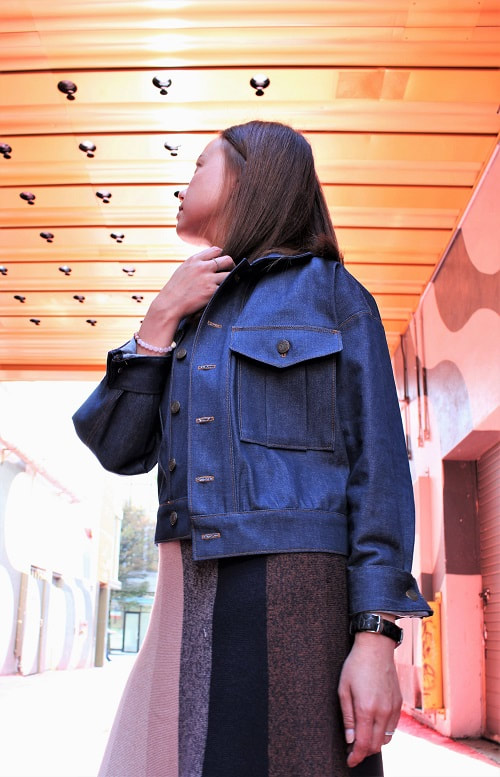
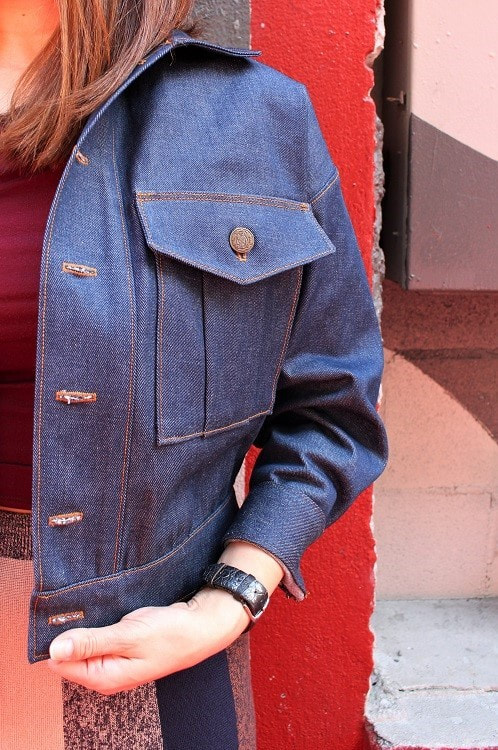
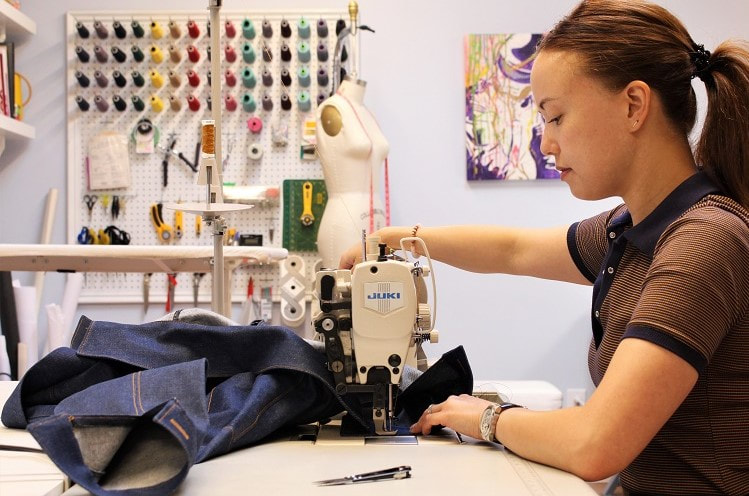
Photographed and written by Sheila Wong Studios. What do you call a denim expert? A jeanius! Autumn is finally here, so it’s time to button up on our latest denim jacket series. The pattern was created while teaching two of our clients how to reverse pattern draft their favorite denim jackets. 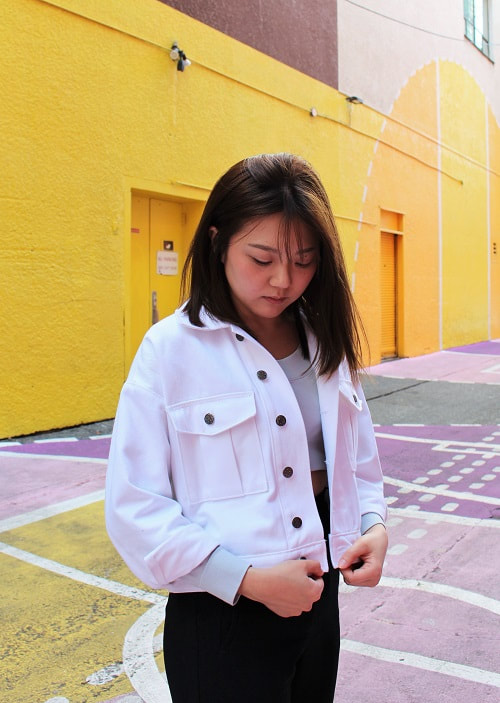 Project Specs
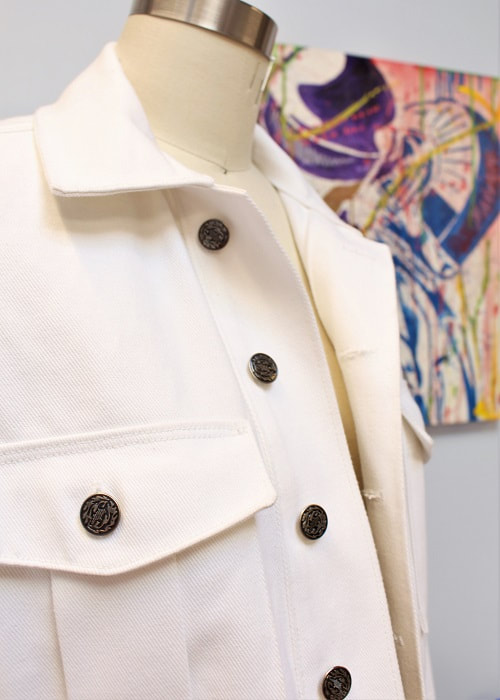
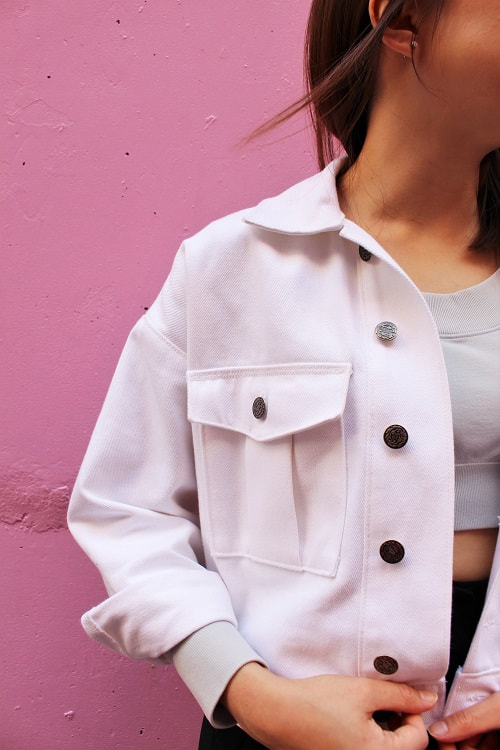
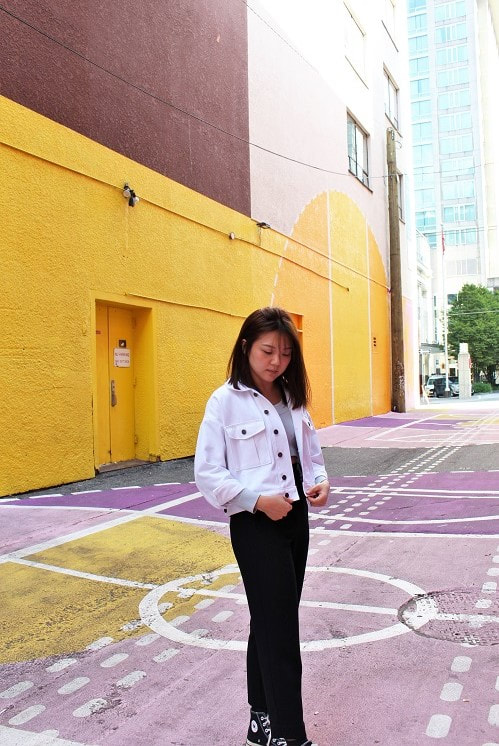
Design ElementsColor VariationsWe made two color variations of this jacket- White and Blue.
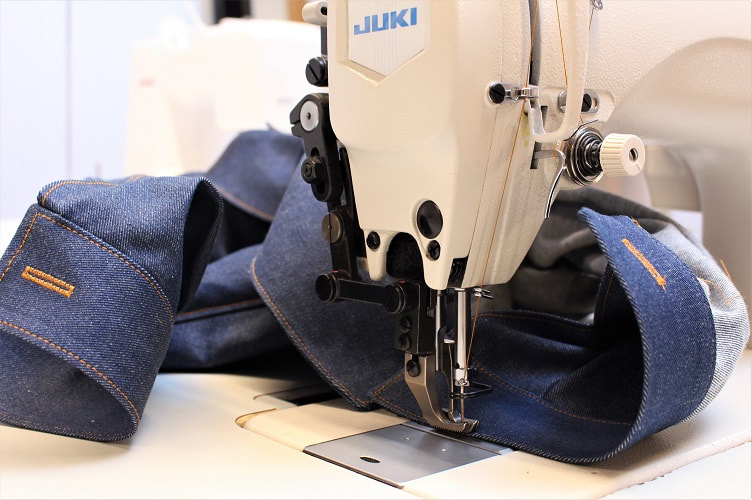
Metal Snap ButtonsThe most challenging part of constructing this jacket was sewing the buttonholes! 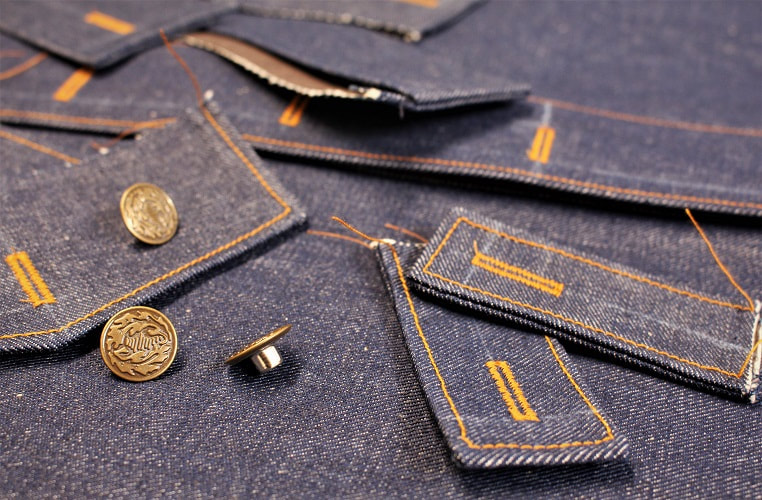 Here is an easy guide to help you sew stubborn buttonholes:
 When cutting open a machine sewn buttonhole, start by making a small hole with a rotary blade in the middle of the buttonhole. Now swap to scissors. Use scissors for cutting out from the middle to the edge with the tip of the blade. This will assist in accuracy. Avoid rolling open the buttonhole with a rotary blade and avoid a seam ripper. Take your time! Top StitchingSewing Tip- When using top stitching thread (thicker thread), use regular size thread in the bobbin if you are having trouble with tension issues. Keep the upper thread thick though. 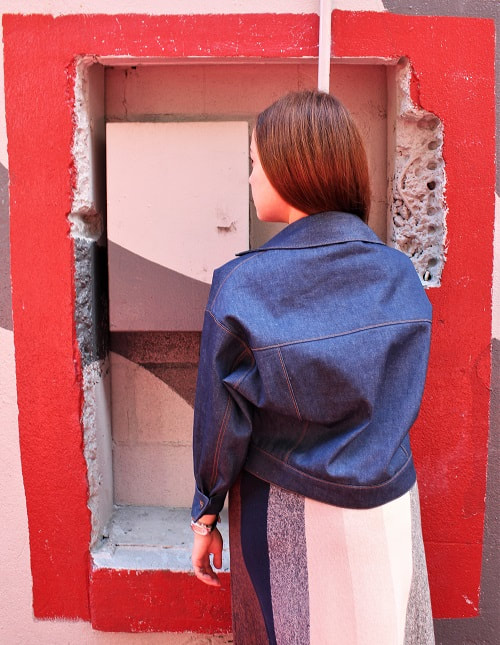 Box Pleat Patch Pocket with FlapOne of the most traditional pockets found on a denim jacket- a box pleat pocket with a flap. Did you know if is was 3D, it would be called a safari pocket?!
Cropped HemStop, Crop, and Roll! Boxy design meant a cropped length would work perfectly. What length do you prefer in a denim jacket? 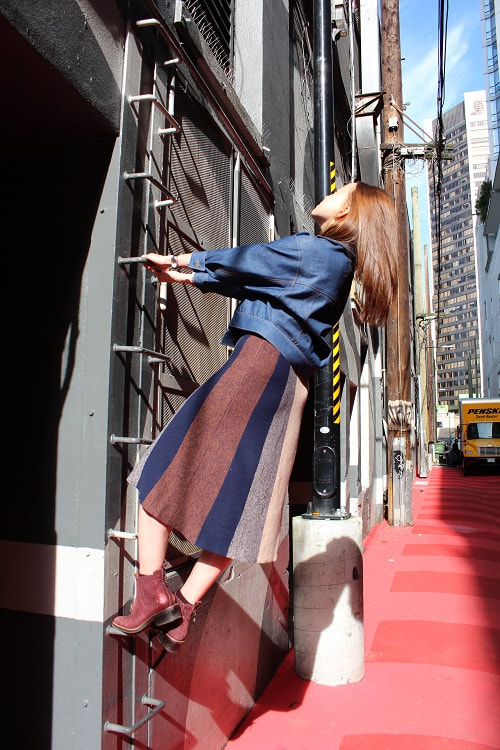 Denim Sewing HacksWhen working with really thick denim, change your needle to a larger size (16-20) and try to hand wheel over thicker areas to avoid breaking your needles. You are most likely to break a needle going at faster speeds. If you are having trouble with thread tension due to fabric thickness variations, swap to a walking foot. It will walk over your layers with ease.
Final DesignThis design turned out to be a real beauty. She must have nice jeans...
BonusWe are thinking about painting the white jacket. What do you think? Keep it clean or paint it up??!!  Happy Sewing!
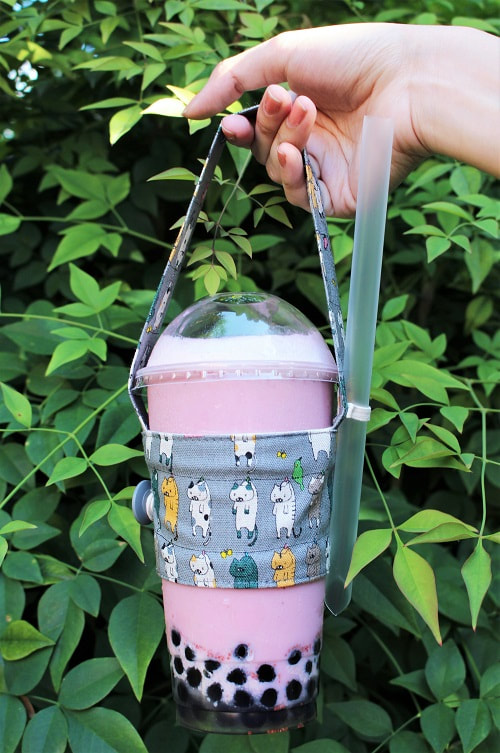
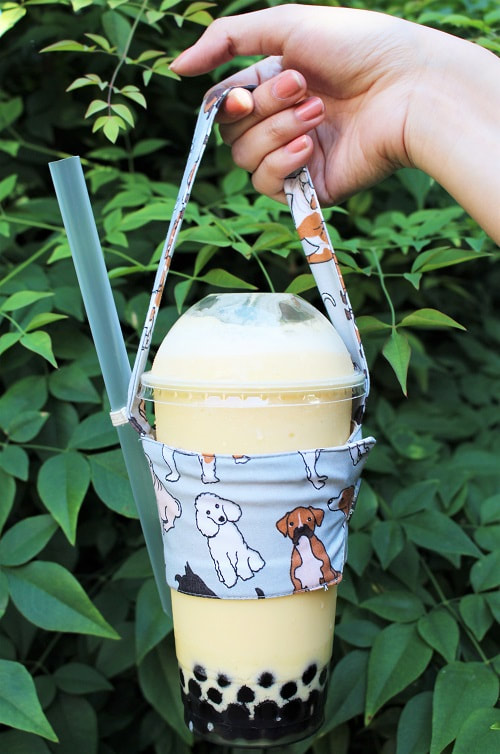
Designed, photographed and written by Sheila Wong Studios This tote has us feeling all bubbly inside! Our latest sew-along will take you through the step-by-step process for creating your own bubble tea tote. Perfect for busy boba lovers! 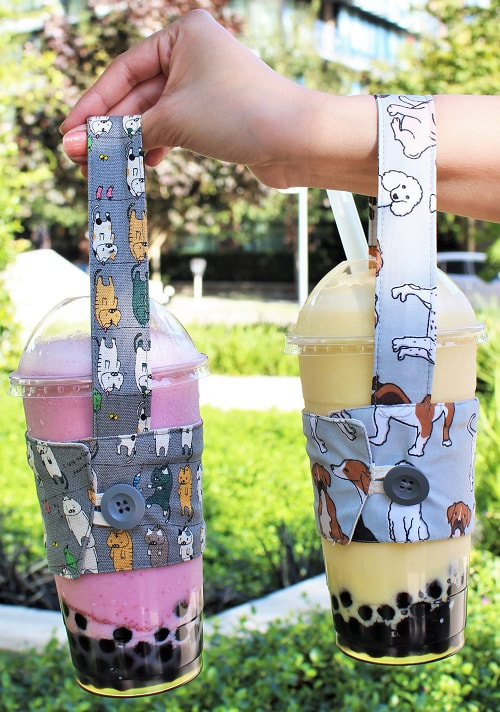 Materials
Pattern DraftingFirst of lets create patterns! Create the following patterns pieces.
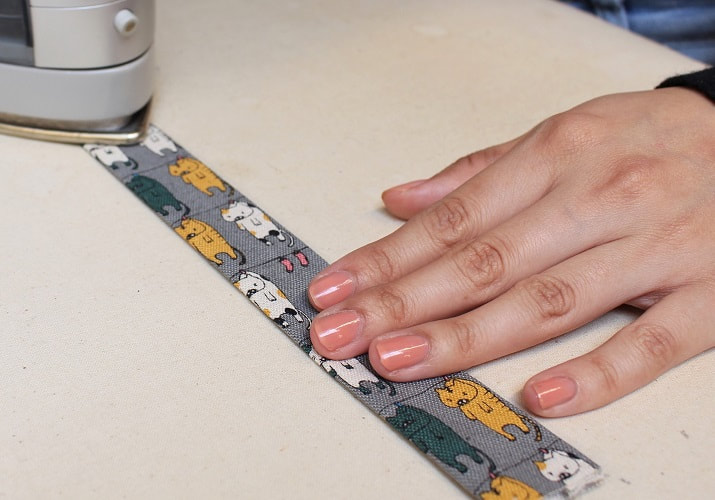
Step 1To create the basic shape for your MAIN SLEEVE, pick up a sleeve protector from your local coffee shop to use as the template. Trace out the shape on paper. A bubble tea cup circumference is slightly larger than a coffee cup so some adjustments will be required. Draw a straight vertical line along the straightest area (with the least curve), cut and separate. 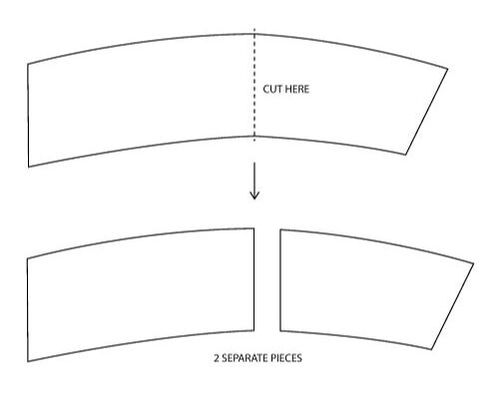 Step 2To ensure we have adequate space for a button and loop closure, add a 1” extension between the two cut pattern pieces. Tape the separate pieces on the parallel lines of the length, creating a 1” extension. Draw in upper and lower edge lines to provide you with a complete pattern piece. 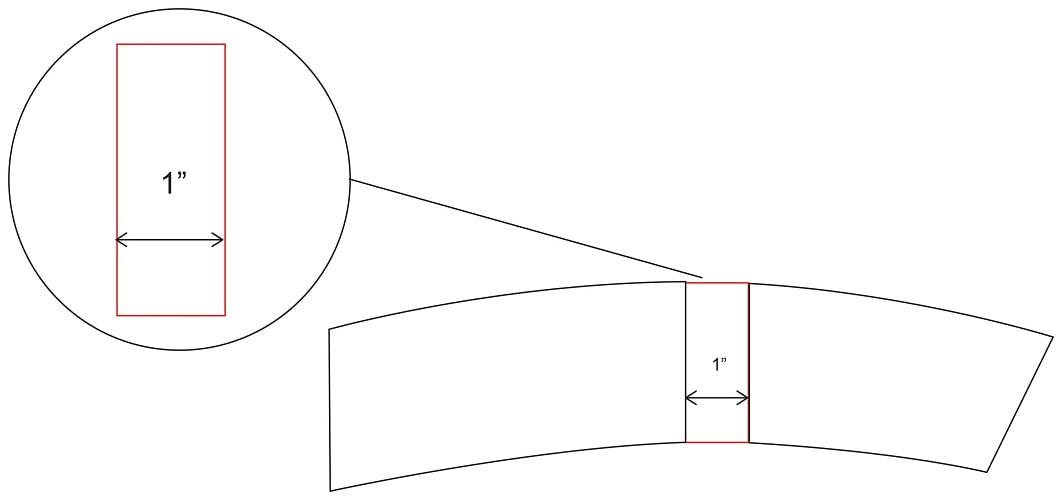 Step 3Add ½” seam allowance around MAIN SLEEVE pattern piece. Mark all notches as indicated in red. Notches are there to help guide us through the sewing construction. In this case, it will help us with strap alignment and elastic closure placement. Grainline can run N to S or E to W. 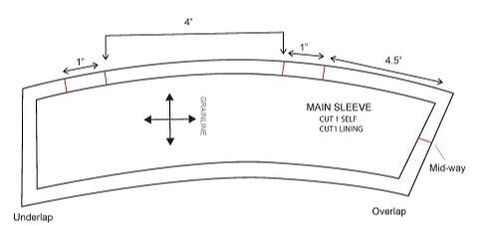 Step 4To create the STRAP pattern piece, draw a rectangle 2” (width) by 12 ¾” (length). Add ½” seam allowance. Mark all notches as indicated in red. 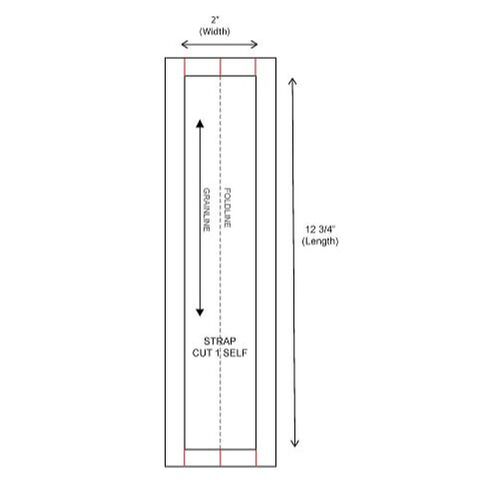 Sewing ConstructionStep 1Cut out your fabric and mark your notches. If your fabric has a print that is directional, consider this when cutting out your pieces. Please note SELF refers to the exterior or main fabric in a project and LINING is your interior or lining fabric. 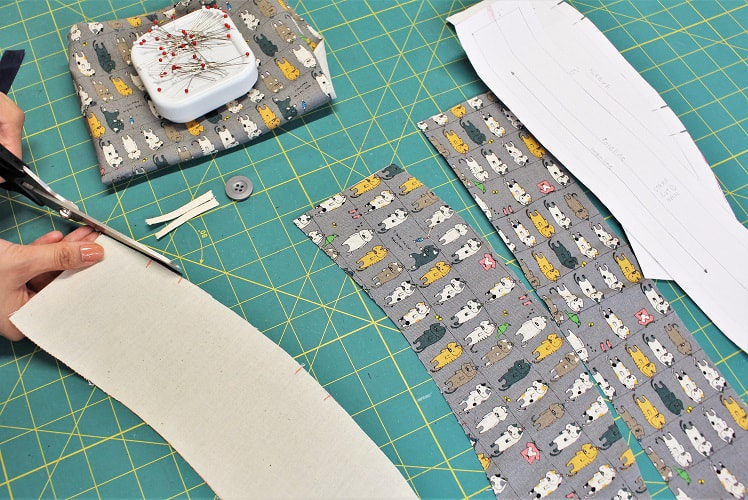 Step 2Let's begin the sewing with the strap! With the wrong side of the fabric facing up on the ironing board, press the longer edges of the STRAP by the seam allowance (½”) on each side. Then, fold the STRAP completely in half, pressing the two folds you created together. Try to get the two folds aligned for a balanced STRAP.
Step 3Pin and edge stitch both edges of the strap at approximately 1/8” in from the edge.  Step 4Pin the strap ends to sit within their corresponding notches at the top of the MAIN SLEEVE. Pin to the exterior fabric piece. We will get to lining at a later step. Stay-stitch STRAP ends to MAIN SLEEVE. Stay-stitching can be done with a longer stitch length and within the project seam allowance. We use ¼” seam allowance as our stay-stitching guide since the overall seam allowance in our project is ½”.
Step 5Time to stay-stitch our elastic closure into place. But before sewing we need to fit our elastic loop. To get an idea of how long your elastic closure needs to be, measure a tight loop around your chosen button and add 1” (½” seam allowance x 2). Feel free to go on the tighter side for the loop as elastic does stretch. Pin and stay-stitch elastic ends in place.
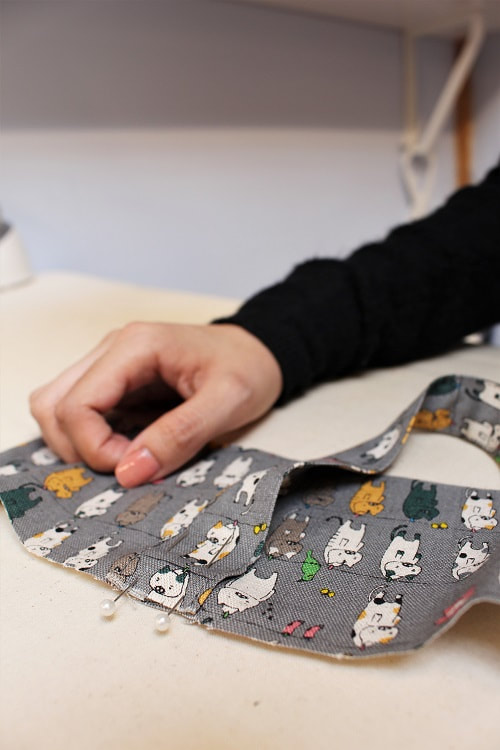
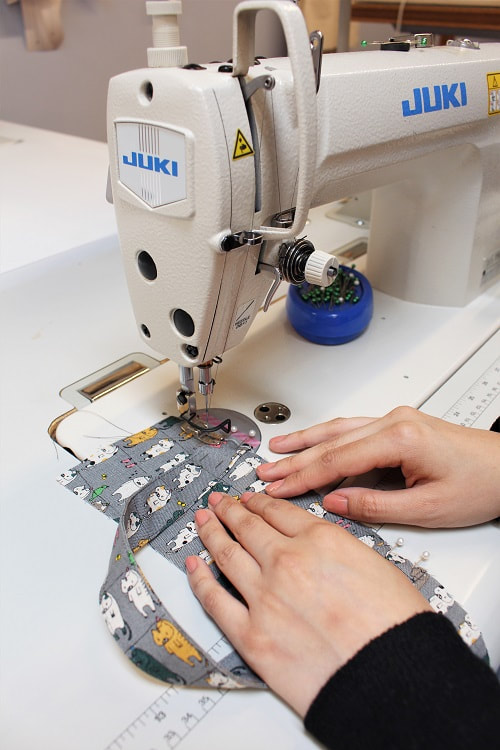
Step 6With right sides of the lining MAIN SLEEVE and the exterior MAIN SLEEVE facing each other, pin around entire piece tucking in the strap. Mark a 2” opening along a straight edge that's clear of the corners, strap and elastic loop. This opening will be the area you flip your project right side out later. 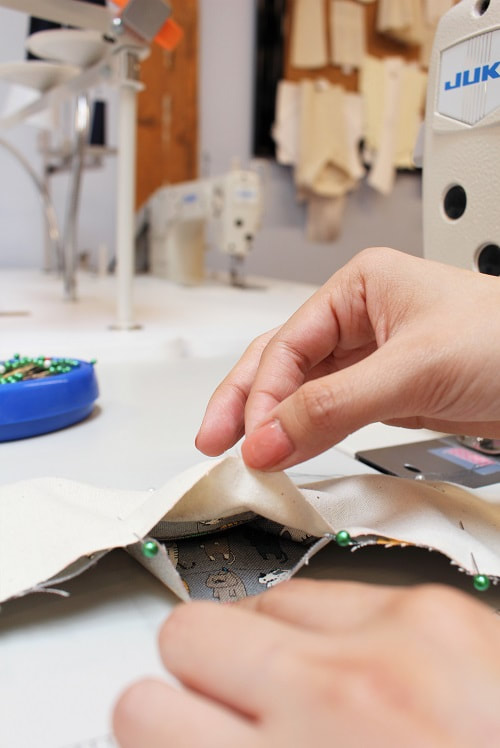 Step 7Starting your sewing at one end of the 2” opening, back stitch and stitch all the way round until you get to other end of the opening, then back stitch to secure the stitch line. Around the corners, pivot with your needle and drop the stitch length down to 1-1.5mm for a more secure corner.  Step 8Prior to flipping project right side out, reduce bulk around the corners by clipping away excess fabric like below. Leave approximately 1/8” seam allowance out from stitched corner. 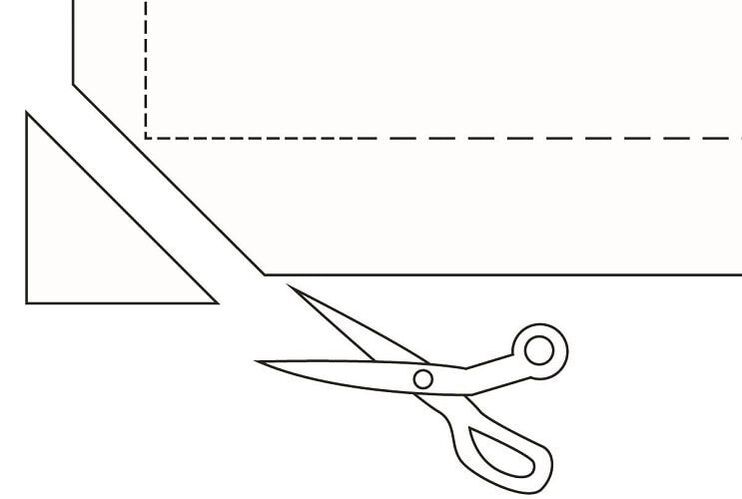 Step 9Using the 2” opening, flip project right side out. Push out corners gently and press MAIN SLEEVE flat.
Step 10Edge stitch at a 1/8” seam allowance all the way around the MAIN SLEEVE. 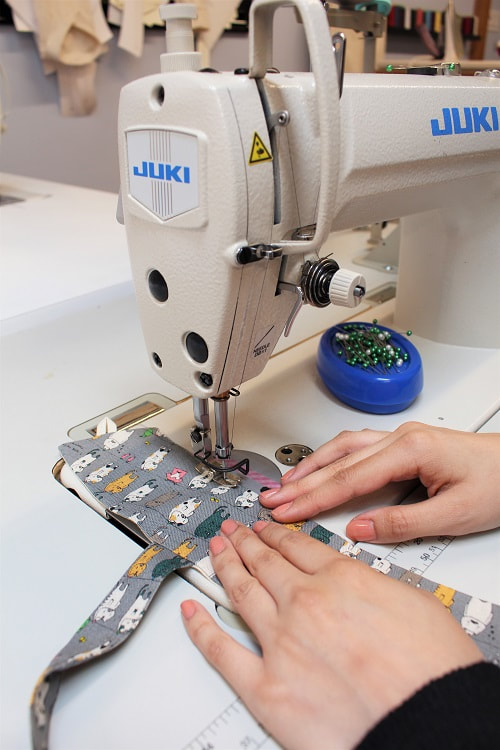 Step 11Let's finish off with some hand sewing! Hand sew your button into place. It is best to have a bubble tea cup around for perfect placement. In our example, the button was placed 2 ¾” in from under-lap edge. 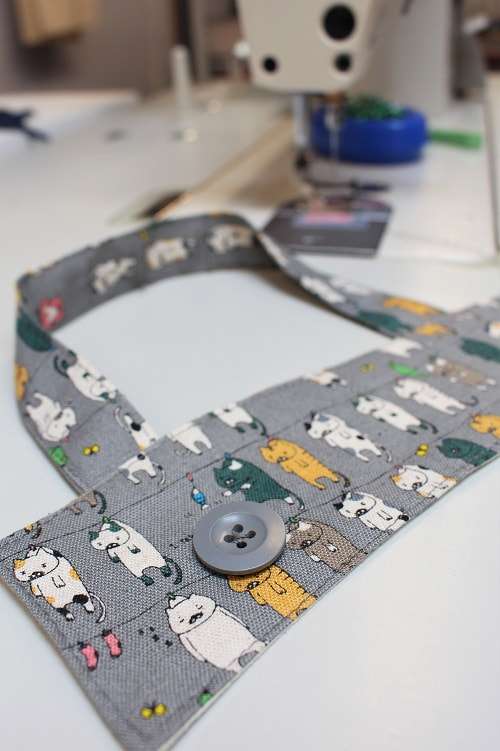 BONUS (Optional Straw Holder)Cut out a ¼” width elastic in the length of 2”. Loop elastic and machine or hand stitch elastic into place at the root of STRAP. It is best to use the opposite side the button closure is on. 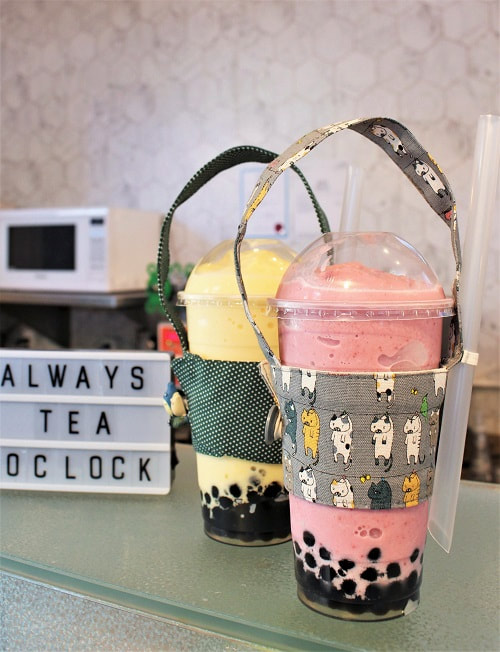 Final DesignVoila! Your very own bubble tea tote is complete. Tell us what yummy drinks you decide to show off your new design with. Tag us on Instagram @sheilawongstudios
Happy Sewing Cu-tea's!
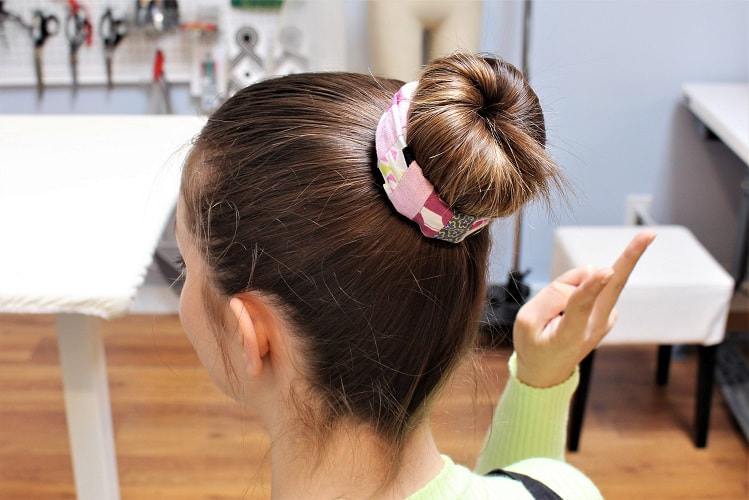
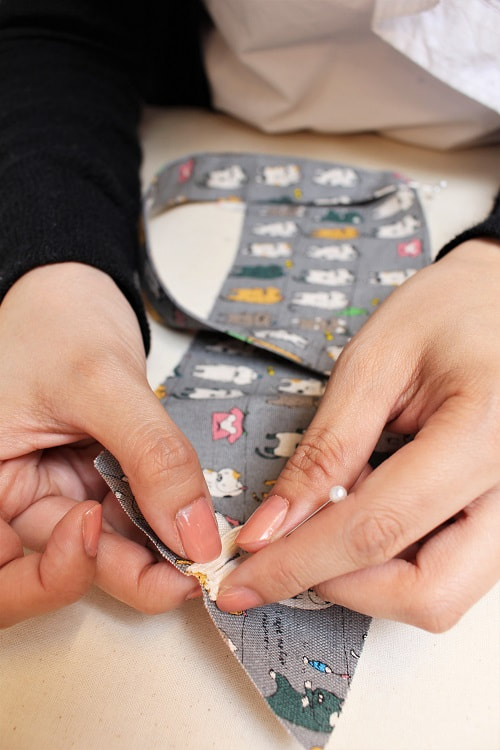
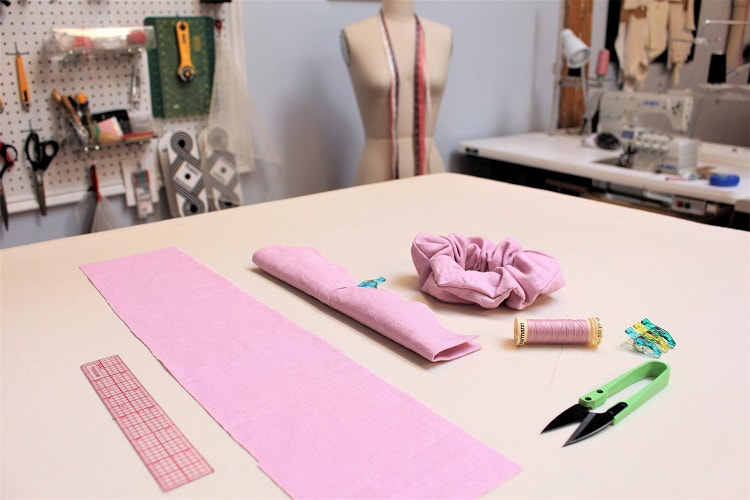
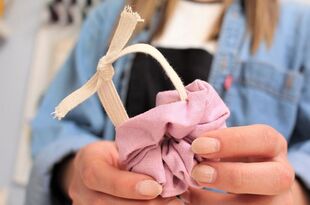
Designed, photographed and written by Sheila Wong Studios. Feeling extra 90's with this week’s tutorial!💕The scrunchie trend has proven time and time again that its here to last. Not only is it the cutest of hair accessories, but its also a great way to recycle excess fabric and reduce waste. This sew-a-long will take you through the step-by-step process for creating your own scrunchie. Materials
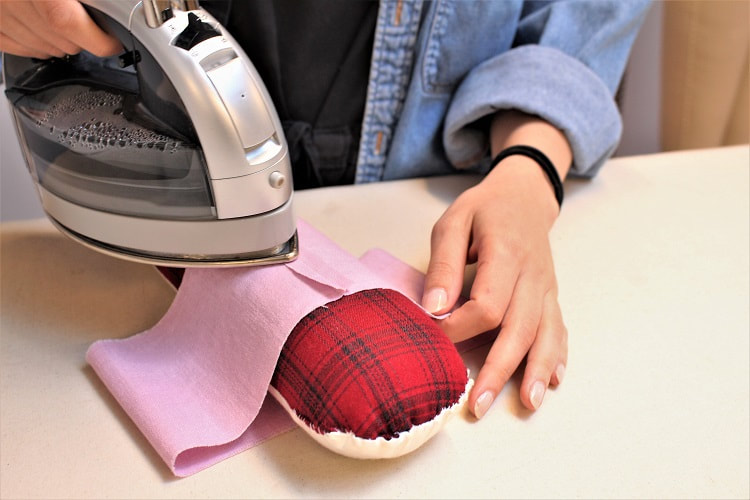
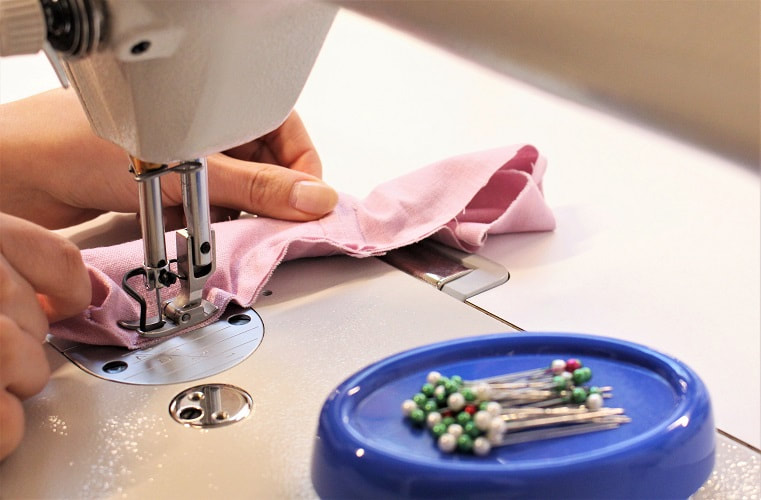
Step 1With right sides facing, fold your fabric in half lining up the shorter edges of the fabric together. Pin and stitch at a 1/4" seam allowance. Back stitch at the beginning and end. 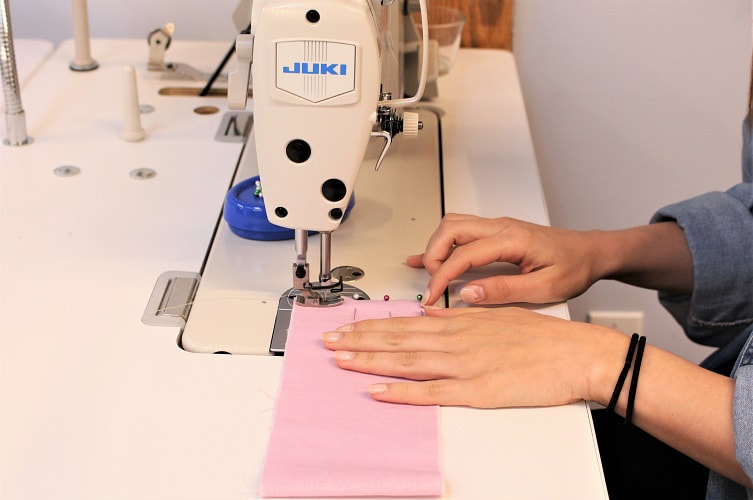 Step 2Press open seam allowance. Use a seam roll if you have one to open up with ease.
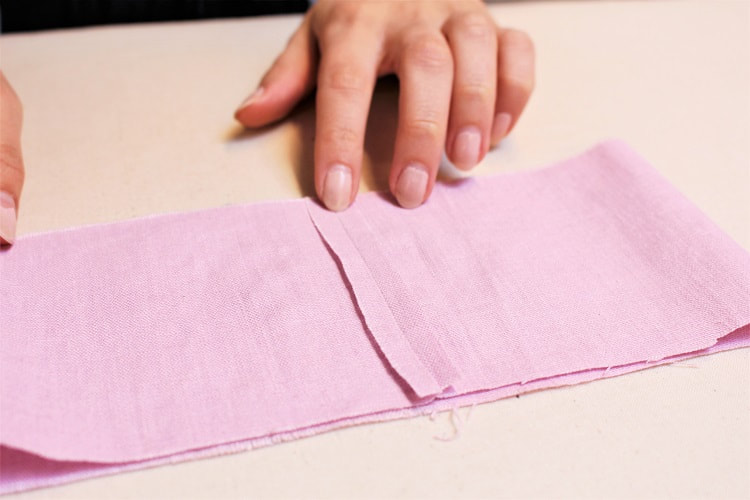
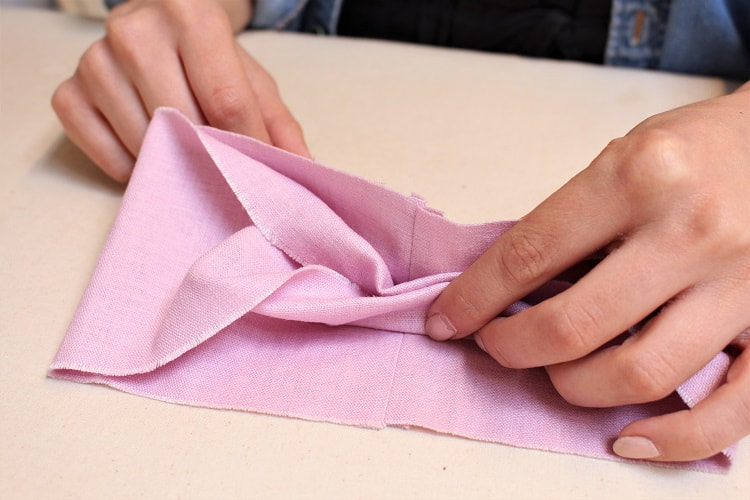
Step 3Place the fabric so the wrong side is facing out (or facing the table). Fold the raw edges in on the upper layer of the circle, enough so that the bottom layer raw edges can fully encase that upper section with room to sew at a 1/4" seam allowance. Pin lower raw edges together avoiding capturing the inside layers of fabric. Your fabric should now resemble a shape similar to a tube- hence "scrunchie tube". Tomorrow we sew the tube. 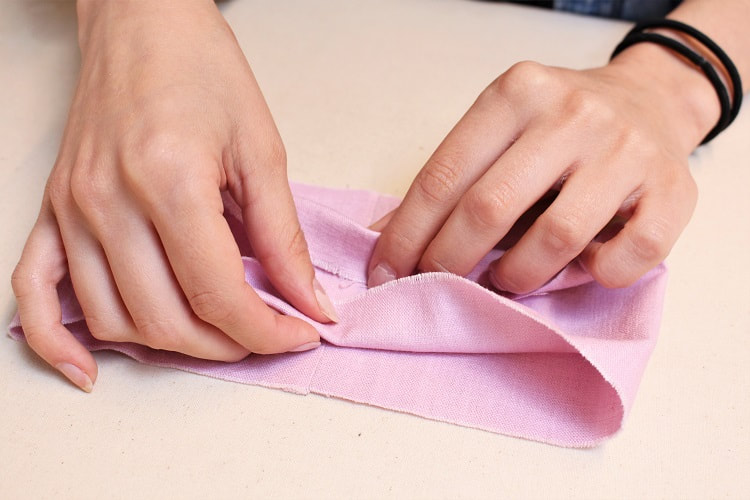
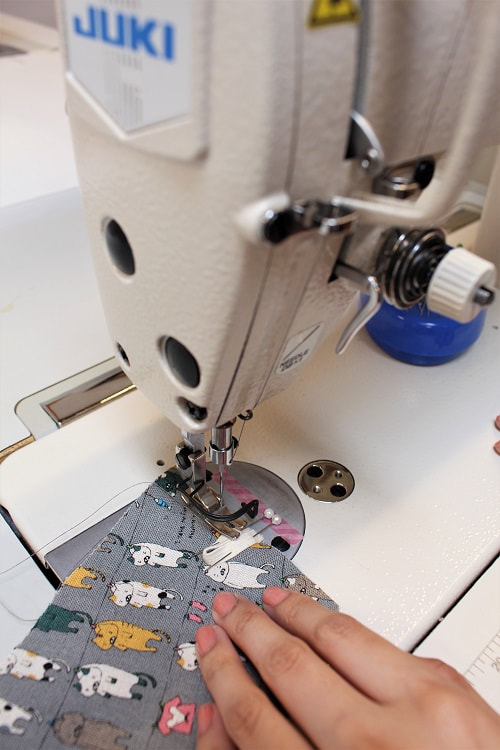
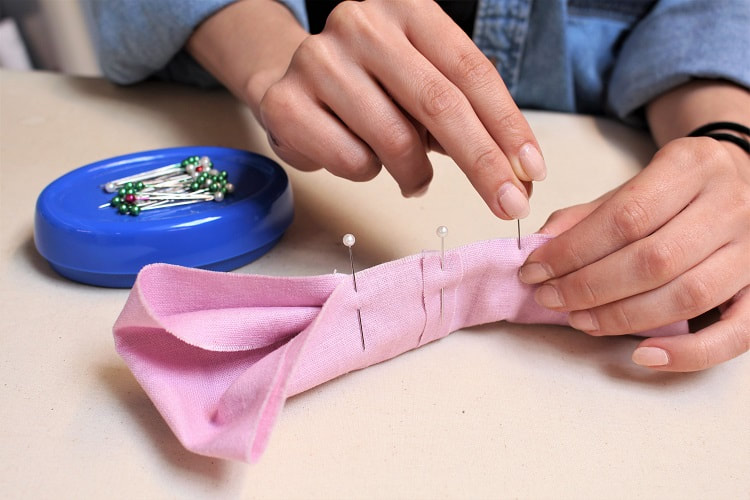
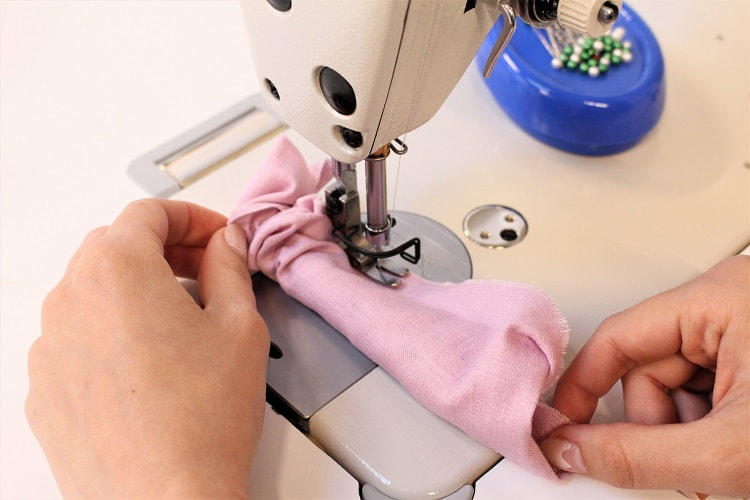
Step 4Stitch your pinned edges at a 1/4" seam allowance. Back stitch at the beginning and end. Continue sewing down the line while periodically pulling the inner layers of fabric out through the bottom opening of the tube. Make sure the inner layers of fabric are away from the presser foot so that you don’t accidentally sew them together…it happens. Keep sewing and pulling until your initial back stitch is visible. Do not sew the full circle! Leave an approx 2" opening to allow for us to flip and insert elastic.
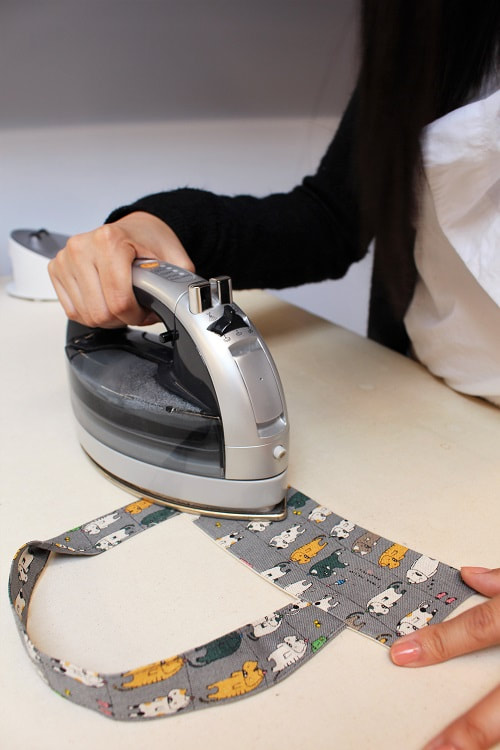
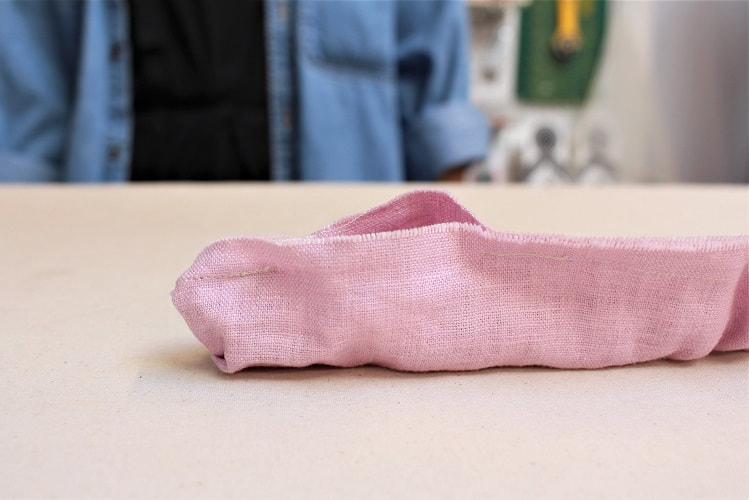 Step 5Pull the right side of the fabric through the 2” opening you created in your circle. Press seam flat. PS- How many times do you think we can get away with saying scrunchie??
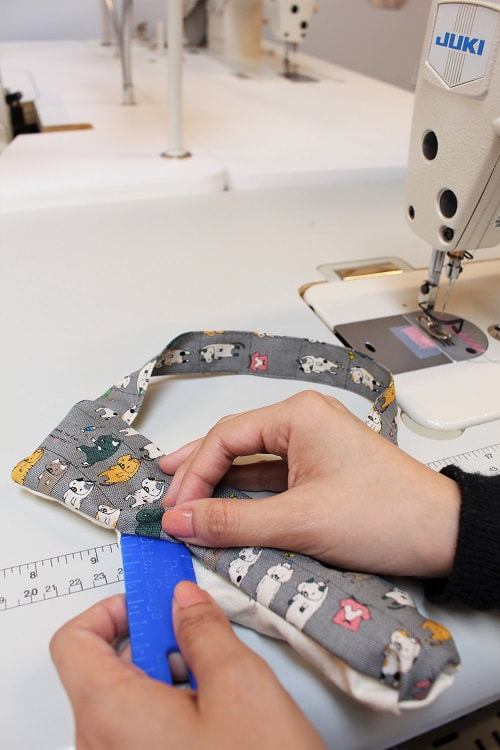
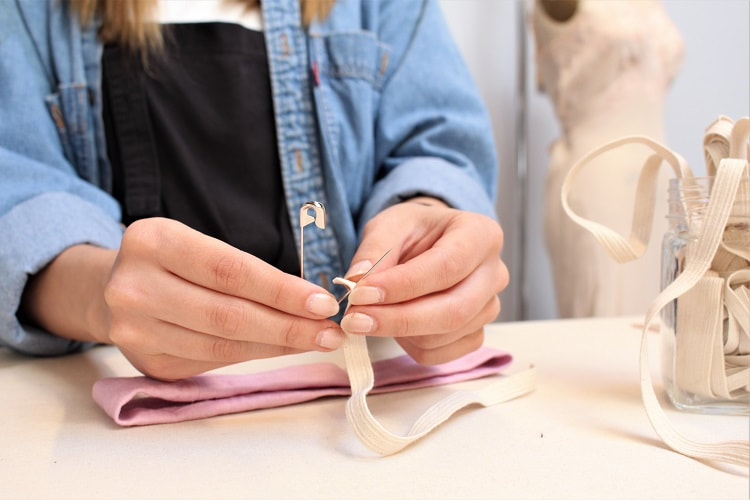
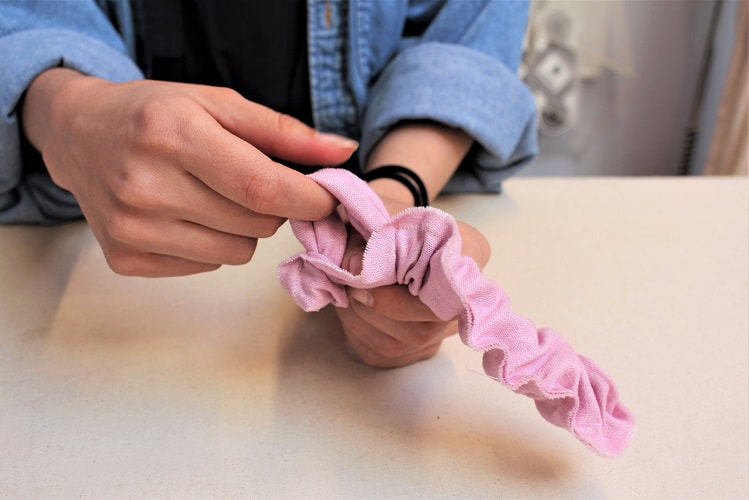
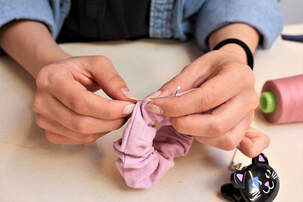
Step 6Cut 10”-11” of elastic. Attach a safety pin to one end of the elastic and feed it through the opening in your “scrunchie circle”. We recommend attaching a larger clip to the opposite end of the elastic, to ensure it doesn’t get sucked into the hole by accident. Slide the safety pin end through the fabric until it reaches the opposite end of the hole. You should see the “scrunch” forming as you go. Tie a knot with both ends and cut away any excess elastic. Give the scrunchie a final pull to hide the knot in the fabric. Alternatively, to reduce bulk you could zigzag the ends of the elastic together. 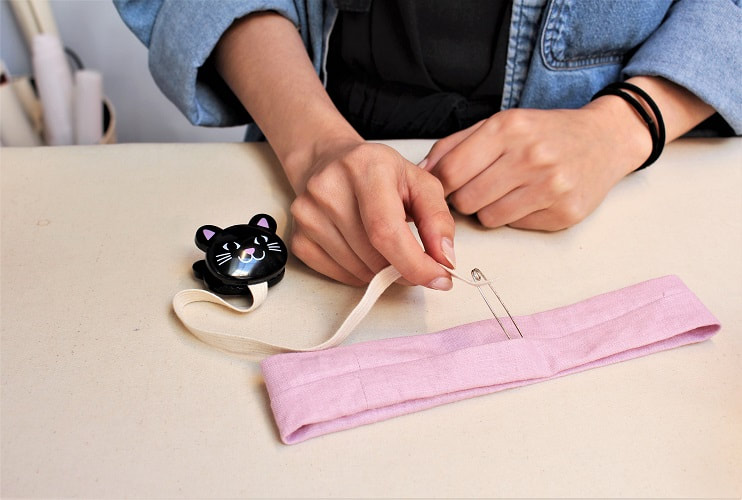
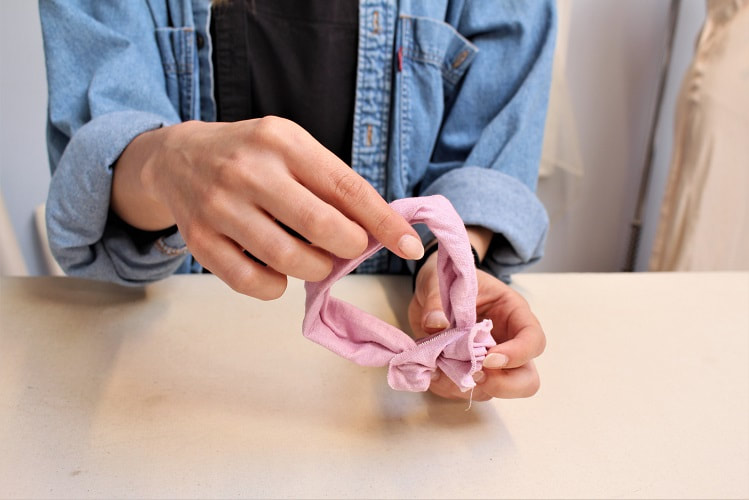
Step 7Draw stitch the opening. A draw stitch is used when you want to sew two folds of fabric and “draw” (bring) them together. Tie a knot to complete this sew-a-long!
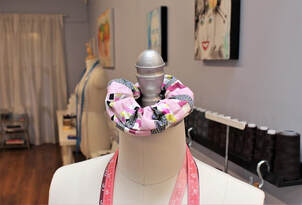
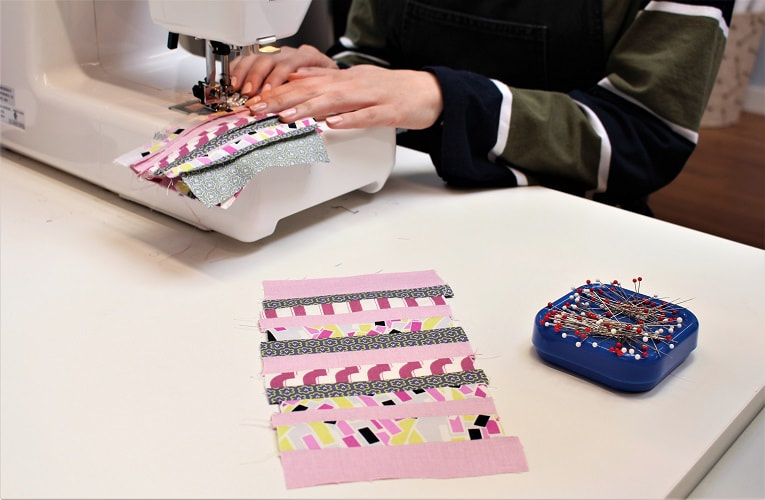
Complete ScrunchieVoila, you just made a scrunchie! Give it the hair test to see how these dimensions worked for you. Your scrunchie should be able to wrap 2-3 times around your hair. 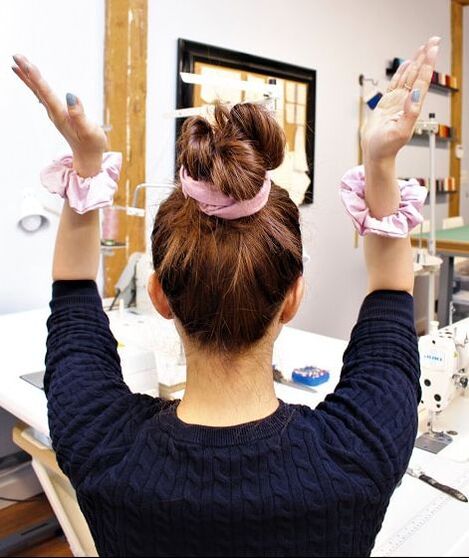 Bonus: Patchwork ScrunchieIf you have smaller leftover scraps of fabric, you can make good use of these by creating a patchwork scrunchie! This is done by sewing different strips of fabric together first to create your initial scrunchie pattern piece (19.7" L x 4.7" W).
Once you have the strips sewn together, you can continue with the steps previously shared in this sew-a-long series.
 Happy Sewing!
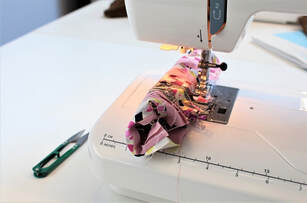
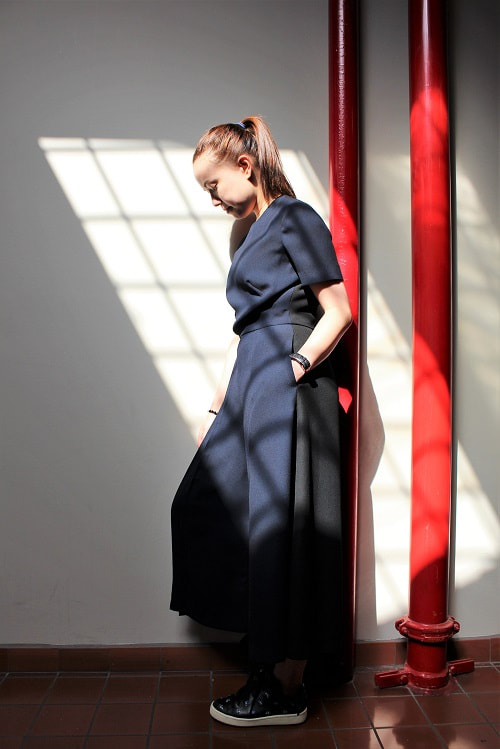
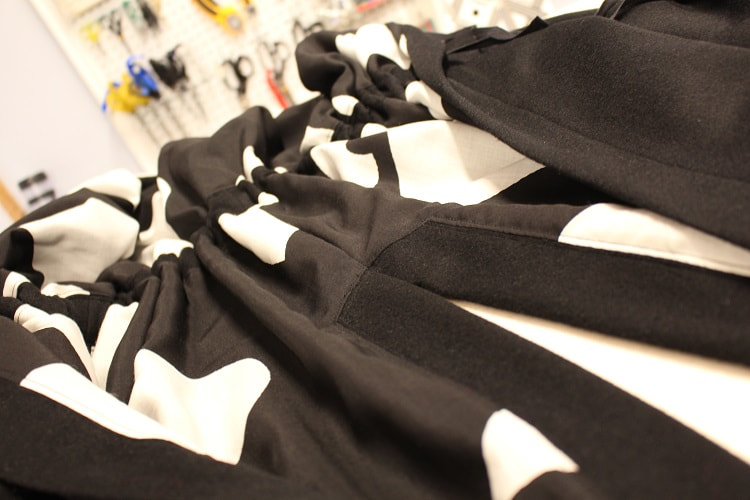
Designed, photographed and written by Sheila Wong Studios Jumpsuits are so popular right now and pleats can be found popping up in the most interesting areas of garments. This jumpsuit was designed for a specific reason- to attend a Japanese Shinto Wedding in Osaka, Japan. Respectable elements had to include subdued colors, non-exposed shoulders/arms, and the ability to wear sheer stockings with closed toe shoes. Inspired by my last trip to Japan, pleats and color blocking were the biggest design elements included. As you will come to learn, I did not have time to create a toile (fit sample), I drafted and cut straight into my good fabric! Keep reading to learn about some of my process and the things I learned! 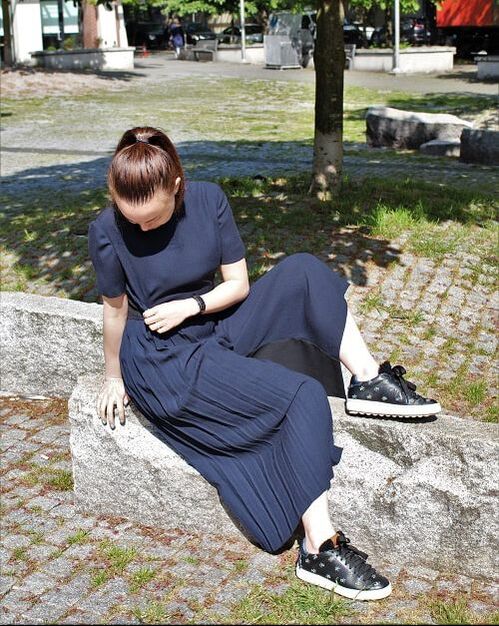 Project Specs
Design ElementsThis jumpsuit was flat pattern drafted from size 6 bodice, sleeve and culotte blocks. The major visual design elements include a pleated panel on the right leg and color blocking of dark blue in the front and black in the back. Other essential elements include french darts on the front bodice, CB (center back) invisible zipper, in-seam pocket on the left pant only, fully lined bodice, over-locked seam finishes and hand stitched hem finishes. Looking back, this is quite the complex garment. PleatsIn 2018, pleats caught my eye in Tokyo, Japan. Pleats were everywhere! Repetitive knife pleats were so popular. But the placement in garments were key I noticed. They were inserted either in panel(s) or by layers and mixed with other fabrics and colors. Hence the inspiration for this jumpsuit. Before I started drafting the pleats for the side panel, I tested a series of 4 small pleats on a sample fabric. This gave me an idea of the proportions and if the fabric I had in mind could even be pressed into my ideal pleat formation. I would recommend testing out your intended pleats on your correct fabric prior to drafting and cutting your pattern pieces. 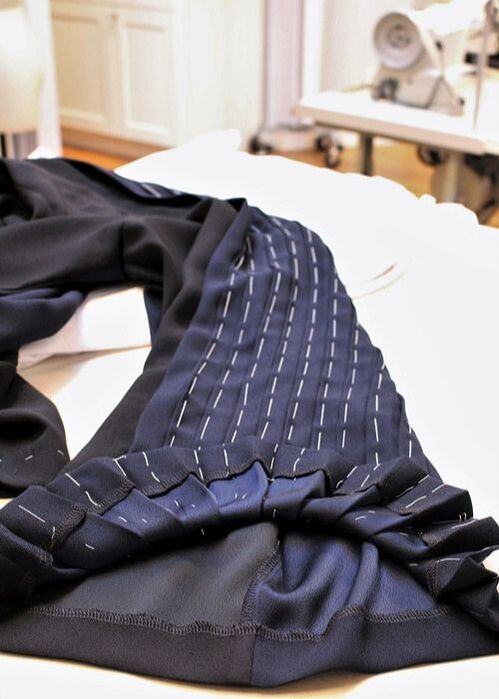 When pleating, you need to keep the fold/press lines organized. With knife pleats, I mark the fold/press line in the same color as the fold-to-here line. I then alternate each pleat in a different color so that I don't mix pleats beside each other. I promise this will keep you sane! You can mark your lines on the fabric with either chalk or thread mark. A total of 10 pleats were involved in the side panel. It took approximately 5 hours to mark, press and thread baste each pleat into place. The pleats needed to be basted into place because they where travelling across the world.
Color BlockingHands down, the color blocking is the BEST thing about this jumpsuit. I am super indecisive, so the ability to inject multiple visual looks within one garment is ideal. From the back it looks like a classic black jumpsuit, from the front it is blue, and from the side it is a combo. Depending on whether you see it from the left profile or right profile will present a whole other vibe. When color blocking, I found it was essential to maintain the same fabric. 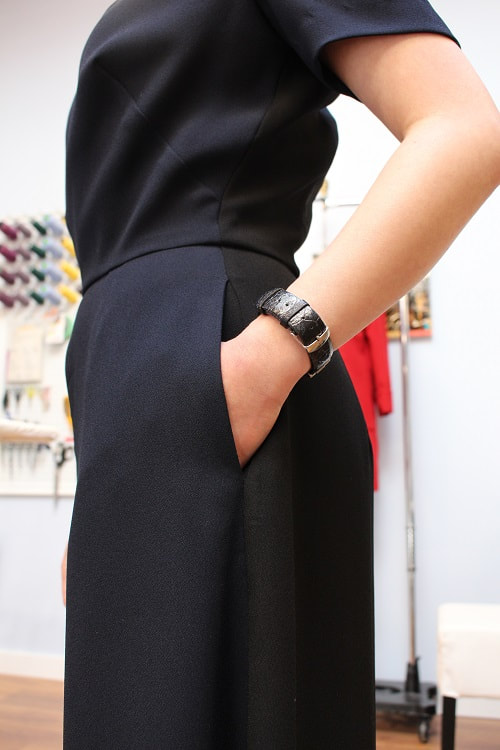 Final Design
What We Learned!This was a rushed design so... that means several design, fit and drafting changes must be made for jumpsuit number two. Essentially this became a wearable toile.
 Happy Sewing!
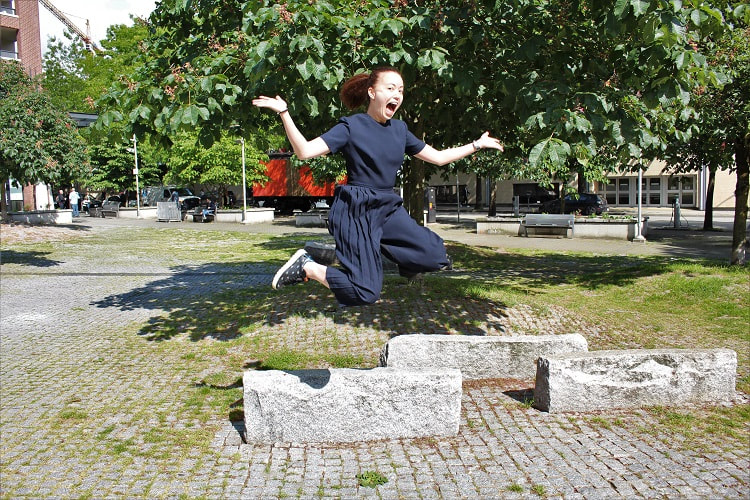
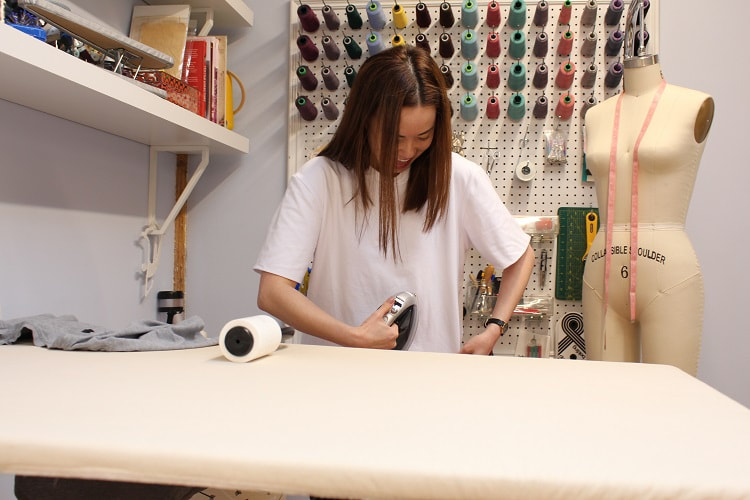
Designed, photographed and written by Sheila Wong Studios The basic white t-shirt is an iconic and essential garment in almost everyone's wardrobe. We played around with designing the perfect white t-shirt. 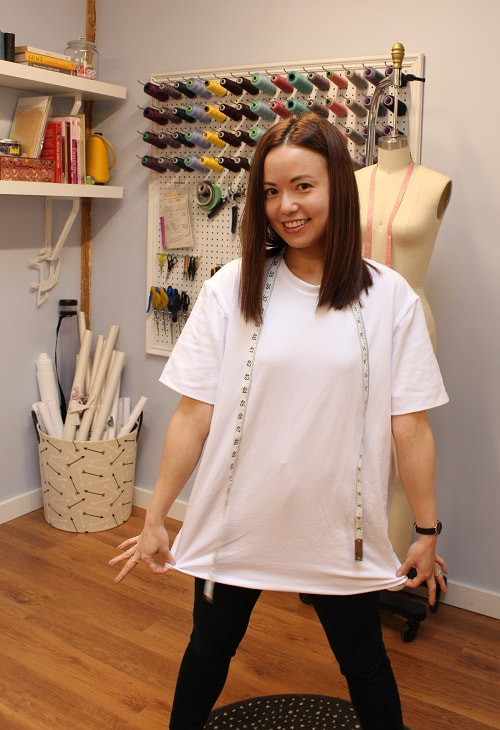 Project Specs
FabricFor the past few years, my husband has been on the hunt for the perfect white knit fabric. We have looked all over Vancouver and even traveled to Tokyo to check out the massive offerings of knit fabric in Nippori Textile Town. By far, this is the BEST white knit fabric we have found to date. What makes it the best? Well it is soft, does not have high spandex content (less than 5% is ideal), and offers the most opaque white possible. My husband has one thing on his mind when looking for white fabric- it cannot be see-through. This fabric was purchased from one of my fabric supply shops in Vancouver- Maiwa Supply Shop on Granville Island. 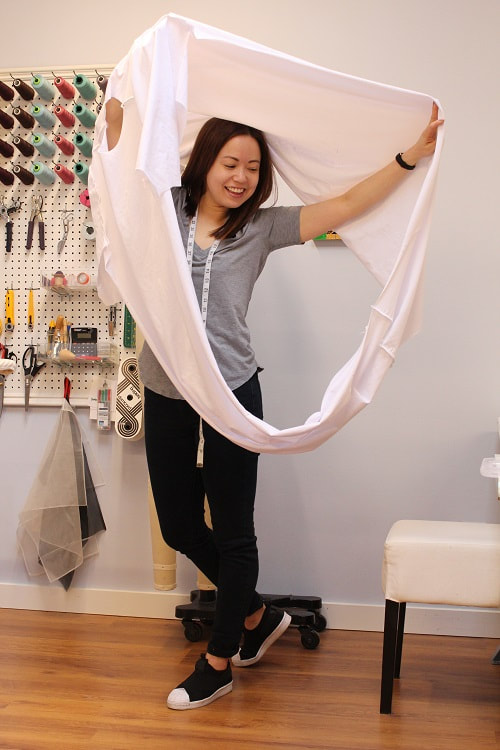 Design ElementsA basic white T-shirt does not have many design elements involved. But, leave it to us to make this basic design complex. Read on to learn about how to fully line a t-shirt.
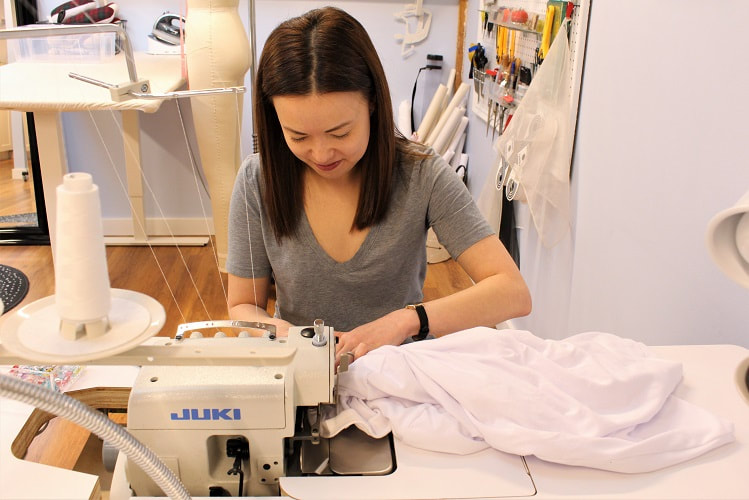
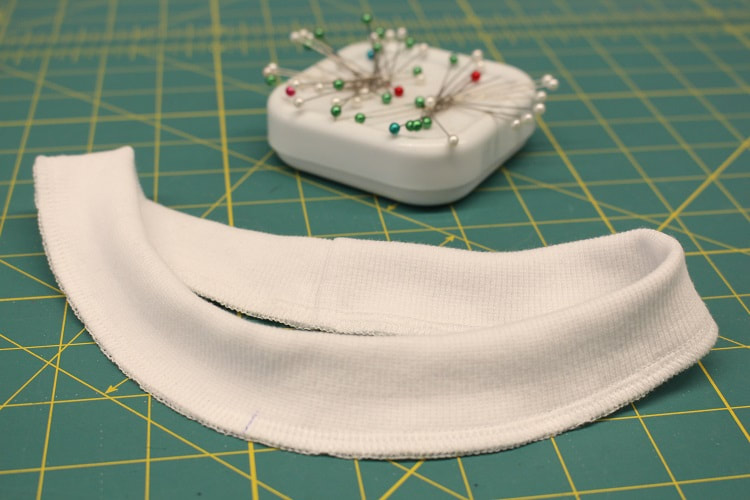
Fully LinedFully lining a t-shirt can be beneficial for many reasons. It can add warmth, it can provide structure, and you can avoid the possible see-through look when working with lighter colored fabrics. I hate seeing male nips in public, unless I am at the beach. You can modify your basic t-shirt pattern easily for a fully lined version. It will take up double the amount of fabric but that is the nature of this design. Fold the fabric on the cross-grain, lining up your hem of the main bodice pieces and the sleeve hem. Essentially, you are creating a mirror image. 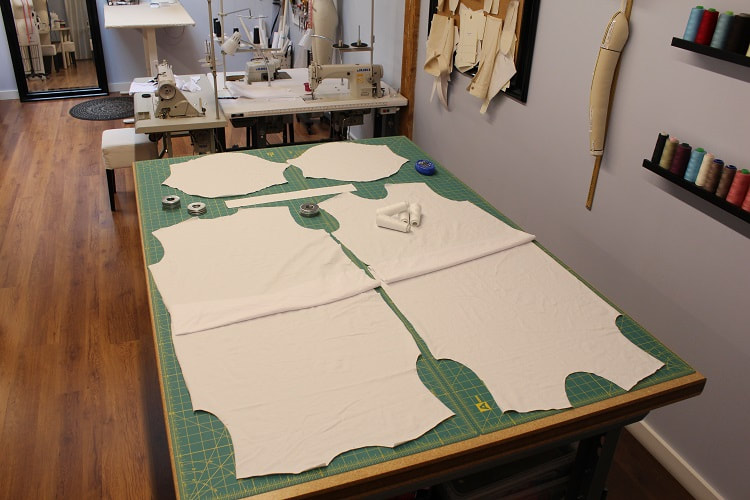 Sequence of sewing steps is a bit more complex. And YES! I did scratch my head a bit as I stitched this one up. First you lay right sides of your front and back bodice pieces together, then stitch up the shoulders (4 of them!). It looks like a big circle at this point. Next you stitch the sleeve caps onto one shirt (either exterior or interior). Once those are attached, you can attache their mirror imaged sleeve caps to the opposite shirt. Last big seams to sew are the side seams combo with the underarm seams. Everything then gets flipped so wrong sides of the fabric are facing each other. While sewing, try not to twist the layers! Ribbed NecklineIt all came together at the neckline. Literally! It was the last seam to be stitched up. The only visible seam on the inside of the garment is the neckline. If you wanted to make this t-shirt fully reversible, simply leave a 3-4" opening along one of the side seams. Use that opening to enter in to stitch the neckline ribbing (sandwiching the exterior and interior shirt necklines). Then hand sew the opening closed. A draw-stitch would work well to bring the folds together. 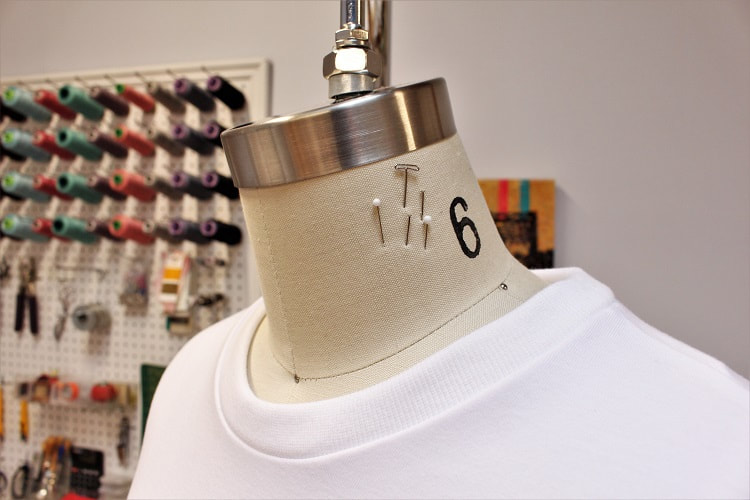
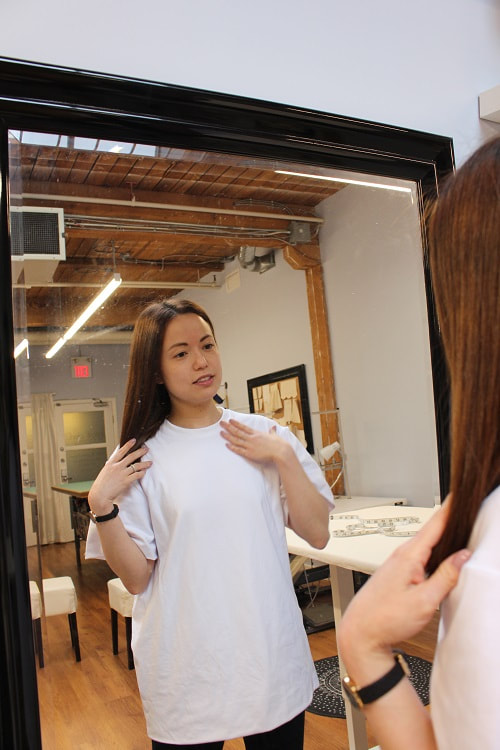
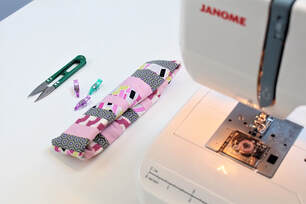
When working with knits, you will notice that we like to work with clips instead of pins. When using pins, you may experience issues penetrating through the spandex or elastic strands and could potentially break the strands. Also, clips are kind to your wrists! 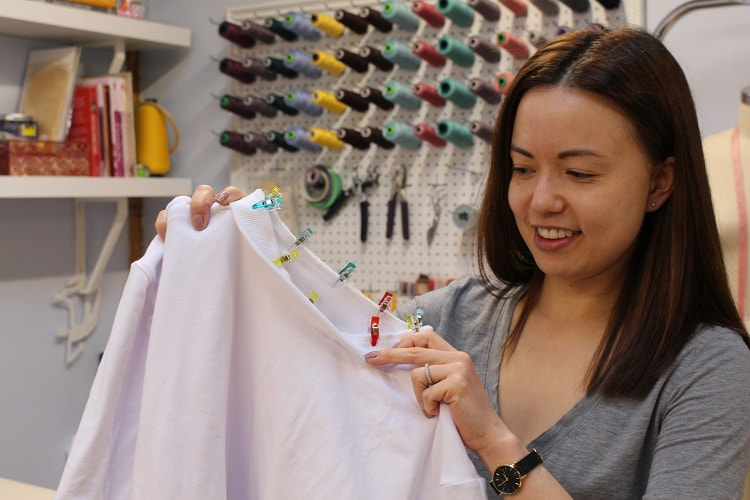 Final Design What We Learned!I can live in basic white t-shirts! This was the first time we designed a fully lined knit t-shirt, so going forward this is what we need to change and/or keep in mind. I hope you get the chance to try out a fully lined version of your favorite t-shirt.
 Happy Sewing!
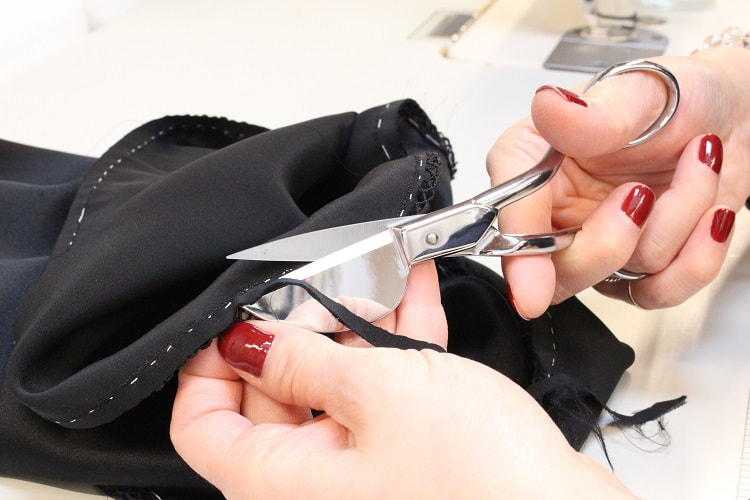
Designed, photographed and written by Sheila Wong Studios Our latest demi-couture design is a bit of a tongue twister- Silk Slip Skirt! Inspired by vintage slip skirts, this design features silk charmeuse fabric and Japanese trim. This blog post will show you how to hand sew lace/trim onto silk. Get your wax out for this one, you will want to keep your threads tidy! 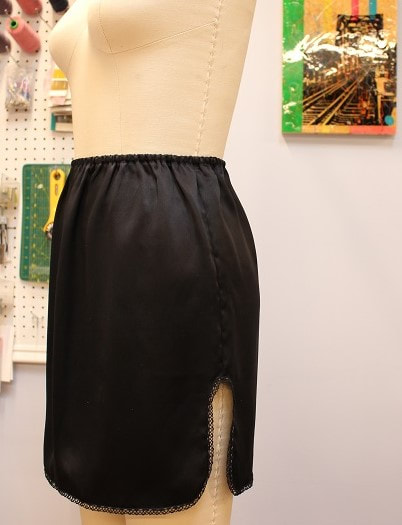 Design ElementsSewing up this sexy silk slip skirt saw some seriously styled seams. See what we did there?? What is your favorite element?
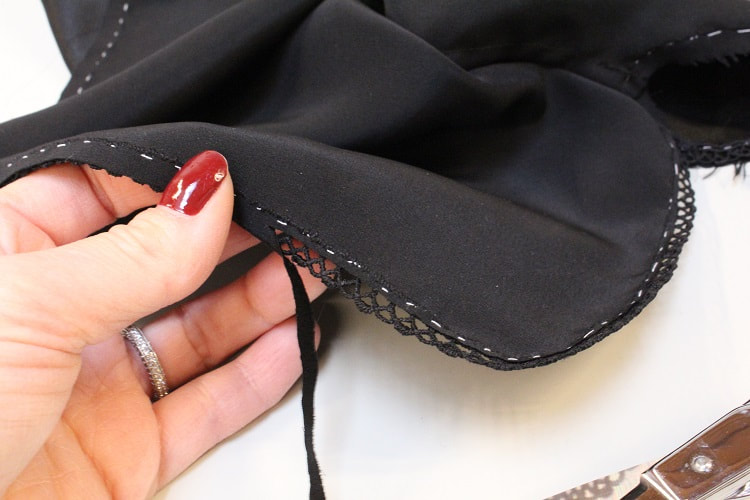
Hand sewn lace trimTo attach the lace trim onto silk, follow the steps below. Step 1Thread baste the lace trim onto main body of fabric allowing for some overlap of lace and silk. In this case, we gave a 3/8" seam allowance (SA) at the skirt hem for the top of the lace to be aligned to. Use a contrasting thread color to make it easily removable later. 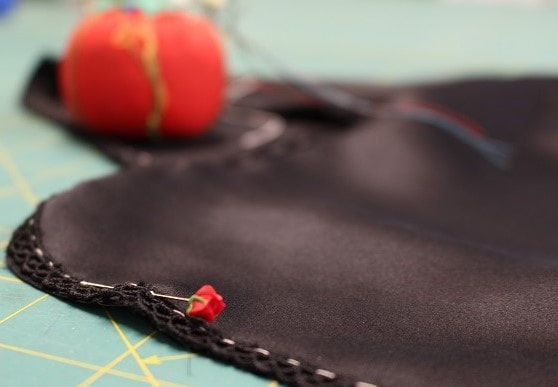 Step 2Overlap approximately 1/4" - 3/4" of the lace. This measurement will be based on the lace repetition present in your trim. Ours is a tiny repetitive shape, so only 1/4" was required. Your goal is that the end overlap lays flush on top of its exact lace shape underneath. Best place to put your overlap is along a side seam. 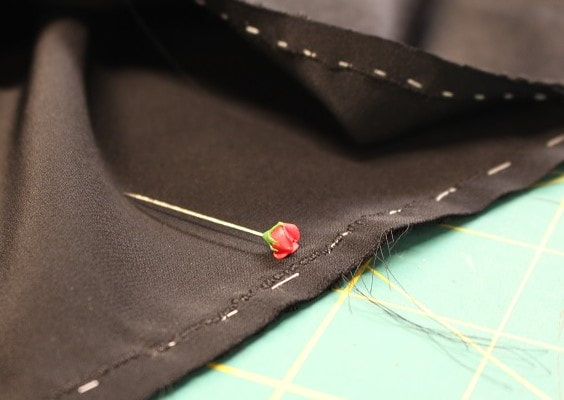 Step 3Whip stitch (aka over-cast stitch) tiny 1/3" - 1/16" width stitches attaching lace to silk. This will allow the lace to become ONE with the silk. The whole concept in the end is to create a flush appearance as if the lace was made with the silk. 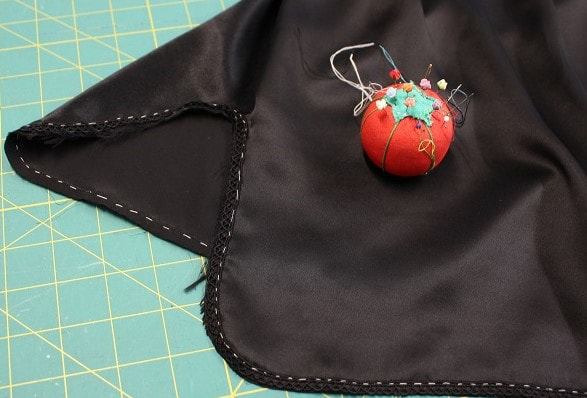 Step 4Continue to whip stitch along the outline of the last overlap lace shape to make the top and bottom lace trim become one. At this point you should only be whip-stitching the lace layers together, no silk. 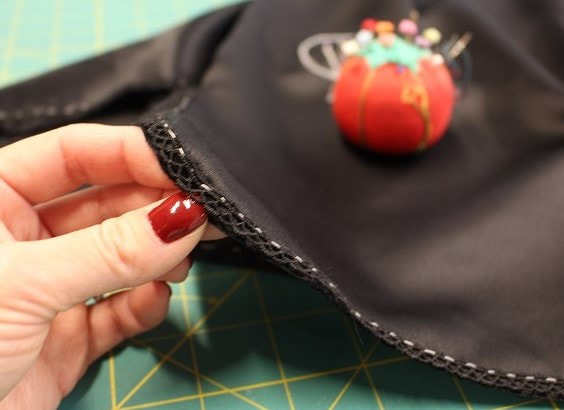 Step 5 Trim away the excess hem seam allowance beneath the lace trim. Stay approximately 1/8" down from whip stitches. We are using applique scissors here.
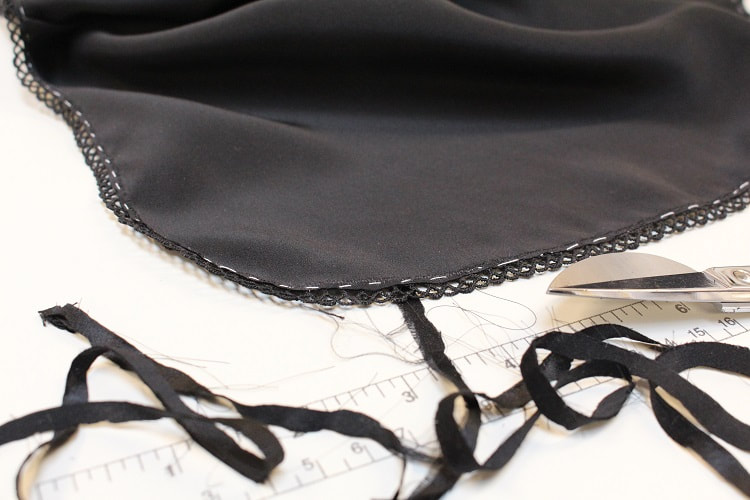
Step 6Trim the under layer of lace where the overlap of lace occurs.
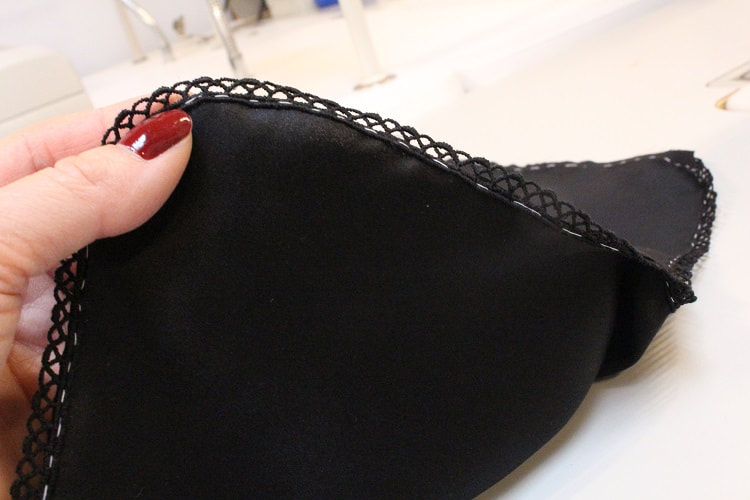
Step 7Remove the basting stitches. FYI: We kept ours in for learning purposes. 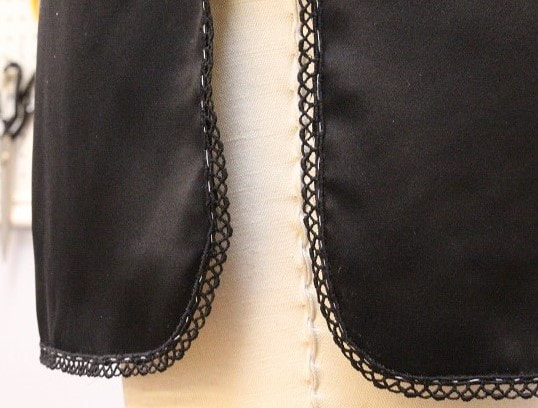 Delicate elastic waistA delicate slim elastic was put into this design. At first glance it looks like a super simple installation, but here are the time intensive steps. Step 1Mark and press in the top of the waist twice. This section will act like a tunnel for the elastic to get fed into. We folded this skirt waist in by 1/4", then 1/2". Step 2Pin and top stitch along the bottom folded edge to create the tunnel. If you look super close, we created a tight double top stitch to emphasize the waist more and for extra security for slipping on and off. Leave a 2" opening close to a side seam but not on it. This is where the elastic will be fed into. 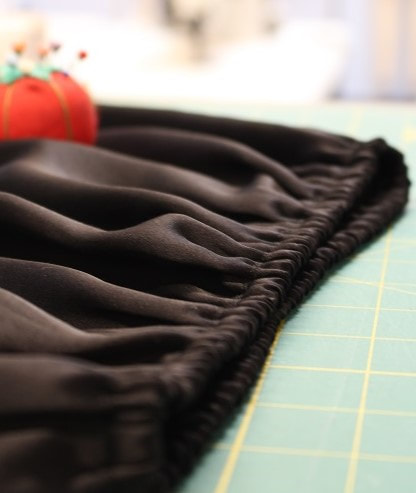 Step 3Fit the elastic to your natural waist measurement but let it be a hair tighter. Cut the elastic and attach a safety pin to the end of the elastic and feed through the tunnel. Step 4Overlap the elastic ends and secure with a strong amount of zig-zag stitching. Push the elastic into its tunnel and close up your top-stitching. Overlap a few stitches from the original line for security. 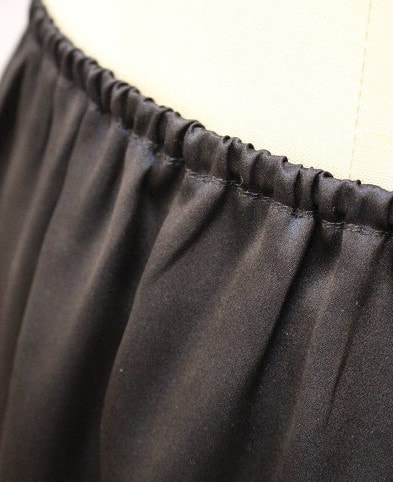 Step 5To get the perfect amount of gathers around the waist, use your two index fingers and expand the waist as far as the elastic will allow. Gently release and allow the elastic to compress back, and voila! Final DesignLook at the side seams on this finished beauty! This design was inspired by our client Natasha who adores vintage undergarments. Thank you for slipping this skirt into our lives! 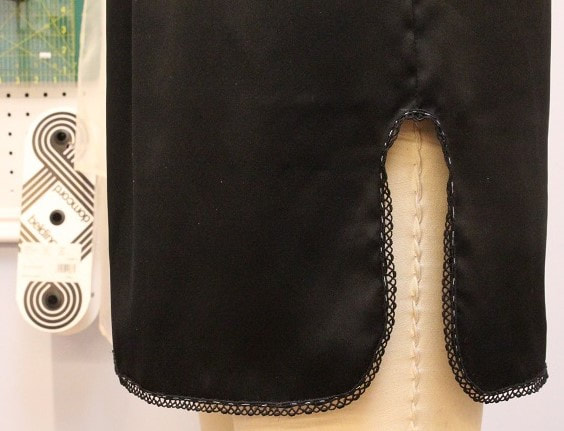 Happy Sewing!
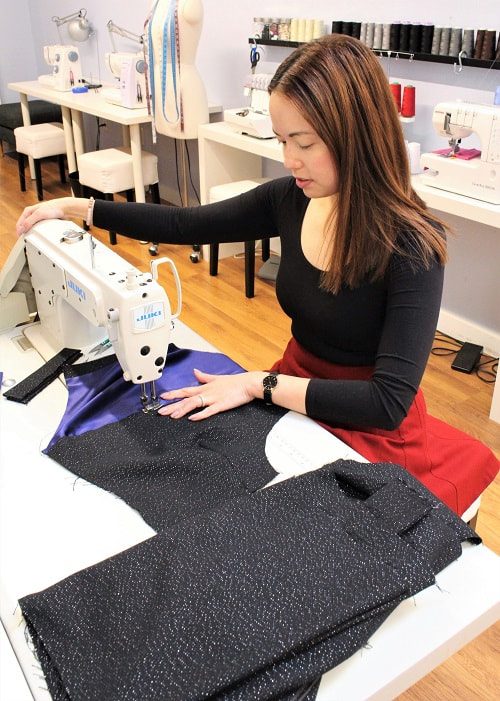
Designed, photographed and written by Sheila Wong Studios Our latest design took over 2.5 months to draft and stitch up. This is actually quite quick compared to many of our lengthy couture designs. This coat is made up of over 25 pattern pieces and features scrumptious materials from Kyoto and Tokyo. The silhouette is even inspired from the streets of Tokyo.  Project Specs
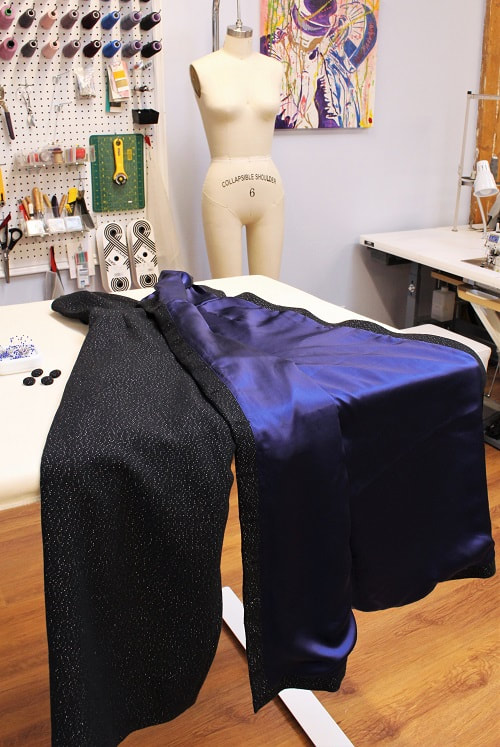
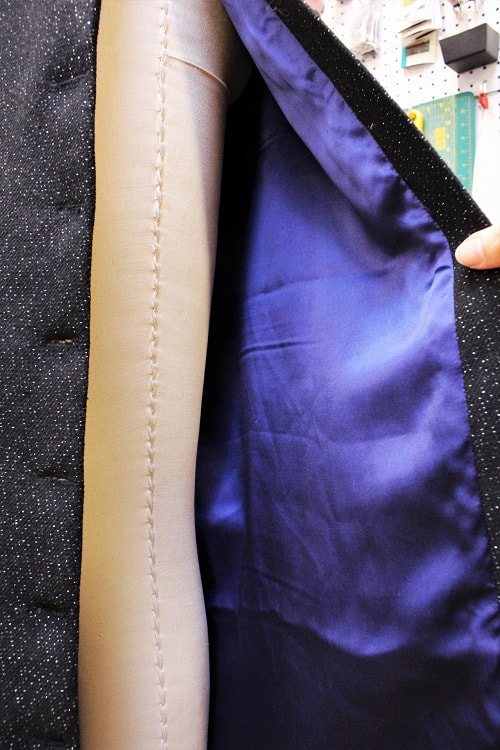
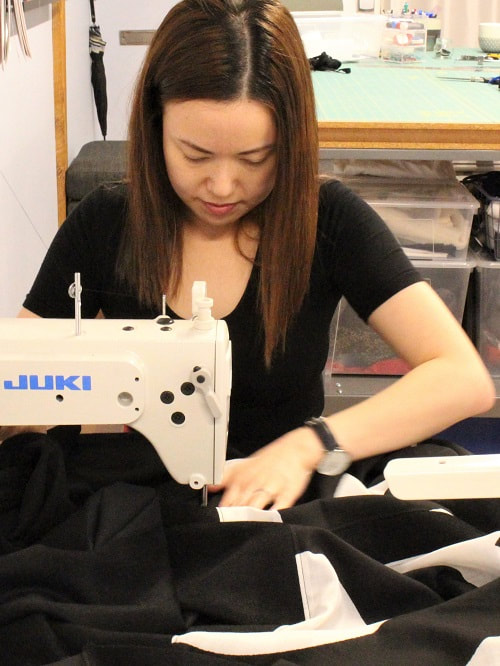 Design ElementsLittle red riding hood knew exactly what she was doing with that over-sized hood in the woods. In the city, it lets us escape the crazy world around us and keeps us warm. Features in our over-sized, fully lined hood includes a drawstring opening and a faced opening that creates weight to sit perfectly on your head. Over-Sized Hood with Drawstring Pulls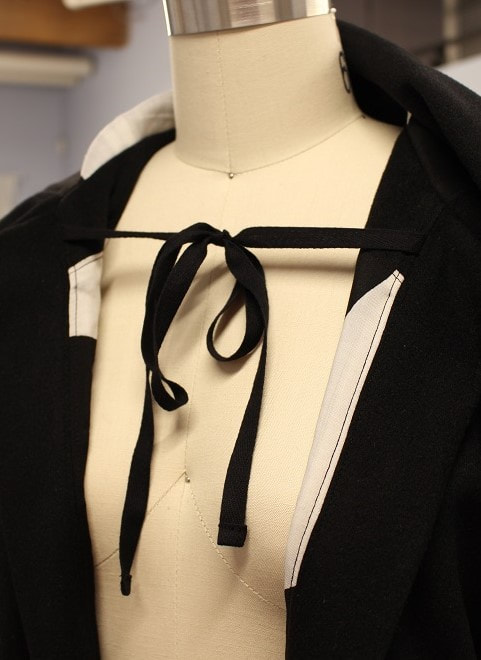 Back CinchesThe back cinches in just enough to let the world know you have a waist and the CB opens up just enough to show off a sneak of your booty. 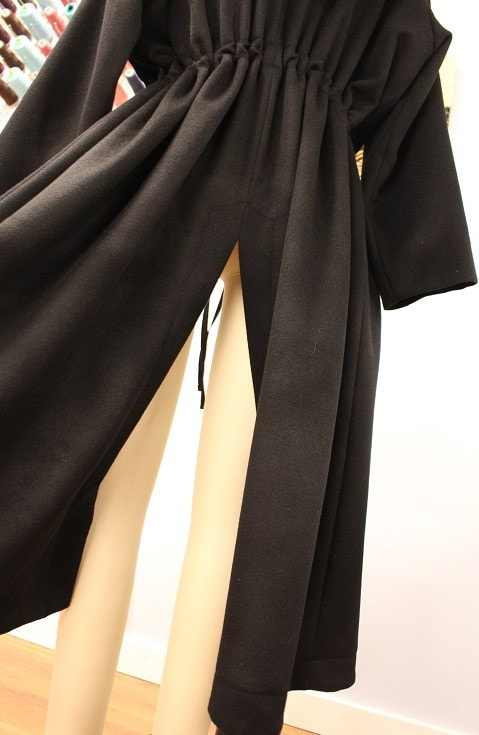 Fully LinedWe can't stop gushing over the lining of this design! The fabric was picked up in Kyoto, Japan at a shop called SouSou. I (Sheila) make it a point to visit SouSou each time I visit Kyoto. This type of cotton is called Ise-Momen and according to SouSou, "the manufacturing process has not changed from the old days. Ise-Momen is woven by the looms made in Meji Period (1868-1912)". What charm! Here you can see the interior view of the waist tie. We faced the waist tie area to create a division of upper and lower lining.
ButtonsBy placing buttons along the CB close to the hem and button holes along the CF close to the hem, it allows you to wear a coat in two different ways. UnbuttonedThis option allows for full coverage around the body to protect you against the environment. Also, you look pretty rad crossing the street with the likes of a cape following you. Buttoned UpThis option allows you to create a different silhouette and structural vibe, meaning you can show off your outfit underneath on a nicer day. 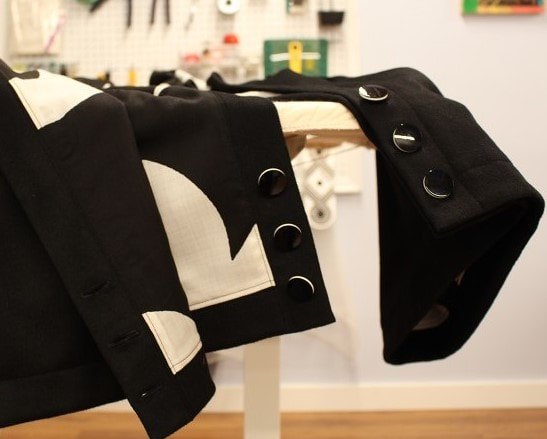 Final DesignHere's an interior look at the finished design! Would you wear this? Tell us what element you love the most! 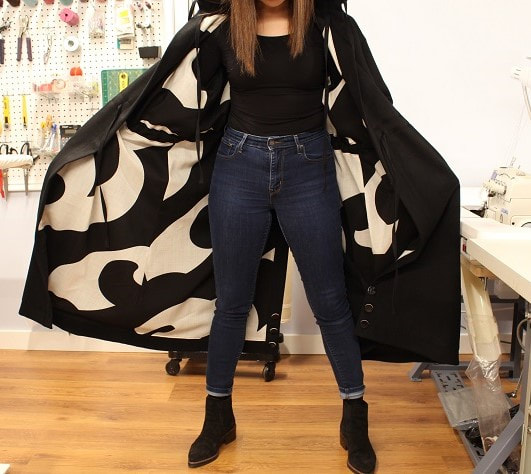 Happy Sewing!
Designed, photographed and written by Sheila Wong Studios |
Archives
November 2022
|


 RSS Feed
|
|
Copyright © 2024 Sheila Wong Fashion Design Studio Ltd. All rights reserved.