|
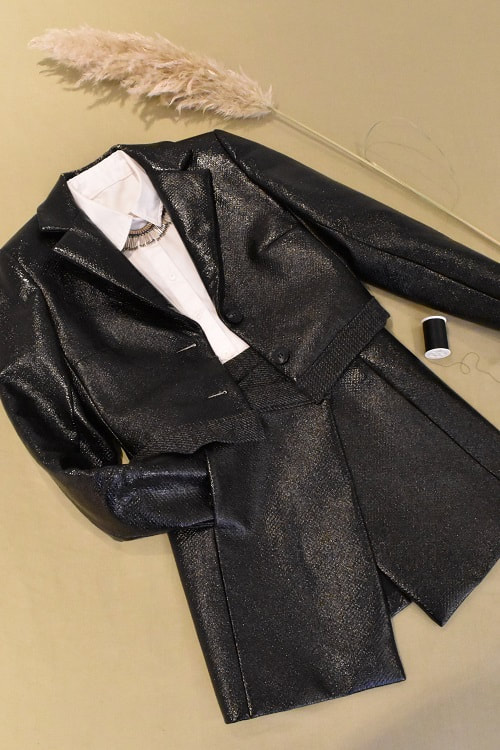
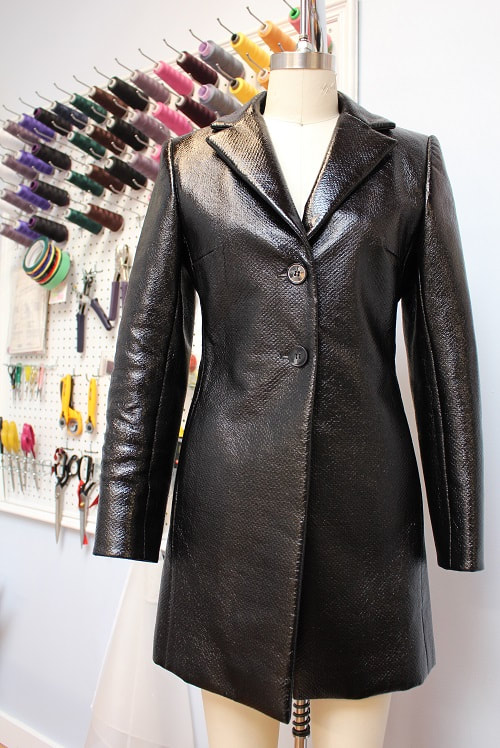
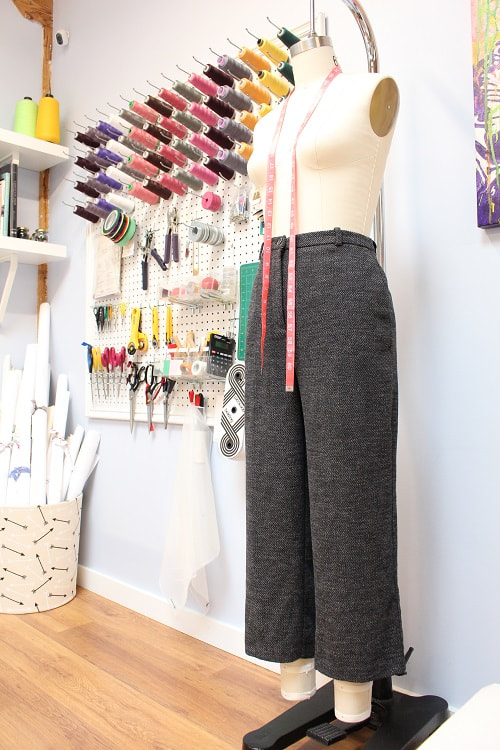
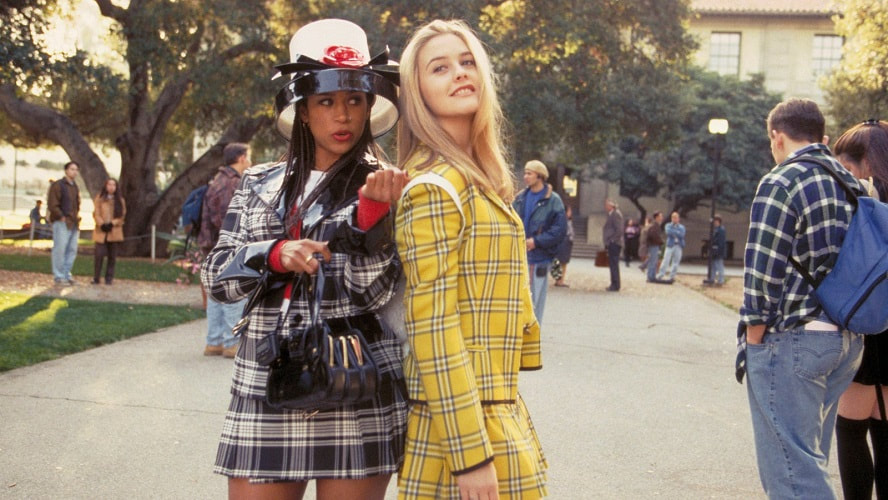
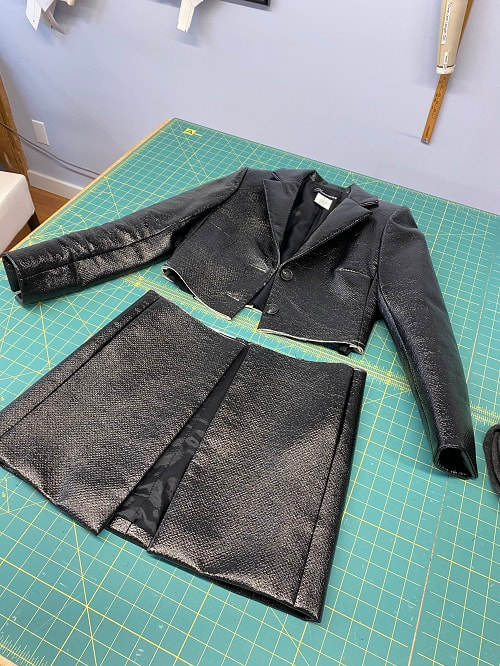
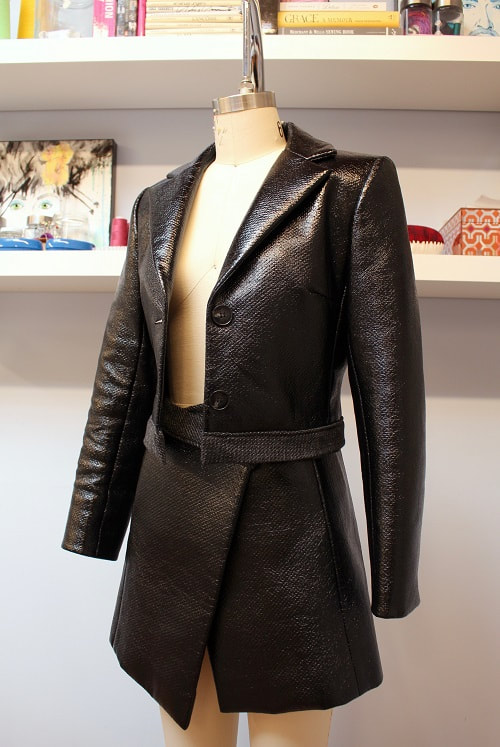
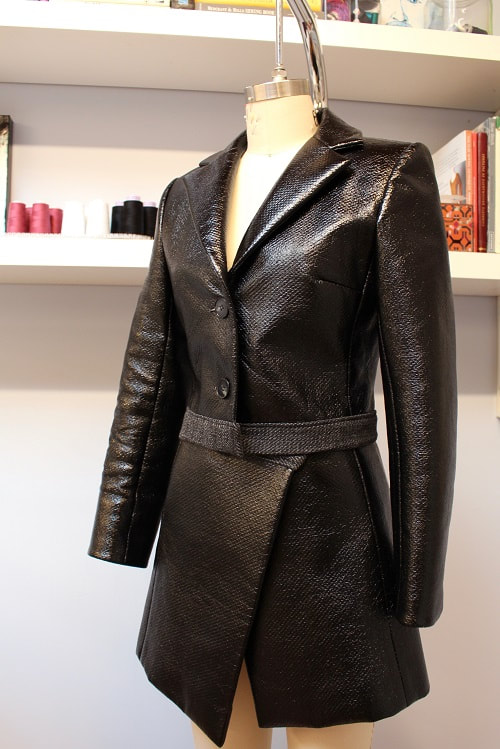
Pivoting our design process to include a variety of sustainable practices is imperative as we go forward. Traditionally, we have a fabric in mind already during the conceptualization process. However, we must give the fabric we already have in our stash a chance to be used first. Non-traditional fabric like drapes, bed sheets, already worn garments, or second-hand fabric from thrift shops can all serve as fabric for a new or upgraded design. Additionally, many of us also have garments in our wardrobe that sadly never see the light of day. We wish we could wear these items, but we do not, and for some reason, continue hanging on to them. So think about how you could either refashion your current wardrobe into a new wearable garment, take apart an item to use for fabric or parts, or simply pass it along to a loved one who will wear it. InspirationOur latest upcycled design is a two-piece jacket and skirt set that was dreamt-up by our marketing coordinator, Natasha. During her down-time, Natasha does freelance styling for local Vancouver models and photographers. Back in 2018, she picked up this awesome shiny pleather jacket (pictured below) from a consignment shop to use for a photoshoot. Unfortunately, it just wasn’t what the creatives were looking for, so it sat in her closet unloved for quite some time. One October night, Natasha had a 90’s movie marathon in which she watched “Clueless” and “The Craft” back-to-back. This inspired her idea to merge two very different 90’s aesthetics- preppy and grunge. She took to her closet to find something that could potentially fit her upcycle criteria and ultimately landed on this wicked jacket plus an old pair of thrifted wool pants.
For those of you that love to shop second-hand, Natasha recommends the below thrift and consignment stores.
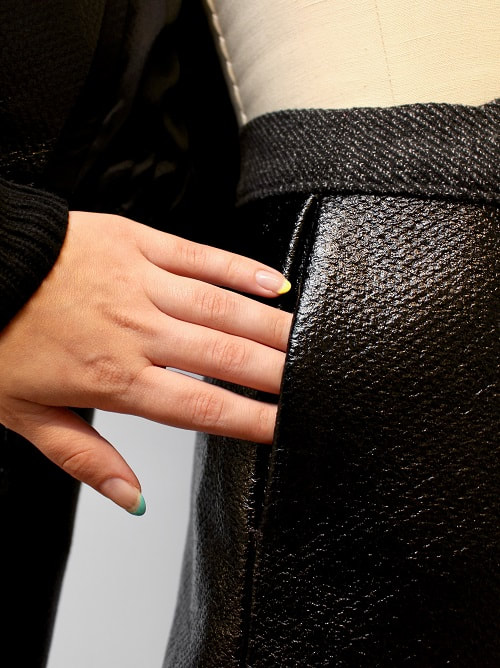
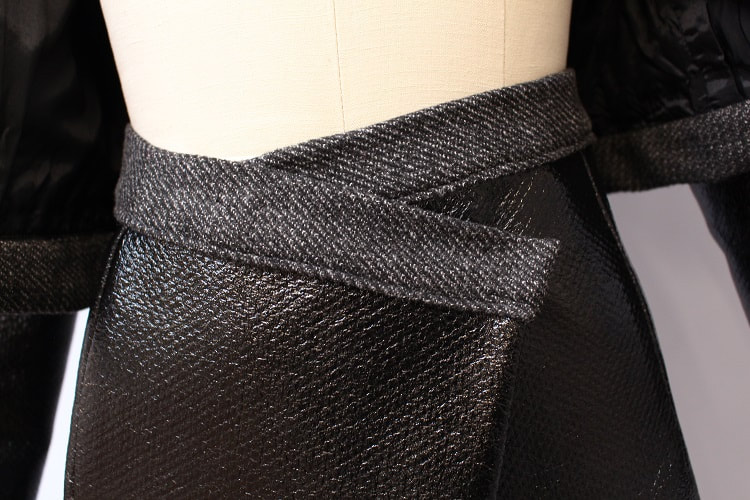
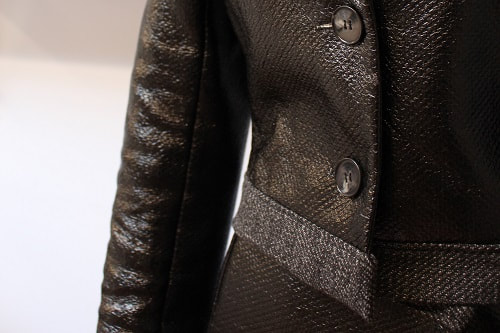
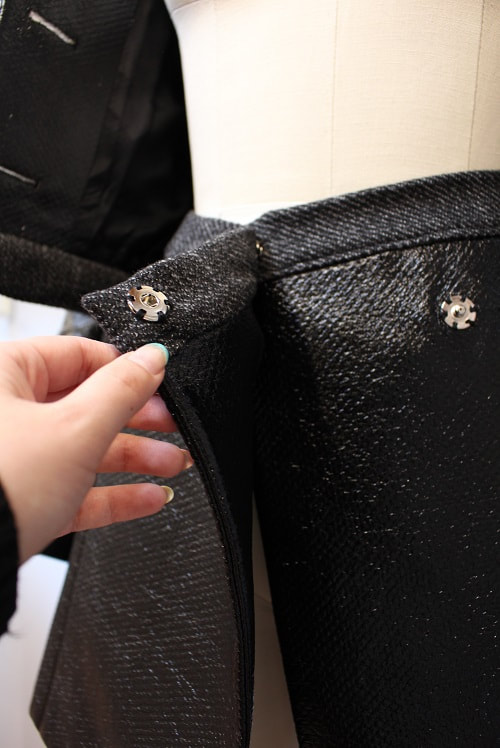
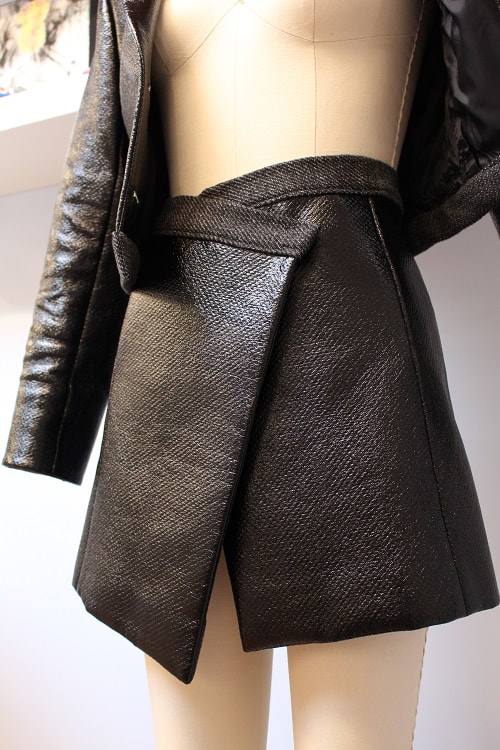
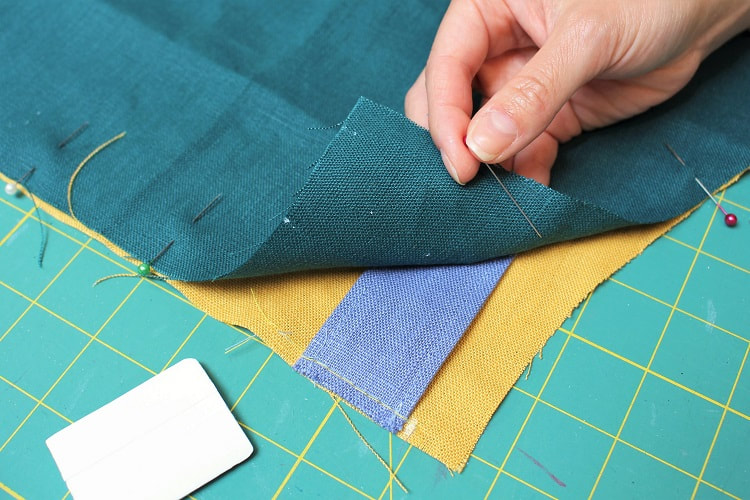
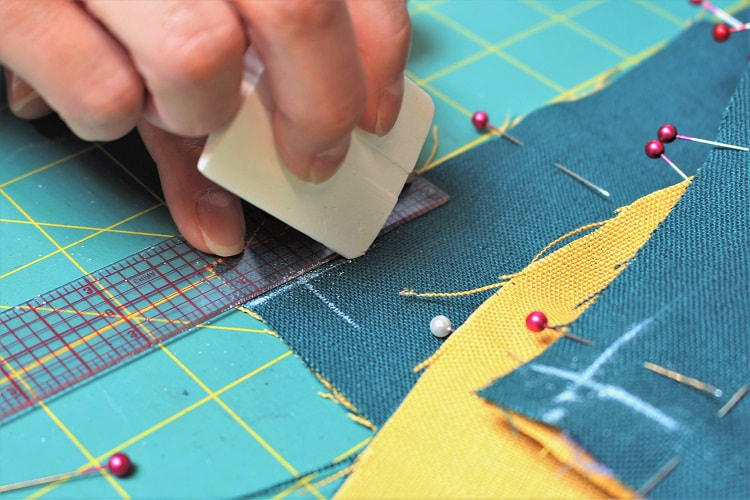
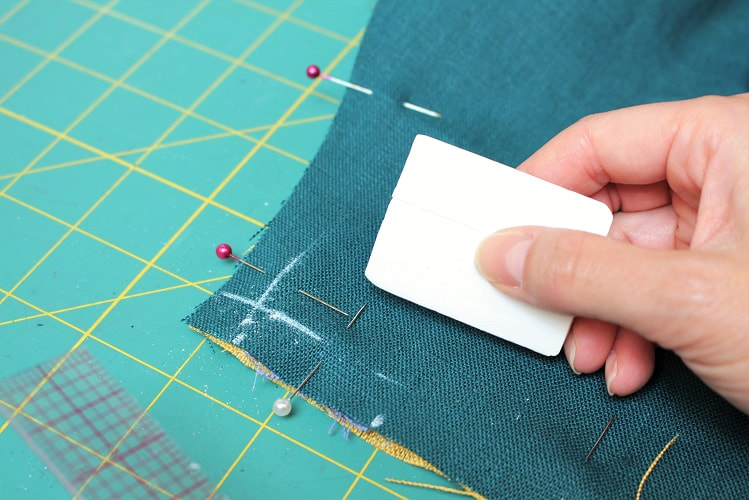
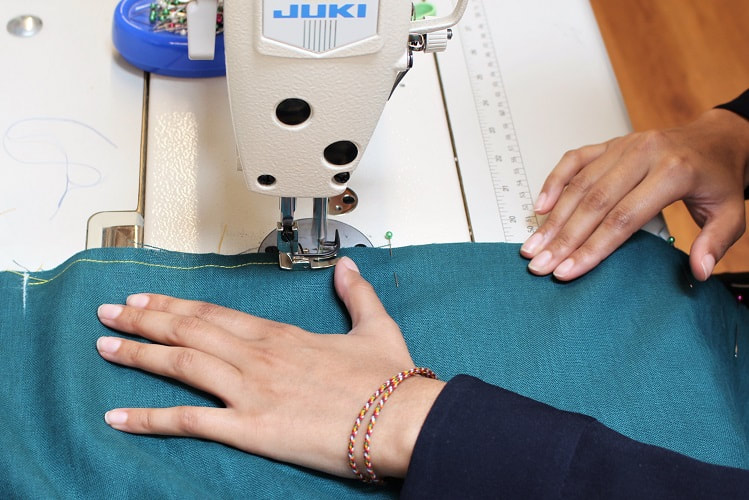
Upcycle Construction ProcessUpcycling is all about working with and around what you already have to create a new perspective. Here is Natasha's step-by-step experimental process of preserving and creating certain design elements. Step 1: Determining WaistlineNatasha wanted to maintain certain design elements on the original jacket, so she halved the garment by cutting just below the second button and just above the side seam pockets. This sat at the natural waistline. If she had cropped the jacket any higher or any lower, she would have had to sacrifice either the second button or both pockets, but this way, she could keep them! The garment is fully-lined, so once cut in half, Natasha stay-stitched the rayon lining to the pleather fabric on both the upper jacket and lower skirt. She found that these two fabric types were a little trickier to work with together than usual. The lining was slippery, while the pleather was very thick. Good thing for industrial sewing machines— thank you, Juki industrial machine! Step 2: Finishing the WaistTo help define the waist of both the jacket and the skirt, Natasha brought in another thrifted garment to assist and add texture to the overall outfit. Finishing off the waist with a non-shiny fabric really grounds the two new garments created. This also allowed the garments to lengthen slightly by 2”. During the upcycling process, you can lose length easily, so this change was very helpful! Now the skirt was a tad more wearable. Natasha was able to use one pant leg's worth of fabric to create both waist finishings. One for the jacket and one for the skirt. Any suggestions on what she should do with the other pant leg? Step 3: Choosing a Skirt-Closure Snap snap snaps! The pleather fabric proved to be too thick for buttonhole installation on our sewing machines, so snaps it was to close up this skirt. This also allowed Natasha to play around with the drape of the skirt. In placing the skirt slightly asymmetrical, a new flared silhouette took shape. Final ThoughtsPresto, 90’s makeover complete! We love how Natasha's upcycled retro blazer set turned out. Natasha gifted this set to her little sister, and it was a perfect fit! Great to know this design will finally get some love after so many years. Upcycling gives new life to forgotten garments and prevents you from adding to a world that is already overwhelmed with material items. Furthermore, it challenges you creatively by forcing you to think outside the box. For more upcycling inspiration, check-out our blog post, Latest Design: Retro Upcycled T-Shirt. Do you like to upcycle? Let us know what garments you’ve re-worked in the comments below, and be sure to sign up for our Insider Newsletter to keep up to date with our designs. Happy Sewing!
Designed, photographed and written by Sheila Wong Studios.
1 Comment
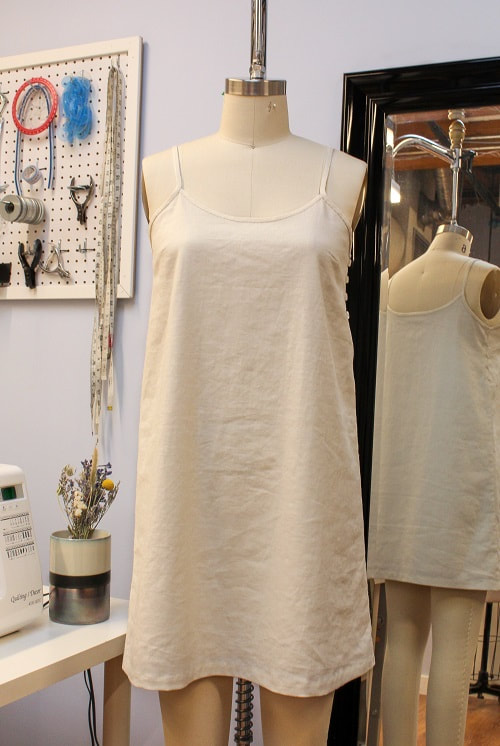
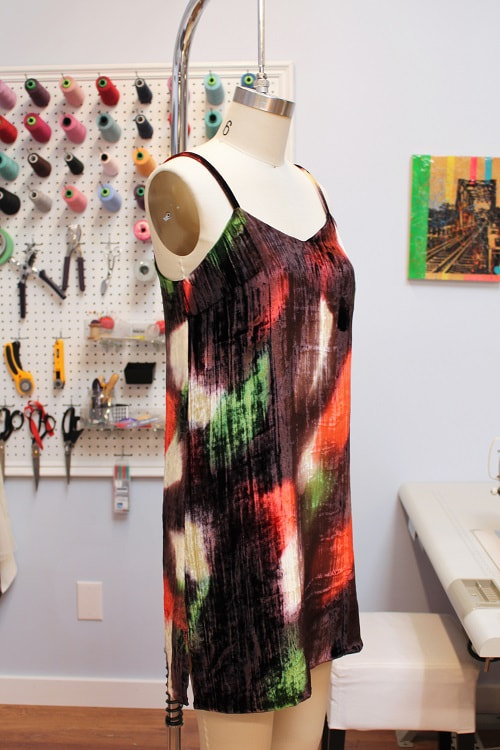
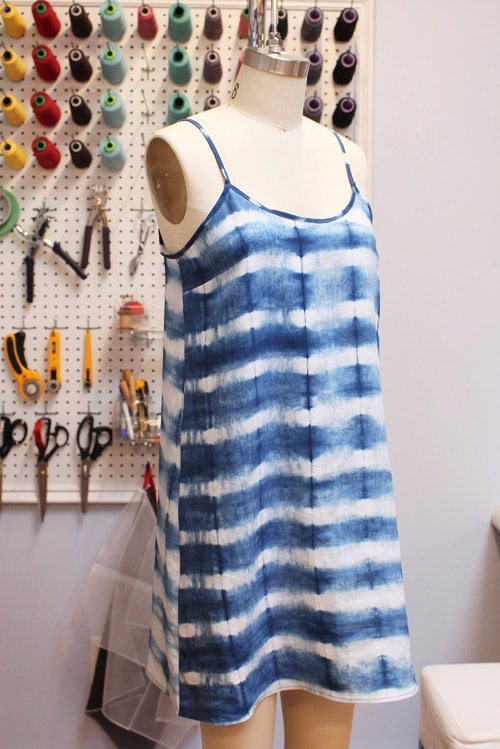
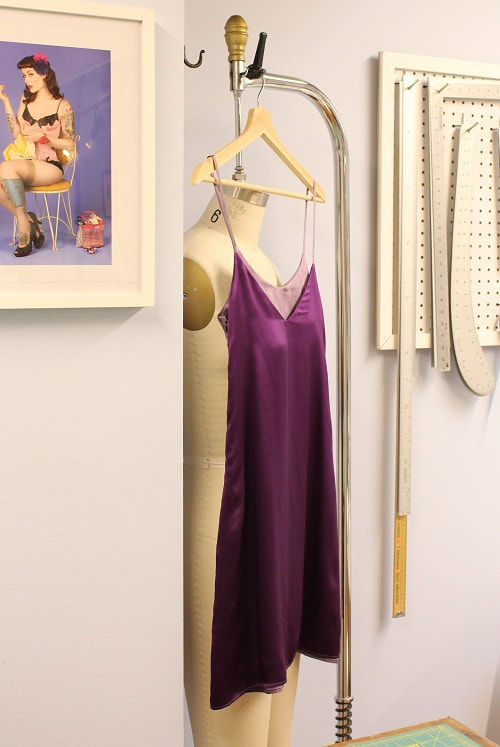
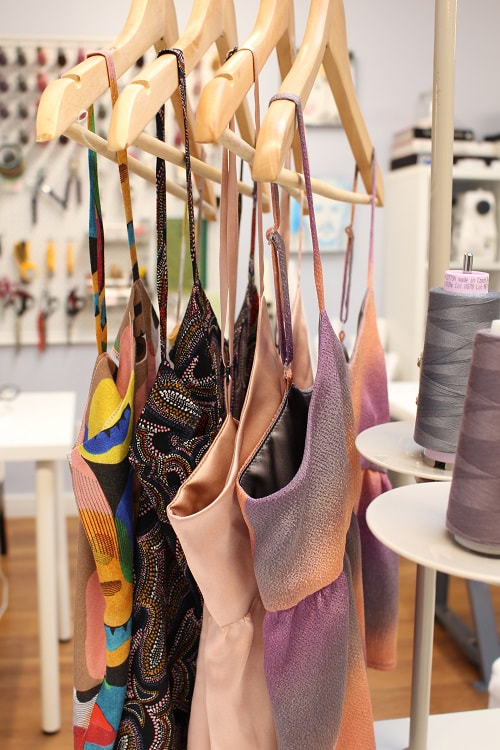
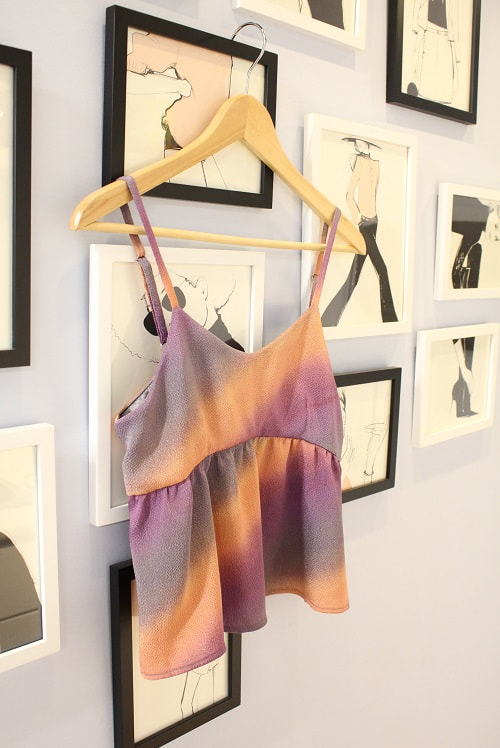
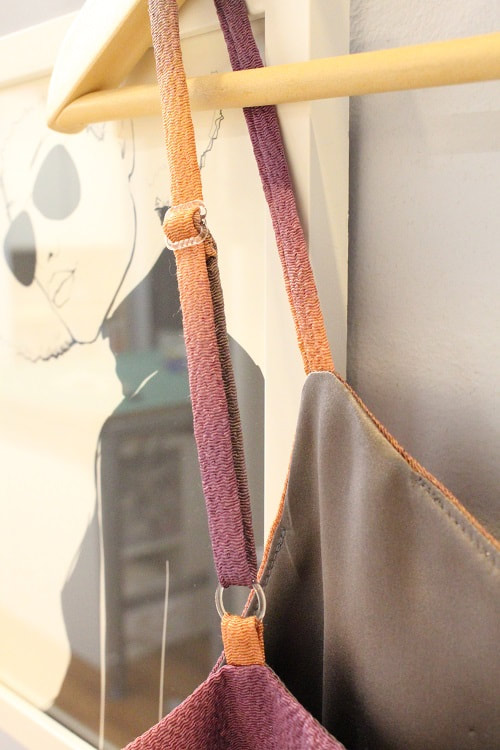
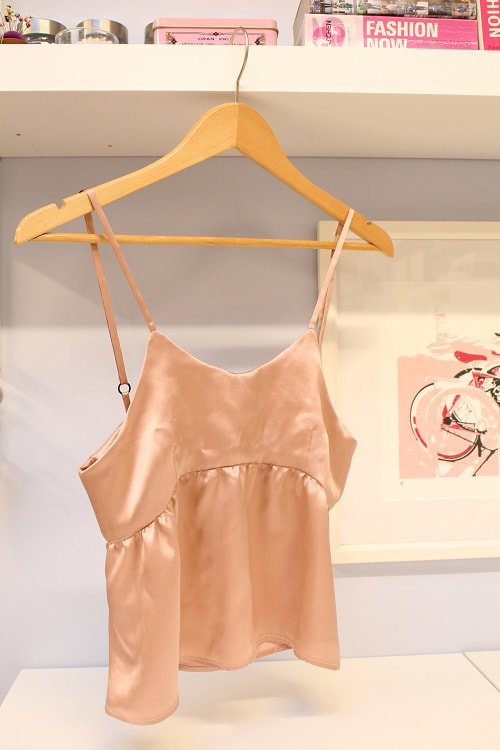
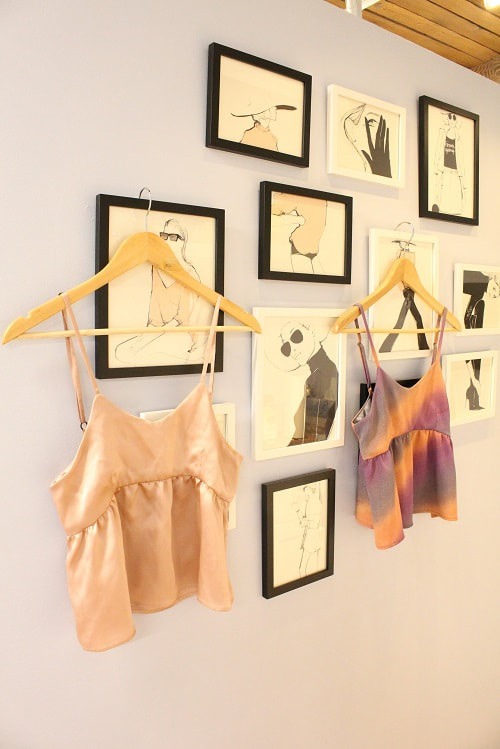
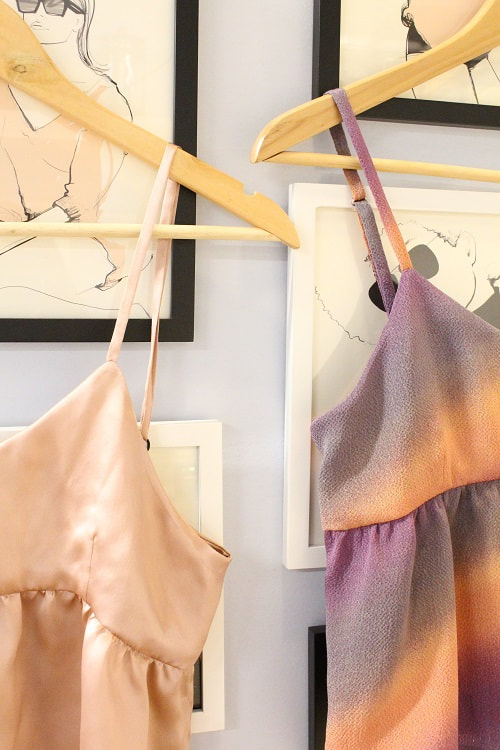
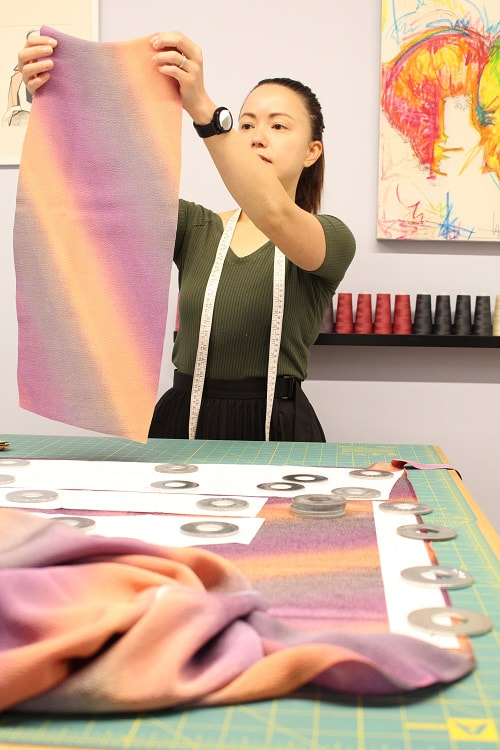
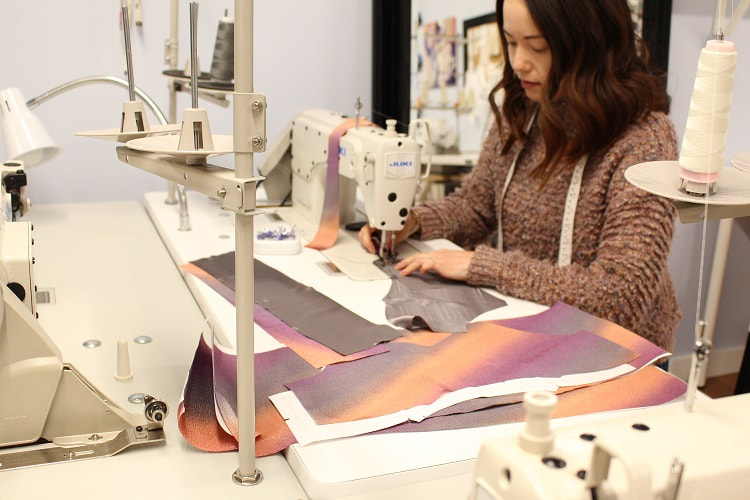
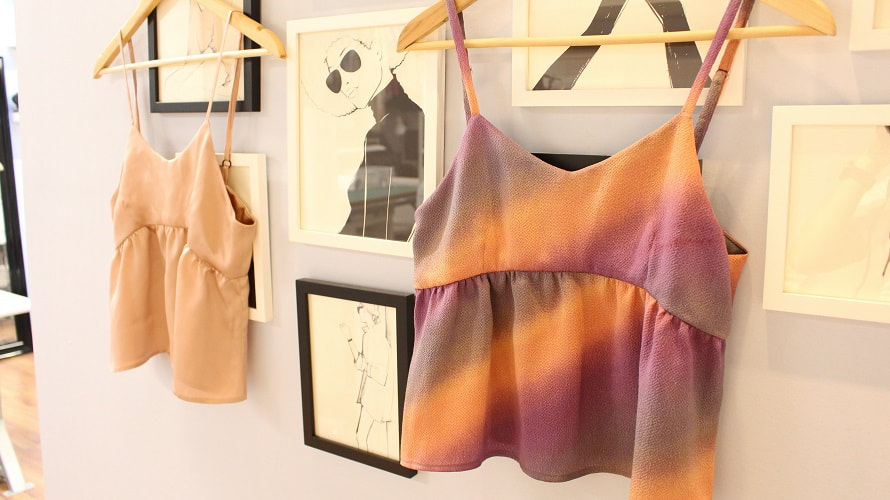
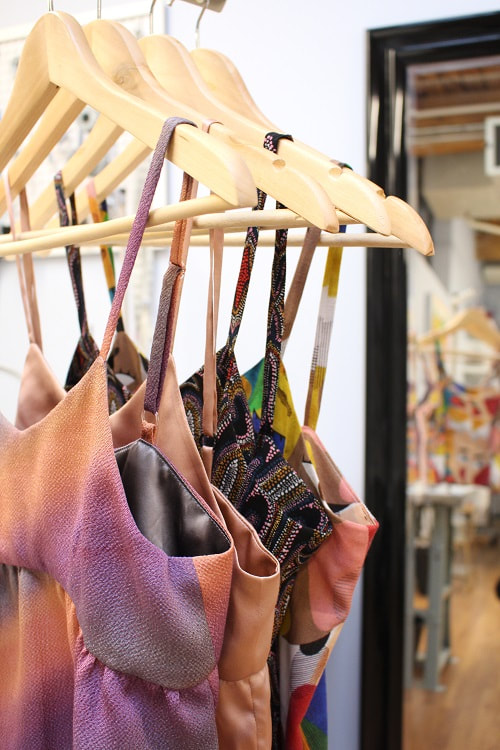
In early 2018, a simple slip silhouette dress pattern was drafted to allow me to demonstrate couture sewing techniques in my hand sewing intensive course at Maiwa School of Textiles. Since then, I have made four variations of the dress silhouette showcasing different fabrics, seam finishes, and surface manipulations. Having a simple silhouette to showcase a variety of machine and hand sewing techniques is ideal while teaching our clients. Earlier this year, we cropped the dress pattern to become an easy-to-wear slip top. In doing so, this allowed me to continue to demonstrate with clients but with less fabric waste. Pictured below, you can see the variety of slip tops we have made to date, with the most recent changing up the design elements the most. Our latest slip top variation was created as a demo garment while instructing our client Anita. I had initially taught her how to draft a simple slip top for her daughter, using the original slip top pattern. Anita wanted to take this slip top even further by introducing darts, gathers, convertible straps, and an empire seam. So voila, a gathered slip top was born! Project Specs
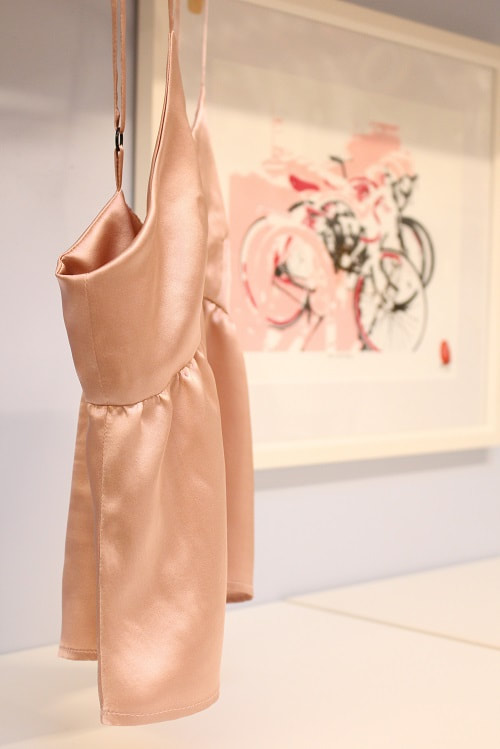
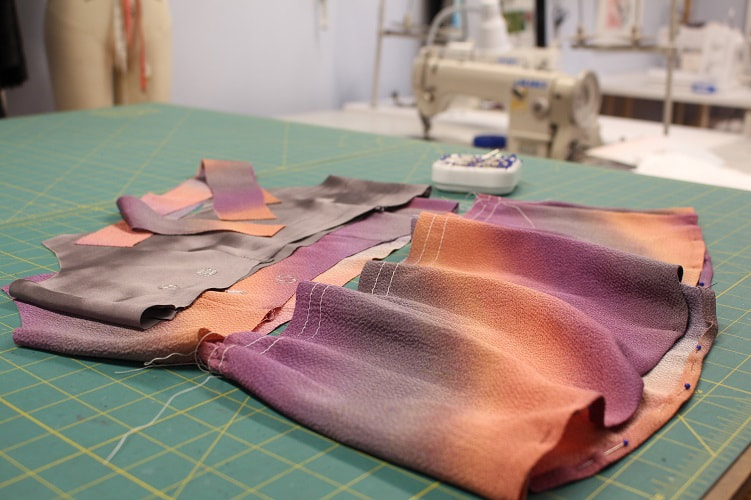
Creating a Toile (Fit Sample)Before cutting into our intended fabric (ombre silk), we created a toile (fit sample) to test out the gathers, bust dart, convertible straps, and strap width and length. All of which were changes from the original slip top. Creating a toile is extremely important in the design process. It helps a designer test out their concept, pattern draft, and correct fit requirements. Not only that, but it also assists the designer in understanding the best sequence of construction. Typically a toile is made out of muslin fabric. But when the final intended fabric for use does not move like muslin, you can choose to make your toile out of a similar but cheaper fabric than your final fabric. We used silk charmeuse. Not exactly cheaper, but it is what we had on hand, not to mention it best resembled the drape of our final ombre fabric. Silk charmeuse fabric is from Atex Designer Fabrics. After fitting the toile, the following adjustments were made to the pattern.
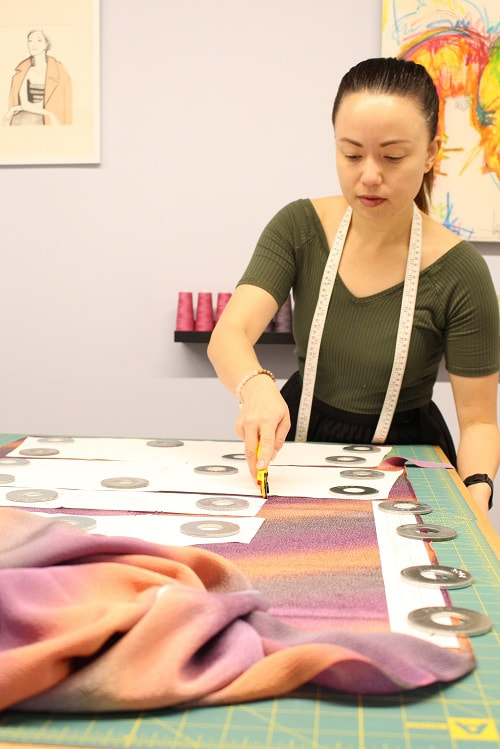
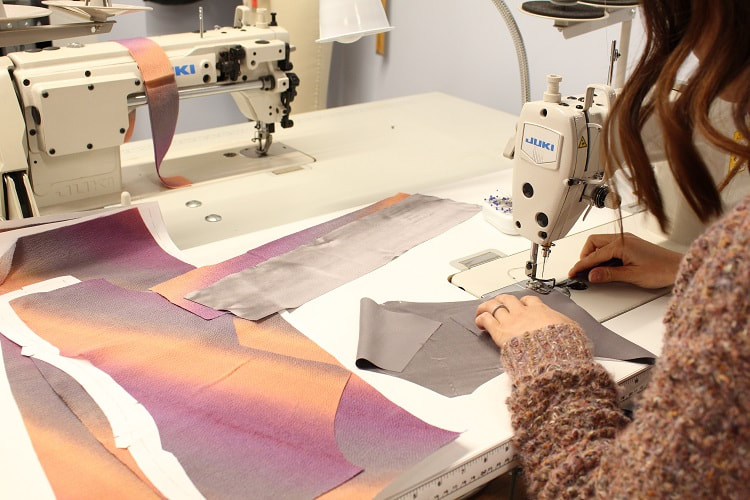
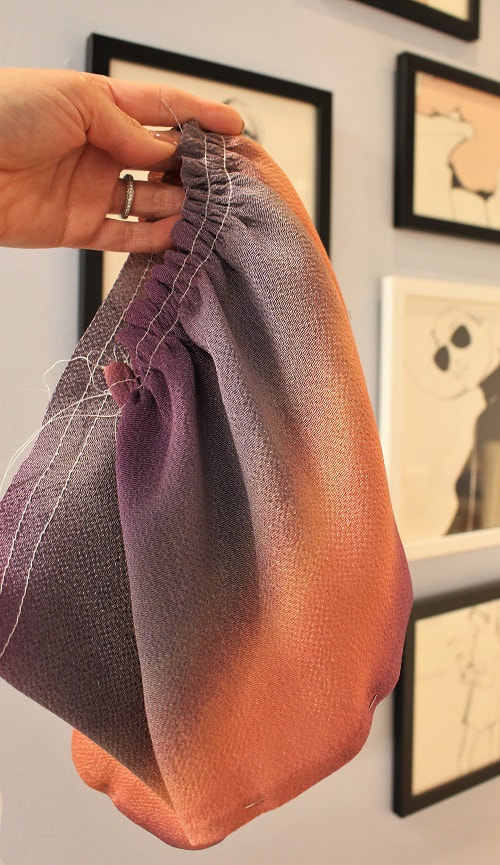
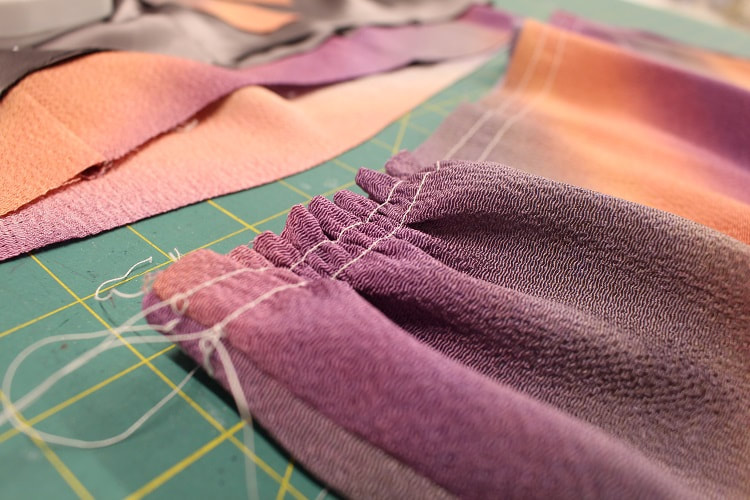
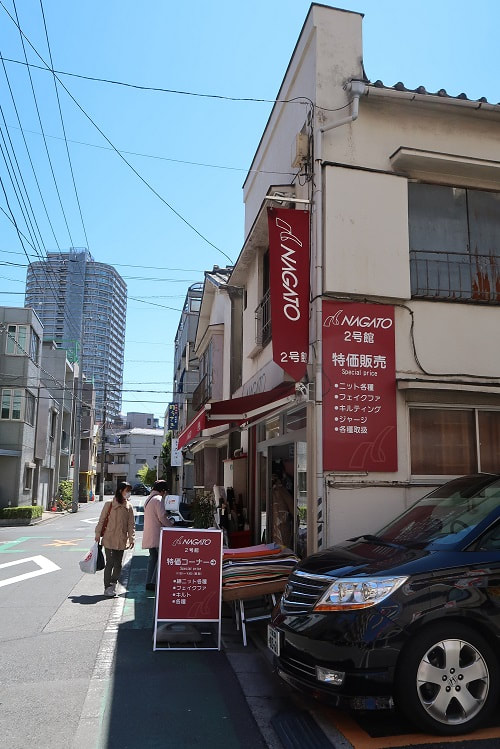
Ombre FabricIn 2017, I picked up ombre textured silk fabric from Nagato Fabrics in Nippori Textile Town in Tokyo, Japan. It was the last of the bolt with only 2 m left... so I bought it all! The fabric is 25” wide, which is more narrow than typical fabrics. I was informed that this type of fabric is meant for kimonos, hence the narrow width. Nagato Fabrics is one of my favorite textile shops in Japan as they have three shops within one block of each other to experience. For more information on Nagato Fabrics, check out our blog post: Latest Design: Couture Striped Jacket. The upper bodice is lined with a grey silk charmeuse fabric, purchased from Atex Designer Fabrics. Gathering TechniquesOur slip top might look simple in nature, but as per usual, there are a ton of elements hidden within this design. While our top features French side seams, a topstitched tailored hem, an empire waist, front bust darts, convertible straps, and a lined upper bodice, I want to focus our attention on our designs' most visual element— gathers. Gathering Sewing Tips:
Final ThoughtsCreating variations of a basic silhouette is the best way to explore a pattern to its fullest. There are other elements we could potentially add to future versions of this slip top such as pleats, round neckline, color blocking, double straps (2 per side instead of 1), cross over straps, pintucks, lace overlays, and the list goes on! What design elements would you like to see on the next variation of this silhouette? Let us know in the comments below. Want to watch this slip top transform and progress? Sign up for our Insider Newsletter to keep up to date with all our latest designs.
Happy Sewing! Designed, photographed, and written by Sheila Wong Studios. When I am not designing new clothes, I am a huge supporter of altering what I have in my wardrobe. Upcycling an already made garment into something unique is an art form on its own. Ever said the phrase “I have nothing to wear” while staring at your clothes-filled closet? Upcycling is the best solution to this age-old fashion dilemma, and it’s kinder on our planet too! We create our own designs here in the studio but even so, a fair amount of consumption is involved when it comes to purchasing and working with new fabrics. Just because it’s handmade, doesn’t necessarily mean it’s environmentally-friendly. We need to ask ourselves several questions when fabric shopping...Who made the fabric? Where did the materials originate from? How much of that fabric is actually sold? And how much fabric did you waste on one design alone? Although we do our best to be mindful of these relevant factors and repurpose our fabric scraps when possible, upcycling remains the ideal solution when it comes to “green” garment construction. Project Specs
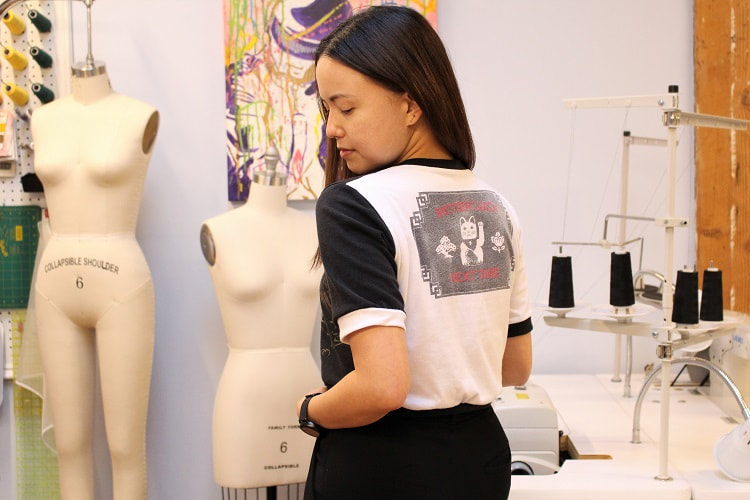
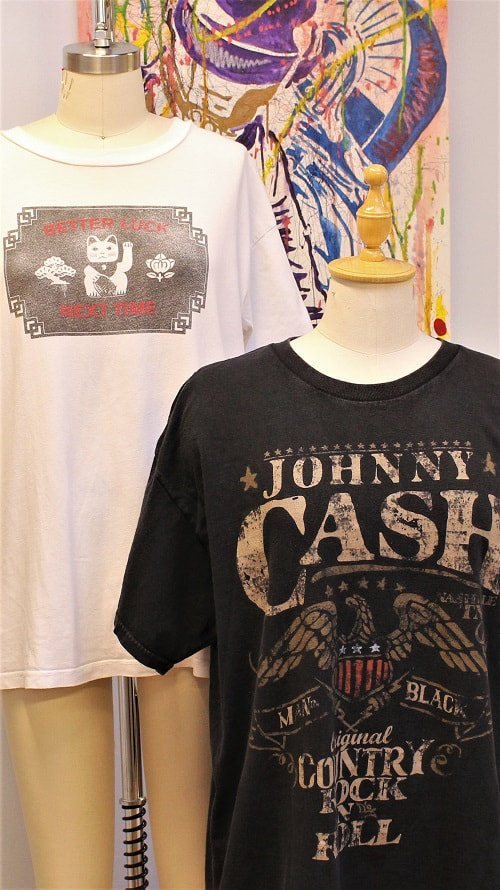
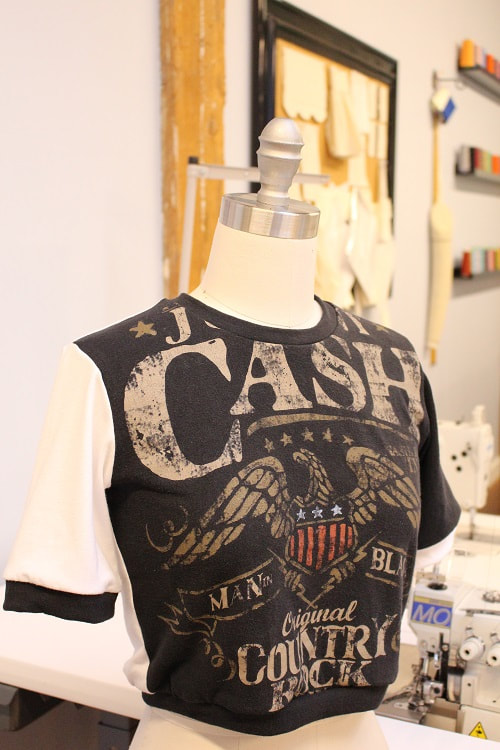
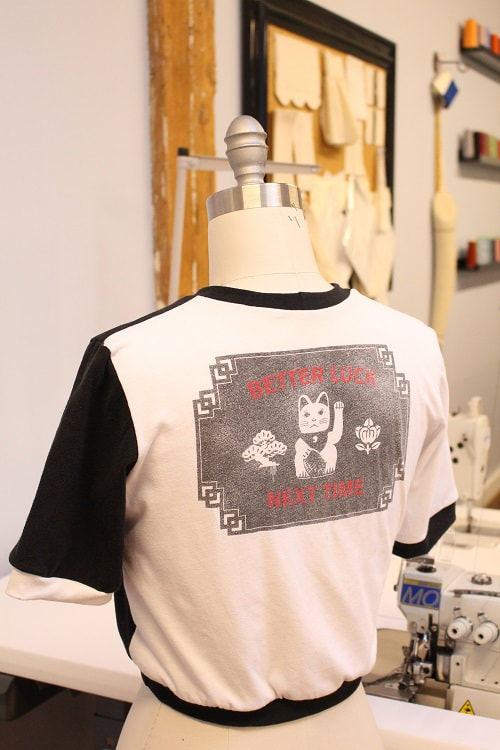
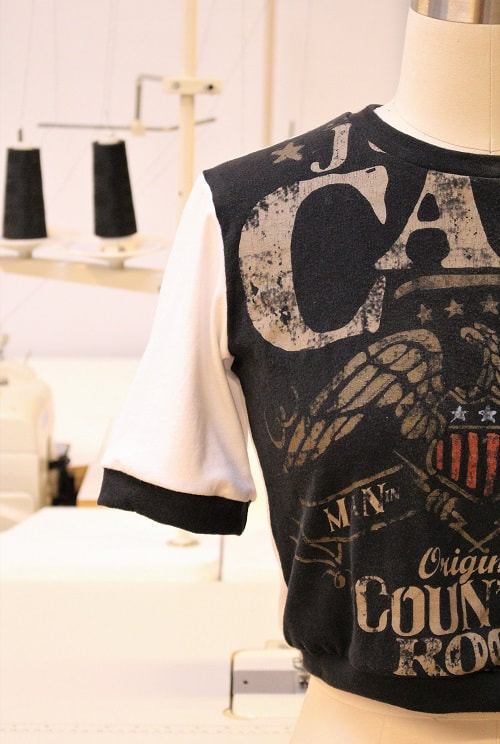
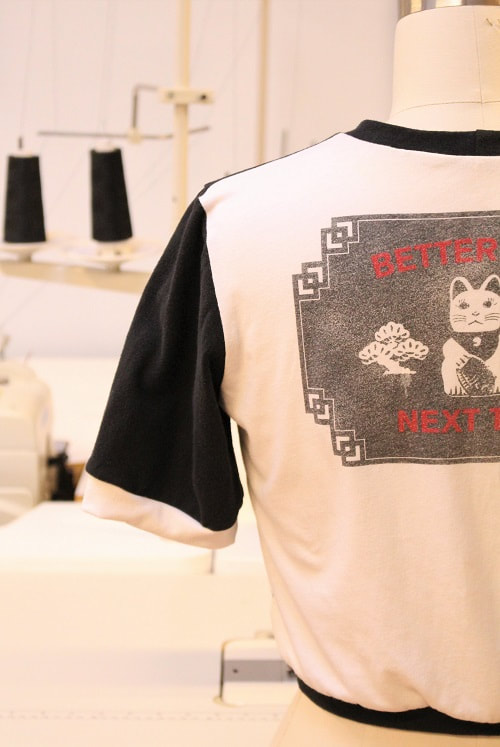
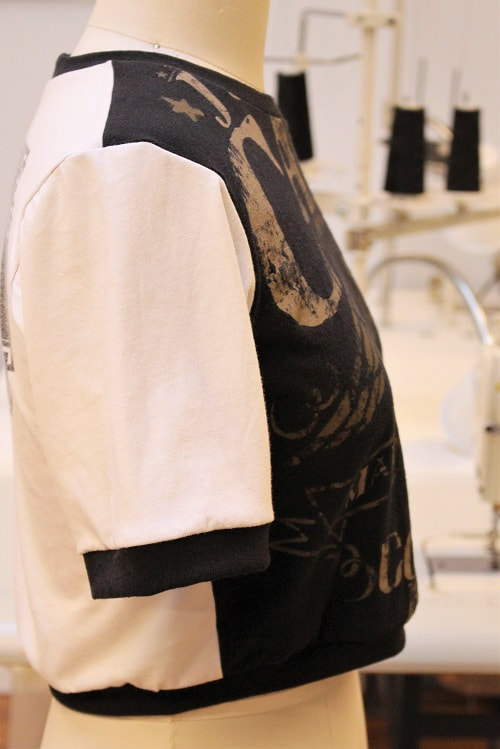
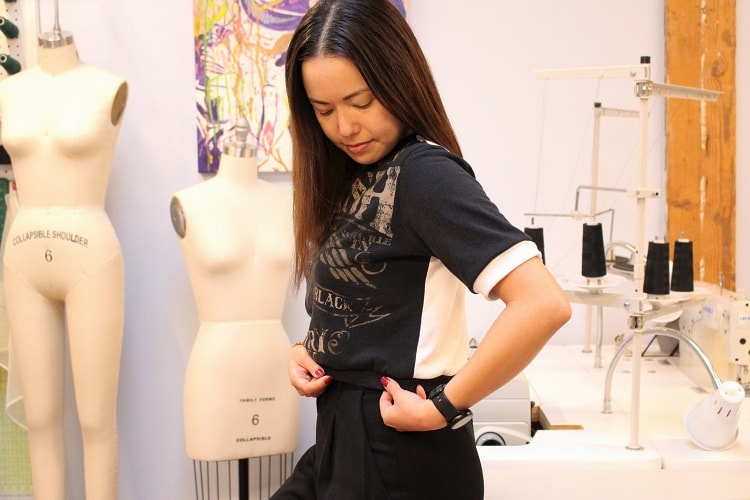
Original Thrifted T-ShirtsTwo thrifted T-shirts were used to create one new design. Our marketing coordinator Natasha provided us with two oversized shirts from her closet that worked perfectly. The shirt on the left is a white T-shirt that features a graphic design, of a lucky cat, with the text “Better Luck Next Time.” The shirt on the right is a retro Johnny Cash concert Tee in black. Both shirts received a lot of love in their prime, maybe a little too much love. The stains and rips made them ideal candidates for this makeover. Get a good look at these two because it’s the last time you’ll ever see them (like this)! VideoWatch us speed-stitch this design on our latest Youtube timelapse video: Upcycled Retro T-Shirt: Fast Forward Edition. Want to follow along? You’ll need an over-lock (serger) sewing machine for this project. If you do not have a serger, use a zig-zag stitch. If you find we move too fast, try lowering the playback speed on the Youtube video settings. Design ElementsSomething old and something new, here are our favorite design elements that make up our Retro Upcycled T-shirt. Graphic Design Placement Placement was key for this design. We needed to ensure the original T-shirts were at least a women's size large to account for the cropped silhouette. This was especially important since both shirts feature a graphic design. In our case, we tried to preserve as much of both graphics as possible. Sadly ol’ “Johnny” didn’t quite make the cut. Har har fabric cutting jokes aside, the bigger the better for this type of project! Initially, we planned on making the front bodice the “Better Luck Next Time” white lucky cat T-shirt. We realized once we placed the pattern down, a major chunk of this graphic image would have been cut-off. More so than the “Johnny Cash” and “Rock N Roll” graphic image/ text on the black T-shirt. So, we swapped them! A project like this is all about working with what you have. You have to be open to changing your plan if you want to achieve the best result. Color Block Sleeves We are BIG fans of color block, as made evident by our past designs. We hummed and hawed about keeping the sleeve and sleeve hem a solid color, but in the end... we just couldn’t help ourselves. Besides, the black and white contrast reminded us of a panda bear. Who doesn't like pandas?! In this shirt, we used approximately 1.5 shirts to make it happen. You can mix and match more than 2 shirts to create a color blocking visual. Self Fabric Ribbing The pattern we used for our Retro Upcycled T-shirt is our Crop Knit T-shirt design with a neckline, sleeve cuff, and hem ribbing finish. For this design, we wanted to make use of the leftover fabric from the original T-shirts. So, we made the ribbing pieces out of self-fabric instead! If you do not wish to apply a ribbing finish to the sleeve cuff and hem, you can position the bottom of the Front Shirt, Back Shirt, and Sleeve pattern pieces aligned to the finished hem on the original shirts. This is actually the fifth time we've used this pattern for our designs! Check-out our blog post: Latest Design: V-Neck Knit Crop Top to see the different variations of our cropped T-shirt design. Final ThoughtsYou don't always need to purchase fabric for a new garment. Look within your closet to see what garments could be upcycled or provide you with enough fabric to create a design. Sometimes the best fabric store is your closet! Using what we have is a great way to be sustainable and slow down consumption rates on new and raw materials. Alternatively, if you have nothing in your closet that will work, think about visiting your local thrift shops for fabric or larger garments. We plan on exploring more upcycled designs going forward, as the overall message is important to us. Want to elevate your current wardrobe by upcycling? Contact us to book private drafting and sewing lessons.
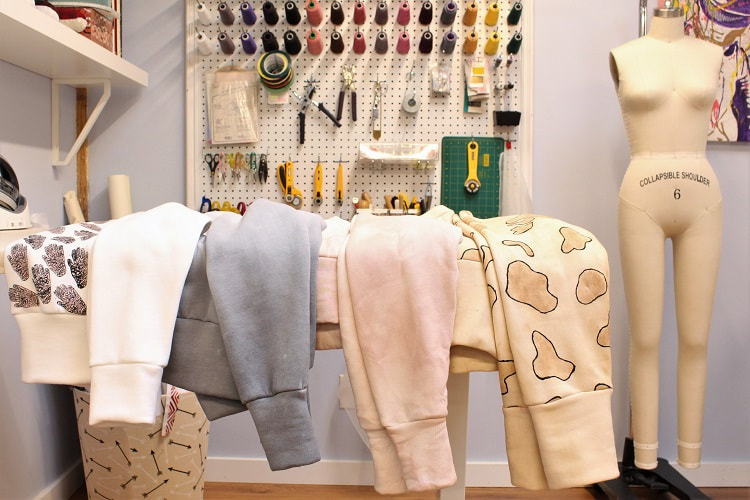
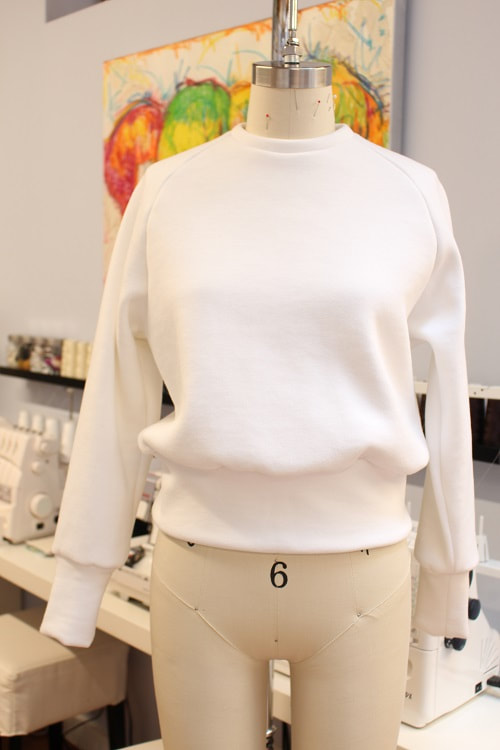
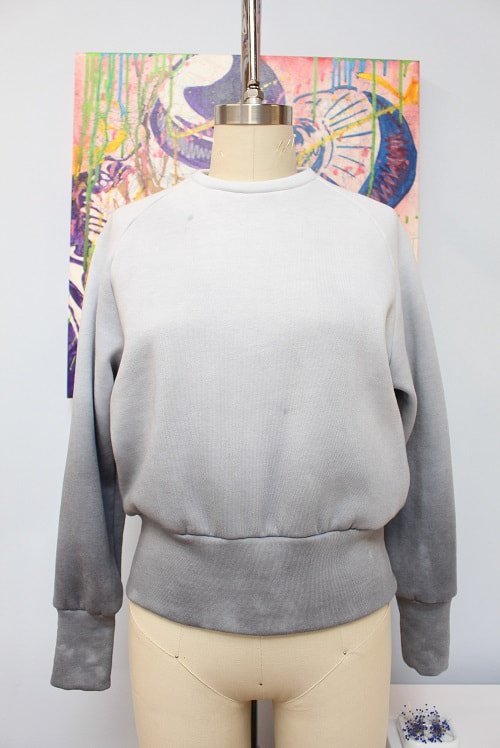
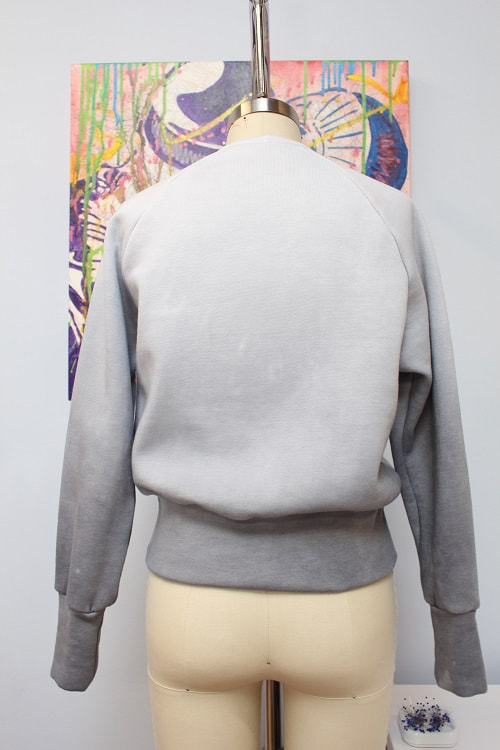
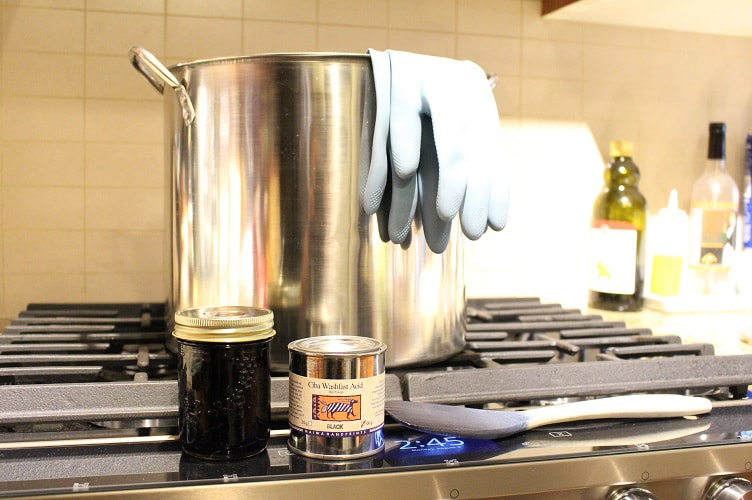
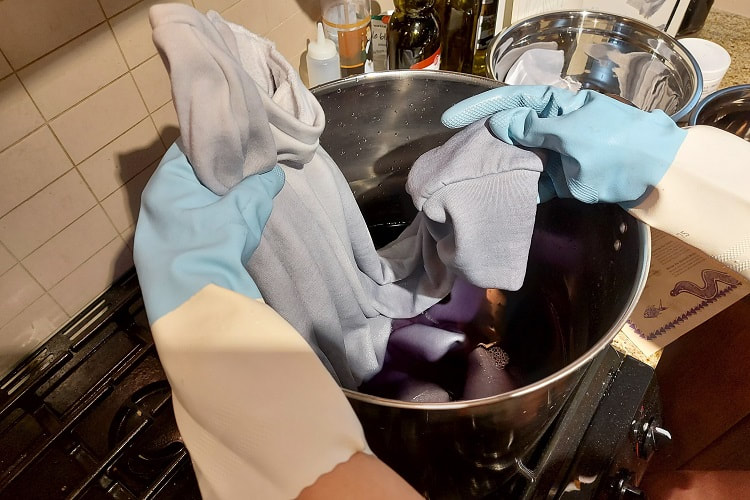
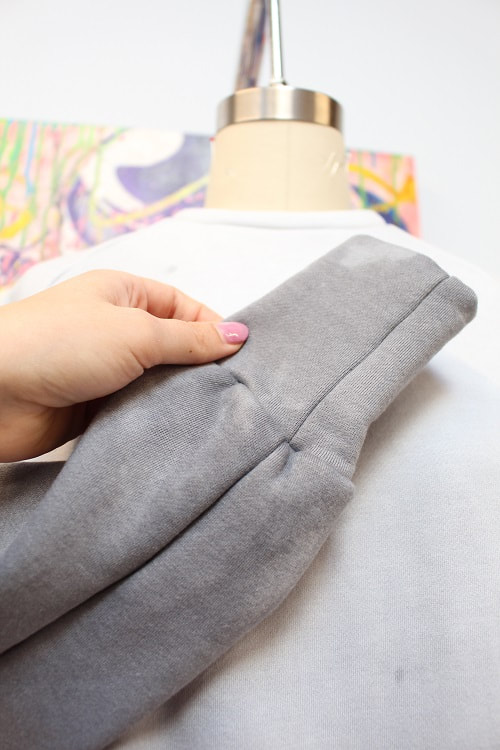
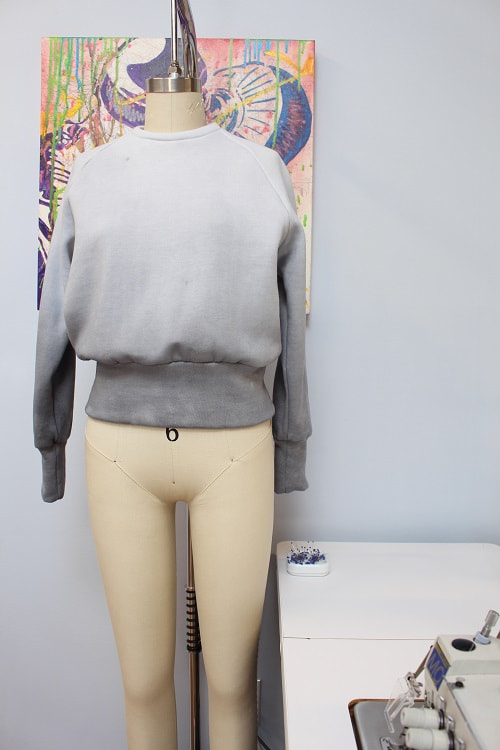
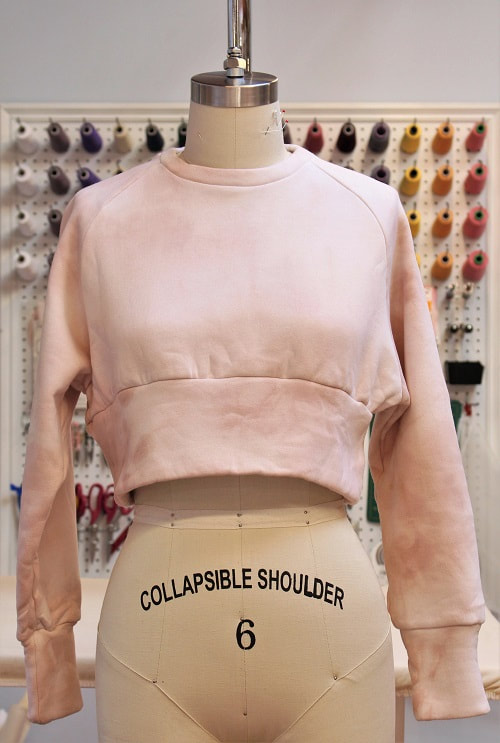
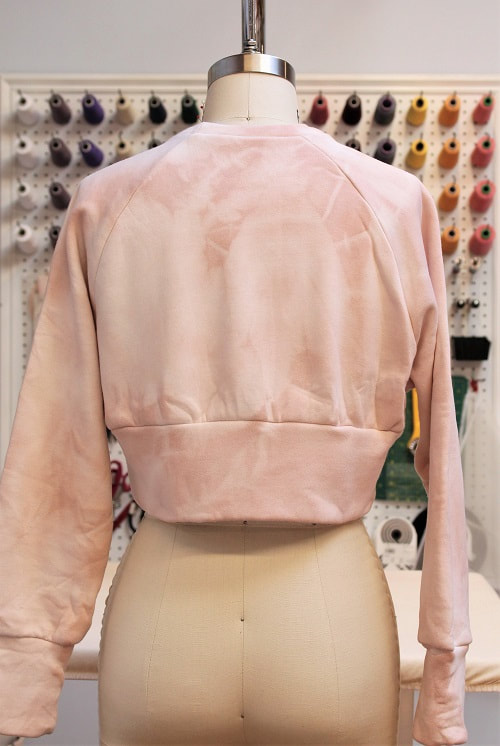
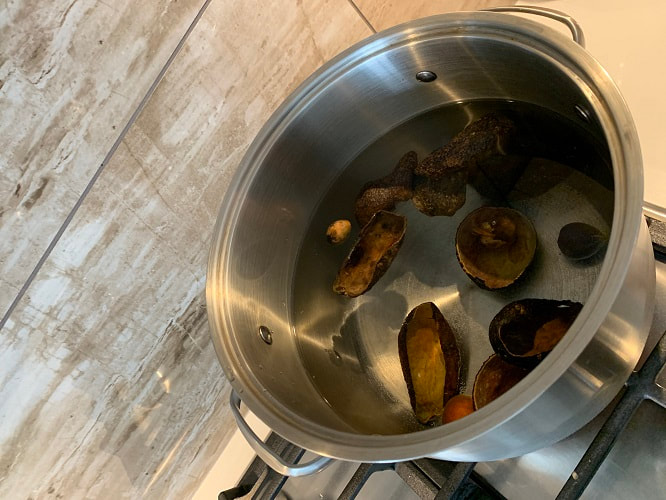
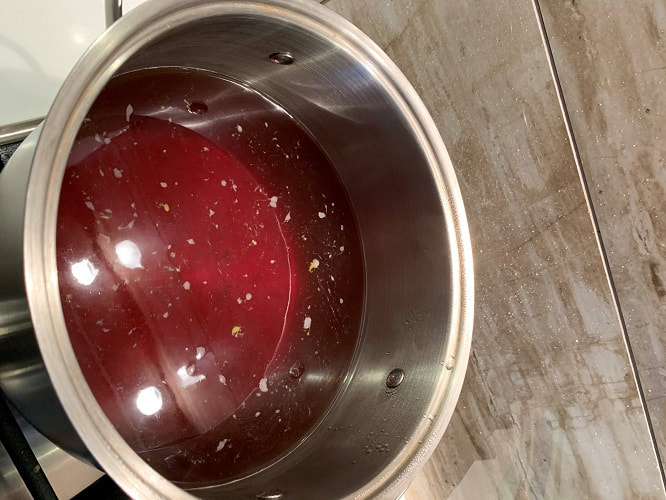
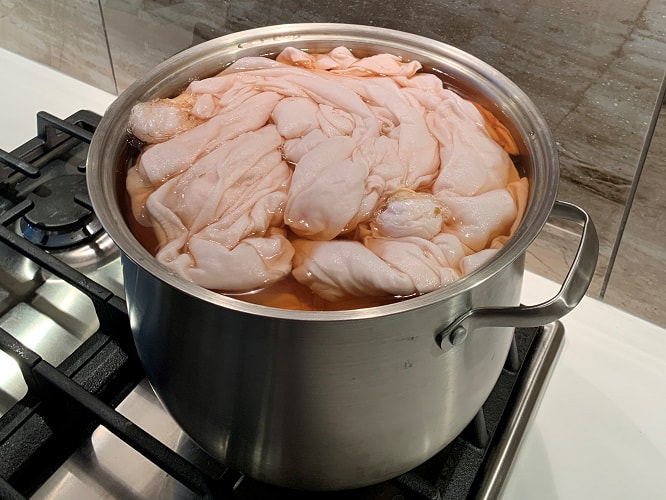
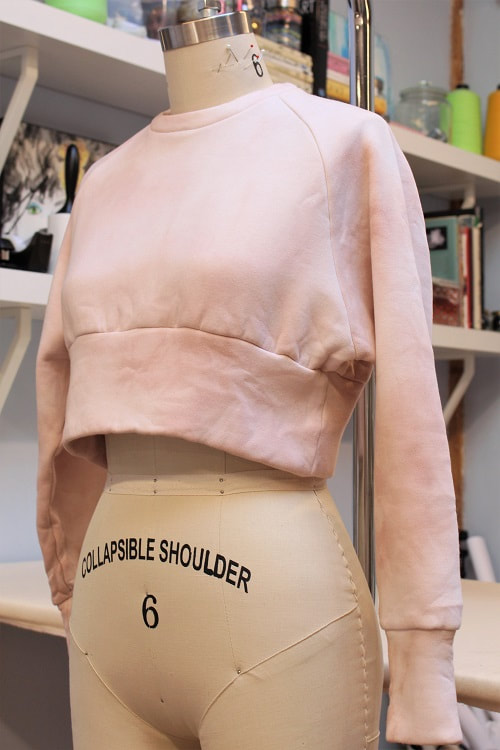
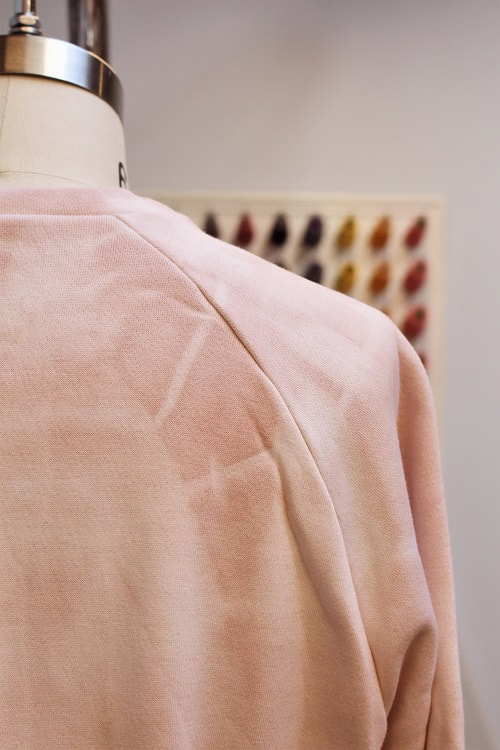
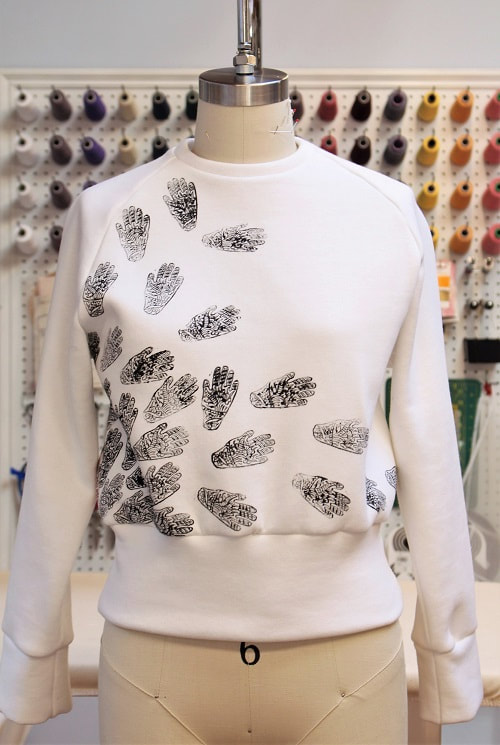
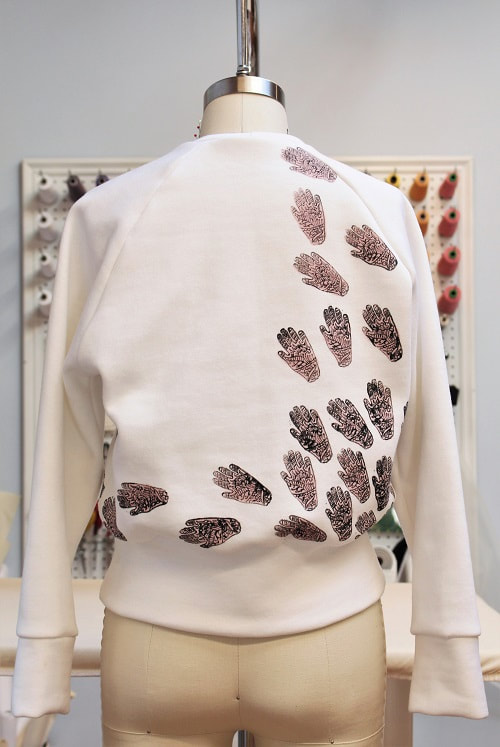
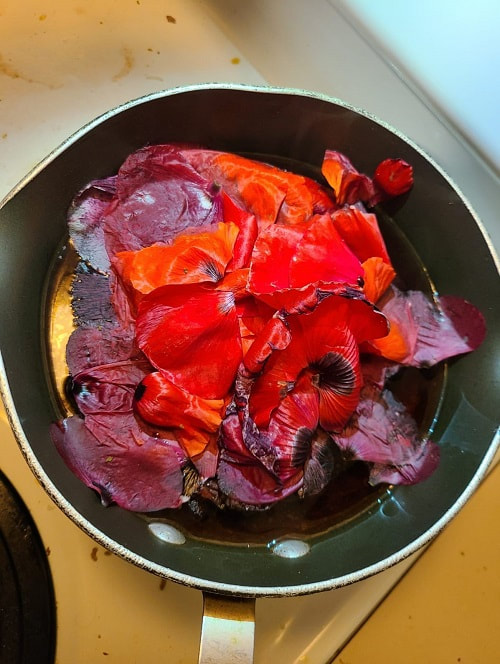
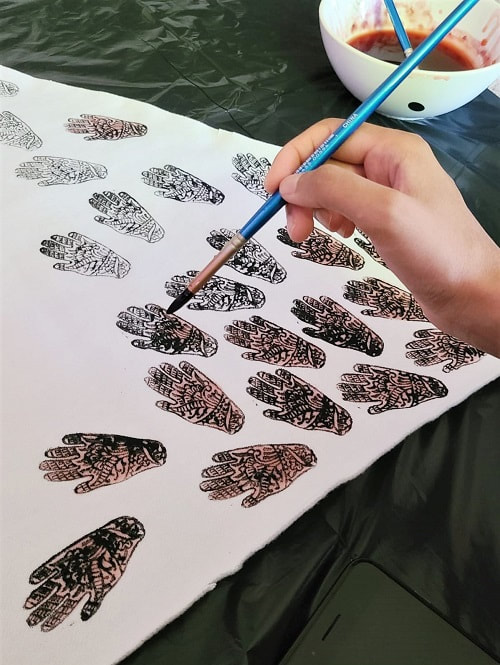
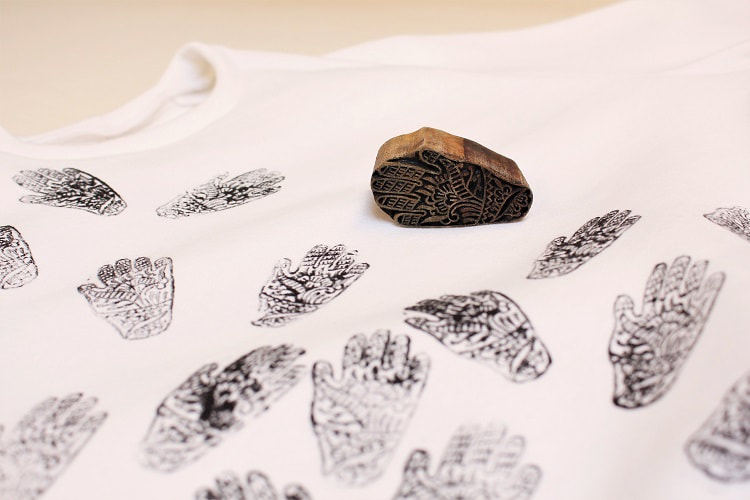
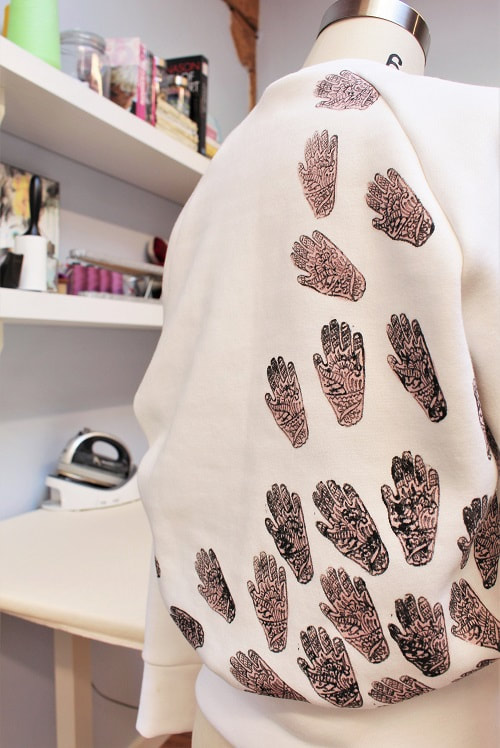
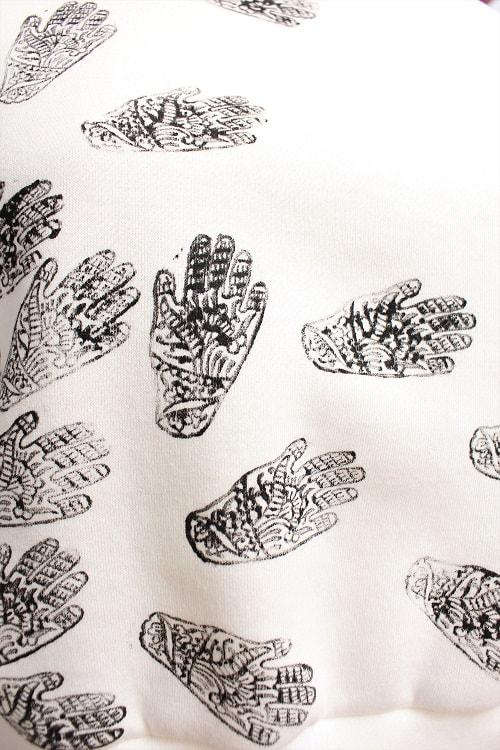
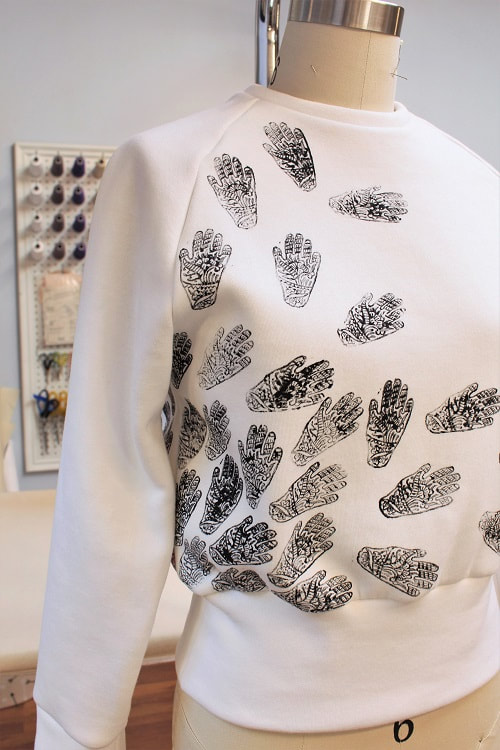
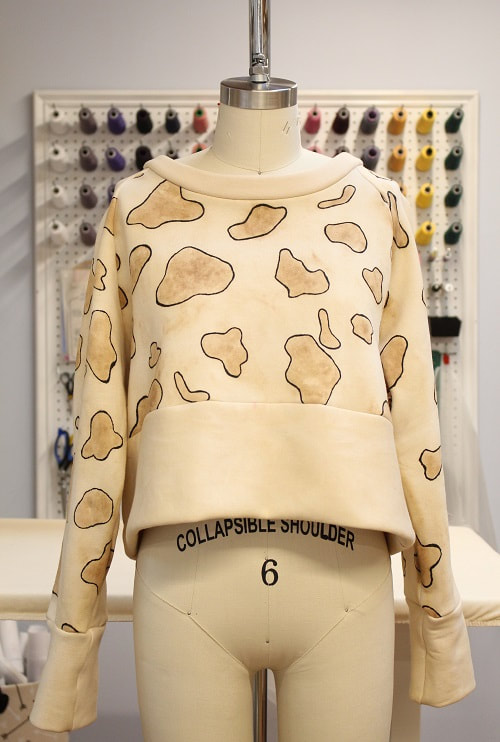
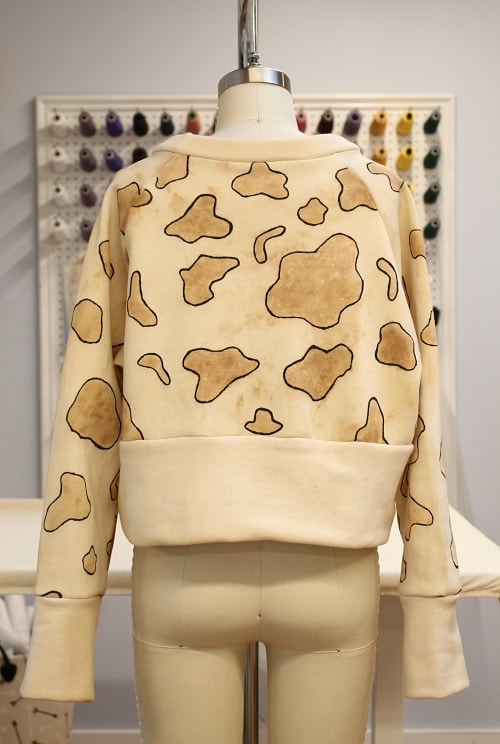
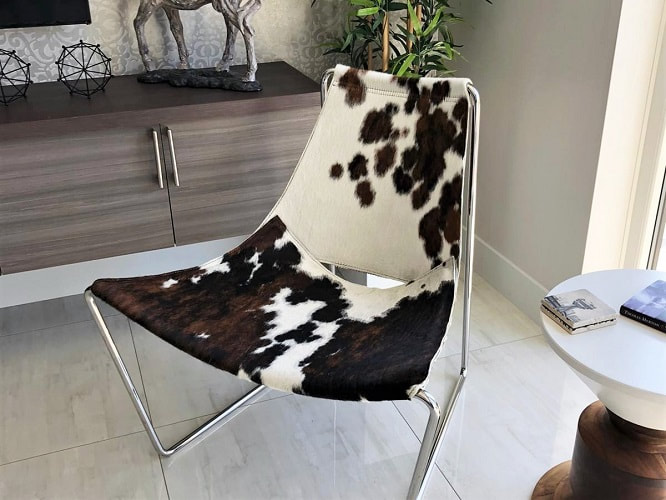
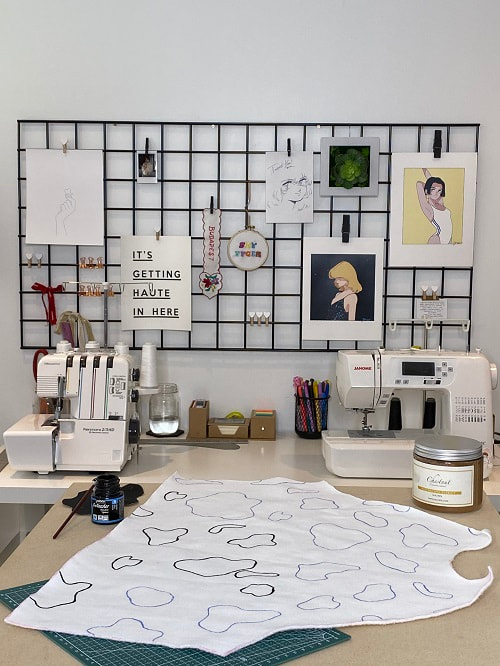
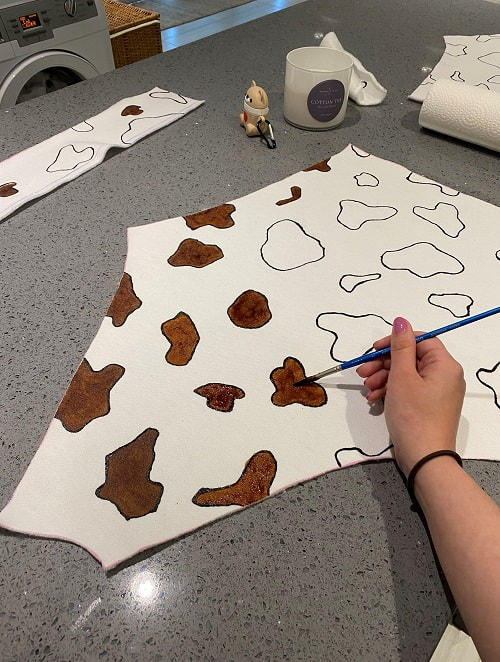
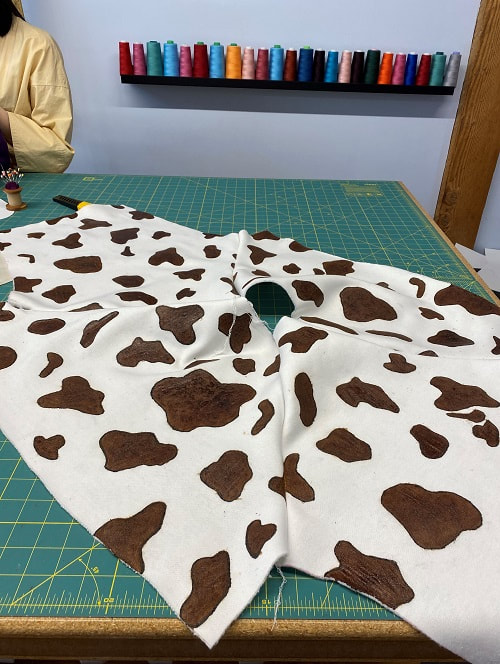
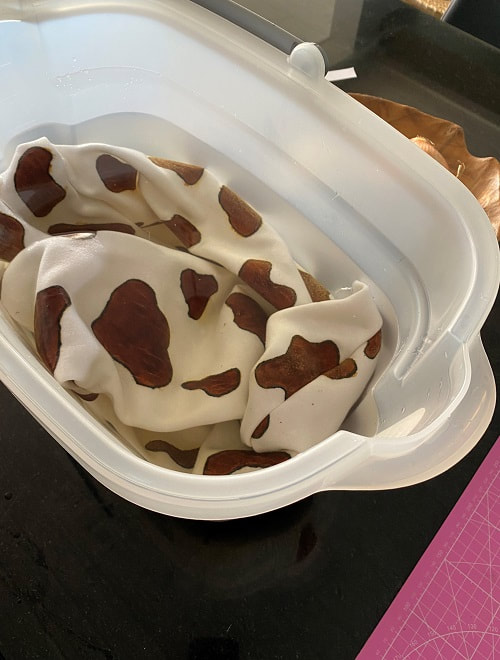
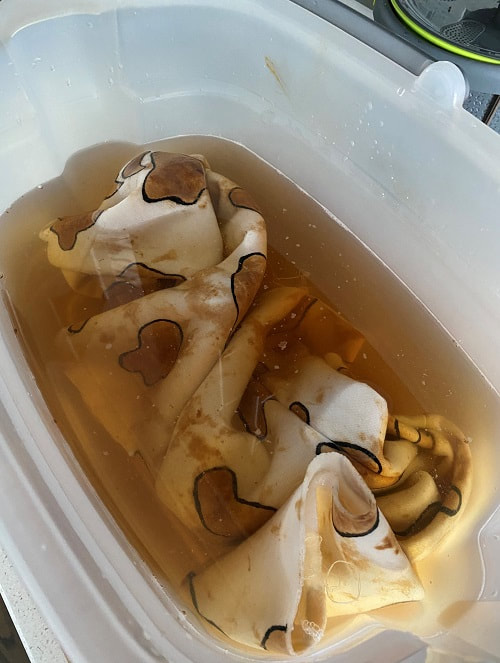
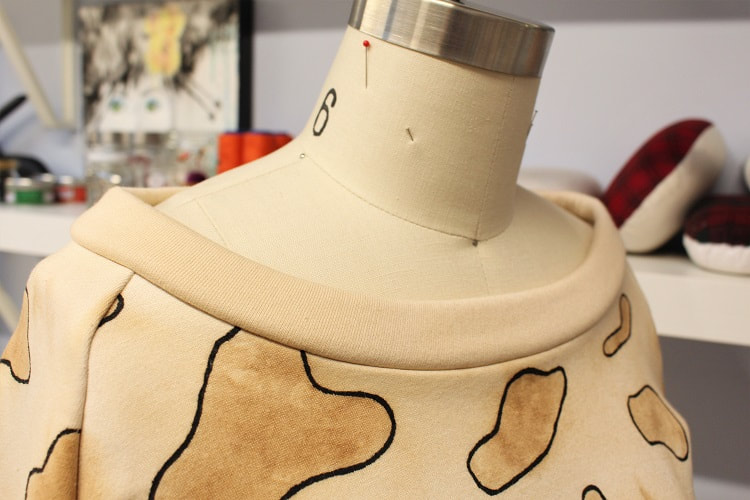
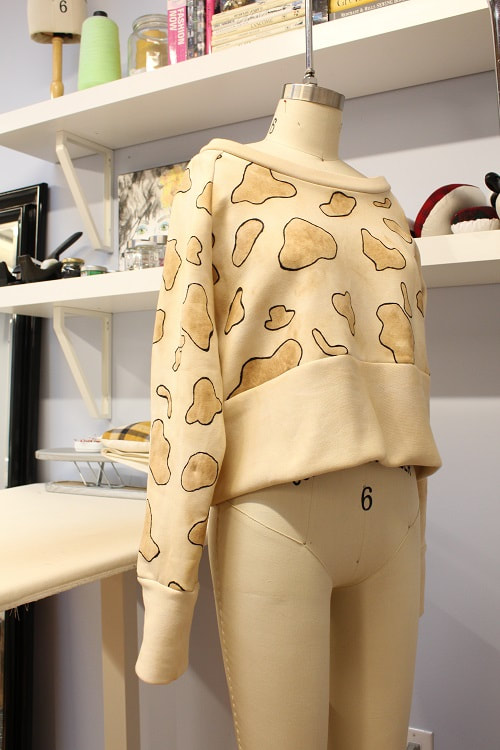
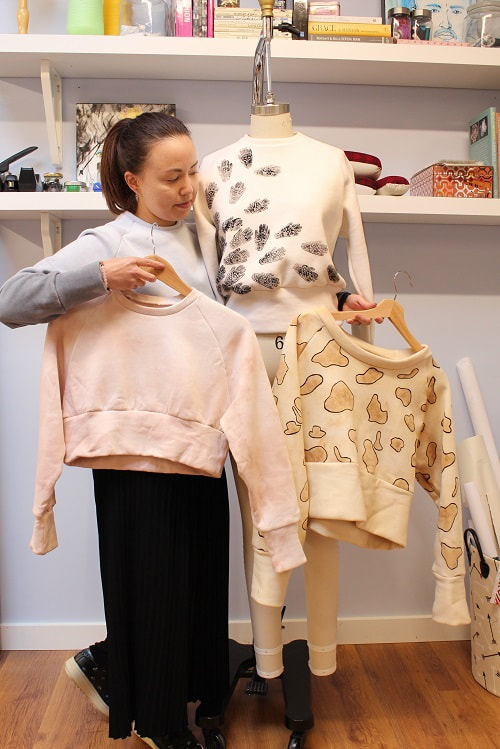
Happy Sewing! Designed, photographed and written by Sheila Wong Studios. Our team is all fairly new to dying fabric. This was an experiment to see how each member of our team would want to dye a blank canvas. Only rules were to use the same white knit fabric and to utilize what you either have at home or what you could order-in to dye the fabric or garment with. Blank Canvas5.2 M of white knit sweatshirt fabric was purchased from Designer Fabrics (Atex) in Vancouver. That’s approximately 1.3 M per sweatshirt. This is as clean as it gets! Inspiration & Dye ProcessTime to add some color! Each of us had a unique inspiration to make the blank canvas sing. Read on as each of us break down our dyeing process, what we learned and where our inspiration came from. If you have not met our full team yet, read more about each of us in the OUR TEAM section of our website. Sheila's SweatshirtInspiration: Rainy day in Vancouver with rain droplets hitting the window. Process: Sweatshirt was fully sewn prior to the dye process. The idea was to go from light grey at the neckline then transition to a dark grey at the hem. I created a black stock solution prior to dyeing the sweatshirt. I used Ciba Washfast Acid in Black from Maiwa Supply Shop. To achieve the ombre look, I had to dye each shaded segment of the sweatshirt slowly. I started first with dropping the entire sweatshirt in a heated dye pot with only 15 ml of black stock solution, in order to get the light grey base shade. I divided up the sweatshirt (eyeballing) into 8 shade segments. Each shade segment I would lift out of the pot and add 15-25ml of additional black stock solution, to produce a deeper shade every time. I held each segment for approximately 15-20min then mixed the solution into the dipped area of the garment. What I learned: I have dyed silk and cotton fabric with the same black dye in the past but creating an ombre effect was a total experiment for me. In hindsight, I should have tested a large swatch of fabric prior to dying the sweatshirt, but I didn't mind making some mistakes and learning through the process! My mistakes were getting a few splotches of the darker grey dye on the light grey area. Caitlyn's SweatshirtInspiration: Pink and summery. Process: I sewed my sweatshirt prior to the dyeing process, then used avocado pits and skins to dye the finished garment. I simply put them in a pot of water, brought it to a boil, and let it simmer until the tannin's were extracted and the water turned a dark pink. I then tied my sweatshirt into a scrunched-up ball and placed it in the dye pot to soak for 2 days. Adjustments were made to the original pattern. I cropped the sweatshirt by taking 5” off the front bodice but left the hem as is for an oversized appearance. I also dropped the neckline by ½ “ overall and adjusted the neckline pattern accordingly. What I learned: Overall, it was a simple and fun project that’s inspired me to play with other natural dyes in the future. For instance, tea or flowers. Sujitha's SweatshirtInspiration: I wanted to go beyond dying my entire garment and explore block printing with natural dyes. Block printing adds an authentic hand made feel to any garment. There is simply no guarantee that each print will be the same and that notion is extremely exhilarating. You start off with an image in mind and when you get going, the results are beyond anything you could have imagined. Process: For my garment, I utilized the use of natural dyes in order to block print and paint. I scavenged my neighborhood and household to find items I could transform into a natural dye. Subsequently, the dye was created by boiling down an entire beetroot and red flowers. In order to achieve the dark red hue I desired, I allowed the pot to simmer for an extended period of time. With the use of a carved block and fabric paint, I was able to stamp my garment in the desired sections and paint over the print with my dye. I opted to keep the front of my sweatshirt black and white and only add the dye to the back. This created the perfect contrast and really made the natural dye pop. It’s safe to say, fabric dyeing is no easy feat and takes patience and a great deal of trial and error. I’ll be exploring this element more on future designs! What I learned: Next time, I will certainly explore more with natural dyes that will provide me with richer colors. Though the red poppies I used were a vibrant shade of red, the final color on the fabric was rather faint. You cannot anticipate what the final color will be, until the dye hits your fabric and dries! By embarking on this project, it opened my eyes to a new world of natural dyes. In a city like Vancouver where we are surrounded by luscious greenery, you can literally take anything you find and turn it into a dye! Natasha's SweatshirtInspiration: Cow printed chair from home. Process: I cut my pattern pieces first, then traced out the cow spots using homemade paper stencils. I then outlined the spots with black fabric paint in order to make the print pop. Once outlined, I painted-in each cow spot using brown chestnut powder, mixed with guar gum. I painted 3-4 layers onto each spot to attempt to achieve a rich dark brown, then left it to dry for 2 days. I found this made my spots too thick and crusty, so I rinsed my pattern pieces in cold water and vinegar. This is how I achieved the final colors- nude overall with light brown cow spots. For sewing, I cropped the sweatshirt by taking 4” off the front bodice. I left the hem alone for an oversized appearance. I also altered the neckline by dropping it by 1” however, it stretched out when I rinsed my pattern pieces. This resulted in an almost boat neckline. What I learned: Originally, I had planned for the cow spots to be dark brown like my chair inspiration. Dark enough so that the black paint would almost blend in. Because the guar gum made the dye really thick, it caused my spots to become chunky and stiff. I needed to rinse my dyed fabric in water and vinegar in order to soften them up, BUT the spots bled out. Although the spots themselves are still darker than the remainder of the fabric, the final outcome was not the initial look I was going for. However, sometimes things turn out to be happy accidents and I still really love the end result! FinalGroup sweatshirt photo op! Our team members have such unique personalities and it really shows in each sweatshirt design. We think it’s great to showcase individuality within a team every once and awhile and this project was a great (and fun) opportunity to play around with this! Should we do another team-based project in the future?? What should we make? Let us know in the comments below! Happy Sewing!
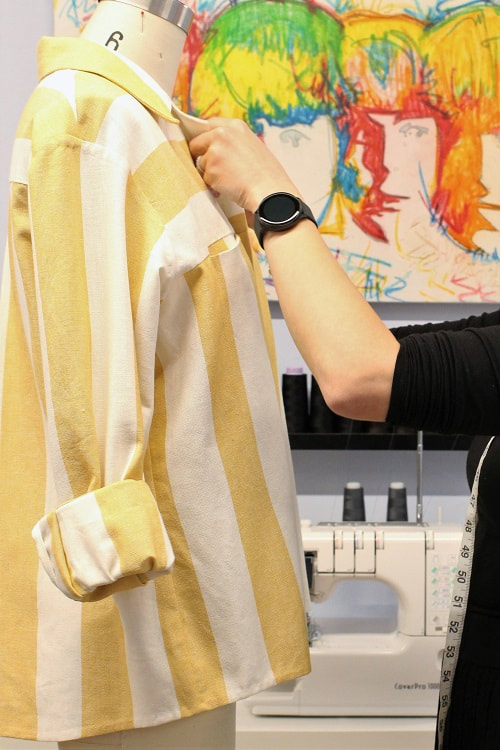
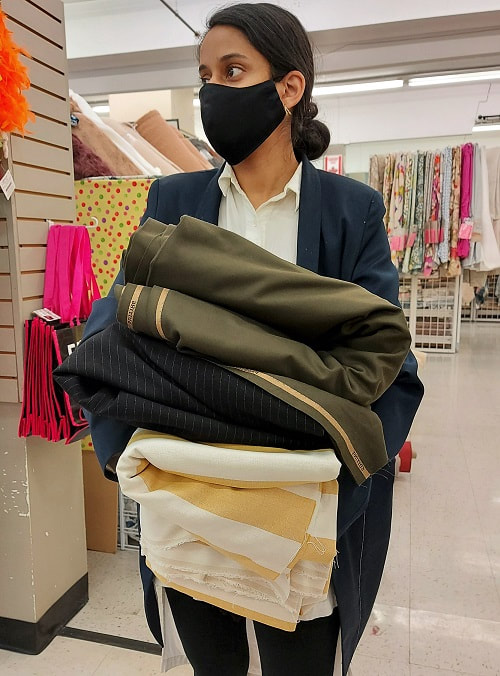
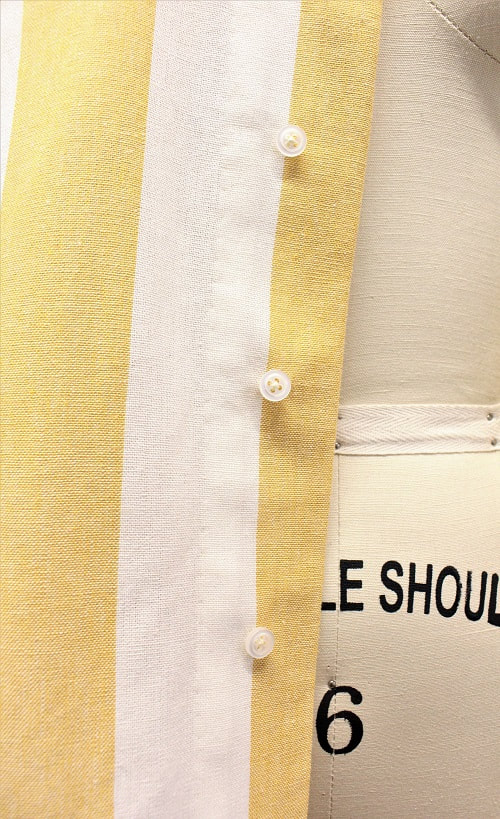
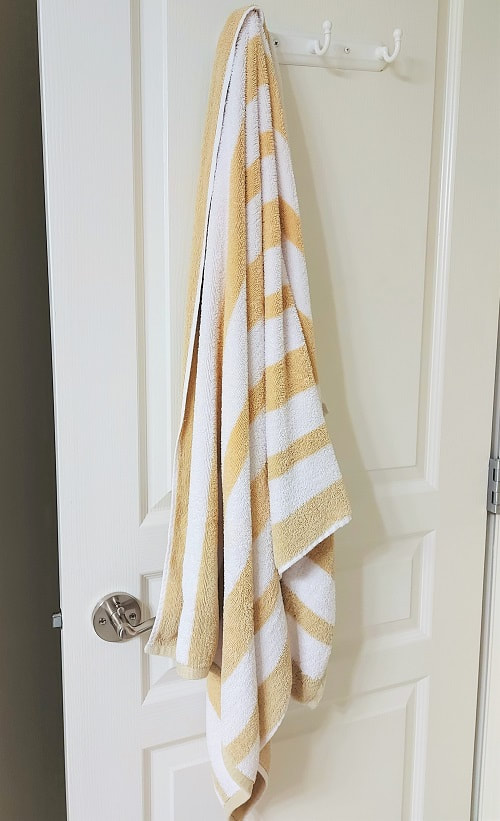
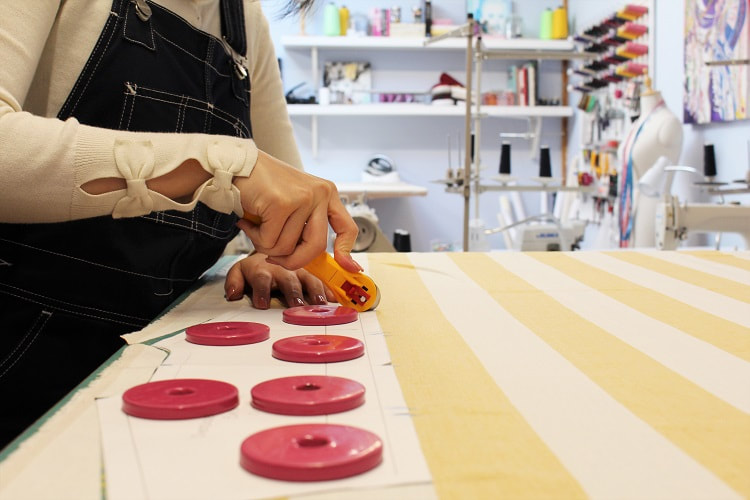
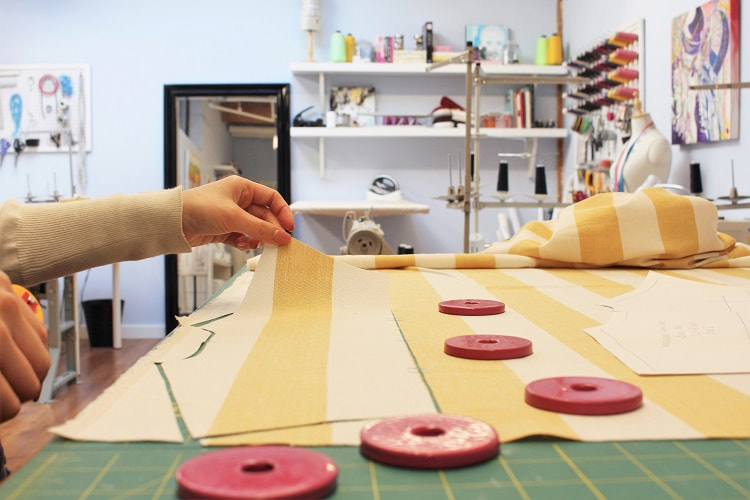
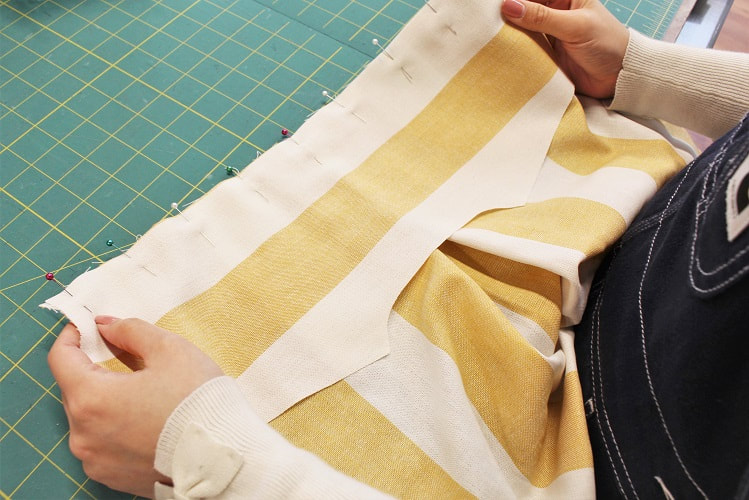
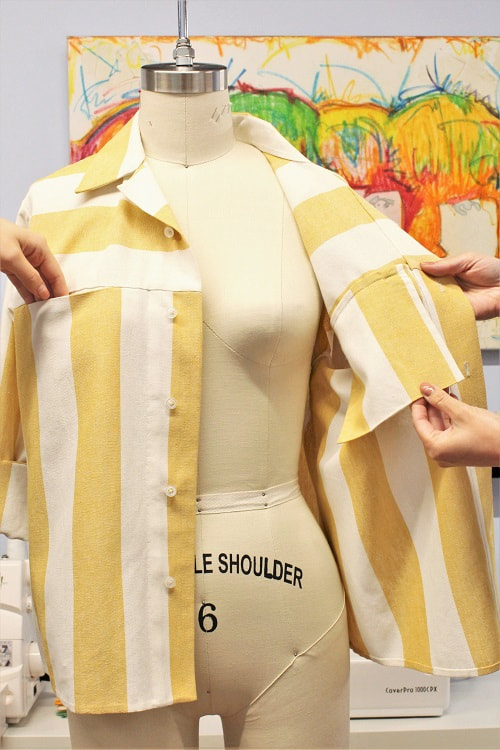
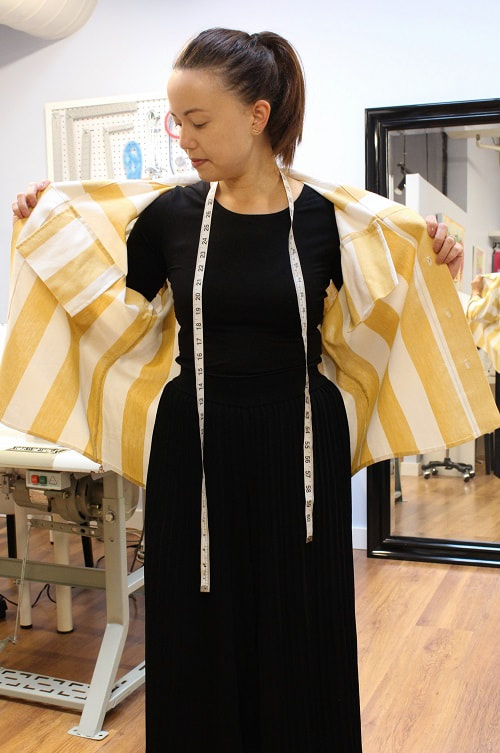
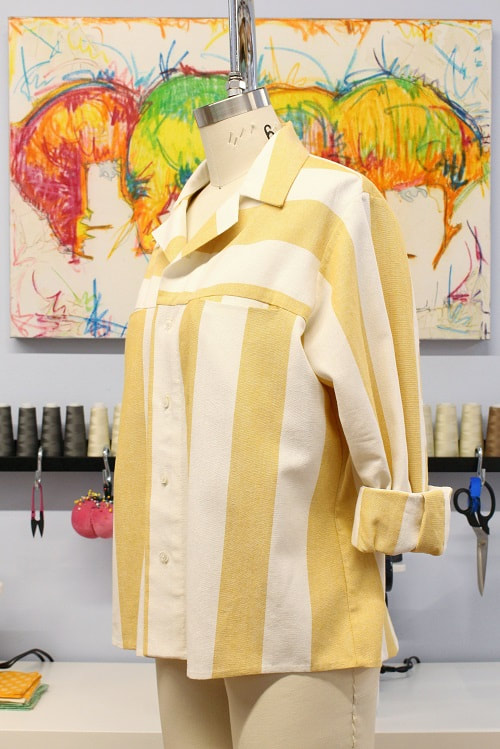
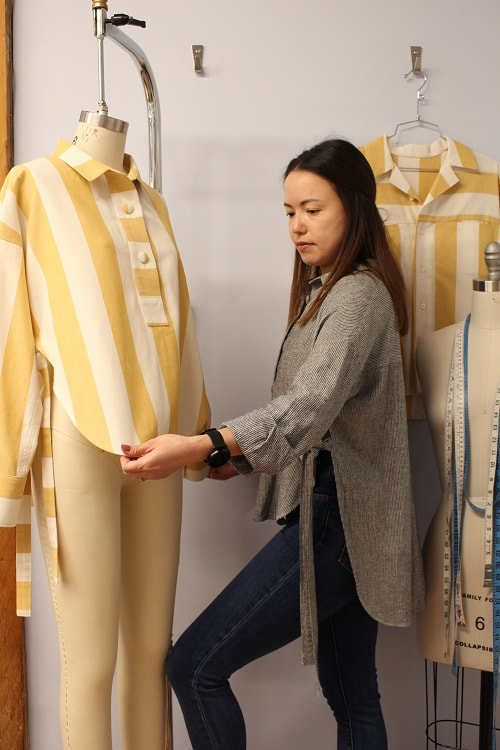
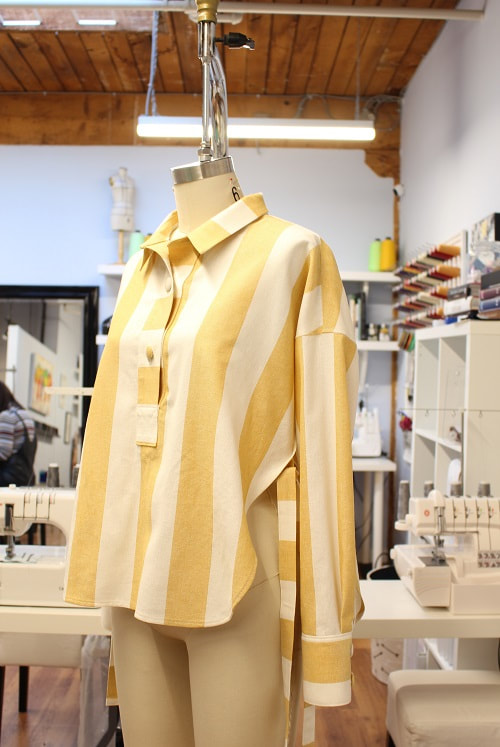
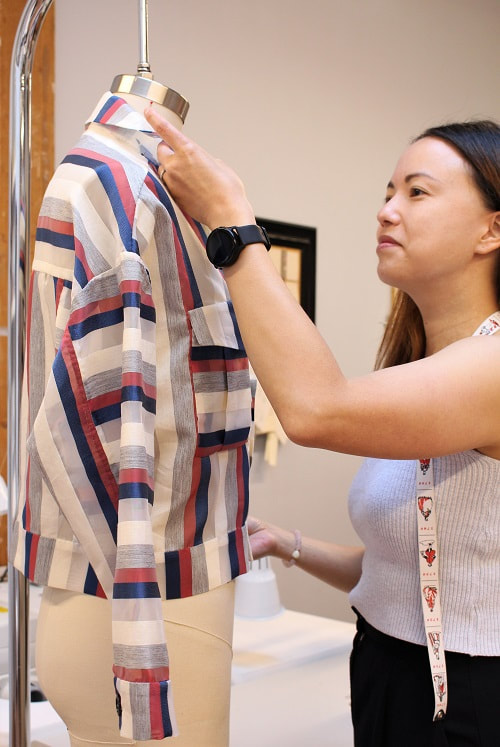
Designed, photographed and written by Sheila Wong Studios Our latest design received the named “Beach Vibes Tailored Shirt” and rightfully so since it was inspired by a beach towel! This summer striped shirt was created as a demo while instructing client Barb (@eyeofaneedle), in making oversized silhouette tailored shirts that reminded her of retro patterns from the 70’s and 80’s. Keep reading to learn about the design process and drafting tips! We have been working with stripes more recently here at the studio. For this design, we wanted to up the ante by inserting design elements based around stripe formation. In the end, we opted for contrasting stripes (horizontal vs vertical). This is not the first time we have done this! Check out our blog post “Latest Design: Couture Striped Coat” for more contrasting stripey goodness. FabricThe inspiration for this design came from a beach towel of all things! Back in June, I visited Fabricland on Marine Drive with our beginner instructor Sujitha. We were on the hunt for fabrics to use for client demos and sample making fabric for new concepts we have been brewing. While browsing the store, this yellow and ivory striped linen/cotton blend fabric caught my attention. It reminded me of a beach towel I own at home, so I decided to buy it. The great thing about inspiration is that it can come from anywhere, even the trivial things. That or I just miss travelling near water. Project Specs
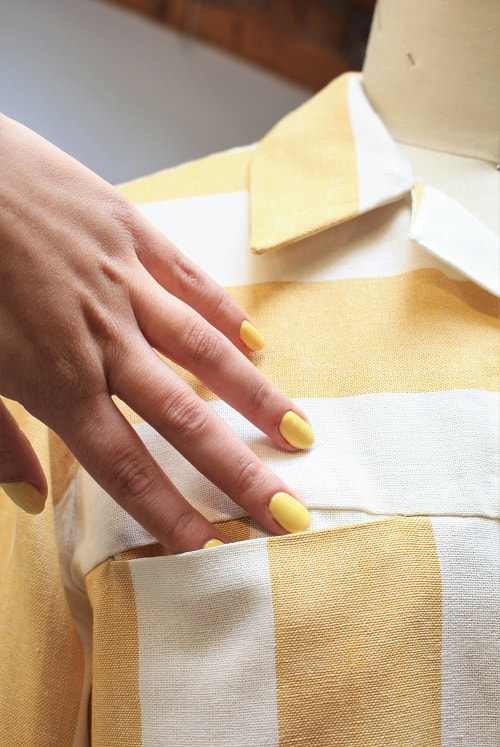
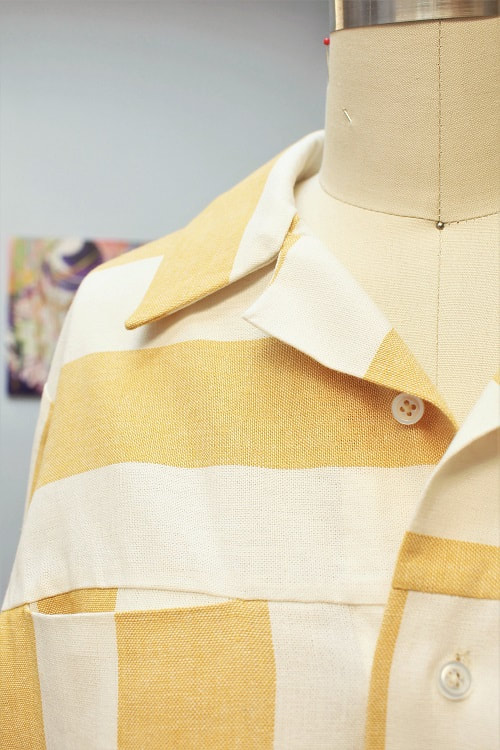
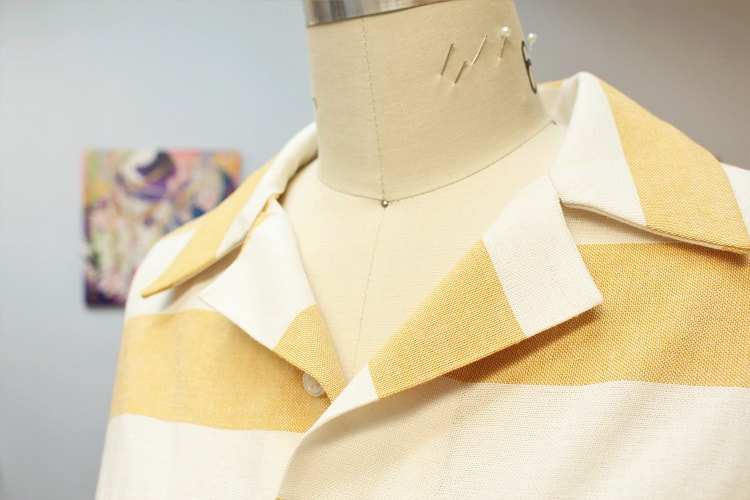
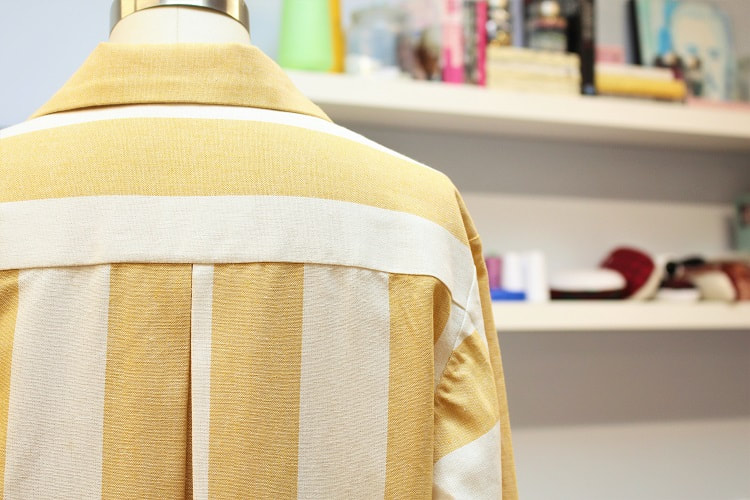
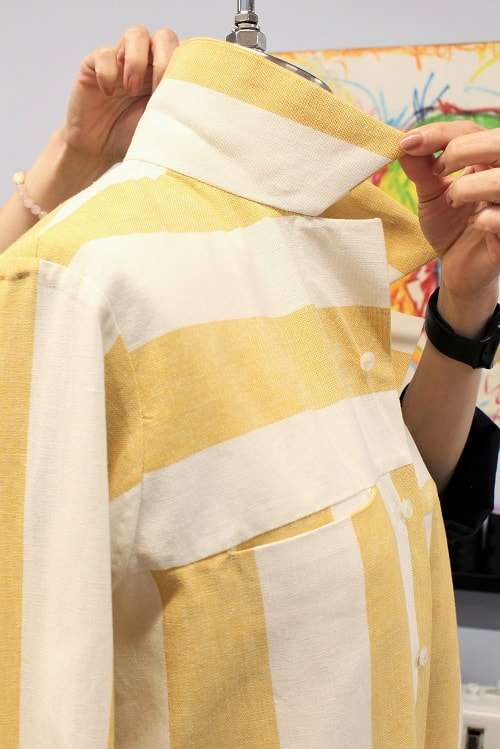
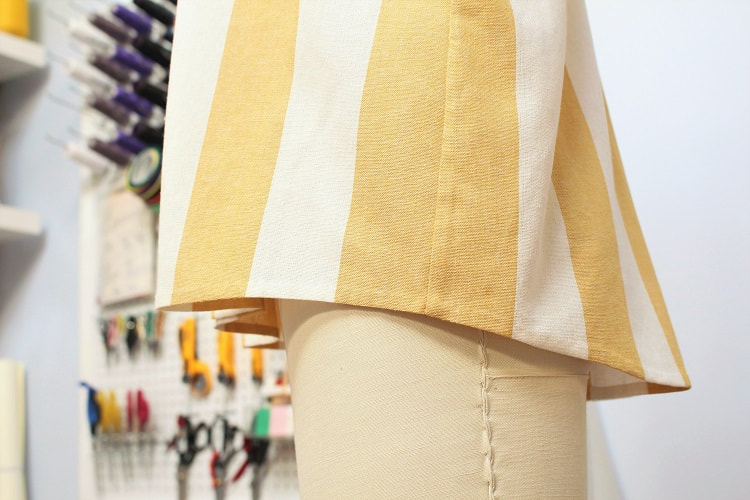
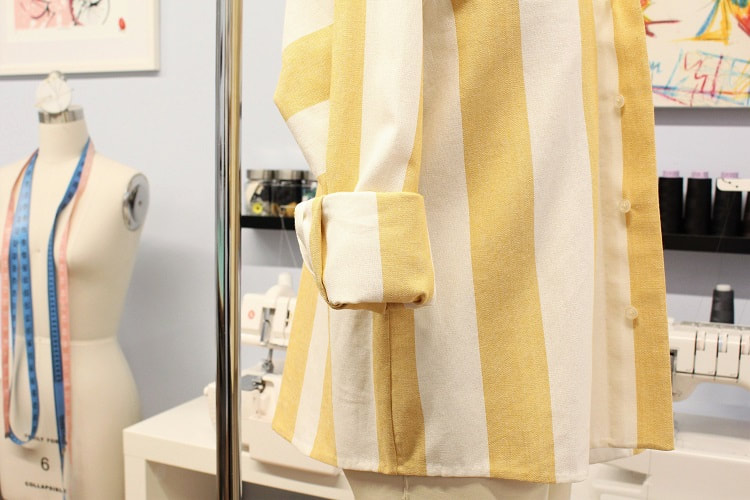
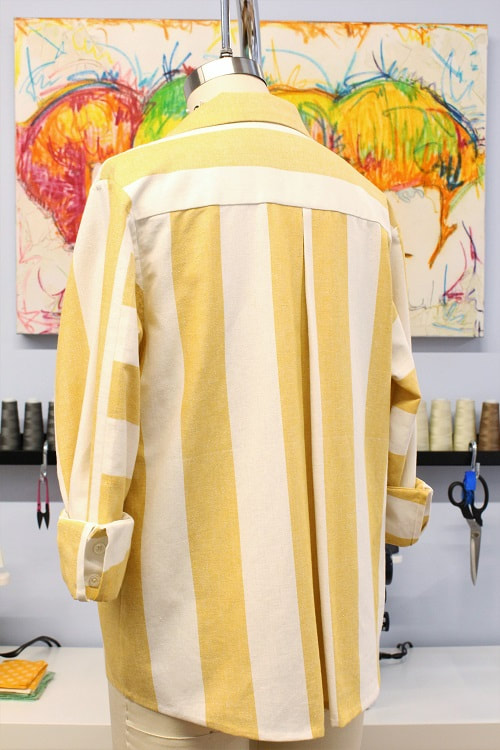
Design ElementsHere is some insight into our experimental process with the design elements. All major seams have a French seam finish with exception of the following seam finishes— hem, cuff closure, collar stand closure, flat felled armhole seam finish, clean seam finish along upper and lower sleeve seam. Horizontal In-Seam PocketTypically, an inseam pocket is vertical along a side seam of a garment…but since when are we typical? An inseam pocket CAN be placed along any seam that allows for space. If you are looking for extra pockets in a garment, this is the easiest pocket to draft. By placing a seam horizontally like we did, it also allows for potential print blocking or in this case, contrasting the horizontal and vertical stripes. Extended Front Lapel & Wider CollarThe space along the neckline where the front opening begins and the front collar ends has been extended to allow for a more casual look. If the wearer wears the shirt with the top button unbuttoned, it will give an appearance of a lapel. Because we did not include a collar stand which typically extends the width of the collar, we made the collar width larger. Drafted for a 3” width collar at the center back, and then tapering down to 2.5” near the front of the collar point. If you look closely, you can see the roll line of the collar in below photo. Gentle Curved HemTraditional tailored shirts have a slight curve up along the side seams of the garment, allowing a wearer to easily tuck in the front or back of the shirt with ease but avoid excess bulk along the sides. We made a very gentle curve, almost plateauing at the side seams. We do not intend on tucking this oversized shirt in though. Drafting Tip: Remember, the more intense the curve you draft, the more challenging it will be to sew. I like to remind myself and my clients of this while drafting any pattern pieces involving potentially intense curves. Final ThoughtsThis design was used as an instructional garment for a client to understand the drafting and construction process. We started from bodice blocks, to basic shirt blocks, to a custom oversized shirt block. From there, we drafted the intricate details of the 2 piece sleeve, collar, collar stand, yoke, CB pleat, front button extension and tailored cuff. A fit sample out of muslin fabric was created to ensure the oversized ease amount was perfect. My client Barb has been creating clothing longer than many of us have. She mentioned this shirt was the best fit and beyond thrilled with the construction. Reminder! Great things take time. You can’t stop the waves, but you can learn to surf. New Addition (Feb 2021)Beach vibes continue as we use up the rest of this stripe fabric from Fabricland. Many of our clients have been learning traditional tailoring techniques this year. Our Jellyfish Tailored Shirt design provides a modern way to learn these techniques. Check out Latest Design: Jellyfish Tailored Shirt blog post to read all about this design. If you would like to learn how to draft and construct a tailored shirt, contact us to book private lessons. Happy Sewing!
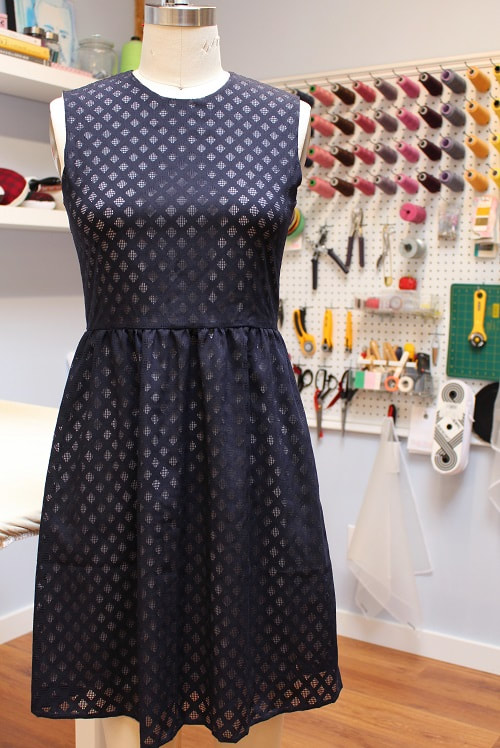
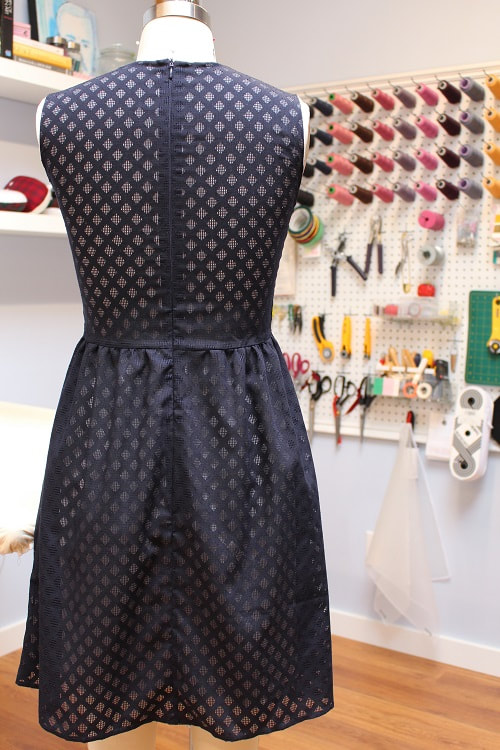
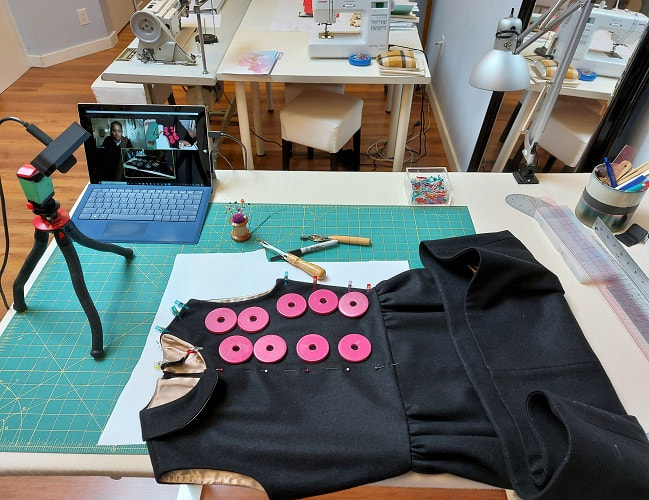
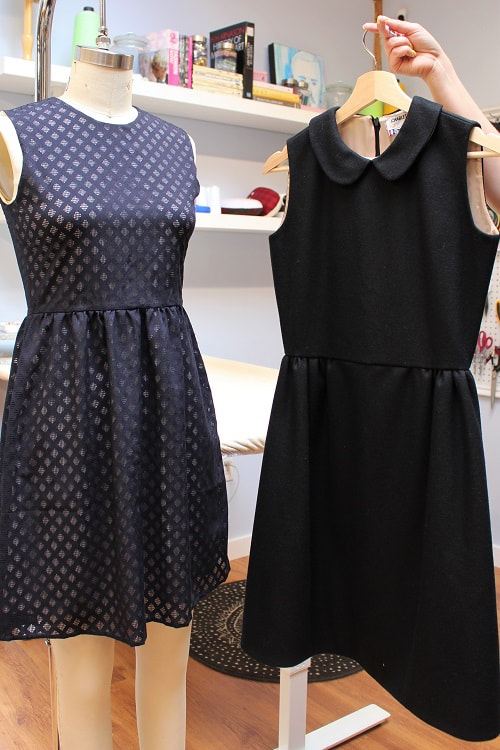
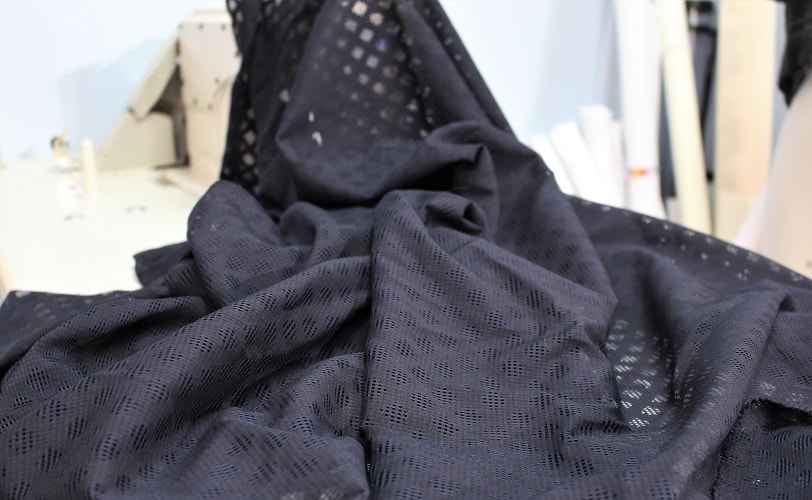
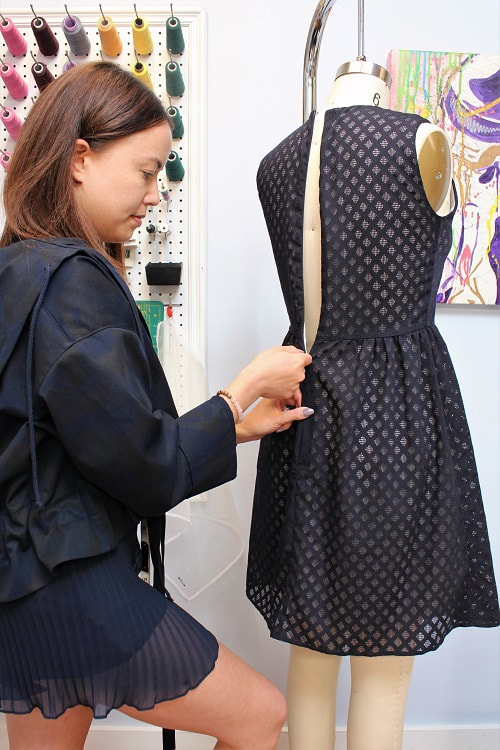
Designed, photographed and written by Sheila Wong Studios. Reverse pattern drafting is one of the BEST entry ways into understanding pattern drafting basics. It is the technique of extracting a pattern off an already made garment. The ability to alter the pattern of a beloved design to better fit your body and personality is empowering and fun. It’s exactly what I did for our latest dress design while teaching a client. DraftingOur blue lace dress was created while teaching client Claire (@seassneptune), how to design a simple sleeveless dress through digital lessons. For those that are new to reverse pattern drafting, one of the best garments to begin with is a sleeveless top or a sheath (straight silhouette) dress. Below is a shot taken while teaching Claire this summer during her digital lessons. I am demonstrating the extraction process at this stage. Typically, I will demonstrate by using a garment from my own closet. I pulled a vintage dress I had purchased back in 2018 from Shimokitazawa in Tokyo, Japan to use with this client. If you are not familiar with the quaint area of Shimokitazawa, it is filled with well curated second hand clothing shops, little boutique coffee shops, and unique eats like curry pan and lasagna soufflé. I opted out of the Peter Pan collar and the invisible side seam pockets. I added more gathering than the original thrifted dress. I also found the armhole was too high on the thrifted dress, so I dropped the armhole by ¾” on the new lace version. FabricBack in 2016, I picked cotton lace fabric from Nagato Fabrics in Nippori Textile Town in Tokyo, Japan. They’re one of my favorite textile shops in the world as they have 3 shops within one block of each other to enjoy. For more information on Nagato Fabrics, check out our blog post “Latest Design: Couture Striped Jacket”. For the lining, ivory stretch jersey fabric was purchased locally from Fabricana in Richmond. They are one of my go-to’s for fabric in the lower mainland! Project Specs
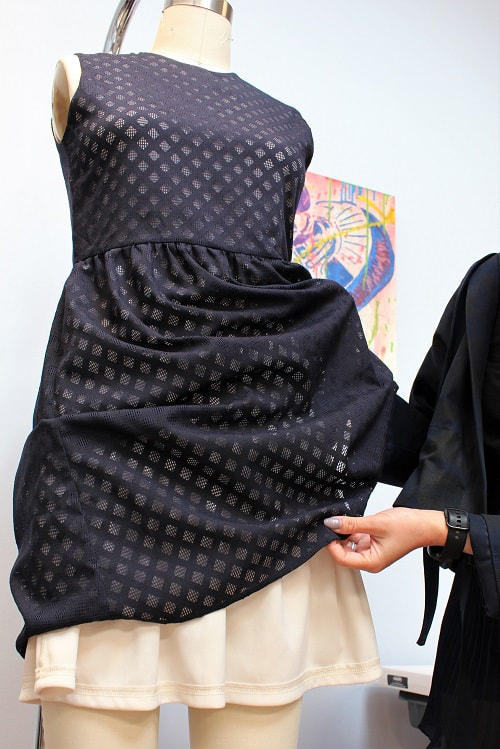
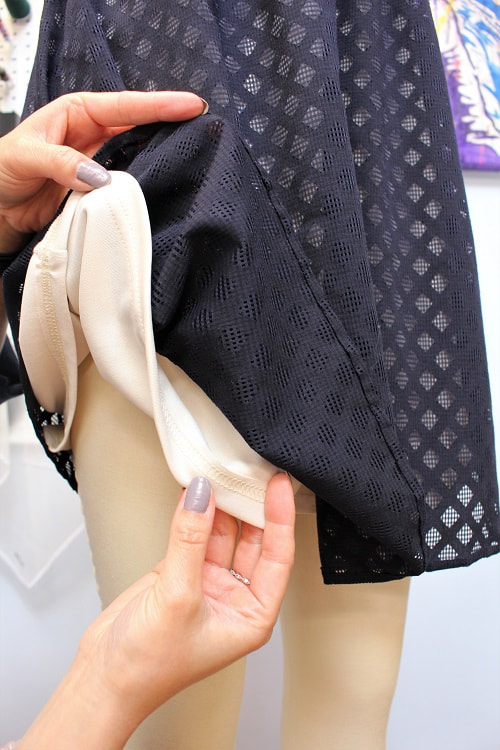
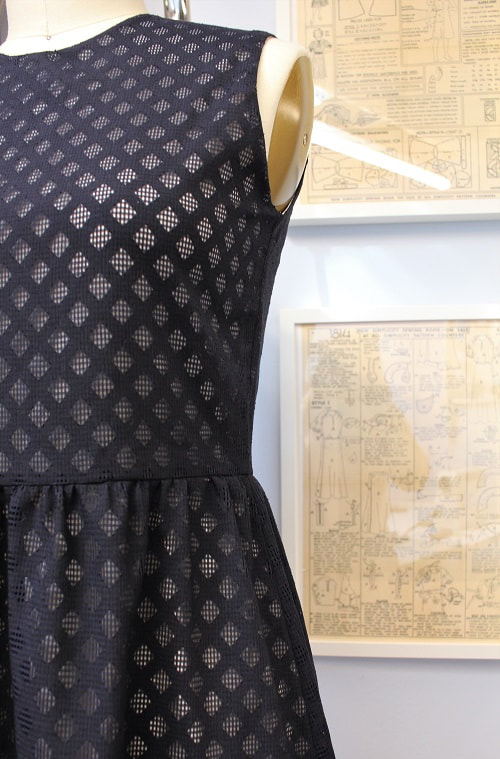
Design ElementsThe silhouette of this dress is rather simple. Bodice is a sheath, no darts and the skirt has just enough 3D created through the gathers and slight amount of flare created during the pattern drafting process. Because the silhouette is simple, it made sense to really put all the focus on the fabric and the seam finishes. Below, I go in further detail about the geometric lace overlay and how I chose to construct it. Lace OverlayLace overlay is the star of this show, as it adds a touch of elegance to the design. The overlay has French seams applied to everywhere with a hand sewn narrow hem finish. My end goal was to create a garment that appeared like the lining did not exist. You can do this by matching the lining color to your skin color. Ivory fabric was used as the lining to provide an almost-naked look in a conservative way...a bit of an oxymoron I know! PS- My skin tone is more pink than ivory. The bodice and skirt are fully lined because who wants to wear a see-through lace dress?! Well...maybe that depends on the circumstance har har, but I went with modesty for this design. Two dresses (exterior and lining) were made separately. They connect along the neckline, armholes and the back zipper opening area only. The jersey lining has overlock seam finishes applied to everywhere with a coverstitch hem finish and understitching was applied to the lining along the neckline and armholes. Understitching is an essential stitch that ensures the lining layer does not creep out. Pairing a woven and a knit fabric is normally not the best idea as the two move (dance) in very different ways but this was the only suitable ivory fabric I had in the studio. Here are some sewing tips when pairing a woven and a knit together:
Gathered WaistGathering along the waistline of the skirt area creates volume on the lower half of the body only. This allows for a more hourglass figure where it might naturally not occur! The thrifted dress had little gathering. I added a 1.5 : 1 gather ratio along the waistline. When deciding how much gathering to add, think about the weight of the fabric. Lighter and thinner fabric can have a higher 2 or 3 : 1 gathering ratio. While a heavy or thicker fabric will not allow for too much gathering so a 1.5 : 1 gathering ratio will work well. You can test out your calculations on scrap fabric to confirm the perfect gathering look for you. If you’re new to gathering and would like to learn more about it, check out our blog post— How to Gather Fabric: Sewing Tutorial for step-by-step sewing instructions. FinalPresto, lace dress complete! I demonstrate pattern drafting and construction for several full garments, to aid in the instruction with clients. This dress in particular, turned out beautifully and I was slightly surprised as I only used fabric from my slowly diminishing Japanese fabric stash. I had no initial intention of applying a lace overlay, but I know my client this time is very much into lace. I figured this would be a great way to demo. Again, I was reminded that some of the best designs come from last minute decisions. Embrace change right?! If you would like to learn how to reverse draft and sew your favorite garments, contact us to book private lessons. Happy Sewing!
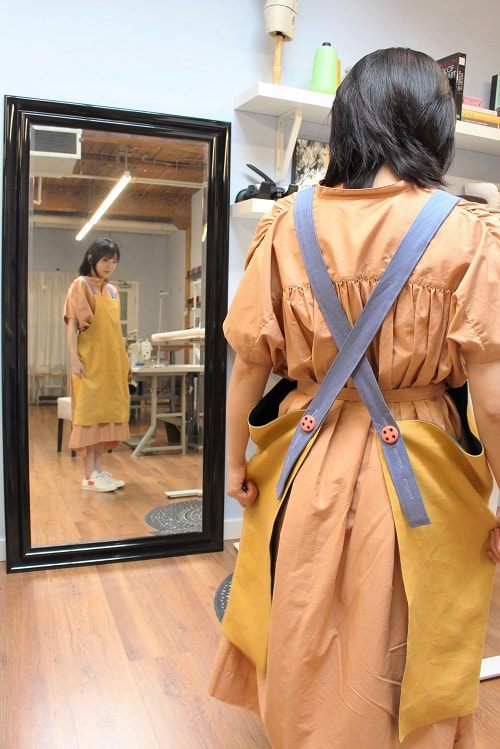
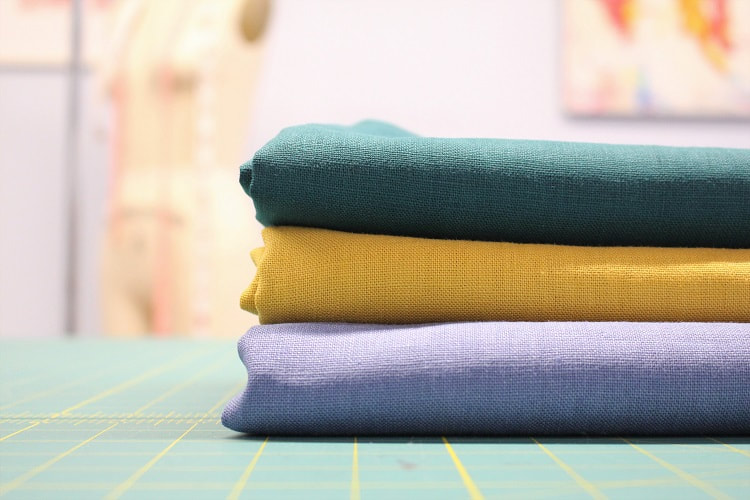
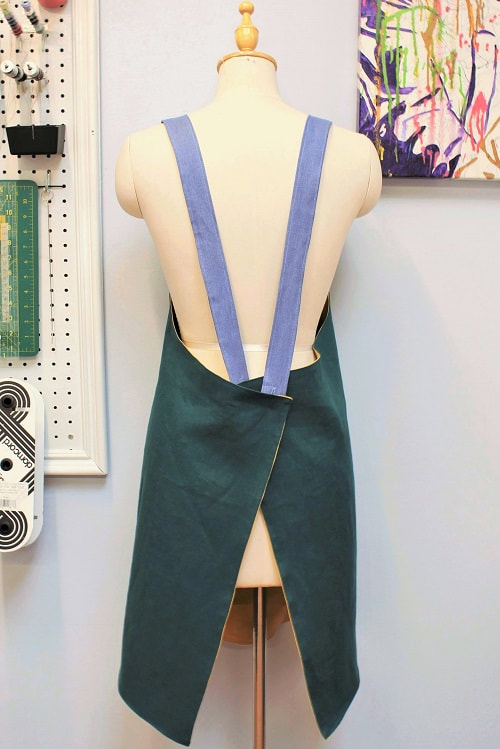
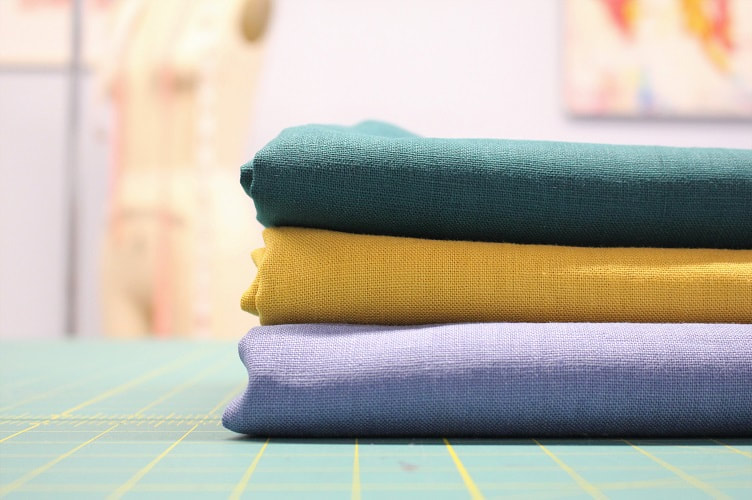
Designed, photographed and written by Sheila Wong Studios. Welcome to part 2 of 2 on creating a reversible crossback apron. In our previous blog post Draft-a-Long: Crossback Apron, we taught you how to draft the pattern for this design. In this blog post, we give you the step-by-step instructions on constructing your very own reversible crossback apron with adjustable button straps! Learn more about the drafting process by reading, Draft-a-Long: Crossback Apron (Part 1 of 2). MaterialsYou will require the following materials to sew our reversible crossback apron.
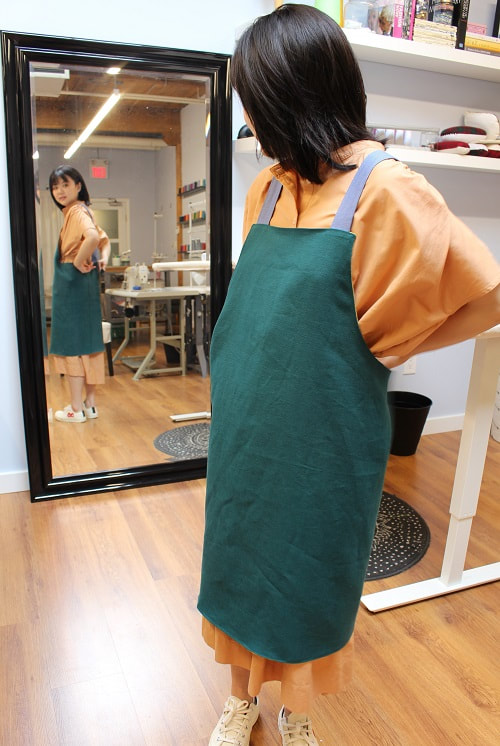
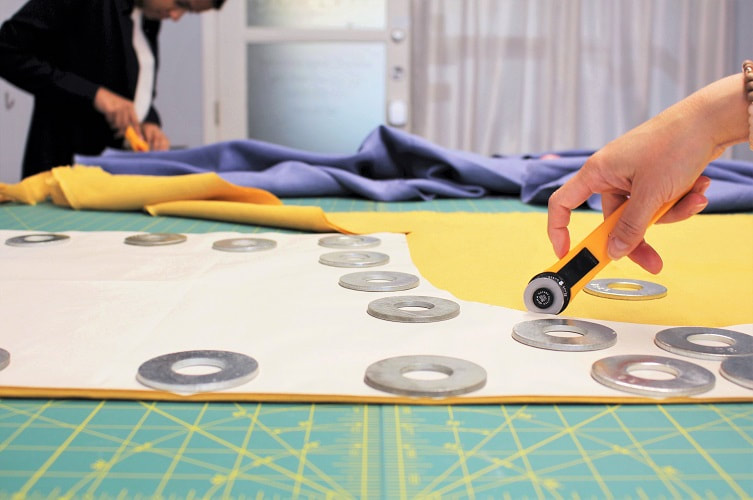
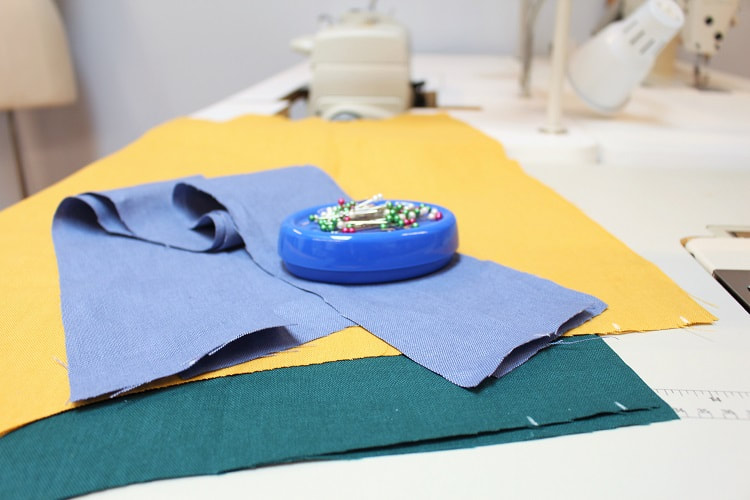
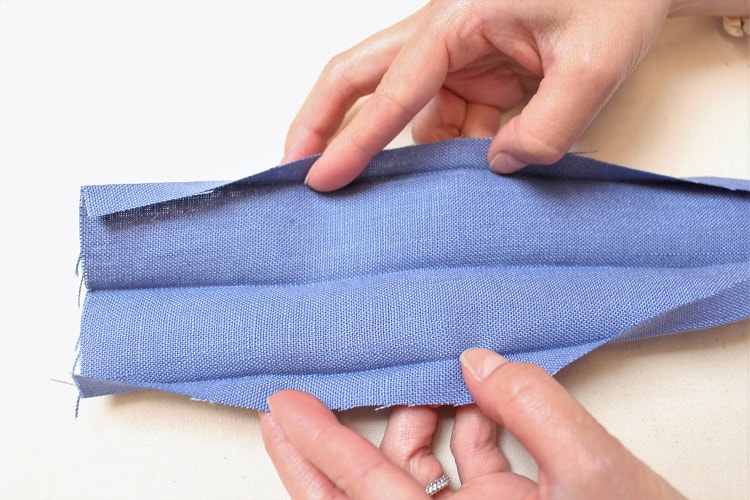
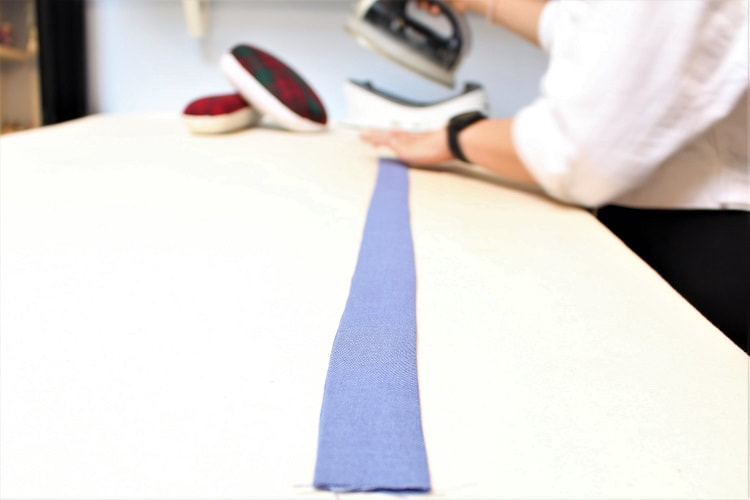
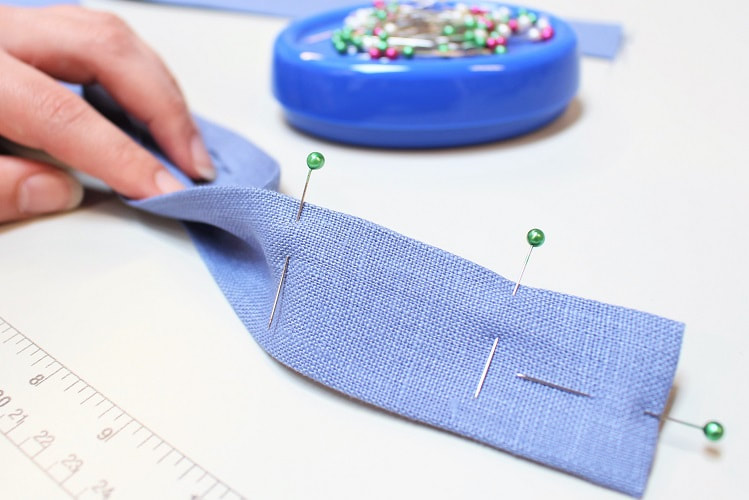
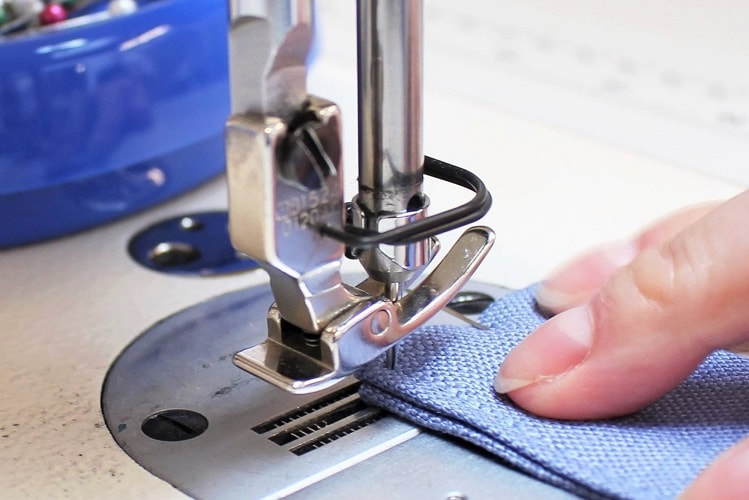
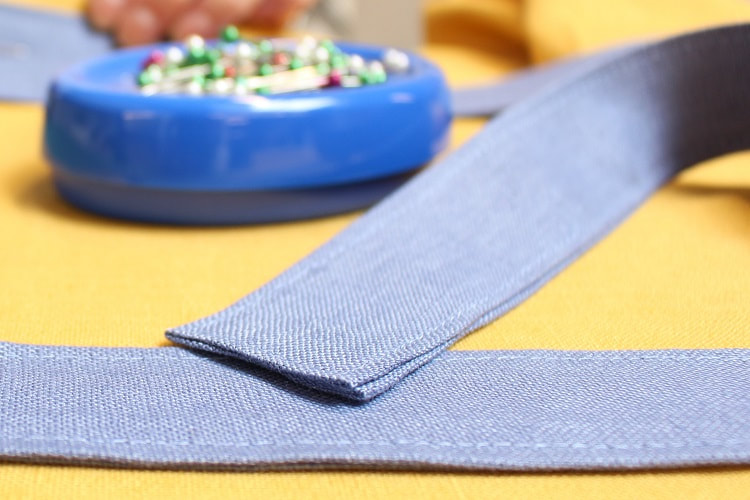
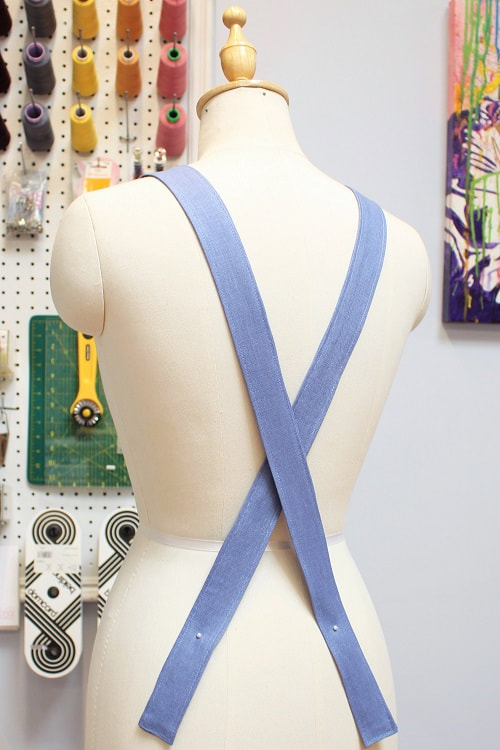
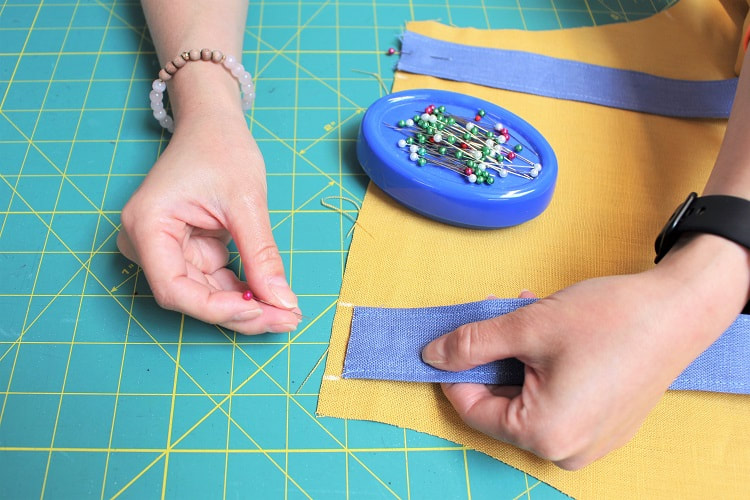
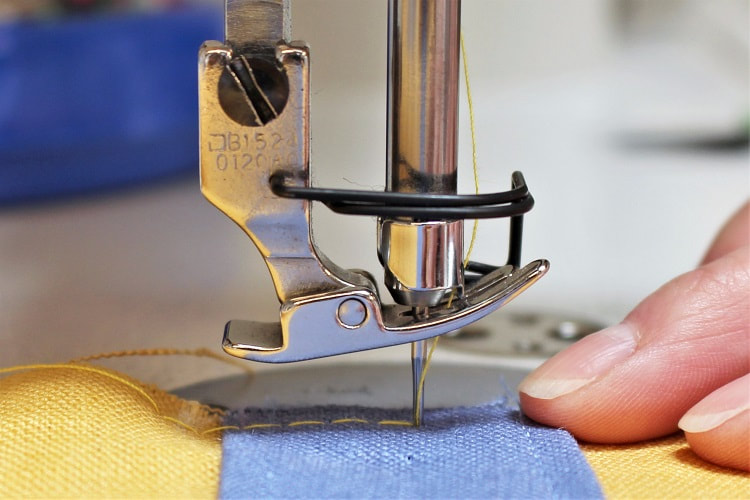
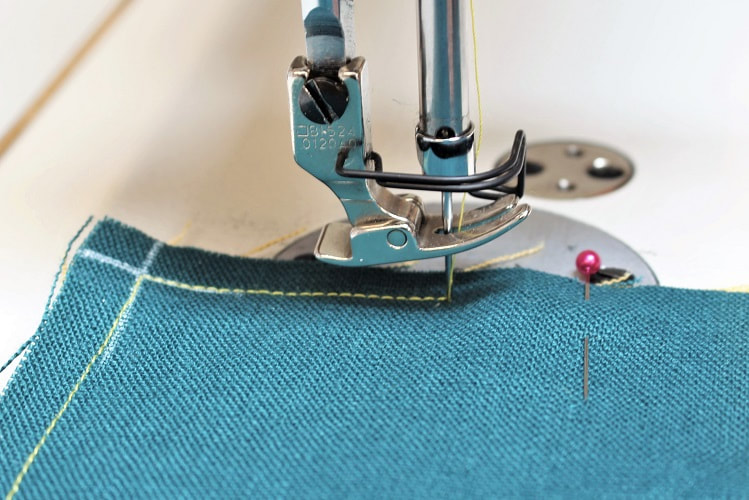
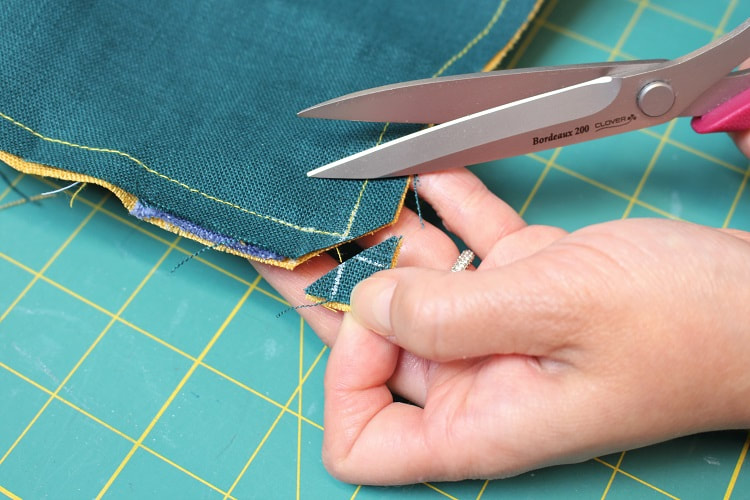
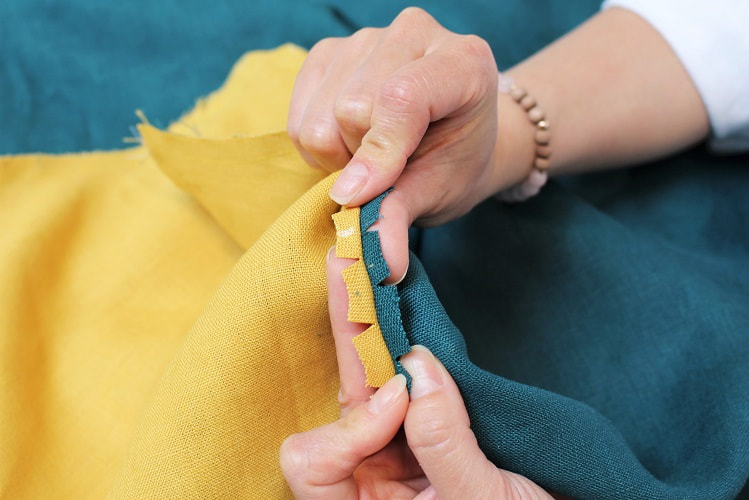
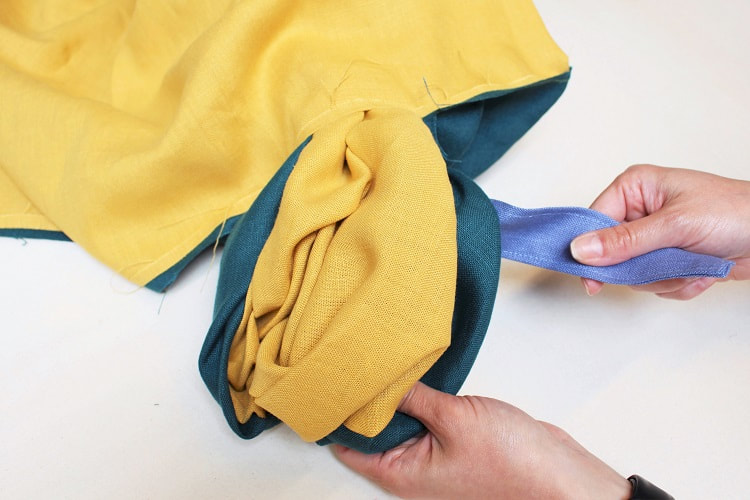
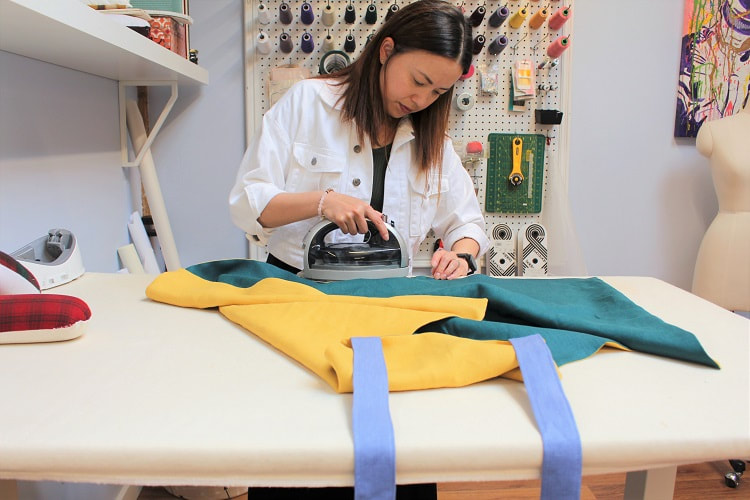
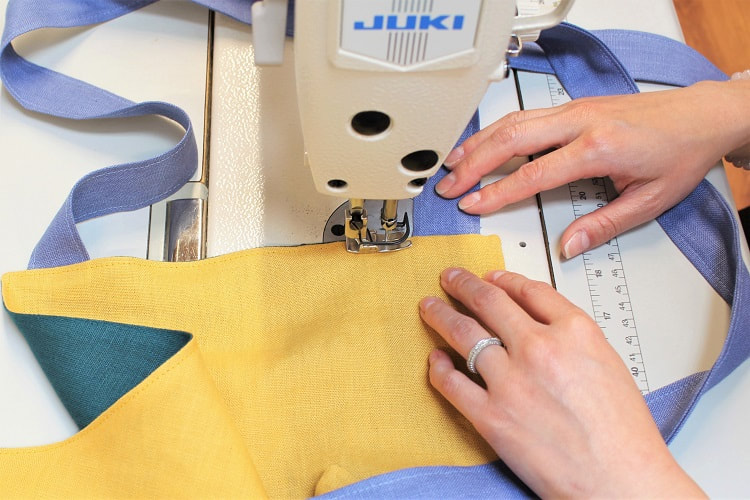
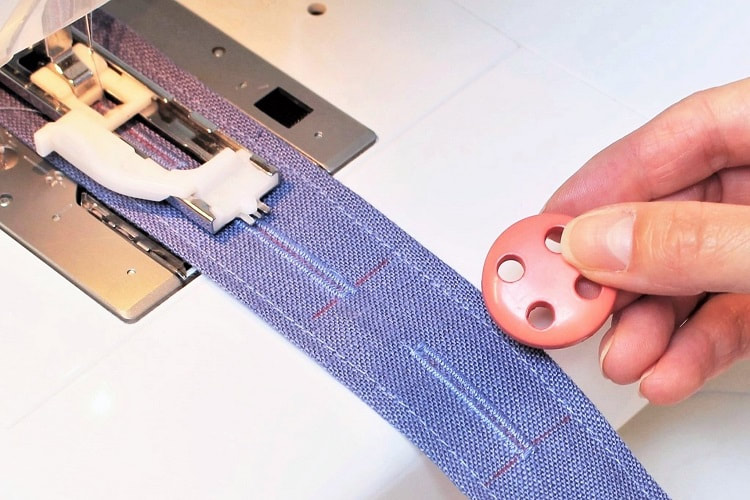
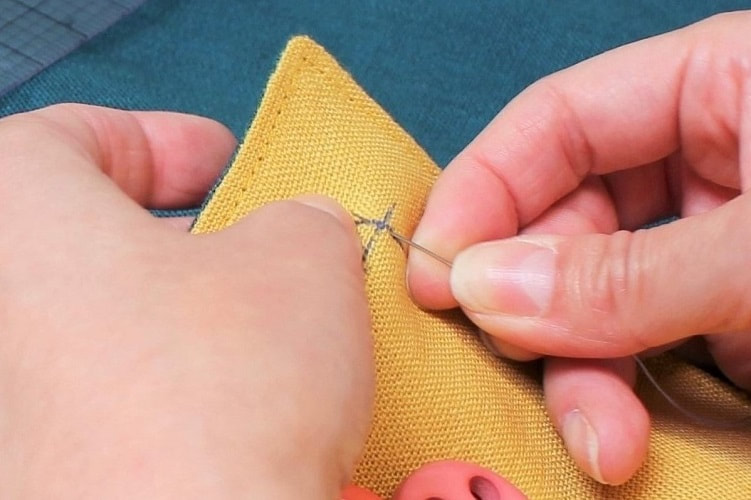
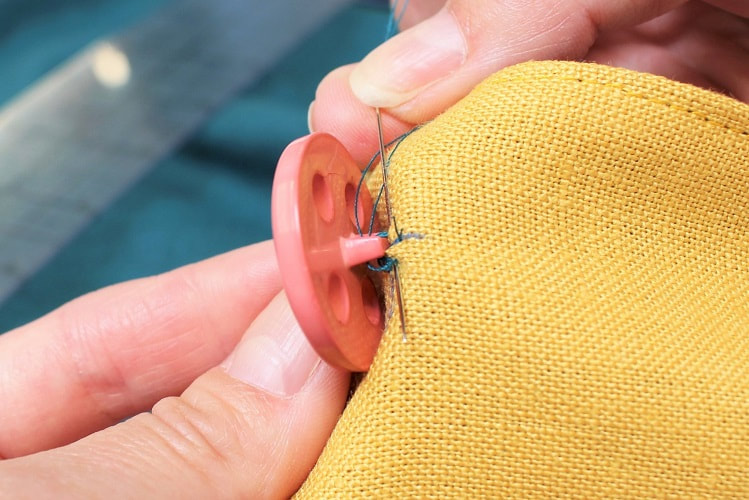
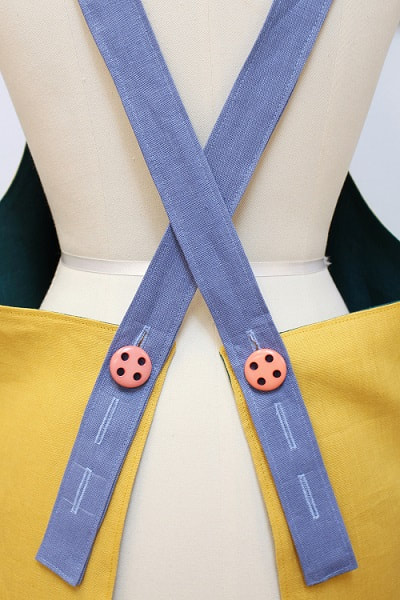
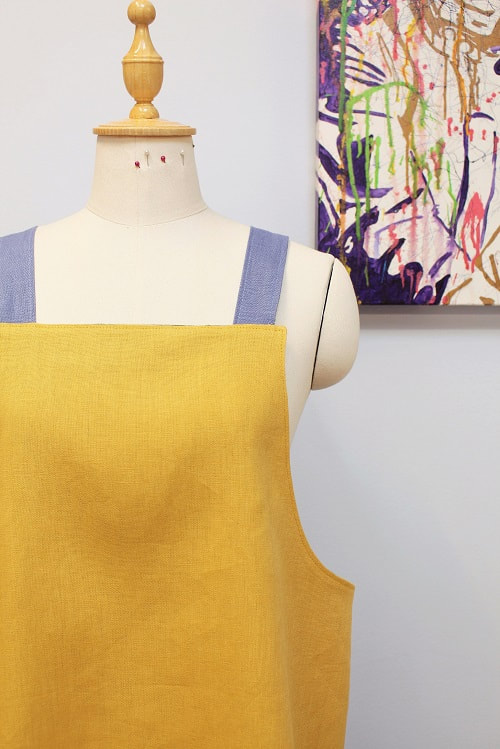
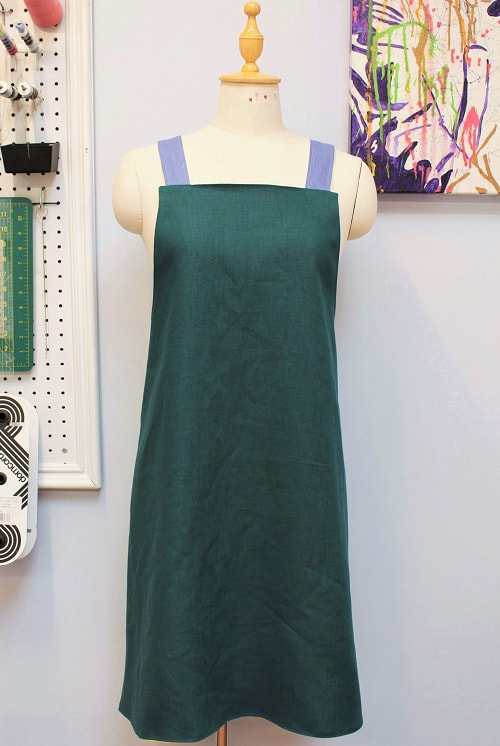
If you want contrasting color straps like us, you will need an additional 0.8 M if cut on grain or 0.15 M on the cross-grain (optional). Cutting FabricThis apron is fully reversible to allow for a SIDE A (MAIN/SELF fabric) and a SIDE B (CONTRASTING/LINING fabric). We will be demonstrating how to sew this apron with the adjustable button straps. Make note of the alternative steps for the sewn in straps. Mark all notches on the wrong side of the fabric. Buttonhole placements can be marked on the right side of the fabric. A reminder that notches are points H, K, L, M, N, S and T from your drafting. Sewing StepsStep 1Let's begin by preparing the straps! A reminder to sew at your chosen seam allowance (SA). We are using 3/8" SA. With the wrong side of the fabric facing up, press in one of the shorter edges of the strap by your allotted SA. This helps us prepare to finish off the hanging ends of the strap for the button version. Feel free to mark in your SA on the right side of the fabric for accurate pressing. For the sewn in strap option, do not press in this edge. Step 2Press in the longer edges of the straps by your SA. Step 3Fold the strap completely in half, pressing the two folds you created together. Try to get the two folds aligned for a balanced strap. Step 4Pin and edge stitch around the entire strap. Edge stitching is a visible top stitching done 1/16" - 1/8" away from the edge. If you are edge stitching the buttonhole version, you have 3 edges to complete, pivoting at the two corners. If you are edge stitching the non-buttonhole version, you only have to stitch the two longer edges. Repeat steps 1 through 4 for second strap. Step 5With the right side of the fabric facing up on one of the main apron pieces, baste ends of straps along the upper front edge at a 1/4" SA. Align strap in between the marked notches (letters L and K from drafting). A stay stitch is a temporary stitch line used to hold multiple layers of fabric in place prior to the next step in construction. It can be done at a longer stitch length of 4mm. Skip to Step 6 if you are creating the buttonhole version. Continue reading below if you are creating the non-buttonhole (sewn in strap) version. With remaining two strap ends, stay stitch them along the lower part of the armhole at a 1/4" SA. Align strap in between the marked notches (letters N and M from drafting). Ensure you cross the straps to create the crossback design element. Step 6With the right sides of fabric facing, sandwich the straps between side A and side B of the main apron pieces. Mark all pivot corners of the apron for ease of sewing. Pin all the way around the entire apron. Step 7Stitch around the entire apron at your SA, leaving a 4 - 5" opening somewhere along the bottom of the apron away from the corners. To secure corners, drop stitch length down to 1.5mm, approximately 1" before and after each corner point. Pivot with your needle down when turning the corner. Step 8To reduce bulk in the SA and ensure the apron layers lay flat while worn we need to complete some trimming and clipping within the SA at the corners and along the curved seams. At each SA corner trim away excess fabric on a diagonal, staying approximately 1/16" to 1/8" away from the stitched corner. There are 6 corners to trim. Along the curved seams (armholes), create small straight clips using the end of your scissors from the raw edge in towards the stitch line, staying at least 1/16" away from the stitch line. Clipping width is approximately 1/2" away from each other and staggered to decrease weak points in the SA. Step 9It’s now time to give birth to our apron! Flip the apron so that all layers are right sides of fabric facing out. Press the apron flat balancing side A and side B. Step 10 (Final step to non-button version)Edge stitch around the entire apron, pivoting at each corner. This step will also close up the opening at the bottom of the apron. Feel free to place a few pins along the opening to ensure the layers of fabric stay put. A great place to start/stop your stitch line is at the bottom of the armhole so the back stitching is not visible from the direct front or back of the apron while worn. If you are creating the non button version (straps stitched in) you are now done. YAY! Continue on if you are creating the button version for this apron. Step 11 (Button option only)You will require 2 buttons. We have used 1" width vintage buttons. During the drafting process we suggested 3 buttonhole spots to allow the apron to be worn by multiple members of your household. A reminder that the buttonhole markings are indicated by letter V, W and X in your drafting. Mark your buttonholes, set up your buttonhole foot and sew as many buttonholes as you wish on the straps. Step 12 (Button option only)Hand sew buttons onto the top corner of the back seam. This apron has the option to be reversible so you could potentially sew 4 buttons onto this design creating back to back buttons. To learn more about back to back buttons check out one of our latest designs— Couture Striped Jacket. Final DesignTa Da! Your reversible crossback apron is complete. Tag us in your final make on Instagram and be sure to sign up for our Insider Newsletters to keep up to date with our latest designs and future draft and sew-a-longs. Happy Drafting and Sewing!
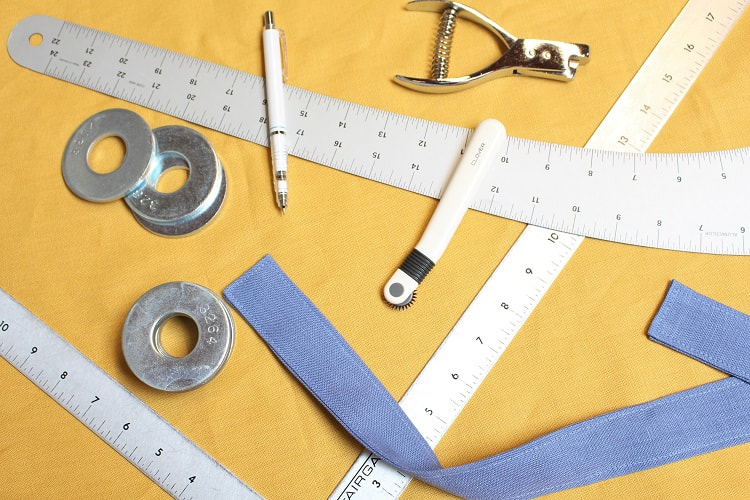
Designed, photographed and written by Sheila Wong Studios. Time for another draft and sew-a-long with me, Sheila Wong! When we are not sewing, many of us have taken to baking and cooking as a means to stay creative over the last few months. This month we are making a reversible crossback apron! In this two-part blog series, we will share the step-by-step pattern drafting and sewing instructions to help you create your own reversible crossback apron. Welcome to part one, the draft-a-long. A crossback apron (sometimes referred to as a Japanese-style apron) is a no-tie, pinafore style apron that is typically made of a lightweight fabric such as cotton or linen. Grab your supplies and let’s start drafting! Drafting Supplies
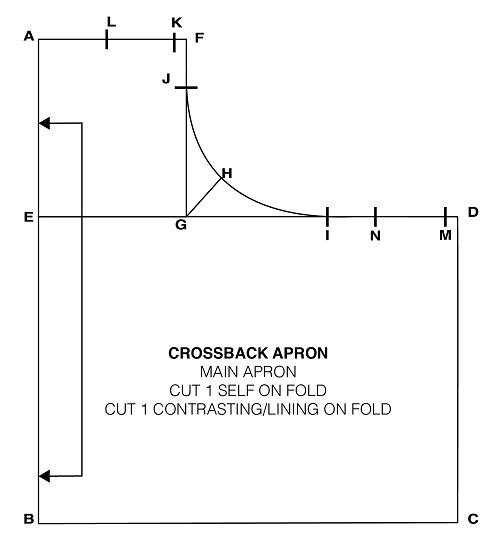
Drafting StepsIn these drafting instructions, we will be suggesting lengths and widths to fit a range of body types. Please note if you wish to personalize certain areas, go for it! We will make a note where you can personalize. A to B= Draw a long vertical line close to the left hand side of your paper. Create A and B cross-marks equal to the desired length of the apron (30"). You can personalize this measurement. Our team in the studio averages a height of 5' 4", so we have used 30" for this example. B to C= From point B, square out a guideline creating the bottom of the apron. Measure out 20", label C. This measurement can also be personalized. We recommend measuring your hip circumference and divide by two. The wider this measurement the more overlap the back of the apron will have. Play around with this number to achieve the desired level of crossback. C to D= A to B measurement minus 9” (30" - 9" = 21”). From point C, square up a guideline. Measure up 21", label D. From point D, square in a guideline towards A to B line, label E where it hits the A to B line. A to F= From point A, square out a guideline creating the top of the apron. Measure out 5", label F. F to G= From point F, square down a guideline towards D to E line. Label G. G to H= Draw a 45 degree guideline in the NE direction from G. Measure along guideline 3”, label H. D to I= 5" E to J= 1" Draw in armhole connecting F - J - H - I - D. Curved section is between J - H - I. F to K= 1/4" K to L= 1 1/2". Please note K and L will become the shoulder strap notch placements. D to M= 1/4" M to N= 1 1/2". Please note M and N will become the end of strap back notch placements. O to P= Draw a horizontal guideline close to the bottom of the paper. Create O and P cross-marks equal to the desired length of the strap (30"). 30" works well if you are creating an adjustable button strap option. If you are opting for a sewn in strap version, we recommend using a length between 22-25". Please personalize accordingly. O to Q= From point O, square up a guideline. Measure up 3", label Q. P to R= From point P, square up a guideline. Measure up 3", label R. Draw a line connecting Q and R. S= Midway between O and Q (3" divided by 2= 1 1/2") T= Midway between P and R (3" divided by 2= 1 1/2") Feel free to draw in a dashed line connecting S and T. This creates a fold line in the strap. Stop drafting here if you are creating a sewn in strap. Continue on if you are creating an adjustable button strap option. U= Midway between O and S (1 1/2" divided by 2= 3/4". Square right a guideline for buttonhole placement. U to V= 2" V to W= 2" W to X= 2". Point V, W and X are the starting points of each buttonhole. Buttonhole length is personalized to the size of your button. Mark Sewing Notches= Using a colored pen/pencil highlight points H, K, L, M, N, S, and T. Include V, W, and X buttonholes. Draw in Grain-lines= On MAIN APRON, draw in a parallel line to A to B line. Bend ends of grain-line towards center front to represent on fold position on fabric. On STRAP, draw in grain-line parallel to O to P line. This completes your working pattern. To create your final pattern to use for sewing, place a blank piece of paper under your working pattern, weigh it down and transfer your pattern using a tracing wheel. Ensure you transfer not only the shape of the pattern but also the highlighted notches and grain-line. Add your desired seam allowance to the final pattern. We suggest using a 3/8” seam allowance. Draw in notches, grain-lines and labels as follows. CROSSBACK APRON MAIN APRON CUT 1 SELF (MAIN) ON FOLD CUT 1 CONTRASTING (LINING) ON FOLD CROSSBACK APRON STRAP CUT 2 SELF (or contrasting if you are feeling jazzy!) Ready to cut your fabric? Click this link: Sew-a-long: Crossback Apron (Part 2 of 2). Happy Drafting!
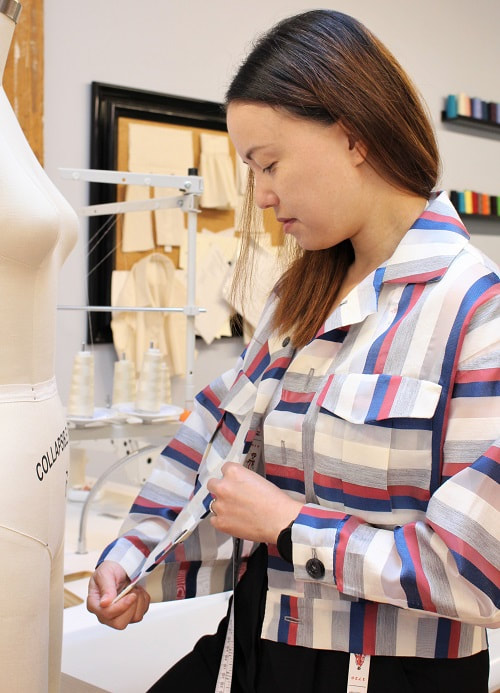
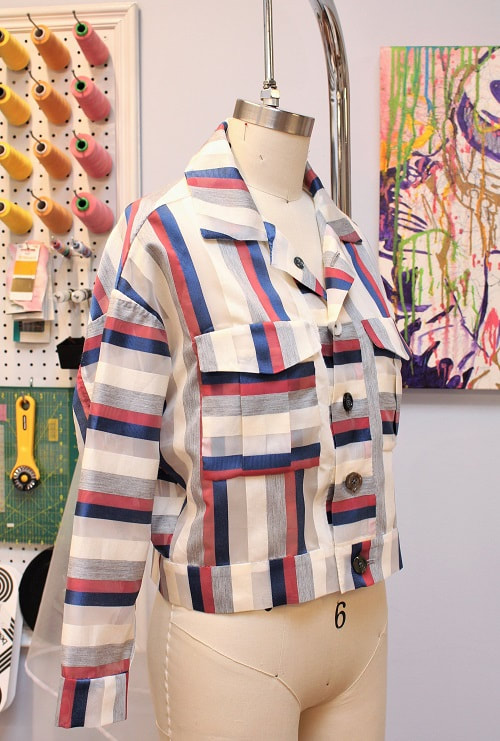
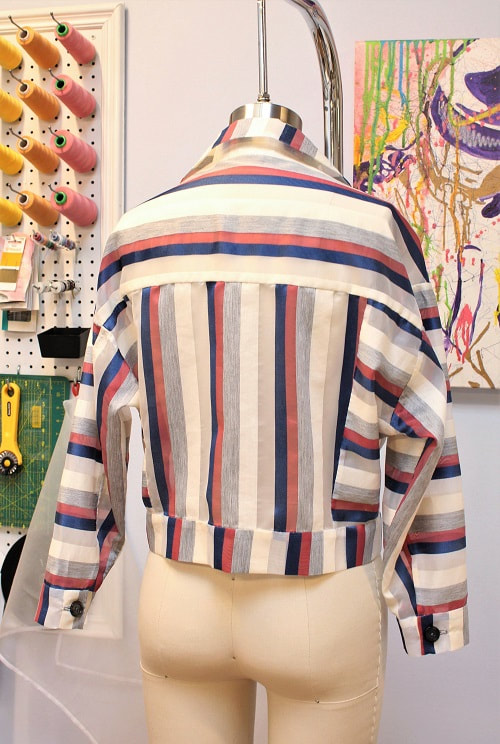
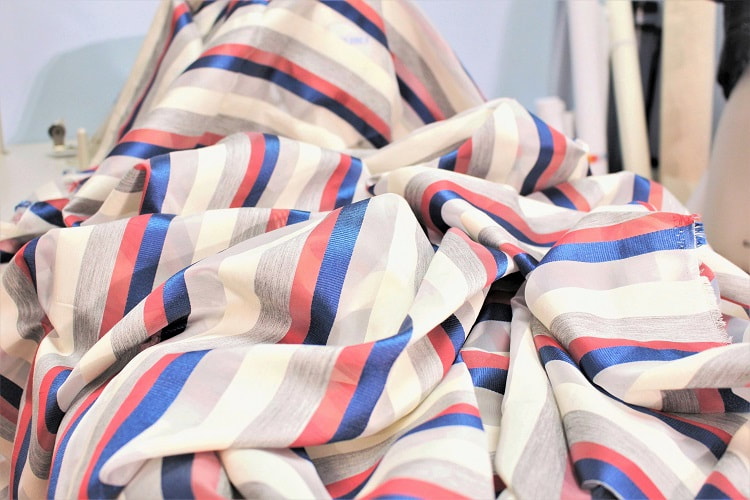
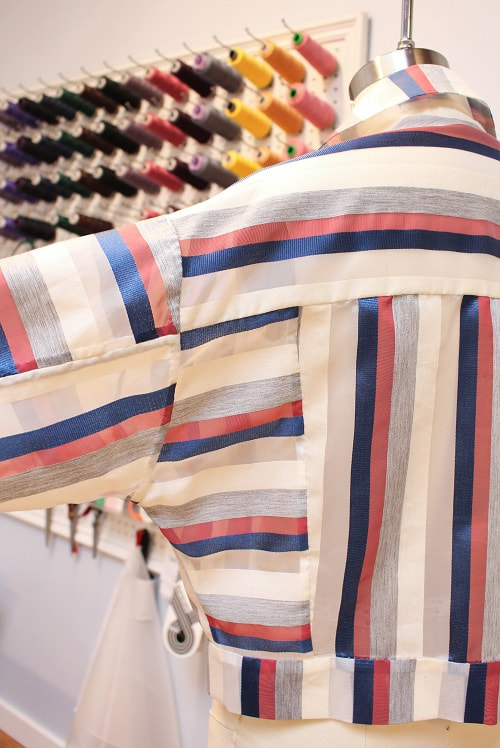
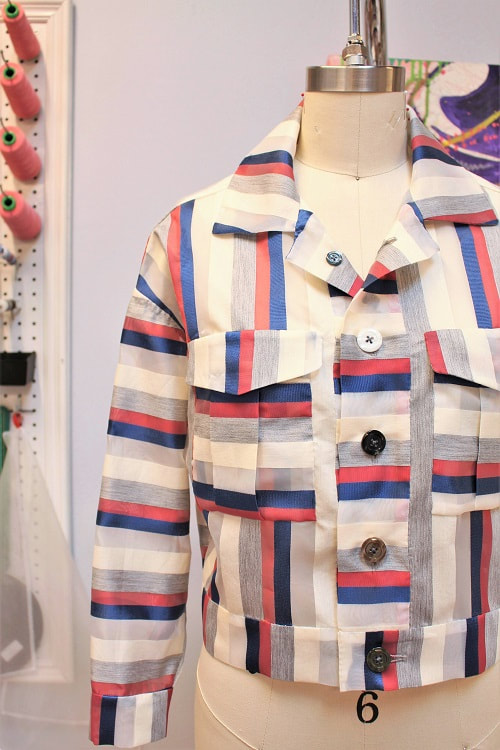
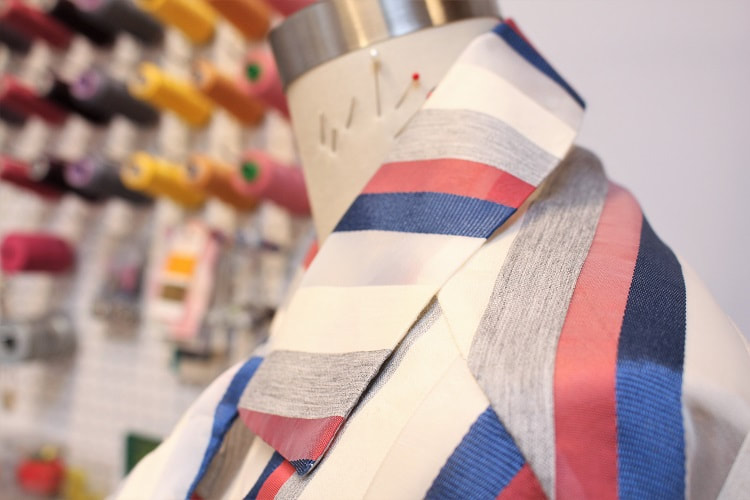
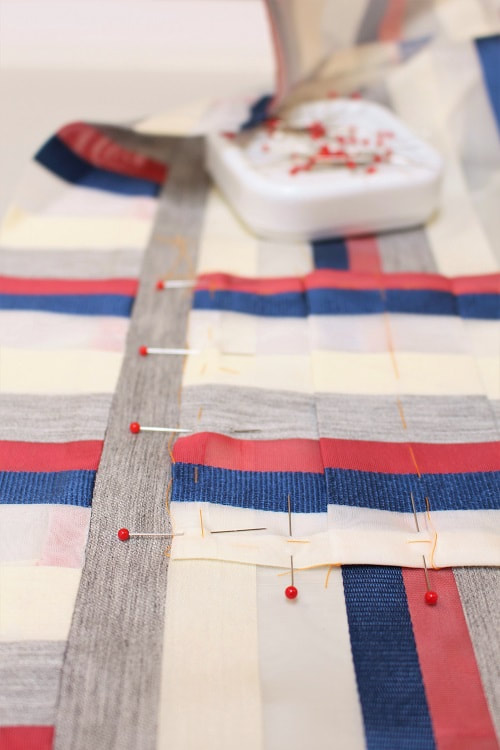
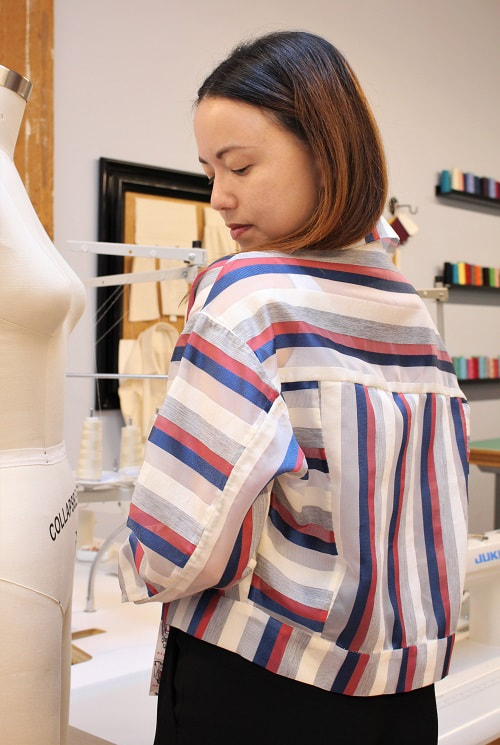
Designed, photographed and written by Sheila Wong Studios Tis the sea-sun! Our latest sun worthy design is a couture cropped jacket featuring contrasting stripes (vertical vs horizontal). This design might look familiar and that's because we used the same pattern as our denim jacket series. Only this time, we went full-couture (almost)! In this blog post, we discuss how we adjusted the pattern so we applied couture sewing techniques to this design, as well as highlighting our favorite design elements. Pattern adjustments were made to accommodate for the thread marking application of this fabric. Adjustments included removing all seam allowances off the original pattern so we can easily thread mark around each pattern piece, directly on the fabric. Thread marking is the process of basting around each pattern piece or the stitching lines in contrasting thread color. Thread marking stitches are inserted in prior to cutting out fabric, as they frame each pattern piece. They are also used to clearly display any notches. This allows you to construct the garment with precision. The thread markings come out after your permanent seam is installed. Fun Fact: In the last 5 years, we have explored over 15 garments with full couture sewing techniques. You can find some of these designs on our Blog Archive. FabricOne of my favorite textile shops in the world is Nagato Fabrics in Nippori Textile Town in Tokyo, Japan. They have 3 shops within one block of each other. Each shop specializes in specific categories of fabric. One shop for knits, one for heavy weight woven's like wool, and the main shop has a variety of garment fabrics. Originally, I picked up this striped organza fabric in 2017 with the intention of using it as an overlay for a full mid-calf length skirt. But as you know, designs can change and its now 2020. This fabric is a mixture of cotton, silk and polyester. Base is silk organza. Want a mini glimpse into the streets and textile eye candy of Nippori Textile Town? Check out our video below. Project Specs
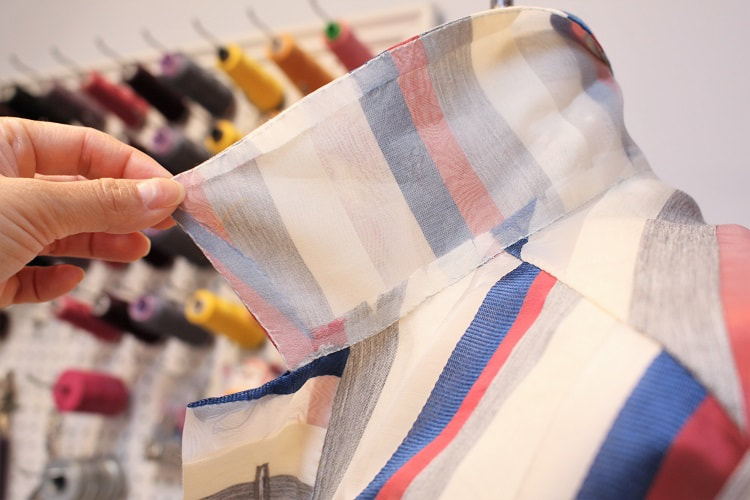
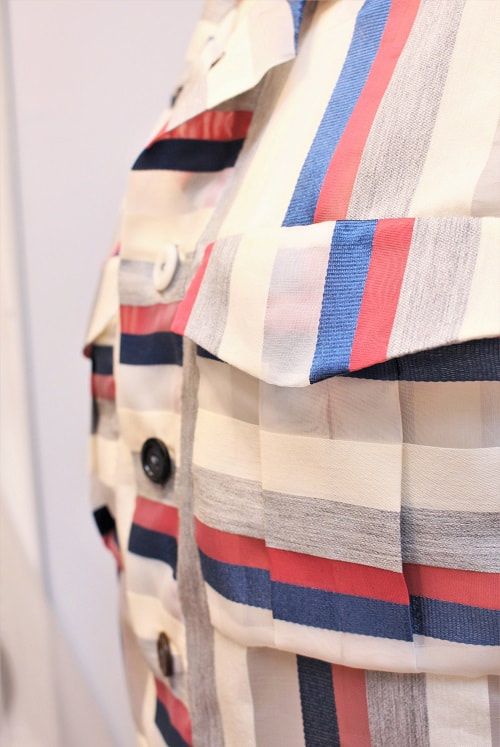
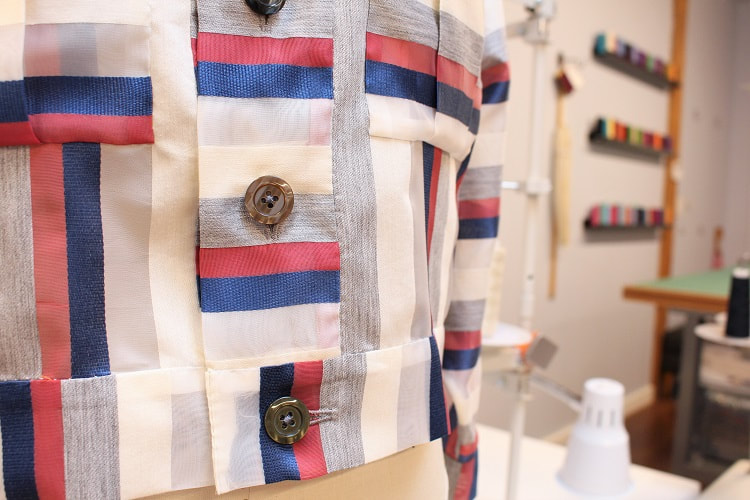
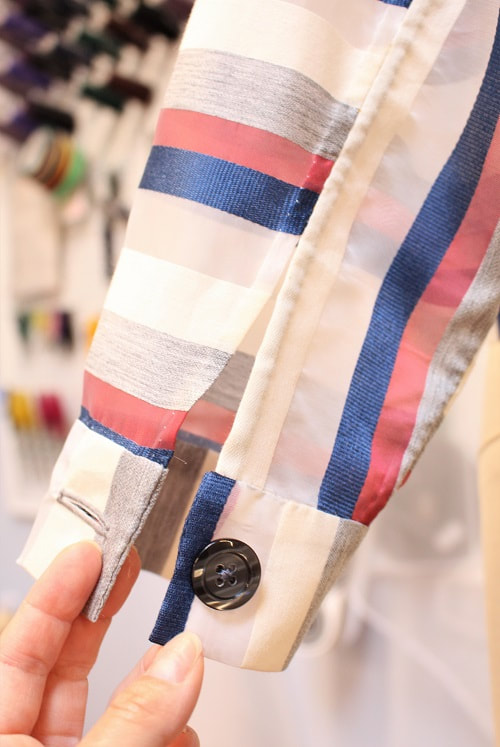
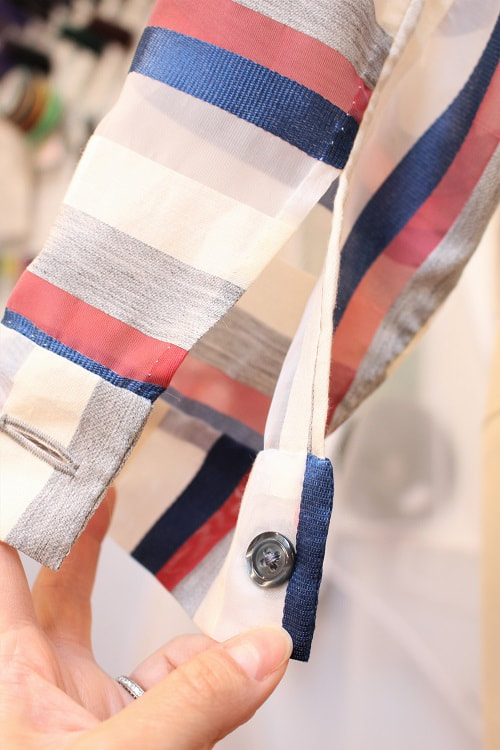
Design ElementsThis jacket is made up of over 10 pattern pieces, so yes there are a ton of design elements involved. Below, I highlight my favorite elements and share my thought process on new techniques you might want to try. Playing with StripesPerhaps a visual assault to the eyes, but playing around with vertical vs horizontal stripes from one panel to the next lets you see all the seam work involved in this design. When you have a look at this exact design with just solid color fabric, you miss out on noticing the 2 piece sleeves, the cuff or even the box pleat pockets. Looking at the final design, I am contemplating changing out the cuff hem facing to be horizontal instead of vertical. What do you think? Maybe I am overthinking it! CollarThis fabric is slightly shear, so we could not cut the under collar in the same striped fabric. We used a solid color of ivory silk organza as the under collar and under the pocket flap to ensure the stripe does not get compromised visually. Something really special about using see-through fabric is the ability to see the inside workings of a garment. You can see the graded seam allowances around the neckline and the clipped areas around the curve. Great as a visual aid for teaching my clients! Box Pleat Patch Pocket with FlapOne of the most traditional pockets found on a denim jacket— a box pleat pocket with a flap. Due to the delicate nature of the fabric and the hand sewing techniques applied, we had to avoid traditional denim jacket techniques such as top stitching and buttons. Pocket components were basted, then slip stitched down to front panel. The pocket flap received an extra step with a false French seam finish to avoid any exposed raw edges under the flap. In addition, each corner of the pocket opening and flap opening received extra slip stitches as back stitching for strength. Originally, I had intentions of placing buttons and button holes on the pocket just as a traditional denim jacket would have, but once a button was placed down it didn't make sense. The button would take away from the playfulness the vertical and horizontal stripes had going on. There is a possibility the weight of the button would be too much for the pocket as well. ButtonsTime for some truth. This jacket sat on a rolling rack for weeks because the thought of buttons and button holes on this not so stable fabric terrified me. Many factors were involved where...
Have you ever stabilized a button with another button?! This was the perfect solution to my delicate fabric vs button weight concern. Main (larger) button on the exterior of the garment and a secondary (smaller) button on the interior of the garment but stitched together. This ensured the buttons do not tug or weigh the fabric, but rather balance and stabilize each other. Below you can see the exterior and interior view. A fun little side (but still related) story is that all the buttons used on this jacket were of different colors but same style/family of buttons. Button colors ranged from brown, blue, green, black, white and grey. All kinda worked with the multi-colored stripes going on. Final DesignWe're ready to wear our design out and about! How would you style with this jacket? Let us know your thoughts in the comments. If you would like to learn more about couture hand sewing techniques, feel free to CONTACT the studio. It is easy enough to inject small bits of couture techniques in a project or go full out on a fully hand stitched garment. You decide! Happy Sewing!
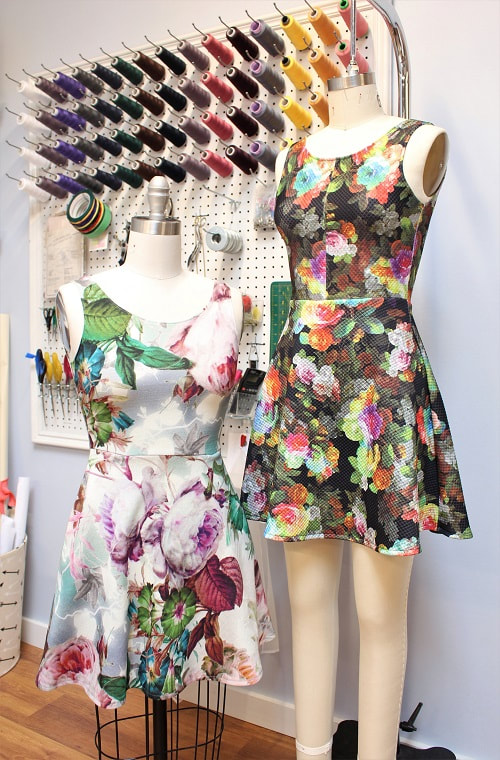
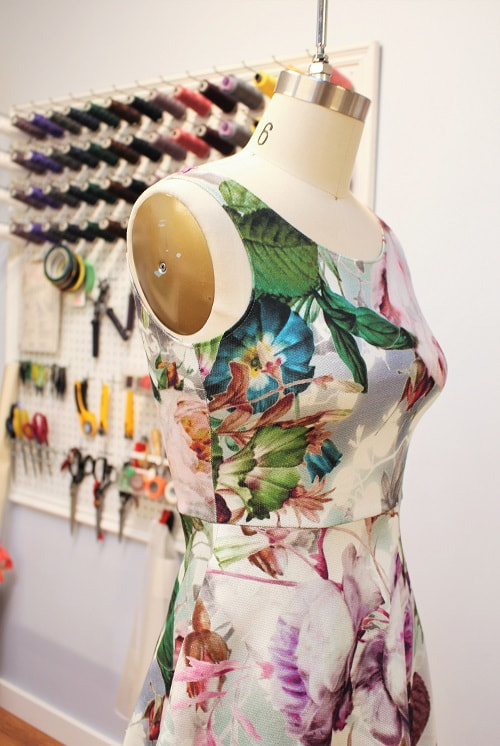
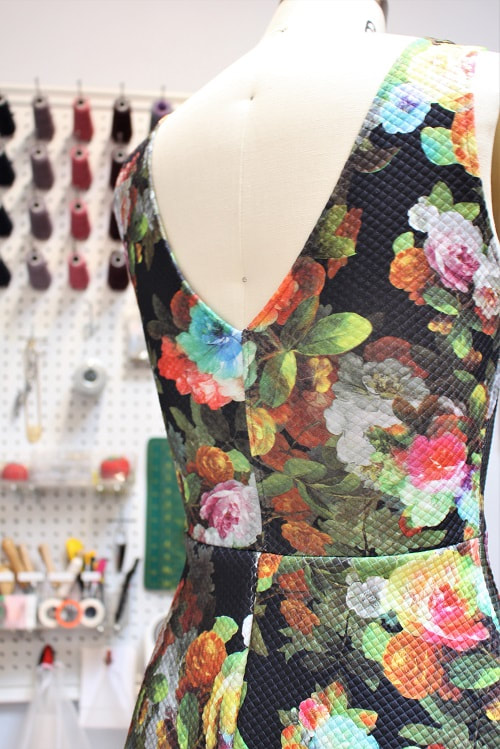
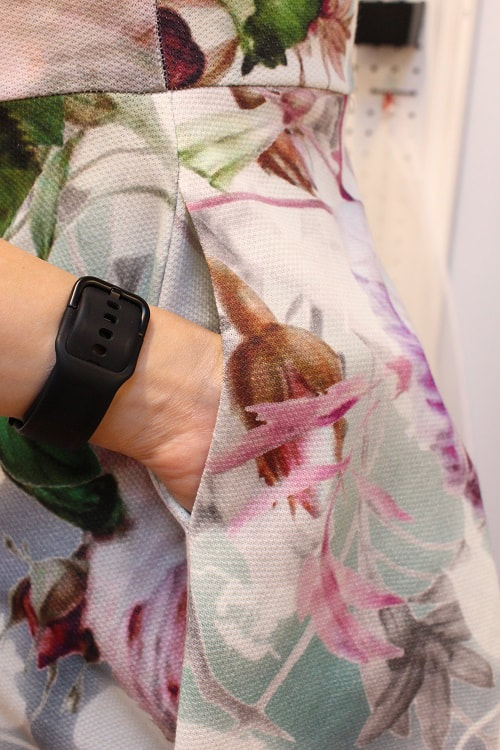
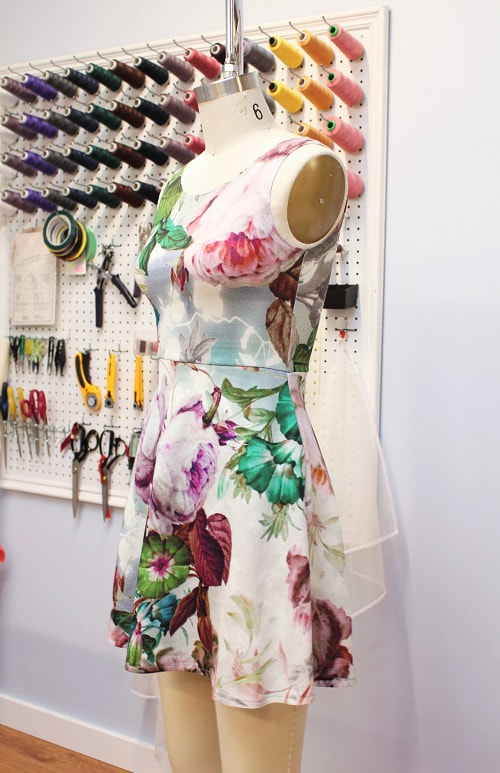
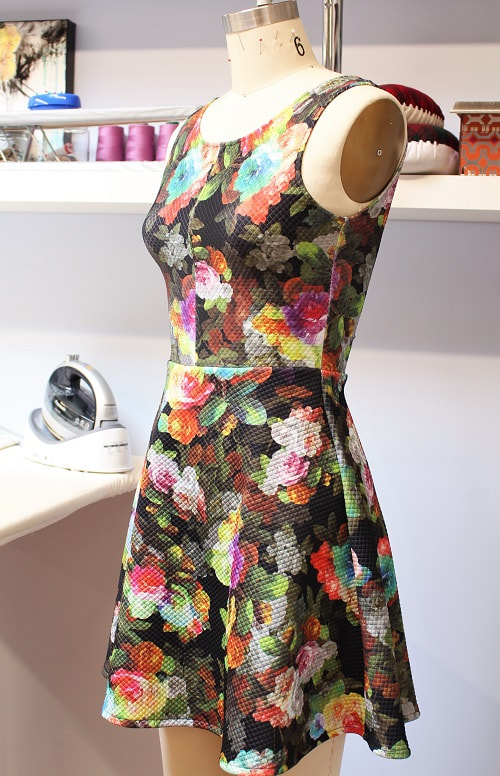
Designed, photographed and written by Sheila Wong Studios. Inspiring others to push their creative boundaries has always been a driving core value in our studio. If you know me well, I frequently say "Why not?!". If you want to push your design techniques further, learning how to pattern draft is essential. Reverse pattern drafting is a good place to begin. For those of you new to the term reverse pattern drafting, it is the technique of taking an already made garment and extracting out the 2D shapes to create a paper pattern. It sounds quite simplistic but the basics of pattern drafting and understanding how fabric can be manipulated is still very important. Our latest design was reverse drafted from a black dress I borrowed from a dear friend Alisa. Typically black is my go-to color of choice, but my heart gravitated towards floral right now. Four pattern pieces make up this dress. The front and back bodice are almost identical with exception of the neckline. The front and back skirt are identical so the exact same pattern piece could be used to cut out front and back. The original garment had no side seam in-seam pockets, but of course we made ours have pockets!
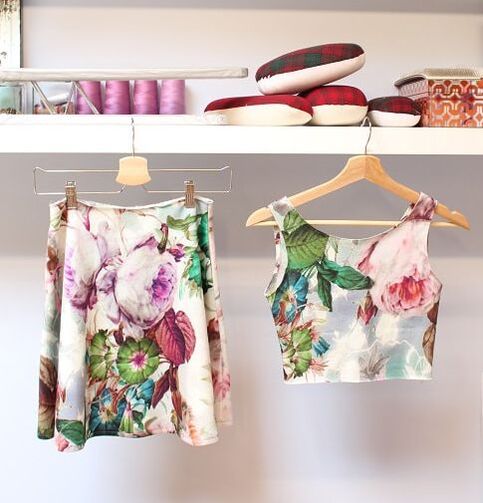
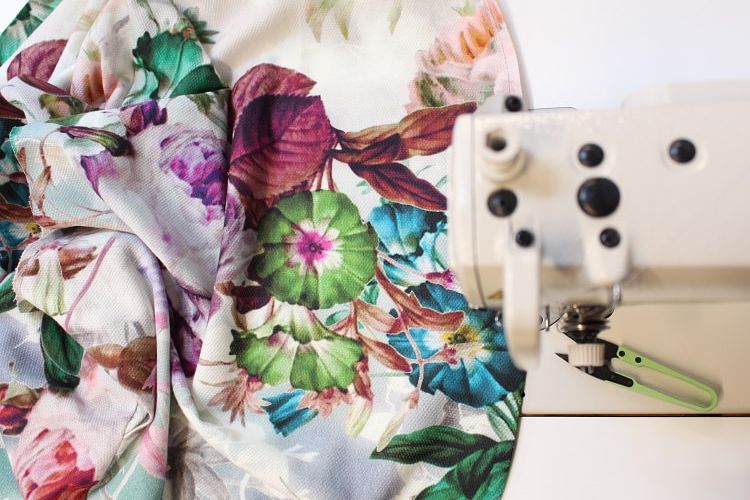
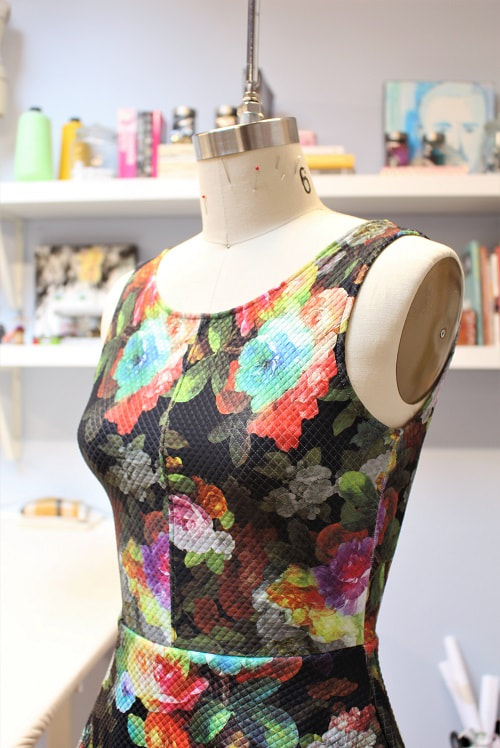
FabricThe day time floral print was purchased from Fabricland, enough to make a sleeveless top and this dress! The nightshade floral print fabric was picked up from Fabricana several years back for a completely different dress design. In both cases there was just-enough fabric left-over to make two versions of this dress. You may notice a center front seam in the front bodice of the night shade version. This is because there was not enough fabric to cut out the front bodice in full. I know we have all been there where we have to "make it work" to get it done. I liked the simplicity of this sleeveless dress so much, so we made 2 versions! Which one would you wear? The day time or nightshade floral version. As you can see, I was really feeling the floral and fauna! Project Specs
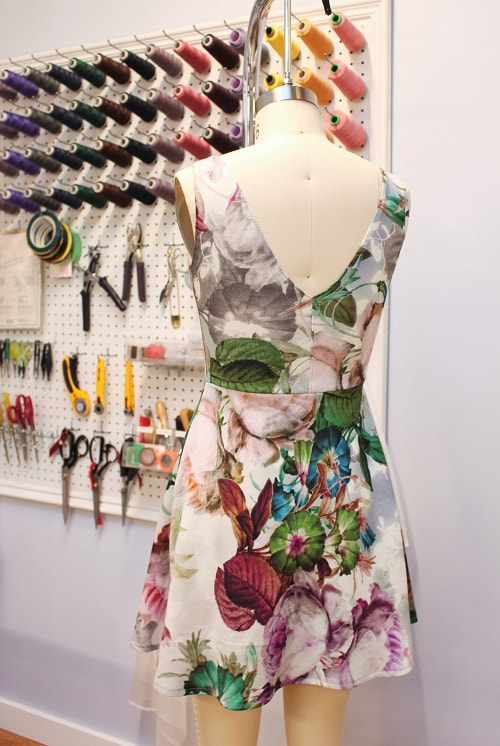
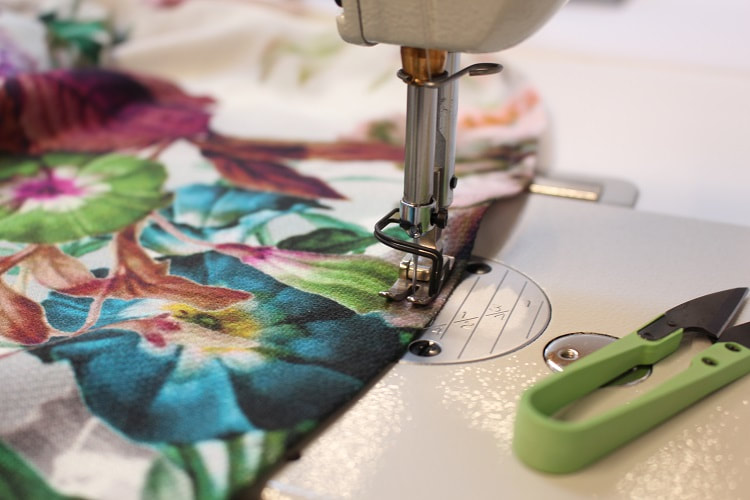
Sewing Tip: Thread ColorPicking out matching thread color on solids is fairly straight forward. Main goal is to ensure the thread color disappears with its corresponding fabric. Back in 2017, I even wrote a post and created a YouTube video all about Picking the Right Thread Color. When picking out matching thread for an all over print with mixed colors, it is always best to match with the background color. If there is no distinct background color, medium grey is a magical color. Medium grey even works well as the constant thread color in your serger that goes with multiple fabric colors when you are too lazy to change up the color. Design ElementsI have always felt creating balance within a design is essential. When designing with a loud print (in this case the colorful floral print), it is important to let the fabric shine. Too many design elements would take away from the floral print. If you have been hesitant to design with prints, begin with designing something simple like a sleeveless top or pairing the print with a solid fabric as a panel in garment. Two in One NecklinesSometimes you just cannot decide what kind of neckline you want. Round or V neck. Which one do you prefer? In this case, the front is subtle with a scoop round neckline and the back add more drama with a deep V neckline. If you felt brave enough you could wear this design with the deep V in the front. In Seam PocketsYou know what a pocket is, you love it as much as us. As mentioned, the original garment we reverse drafted from did not have an in-seam pocket. We have to take the liberty to put one in. There are two different sequence of construction steps in installing an in-seam pocket. A modern version vs a more traditional version. Below I describe both. Which one do you use? I am in the traditional camp. A modern version involves sewing a pocket bag to the front side seam and another pocket bag to the back side seam, essentially creating ears. In one full go, you stitch the front to back together along the side seam, pivoting at the top of the pocket bag, then around the bag, pivoting once again once you hit the side seam, then head down to the hem to finish. Anyone can achieve an in-seam pocket with this version. A traditional version of installing an inseam pocket rather has the two pocket bags stitched to the front panel opening with a series of intricate steps that involve pivoting, edge stitching, pressing, clipping and stay- stitching. At the very end, the side seam is sewn in one straight seam, gently pulling away the pocket opening and carefully hitting the top and bottom opening of the pocket. This version involves more patience and technical skill, but in the end it sits so beautifully and all the raw edges inside can be cleaned up neatly unlike the modern version. Top-StitchingYou need to look pretty close to see all of the top- stitching on these dresses. Top-stitching can be found along the neckline, armholes, center back seams of the bodice center front seam of the night shade version and the hems. Final DesignWhich print do I prefer? I love the vintage vibe of the daytime version, but the night shade version is where my heart is. It probably helps the spandex content in the night shade is higher, thus making it more comfortable. A reminder that when you are reverse pattern drafting a knit (stretch) garment, the subsequent garments made using that pattern should have the same spandex content or else it will not fit the same. I recommend you take the original garment with you when fabric shopping to help 'feel' the stretch capability. You could also check the spandex percentage in the garment tag and match your fabric accordingly. If you would like to learn how to reverse draft and sew your favorite garments, contact us to book private lessons.
Happy Sewing! Designed, photographed and written by Sheila Wong Studios. |
Archives
November 2022
|
Copyright © 2024 Sheila Wong Fashion Design Studio Ltd. All rights reserved.



 RSS Feed
