|
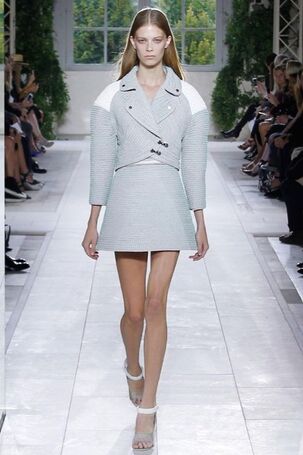
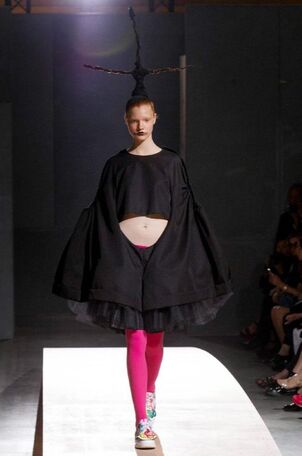
Heading into Fall season, sleeves are... well everywhere! There is more than just your basic short and long sleeves out there. In this post I will go over some pretty amazing sleeves with equally amazing names. Now the question is, which sleeve will you slide your arm into this Fall? Cap Sleeve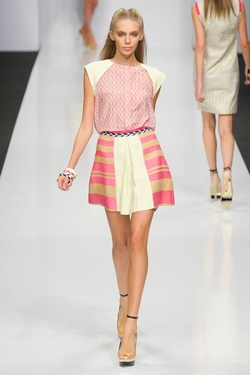 Just a smidge more fabric than a sleeveless garment. A cap sleeve literally caps your shoulder. Most cap sleeves are made by extending out the shoulder seam. Byblos Spring 2013 retrieved from NY Mag. Gigot Sleeve This sleeve is one of my favourite sleeves to say out loud. Try is with me, 2 syllables- "jgie zhego"! Sounds like you are calling for a dog. Another name for this sleeve is leg o'mutton, equally as fabulous to say out loud. The easiest way to spot this sleeve is to picture a chicken leg. Extremely full at the top and fitted down to the wrist. Used in the 1800's, the idea was that if your gigot fullness was extreme, it would make your waist appear smaller. Vivienne Westwood 2013 retrieved from NY Mag. Bishop Sleeve A long sleeve with fullness at the bottom created by gathers or pleats and narrow at the top. Fullness is controlled by a cuff at the wrist. Gucci Spring 2013 retrieved from NY Mag. Dolman Sleeve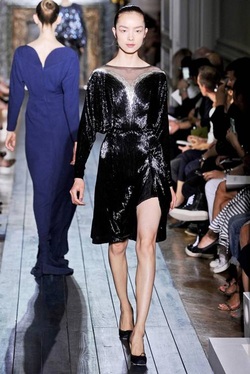 This sleeve reminds me of bat-wings. Personally I dont think this is very flattering on most figures, as it takes away from a women's natural curves. But leave it to Valentino to make a dolman sleeve flattering by cinching in the waist- good job! Important elements for a dolman sleeve include a fitted sleeve from wrist up to elbow region then excess amount of fabric dropped from armhole area. Valentino 2012 retrieved from NY Mag. Bell Sleeve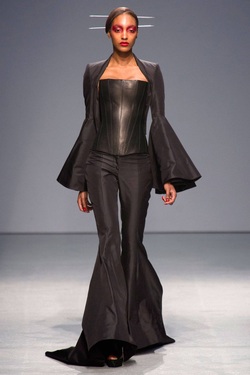 Visually just picture your arms are bells, with some bells being larger than others- this is a bell sleeve. There are variations of this sleeve where the bell can flare out at any part of an arm. Typically you will see a seam connecting the top of the sleeve to the bell part, this allows a designer to achieve the flare. Bell sleeves can add drama to any outfit, but I dont recommend dining in bell sleeves. Gareth Pugh 2013 retrieved from NY Mag. Puff Sleeve Gathers at the sleeve cap and sleeve hem make up a perfect puff sleeve. Extremely feminine and youthful sleeve. I think the last time I wore this sleeve, I was 12. If you have broad shoulders, this sleeve only makes you look wider. Chanel Resort 2013 retrieved from NY Mag. At times, certain sleeves defy conventional labels and fall under their own unique category. Here are two of my favourite one of kind sleeves from Spring 2014 shows. Happy Sewing!
Written by Sheila Wong Studios
2 Comments
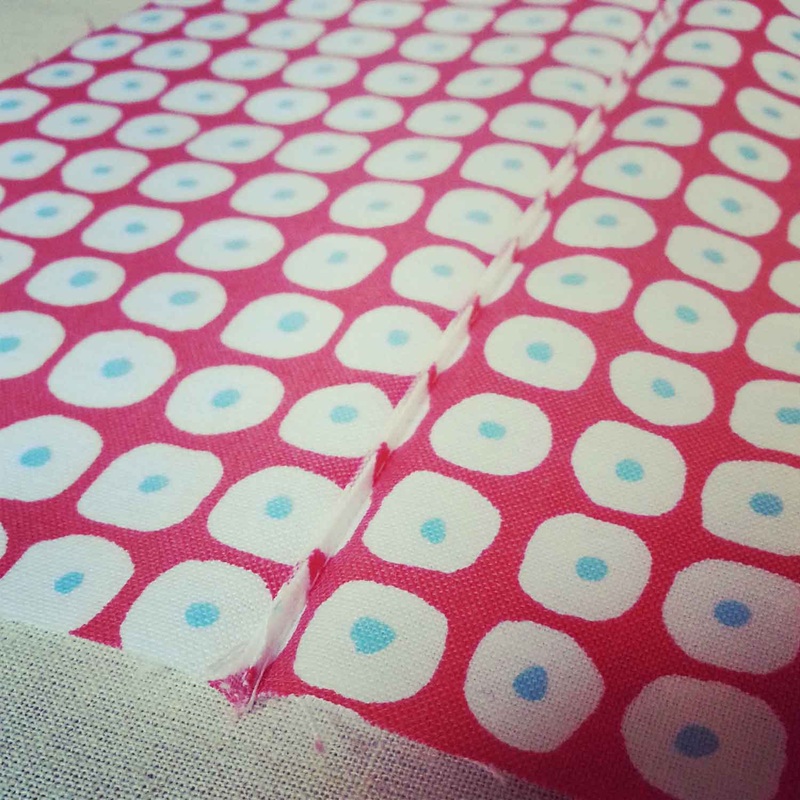
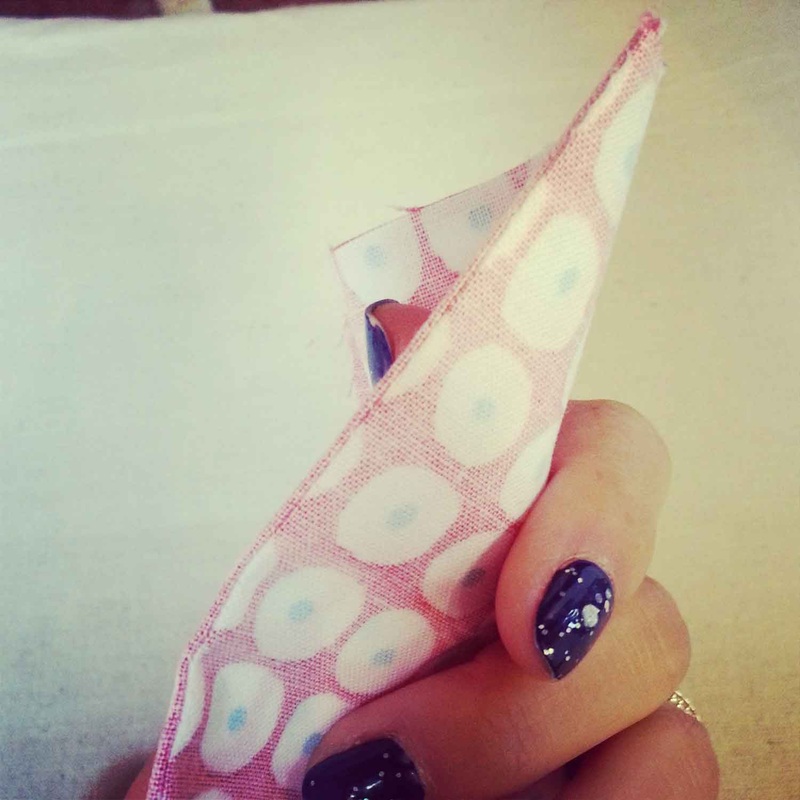
Part 2 of a 3 part series in sewing French seams, say hello to the narrow French seam. Please click HERE if you would like to view Part 1: How to Sew a Regular French Seam. The construction steps are very similar to the regular French seam except for certain seam allowances have changed to accommodate a narrow completed seam. A narrow French seam should be used for thin or sheer fabrics with medium to high fray rates. A narrow finished seam allowance will allow the seam to almost disappear in the garment. Remember, French seams are best used on straight to slightly curve seams. They will not lay flat for seams that are extremely curved. Step 1 Wrong sides of fabric facing, line up your seam, pin, and sew at 3/8" seam allowance. Please take note that a total of 1/2" seam allowance has been allocated for this pattern. Step 2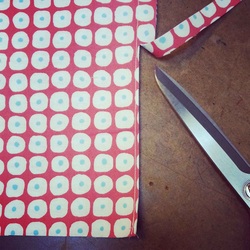 Trim seam allowance down to 1/16" seam allowance. Step 3Press seam flat to look like a book spine. Right sides of fabric should be facing each other.
Step 4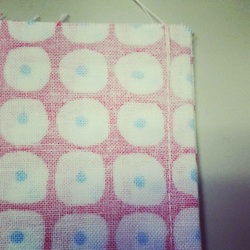 Right sides of fabric facing, sew at 1/8" seam allowance from book spine edge. This step fully encloses your raw edge. Step 5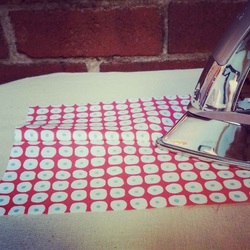 Pressing from the right side of your garment, press all seam allowances to one side. Pressing from the right side will allow the iron to naturally open your seam flat. Check out my Pressing Tips here. 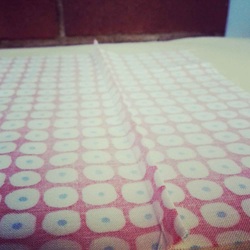 Your finished seam allowance inside your garment should look like this photo with a seam allowance of 1/8". Check back for Part 3: How to Sew a Faux French Seam.
Happy Sewing! Photographed and written by Sheila Wong Studios Welcome to part 3 of how to sew a French Seam. This tutorial will show you how to sew a Faux French Seam, also known as a False French Seam. Click HERE if you would like to start with the Regular French Seam and HERE for the Narrow French Seam. Why a Faux French Seam? The end product looks the same as a Regular French Seam, but the process is completely different and involves both machine and hand sewing. You would use this technique when working with extremely delicate fabrics like fine lace, which have no place near a machine. Step 1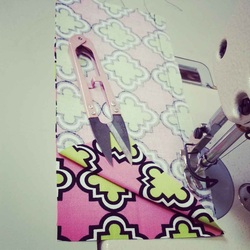 Right sides of the fabric facing either hand sew or machine sew at 1/2" seam allowance. I have used black thread so you can see it in photos. Ideally you should be using matching thread. 1/2" total seam allowance as been allocated for this example. Regular seam allowance ranges from 3/8-5/8". Step 2Separately, press seam allowances in half, folding raw edge in. Line up raw edge beside sewn line in Step 1. See video below for detailed instructions. Step 3Slip Stitch closed your seam allowance on the fold. See video below for detailed instructions. Step 4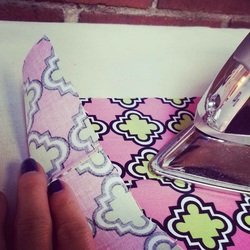 Pressing from the right side of your garment, press all seam allowances to one side. Pressing from the right side will allow the iron to naturally open your seam flat. Check out my Pressing Tips here. Happy Sewing!
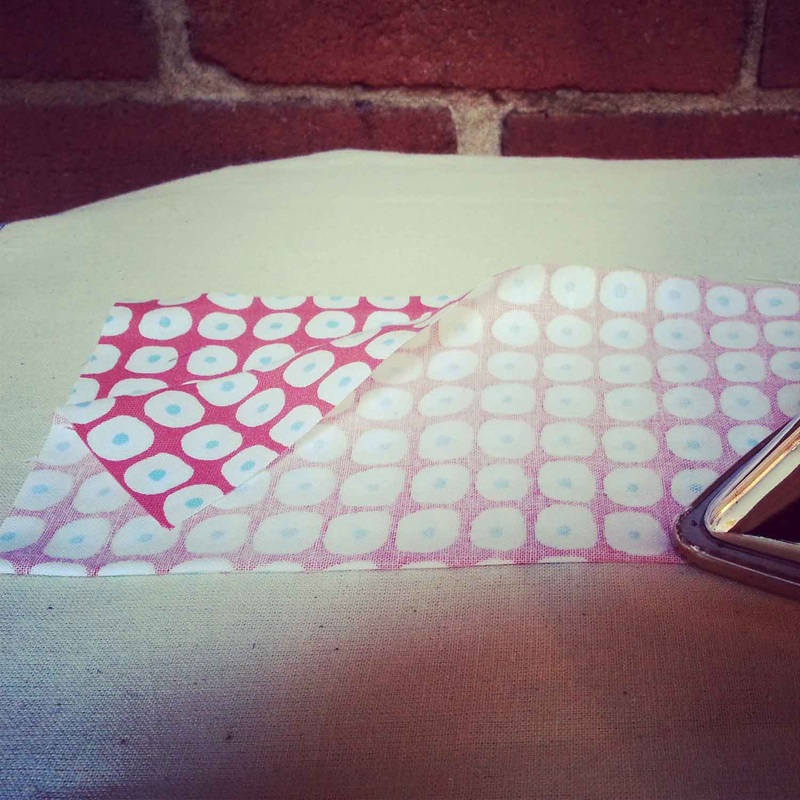
Photographed and written by Sheila Wong Studios In the midst of bridal season one of my good friends and artist Andrew Briggs asked me to sew a few pocket squares for his upcoming wedding. Naturally, I said yes! Enjoy this three step tutorial. 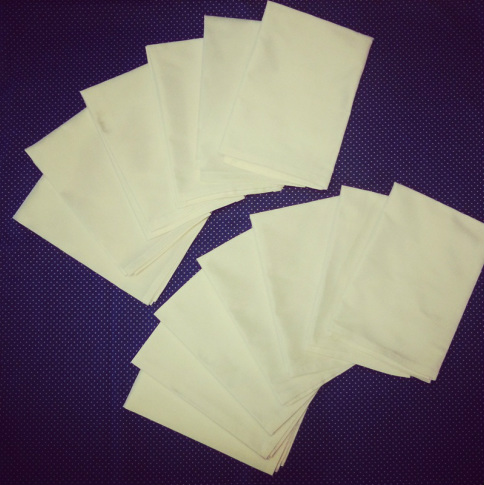 Materials
Step 1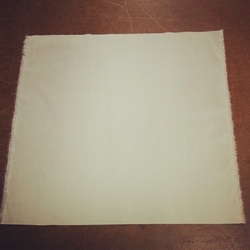 Cut out a square piece of fabric in the dimensions 16 inches x 16 inches. Total 1 inch seam allowance all around is already included. One edge needs to run along the lengthwise grain and the other on the crosswise grain. This will make sure your square stays like a square and does not warp. Step 2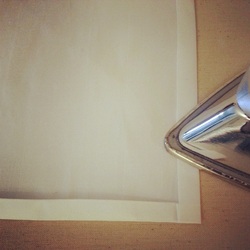 With a 1 inch seam allowance in our pattern, fold and press each edge twice at 1/2 inch each time. Step 3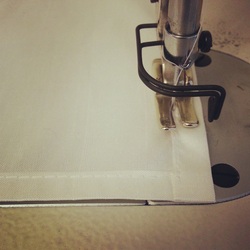 With matching thread sew folded edges down at an equal distance from pocket square border in a complete square. Happy Sewing!
Designed, photographed and written by Sheila Wong Studios It can be extremely fun hitting up the fabric store picking up new fabric. Having an understanding of basic fabric terms will better equip you in being a smart sewer and shopper. 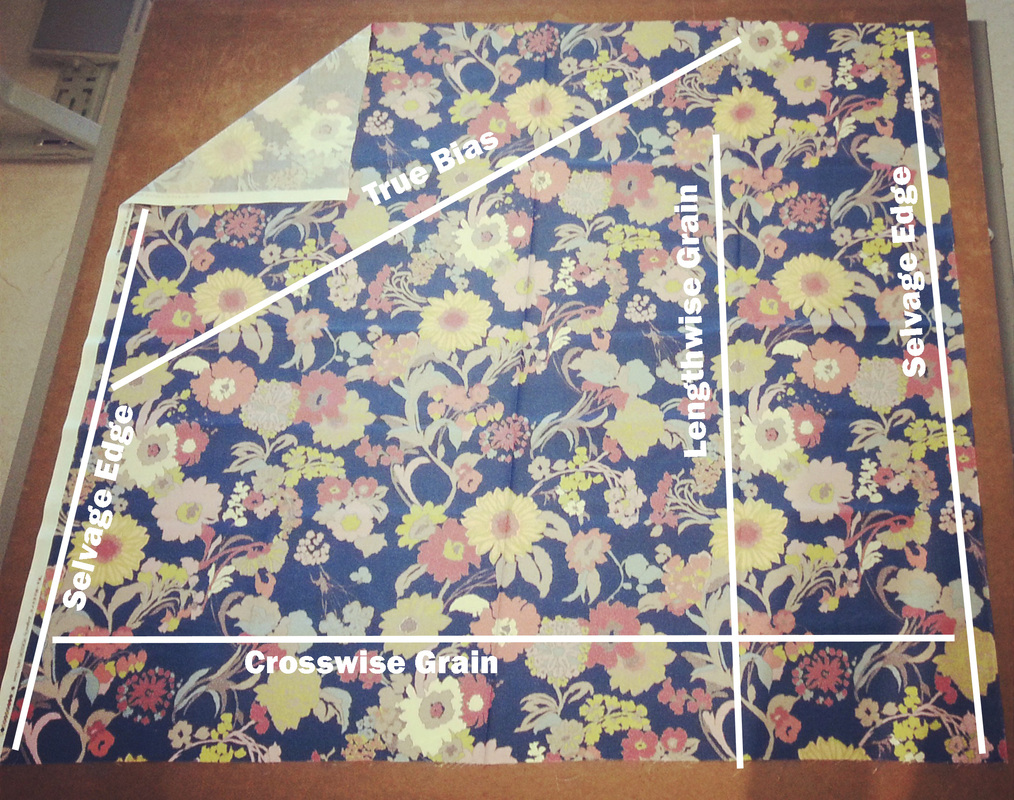 SelvageThe finished, firmly woven edge on fabric. Sometimes you will see tiny perforated holes or manufacturers writing along this edge. This edge will run along both sides of the lengthwise grain edges. Lengthwise Grain (Warp)Running parallel to the selvage edge. These yarns are the strongest and most stable. Commonly this will run vertical on a body. Crosswise Grain (Weft)Yarns running from one selvage edge to the other selvage edge make up the crosswise grain on a fabric. Most woven fabric will have a bit of movement along these yarns. True BiasSitting at a 45 degree angle from the selvage edge, it is a line that intersects with the lengthwise and crosswise grains. True bias has alot of movement and give. It can easily conform to the contours of a body. Commonly seen in evening wear. Happy Sewing! Photographed and written by Sheila Wong Studios I always tell my clients that taking the time to press a garment along the ways of construction is essential. Why? Because it sets your designs apart in a more professional manner. I guarantee if you incorporate the following basic pressing techniques to your next design, you will not be disappointed! Before we get started...did you know that I have gone through 8 irons in the last 3 years. I press almost every day! Basic Pressing Tips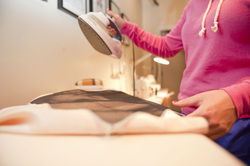 Ever wonder why you iron feels so heavy? Well the natural weight of the iron is just the right amount to press a garment. So please refrain from pushing down like hulk in the thoughts that it will assist in flattening a seam or a wrinkle. Also, no need to wiggle the iron while pressing. Steady heat in one continuous motion is plenty. 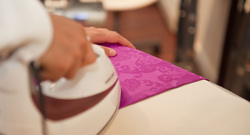 In my experience, I have found not all irons have the same heat levels. It is extremely important to test with a scrap of your intended fabric which level of heat to set your iron to. With a scrap, place your iron at a setting you think might be right and leave your iron on for 10 seconds. If there was any burning or shine created, your setting is too high. Pressing Seams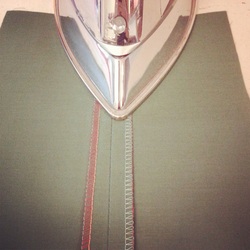 When pressing a seam that needs the seam allowances to be fully open, press from the wrong side of garment. This ensures a flat laying seam. 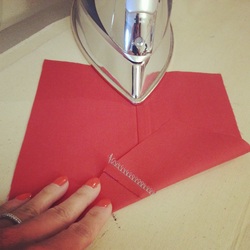 When pressing a seam that needs the seam allowances to be sitting to one side, press from the right side of garment. This lets you press the seam flat. Iron Maintenance Always be aware of the water level in your iron. Do not let it get too low or else you will not receive a clean press. Also the steam function that assistants in giving that flat appearance will not work. 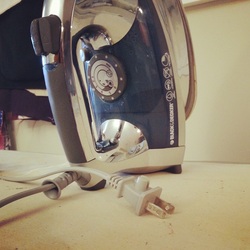 This one is really simple, yet I am still guilty of it. Turn off your iron when not in use. It extends the life of your iron. Keep an eye out for future blog posts on pressing difficult fabrics and attaching fusible interfacing with ease.
Happy Sewing! Photographed and written by Sheila Wong Studios |
Archives
November 2022
|
 RSS Feed
|
|
Copyright © 2024 Sheila Wong Fashion Design Studio Ltd. All rights reserved.