|
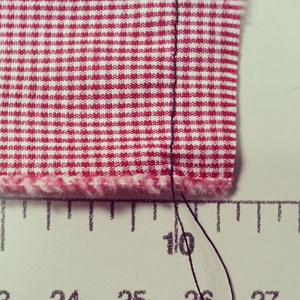
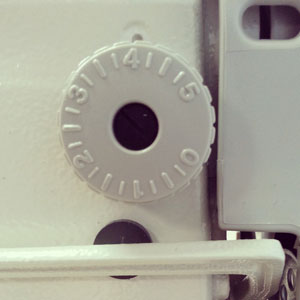
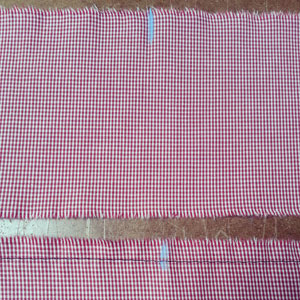
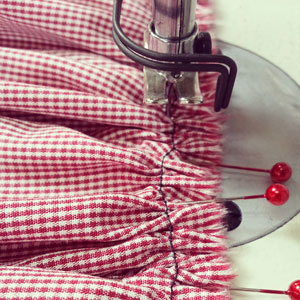
Excess fabric can be worked into different design elements such as darts, pleats and gathers. Gathering fabric is a simple way to remove excess fabric, and it adds to the style of a garment. Gathered skirts are easily in most of our wardrobes. 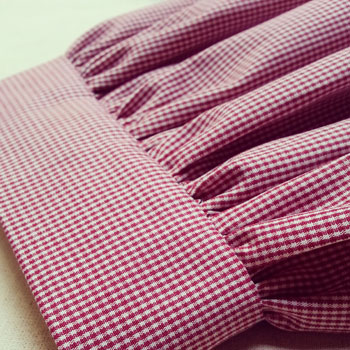 Gathers are typically sewn into another pattern piece. These can include waistbands, cuffs, collars and bodices. This tutorial will show you how to create gathers in one pattern piece to be attached onto another piece that does not require gathering. I will use a cuff example here. Step 1Consider your seam allowance first. My seam allowance is 3/8". Begin with sewing a basting stitch approximately 1/16-1/8" away from your final sew line, in the seam allowance area. Several sources have you sew your basting stitch in the middle of your seam allowance, but I find the closer you can get to your sew line, with out actually being on your sew line the better your gathers will sit in the end. A basting stitch is used to temporarily hold fabric together and is sewn using a wider stitch length. I use a 4mm stitch length. A basting stitch is also used to gather fabric. Do not back stitch and leave at least 3-4" tails of thread to pull later.
If the piece you are applying gathers to is really long, I would break it up into 4 equal sections with their own tails. You will thank me when you start pulling threads and one breaks mid way! 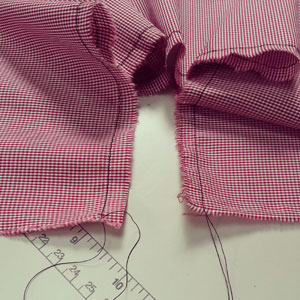 Step 2Before you start pulling the threads, I suggest marking the middle points on the gathering piece and the cuff (or whatever pattern piece you are attaching your gathering onto). Again, if you are applying gathering to a long area, separate into quarters to manage better. This will ensure the gathering is balanced when sewn into your garment.
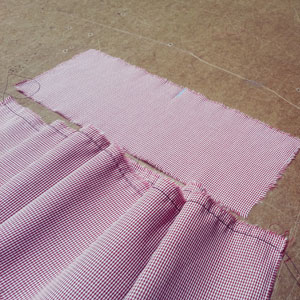
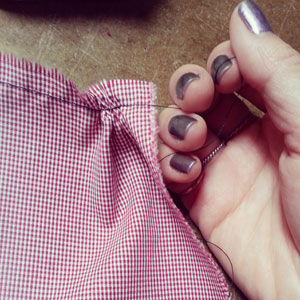
Right sides of fabric facing each other, pin marked middle points together. 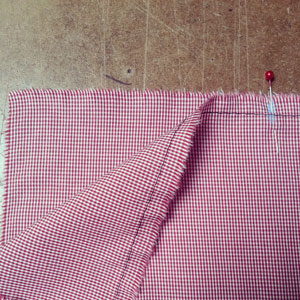 Step 3Starting on one end of your basting stitch, pull at one thread to begin creating gathers. Move gathers towards the middle. Pull until the gathered piece becomes the same length as the garment seam you are sewing it to. In this case, I will pull until my gathered sleeve becomes the same length as my cuff. Repeat thread pulling to create gathers on the other end.
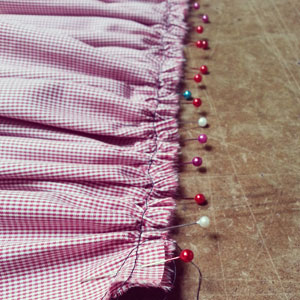
Pin layers together. As you pin, try to re-position each gather to be straight. If gathers are turning diagonal it will show in your finished garment.
Step 4Switch you stitch length back to 2.5mm, sew at 3/8" seam allowance. Your sew line should be just to the left of your basting stitch.
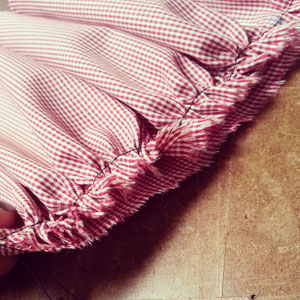
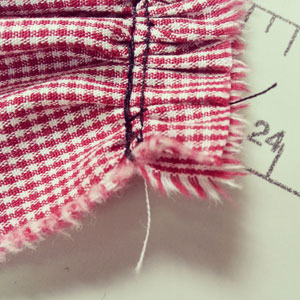
When finished, your gathering should look like below. 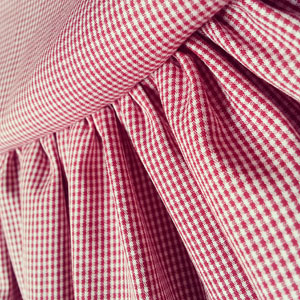 Step 5Press the non gathered side of the seam flat, using the edge of your iron. 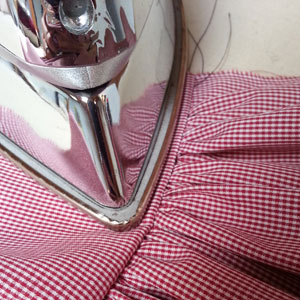 Gathering is complete! You can now continue sewing your garment.  Happy Sewing!
Photographed and written by Sheila Wong Studios
2 Comments
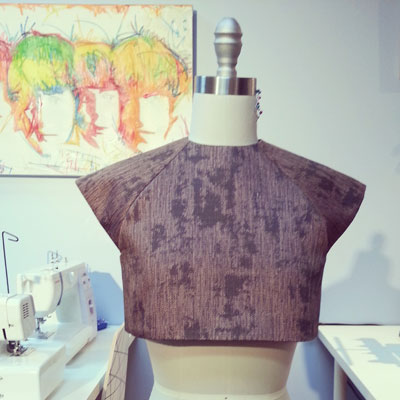
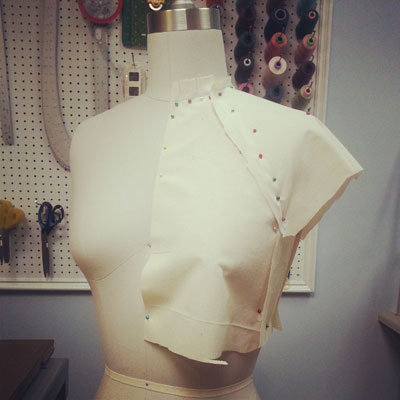
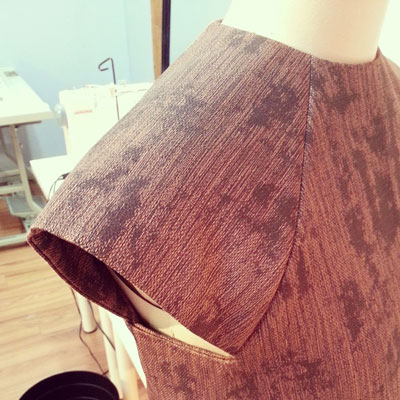
My latest design is a structured crop top made from a Cotton blend fabric. The inspiration really originated from the fabric, as most of my designs do. I wanted to maintain clean straight lines. With only one curve in the pattern at the neckline, as required.
I wanted to give you an inside view into my design process, so I have documented with photos along the way. Materials cost approximately $15 and 0.9M of fabric was used. The total process took a total of 9.5 hours, over the span of 2 weeks, from conceptualization to completion of construction. Concept & Inspiration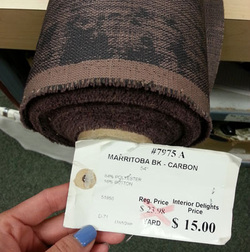 I was shopping in the interior fabrics section at Fabricana, when this print caught my eye. Here is a lesson for you, do not ignore the interior fabrics just because it was originally designed to be used for home decor projects. Some of my favorite designs are made from "interior" fabrics. At the time of purchase, I had no clue what I would design from it yet, but knew it had to be structured due to the stiffness of the fabric. Almost a year later....here we are. DrapingThis crop top called for draping as I wanted the raglan sleeve seams to hit certain spots and I wanted a side panel in the design. You will notice I left ample seam allowance to create my first muslin.
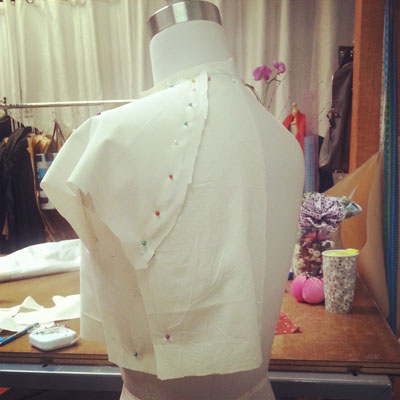
Fit Sample (Muslin) #1Based on my draped pieces prior, I sewed them together and turned in the hems to get a real feel to what the top would look like.
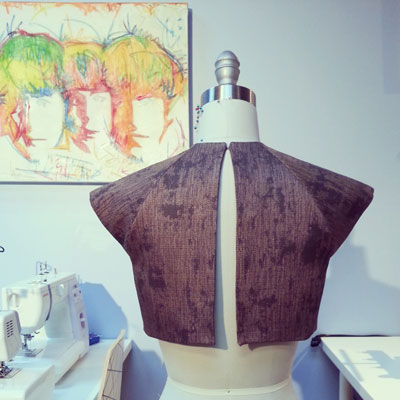
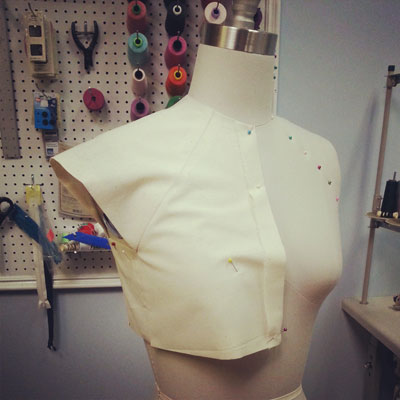
I had to make a few adjustments by marking the muslin with chalk. I dropped the armhole by 1/2" to give room for movement. Did not want to walk like a robot. I also re-curved the hem to make up for the bust lifting up the hem. Pattern Drafting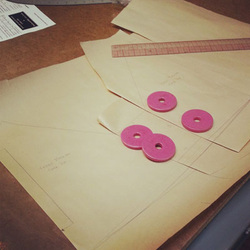 From the draping and fitting, I created 2D paper pattern pieces reflecting the fabric pieces. Fit Sample (Muslin) #2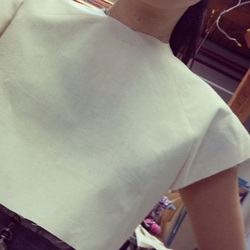 A second muslin was created from the paper patterns to make sure the adjustments sat correctly. I decided to try this on since I will be wearing the final design. As you can tell from the photo, the neckline was a tad tight, so I marked that appropriately. Final Pattern Drafting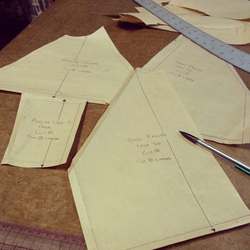 Once I was happy with the neckline correction, I finalized all the pattern pieces with seam allowances, grain-lines, titles and notches. Cut out Fabric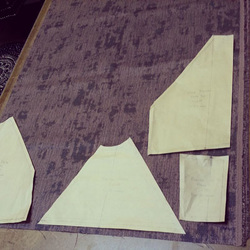 Paper pattern pieces down, pin and cut. 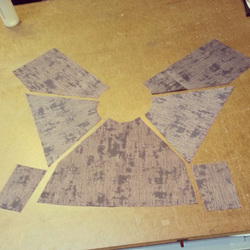 Prepping for the garment sewing stage, I had to show you what this top looks like all lined up. Garment ConstructionThe sleeves are a combination of a raglan and cap sleeve. I wanted to stay away from an inset sleeve to create the sleeve hem flare.
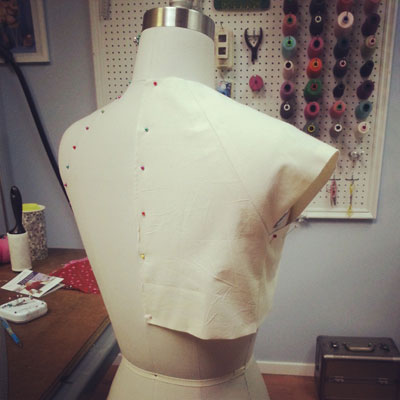
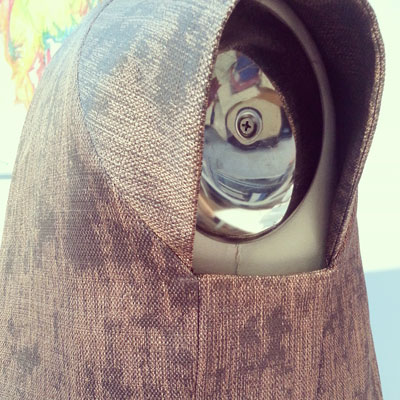
The most challenging part sewing this top would be where all the seams collide under the armhole at the corners of the side panel. Eight seam allowances converging at one point, four from the exterior and four from the lining. In this situation it is important to mark the exact point that all should converge, so you don't sew over. Patience was key here.
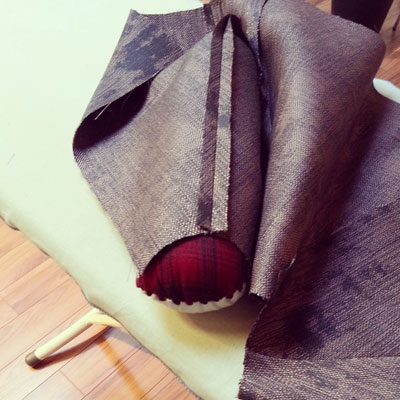
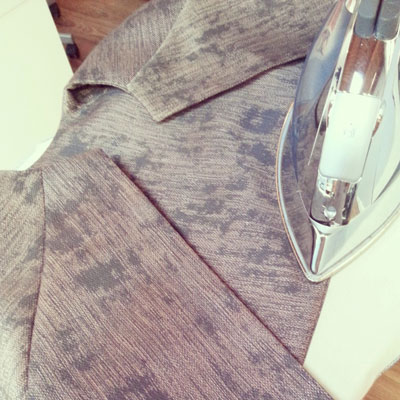
This top is fully lined with the same fabric as the exterior. This means I have to make two tops first, then bring them together. Because of all the style lines and seams, it is fairly important that I pressed open each seam along the way prior to bringing the exterior and lining tops together. A fully lined garment means no raw or exposed fabric edges are visible. A small opening is left un-sewn at the hem to flip garment right side out. Hand sew a slip stitch to close up opening.  After a good final press, I hand sewed a hook and eye to the top center back. I wanted to maintain an airy feel to the design but not have it fall off, so only one hook and eye was required.
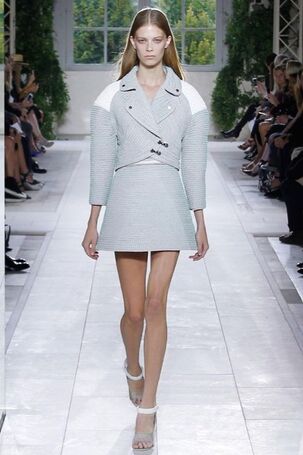
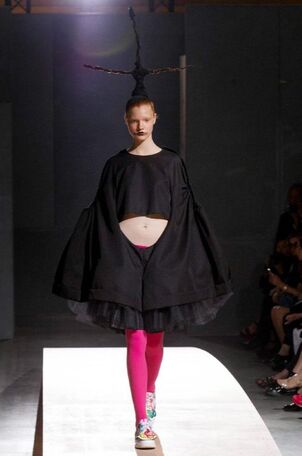
For those curious and not familiar with the design process, all the step leading up to construction usually take longer than the actual garment sewing. In this case, it was approximately 30% sewing to 70% pattern creation and prep. Wondering what I will wear this top with? Check out my Instagram feed. Happy Sewing! Designed, photographed and written by Sheila Wong Studios Heading into Fall season, sleeves are... well everywhere! There is more than just your basic short and long sleeves out there. In this post I will go over some pretty amazing sleeves with equally amazing names. Now the question is, which sleeve will you slide your arm into this Fall? Cap Sleeve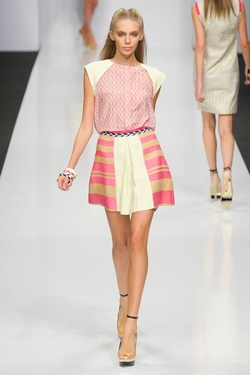 Just a smidge more fabric than a sleeveless garment. A cap sleeve literally caps your shoulder. Most cap sleeves are made by extending out the shoulder seam. Byblos Spring 2013 retrieved from NY Mag. Gigot Sleeve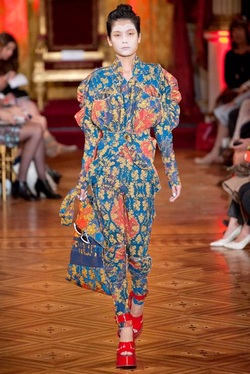 This sleeve is one of my favourite sleeves to say out loud. Try is with me, 2 syllables- "jgie zhego"! Sounds like you are calling for a dog. Another name for this sleeve is leg o'mutton, equally as fabulous to say out loud. The easiest way to spot this sleeve is to picture a chicken leg. Extremely full at the top and fitted down to the wrist. Used in the 1800's, the idea was that if your gigot fullness was extreme, it would make your waist appear smaller. Vivienne Westwood 2013 retrieved from NY Mag. Bishop Sleeve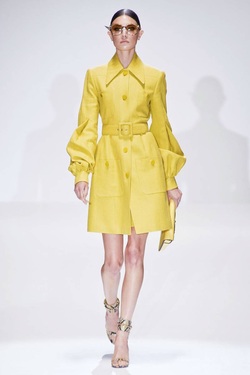 A long sleeve with fullness at the bottom created by gathers or pleats and narrow at the top. Fullness is controlled by a cuff at the wrist. Gucci Spring 2013 retrieved from NY Mag. Dolman Sleeve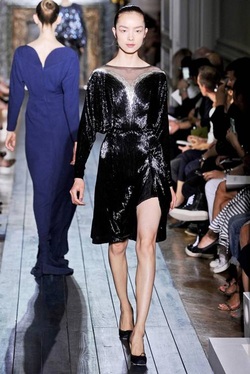 This sleeve reminds me of bat-wings. Personally I dont think this is very flattering on most figures, as it takes away from a women's natural curves. But leave it to Valentino to make a dolman sleeve flattering by cinching in the waist- good job! Important elements for a dolman sleeve include a fitted sleeve from wrist up to elbow region then excess amount of fabric dropped from armhole area. Valentino 2012 retrieved from NY Mag. Bell Sleeve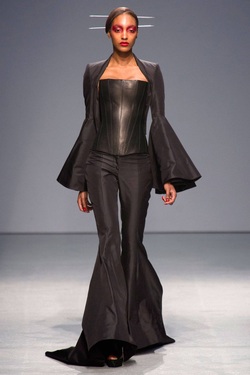 Visually just picture your arms are bells, with some bells being larger than others- this is a bell sleeve. There are variations of this sleeve where the bell can flare out at any part of an arm. Typically you will see a seam connecting the top of the sleeve to the bell part, this allows a designer to achieve the flare. Bell sleeves can add drama to any outfit, but I dont recommend dining in bell sleeves. Gareth Pugh 2013 retrieved from NY Mag. Puff Sleeve Gathers at the sleeve cap and sleeve hem make up a perfect puff sleeve. Extremely feminine and youthful sleeve. I think the last time I wore this sleeve, I was 12. If you have broad shoulders, this sleeve only makes you look wider. Chanel Resort 2013 retrieved from NY Mag. At times, certain sleeves defy conventional labels and fall under their own unique category. Here are two of my favourite one of kind sleeves from Spring 2014 shows. Happy Sewing!
Written by Sheila Wong Studios |
Archives
November 2022
|

 RSS Feed
|
|
Copyright © 2024 Sheila Wong Fashion Design Studio Ltd. All rights reserved.