|
I have been waiting for the perfect fabric to design a skater skirt. So the moment I found a thick boiled wool fabric, it was time. A skater skirt is a high waisted skirt that has dramatic flare. The term 'skater skirt' originates from what a female figure skater would wear. When a figure skater did their spins, their skirt would flow around them beautifully, hence the term skater skirt. I wanted to design my version of the skater skirt with as much flare as possible. Check out highlights from my design process below. 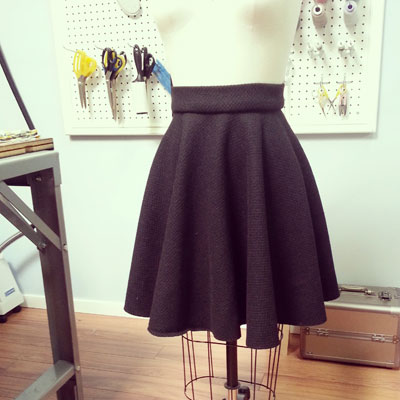 Project Specs
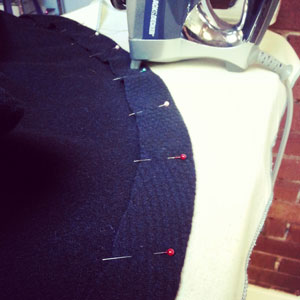
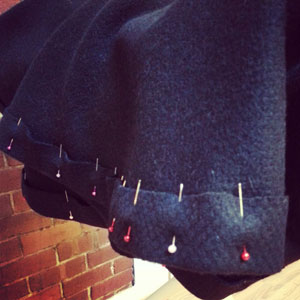
FabricI used a thick black boiled wool fabric. It is fantastic for the winter, but looking back it was not fun hand sewing the waistband due to the thick seam allowances it was creating. Regardless, it was worth it! I purchased the fabric from Fabricland on Marine Drive.  Boiling wool dates back to the Middle Ages. It is the process of taking already weaved or knitted fibers, which makes fabric, then boiling and agitating it in hot water. This process shrinks the fabric resulting in a really tight and dense fabric. This create the heavy weight you feel. I am fairly sure my skater skirt weighs at least 2 pounds. Pattern DraftingI wanted as much flare as possible in this skirt with out having to add any gathers or pleats. So, I drafting a complete circle with enough space in the middle to fit my waist. A waistband was also drafted (sorry not shown) that fit right around my natural waist. Seams are only on the side seams. Ideally, it would have been nice to only have a center back seam to decrease the weight with the boiled wool. 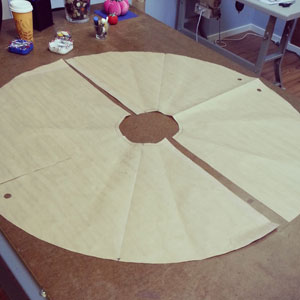 Another term for this style of skirt is a circle skirt. Any guesses why it would be called this? Just have a look at the pattern! Construction DetailsThis skirt was almost fully hand sewn with the exception of the side seams, the zipper and the initial attachment of the waistband to the skirt. Normally hook and eyes are used to accompany a zipper closure, but I opted for snaps as I find the larger snaps much more secure and discreet. 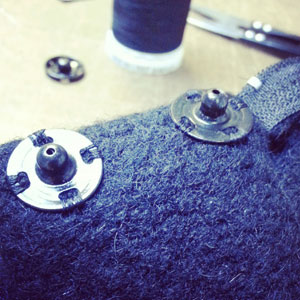 The majority of my time was spent preparing and hand sewing the hem. The length of the entire hem all the way around is 145 inches, so you can only imagine how long that would take to hand sew. I applied a blind slip stitch to finish the hem. A helpful characteristic of boiled wool is that when pressed or steamed the fabric will mold to the shape you require. This made pressing the hem into place really easy with out any excess fabric in the hem seam allowance.
I thought I would include an inside view of the skirt for you. How cool does it look laying flat? Makes me want to twirl around to show off the flare. 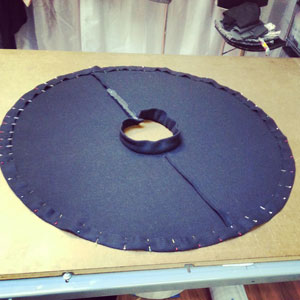 Final DesignLearn how to make your own skater skirt by booking yourself in for a sewing lesson with me. This is how I wore my skater skirt. Now its time to twirl!  Happy Sewing!
Designed, photographed and written by Sheila Wong Studios
5 Comments
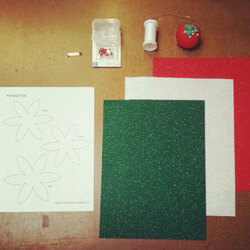
This tutorial is inspired by my client Connie who made a traditional stocking for her grand daughter. We created beautiful felt poinsettia's to be hand sewn onto the front of a stocking. Now, I will admit I had no clue what a poinsettia was, but they are big during the holiday season. I was so inspired, that I started to think where else could these fabric poinsettia's be placed. Thought of decoration around the house, tree ornaments, brooches and even extra décor on gifts. 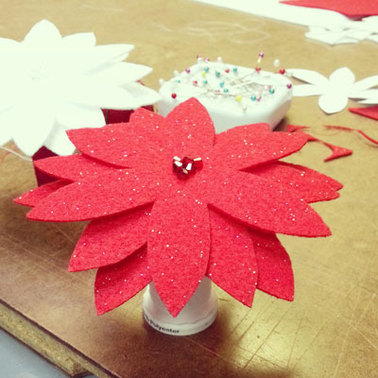 Materials
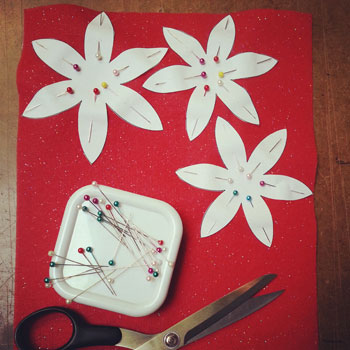
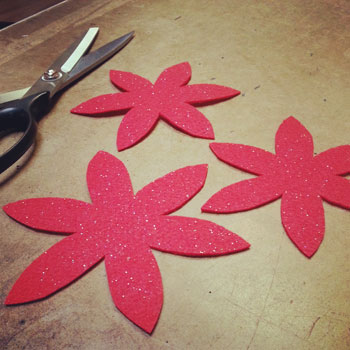
Step 1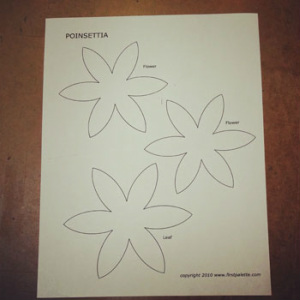 Create a pattern or download free patterns online. I found mine HERE on First Palette. Cut out your paper pattern. Step 2Pin and cut out your poinsettia felt layers.
Step 3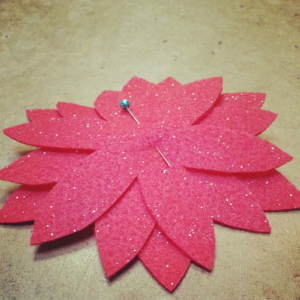 Position 3 layers of felt to create a flower, and pin in place. Step 4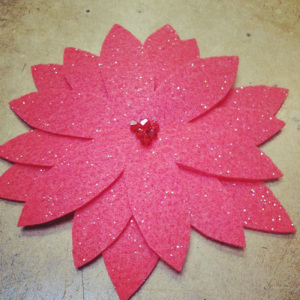 Thread up a hand sewing needle. Prior to sewing beads, secure the 3 layers of your flower with a few stitches going top to bottom in the center 3-4 times. Sew as many beads as you like, keeping beads centered in the poinsettia. Finish and tie a knot in the back. Step 5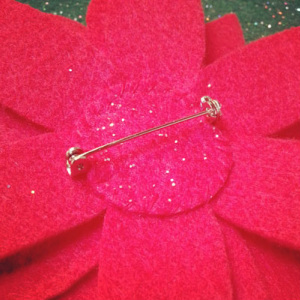 Now you can decide how you will use your poinsettia. Hand sew a ribbon to the back if you are making it into a decoration. I'm making my poinsettia into a brooch. First hand sew the brooch back to the back of flower. Next, cut out a small piece of felt and hand sew felt down around the circle. Happy Sewing!
Photographed and written by Sheila Wong Studios |
Archives
November 2022
|
 RSS Feed
|
|
Copyright © 2024 Sheila Wong Fashion Design Studio Ltd. All rights reserved.