|
Here is my version of a top Winter 2014 trend- a long waistcoat. A waistcoat can be defined as a sleeveless garment covering the top half of a body with a center front opening. My take on this Winter 2014 trend is futuristic and void of any unnecessary bits like closures, top-stitching, darts, etc. PS- Waistcoat is just a formal way of referring to a vest. 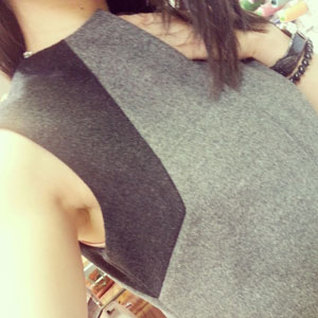 Project Specs
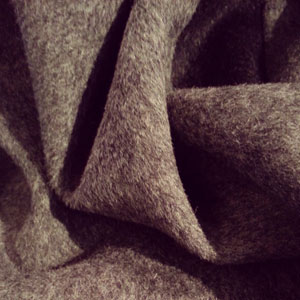
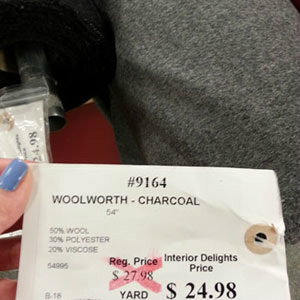
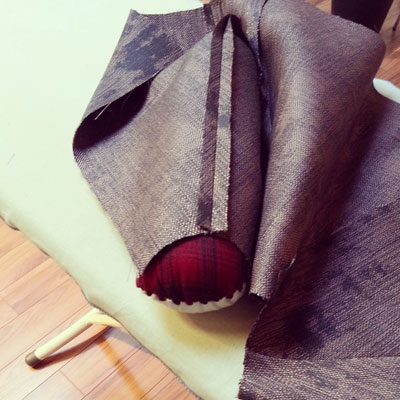
FabricI fell madly in love with this fabric the moment I touched it! It is so extremely soft and warm to the touch. I initially thought of a cropped vest, but one year later it evolved to a long waistcoat. I found this fabric at Fabricana in Richmond in the Interior Delights section which is upstairs. Interior Delights is actually a separate company from Fabricana. Did you know that? Don't be afraid to explore home décor fabrics. Some of my favorite fabric finds are from the home décor section.
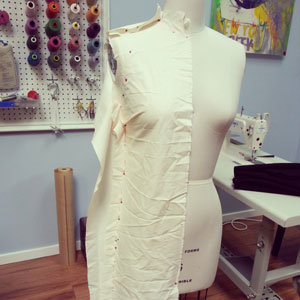
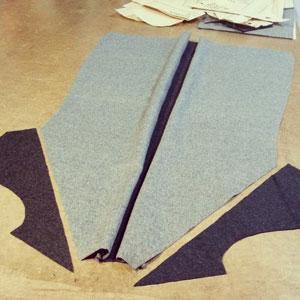
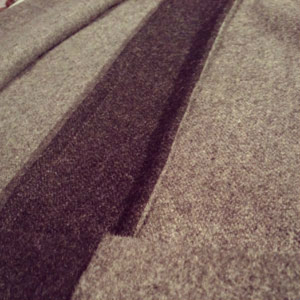
I purchased the light grey and dark grey color-ways. I initially used a small portion of the dark grey on a dress for the bodice. I had just enough left-over to create this waistcoat. 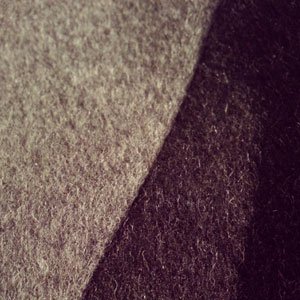 Draping/ Pattern DraftingFor those of you who know me, I am not a fan of illustration. I tend to already have the design in my mind and go straight into draping what I in vision. I wanted to keep this garment as fitted, sleek and clean as possible. Meaning clean lines, no darts and no top stitching. I was able to remove the front dart by creating a style line coming from neckline to side seam. I mirrored the same idea on the back, to give the waistcoat a balanced look.
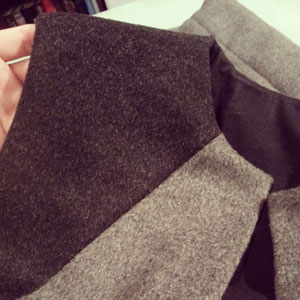
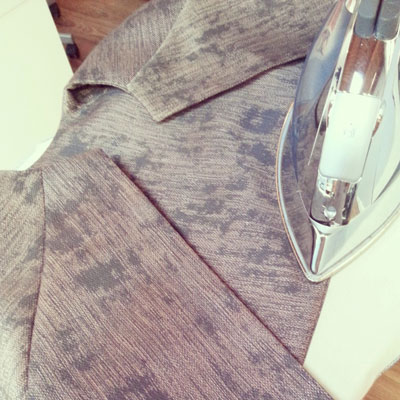
Construction DetailsBeing able to bring together two different colors in identical fabrics in one garment is what I think really adds to the appeal of this waistcoat. It gives it that futuristic vibe that a lot of my designs already posses.
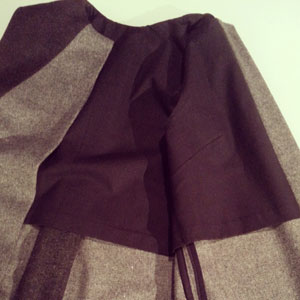
Sewing the front dark grey piece to the front light grey piece along the style line was a tad tricky. I had to ensure I found the exact pivot point so the front would lay smooth over the bust. I just chalked out the pivot area on the wrong side of the garment prior to sewing. It was important that the side seams lined up perfectly too. It would be obvious with the contrasting fabric if the style lines did not match up. Pinning this point was essential prior to sewing the side seam.
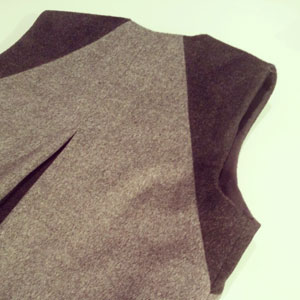
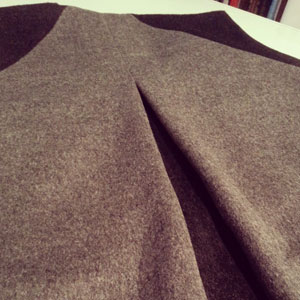
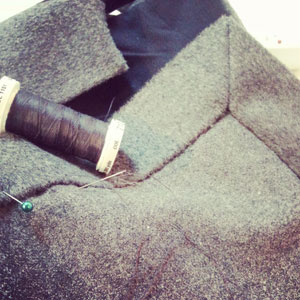
Inverted Box PleatAn inverted box pleat was not in my original design, but I felt the garment needed more dark grey too add to the overall interest. A 2" panel was sewn into the center back seam using a French seam finish. Learn How to Sew a French Seam HERE. I wanted the pleat to be a subtle addition to the back, so I sewed down approximately 8 inches from neckline down the back.
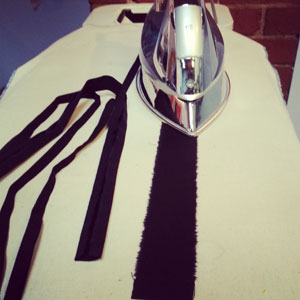
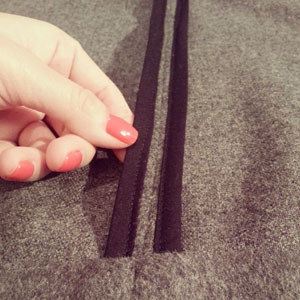
Bound Side Seam FinishI do not believe in leaving raw edges exposed in a garment. I like to take the time to neaten any exposed edges. I applied hand made binding strips to the side seams to create a bound seam finish. Learn How to Sew Bound Seam Finish HERE.
LiningI particularly enjoy garments that are not lined, but only if the seams are neatly finished. I needed to either add a facing to neckline, armhole and center front or just line the garment entirely. I opted for lining the bodice area only. That way I would not add to the weight of complete garment, especially going into spring weather.
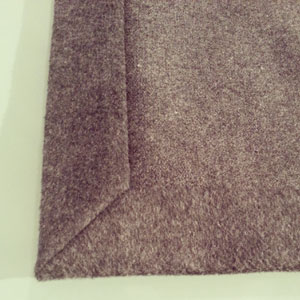
The hem of the lining was slip-stitched closed and the neckline was edge-stitched to secure lining to the interior of the garment. Hidden to the eye, I applied tack-stitches to the sides seams and center back at pleat to hold the lining in place. Mitered CornerKeeping with the clean line aesthetic I wanted for this design, I finished the center front corners at the hem with a mitered corner. Learn How to Sew a Mitered Corner HERE.
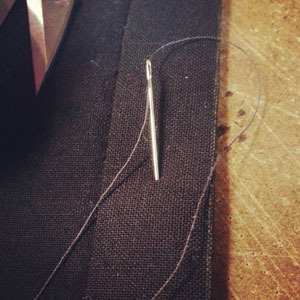
Hand SewingTop-stitching was not allowed for this garment. To complete the garment, blind slip-stitching was sewn along the center front opening and hem. 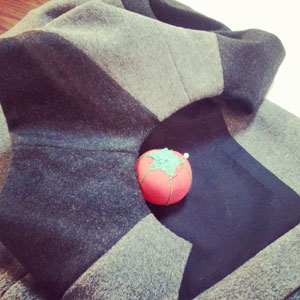 Completed WaistcoatThis is how I styled my waistcoat. Kept it simple with a Club Monaco blush pink tank, Rachel Roy denim and white Cole Haan leather shoes. 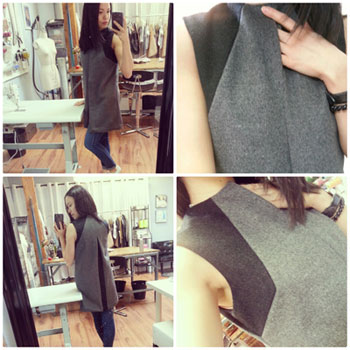 Happy Sewing!
Designed, photographed and written by Sheila Wong Studios
7 Comments
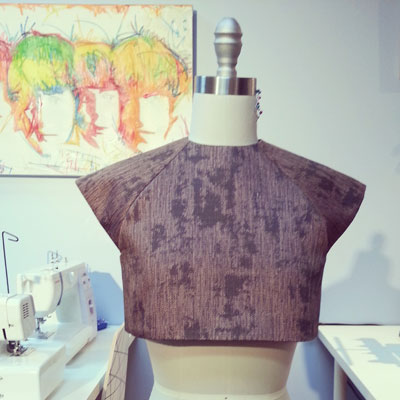
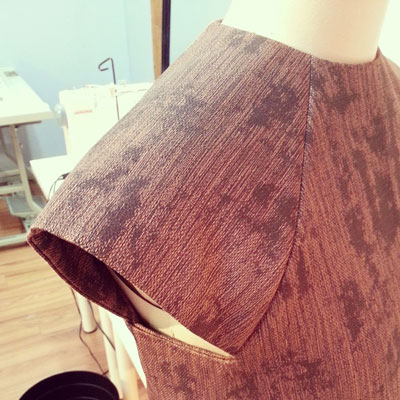
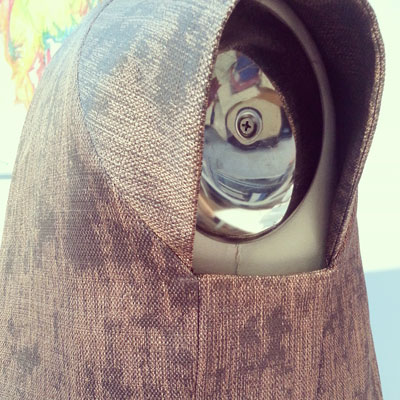
My latest design is a structured crop top made from a Cotton blend fabric. The inspiration really originated from the fabric, as most of my designs do. I wanted to maintain clean straight lines. With only one curve in the pattern at the neckline, as required.
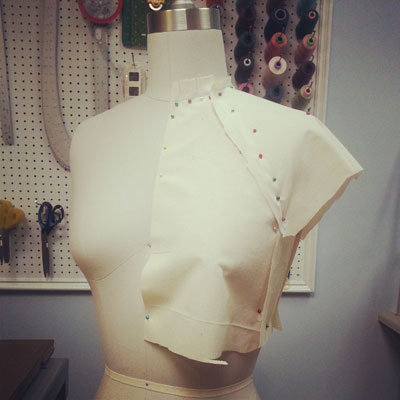
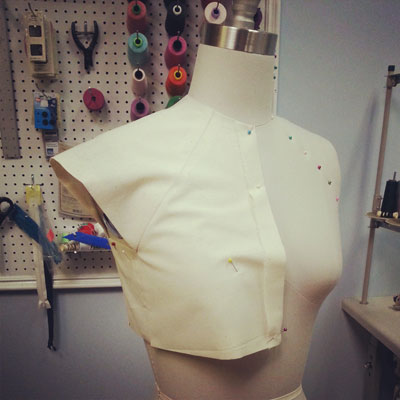
I wanted to give you an inside view into my design process, so I have documented with photos along the way. Materials cost approximately $15 and 0.9M of fabric was used. The total process took a total of 9.5 hours, over the span of 2 weeks, from conceptualization to completion of construction. Concept & Inspiration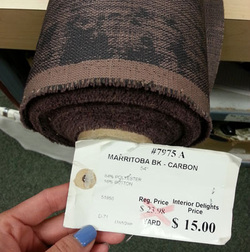 I was shopping in the interior fabrics section at Fabricana, when this print caught my eye. Here is a lesson for you, do not ignore the interior fabrics just because it was originally designed to be used for home decor projects. Some of my favorite designs are made from "interior" fabrics. At the time of purchase, I had no clue what I would design from it yet, but knew it had to be structured due to the stiffness of the fabric. Almost a year later....here we are. DrapingThis crop top called for draping as I wanted the raglan sleeve seams to hit certain spots and I wanted a side panel in the design. You will notice I left ample seam allowance to create my first muslin.
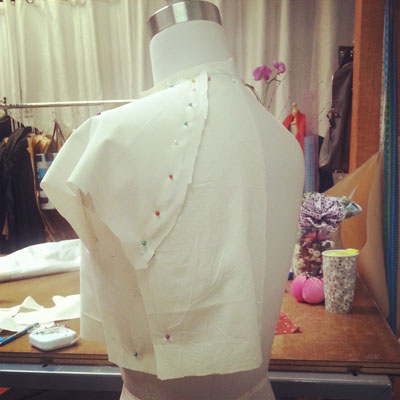
Fit Sample (Muslin) #1Based on my draped pieces prior, I sewed them together and turned in the hems to get a real feel to what the top would look like.
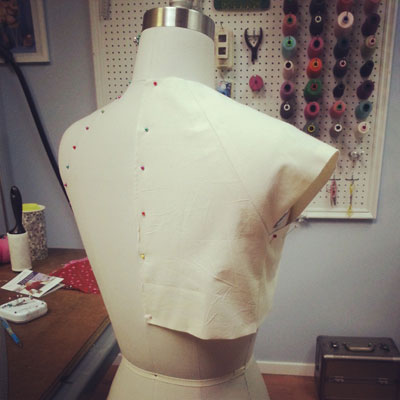
I had to make a few adjustments by marking the muslin with chalk. I dropped the armhole by 1/2" to give room for movement. Did not want to walk like a robot. I also re-curved the hem to make up for the bust lifting up the hem. Pattern Drafting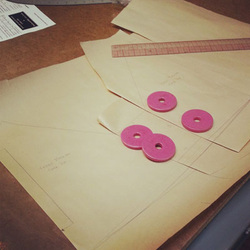 From the draping and fitting, I created 2D paper pattern pieces reflecting the fabric pieces. Fit Sample (Muslin) #2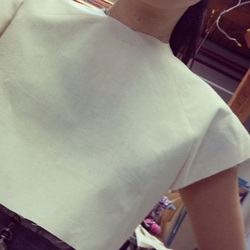 A second muslin was created from the paper patterns to make sure the adjustments sat correctly. I decided to try this on since I will be wearing the final design. As you can tell from the photo, the neckline was a tad tight, so I marked that appropriately. Final Pattern Drafting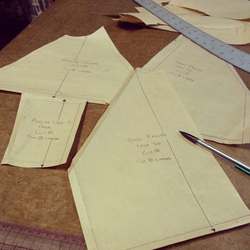 Once I was happy with the neckline correction, I finalized all the pattern pieces with seam allowances, grain-lines, titles and notches. Cut out Fabric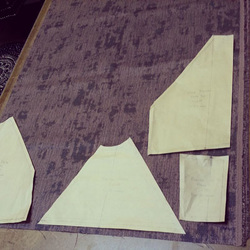 Paper pattern pieces down, pin and cut. 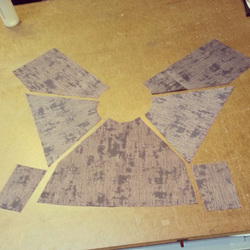 Prepping for the garment sewing stage, I had to show you what this top looks like all lined up. Garment ConstructionThe sleeves are a combination of a raglan and cap sleeve. I wanted to stay away from an inset sleeve to create the sleeve hem flare.
The most challenging part sewing this top would be where all the seams collide under the armhole at the corners of the side panel. Eight seam allowances converging at one point, four from the exterior and four from the lining. In this situation it is important to mark the exact point that all should converge, so you don't sew over. Patience was key here.
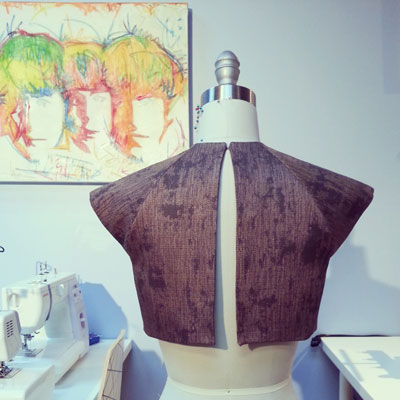
This top is fully lined with the same fabric as the exterior. This means I have to make two tops first, then bring them together. Because of all the style lines and seams, it is fairly important that I pressed open each seam along the way prior to bringing the exterior and lining tops together. A fully lined garment means no raw or exposed fabric edges are visible. A small opening is left un-sewn at the hem to flip garment right side out. Hand sew a slip stitch to close up opening.  After a good final press, I hand sewed a hook and eye to the top center back. I wanted to maintain an airy feel to the design but not have it fall off, so only one hook and eye was required.
For those curious and not familiar with the design process, all the step leading up to construction usually take longer than the actual garment sewing. In this case, it was approximately 30% sewing to 70% pattern creation and prep. Wondering what I will wear this top with? Check out my Instagram feed. Happy Sewing! Designed, photographed and written by Sheila Wong Studios |
Archives
November 2022
|


 RSS Feed
|
|
Copyright © 2024 Sheila Wong Fashion Design Studio Ltd. All rights reserved.