|
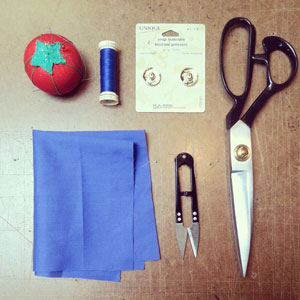
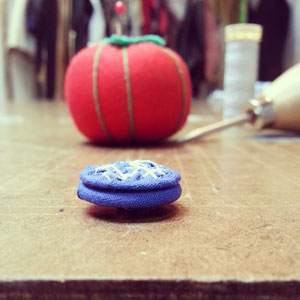
Elevate the quality of a garment with fabric covered snaps. Often seen on pricier apparel, these snaps only take a few minutes to sew. But, can change the look dramatically. 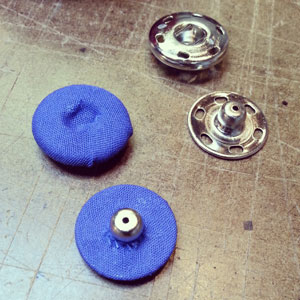 Before I start, here are a few tips to help in the process. I have found that light weight fabric works the best as it lets the snaps, actually 'snap'. When choosing the size of snaps, consider where in the garment the snaps will be placed. I suggest not using a size any smaller than 18mm, or you will have a great deal of difficulty covering the snap in fabric. Materials
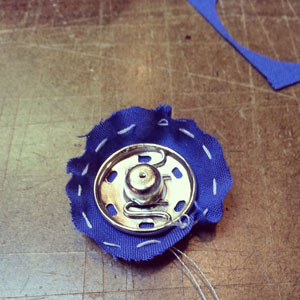
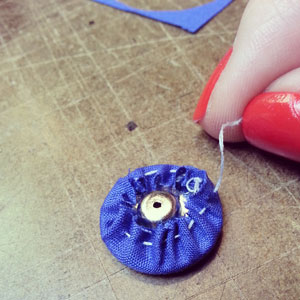
Step 1Cut out a fabric circle 1/4" larger than snap. 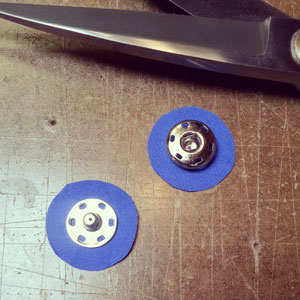 Step 2Hand sew a running stitch approximately 1/8" away from circle raw edge. 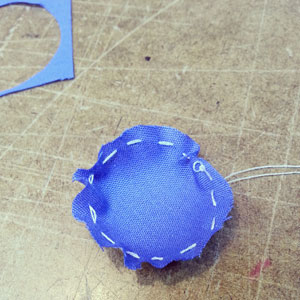 Step 3Completing one snap at a time, place right side of snap facing down. Gently pull the end of the running stitch with loose threads until fabric circle is sitting snug around snap. For extra security, feel free to run a few stitches through the back layers. Tie a knot once you are satisfied.
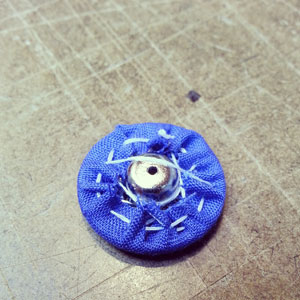
Step 4Repeat step 3 to the corresponding snap. Covered snaps should look like the bottom set shown in the photo below. All four snaps displayed are right sides facing up, once the fabric is covered its difficult to see what the snap looks like. So I have placed 'naked' snaps above to help you. 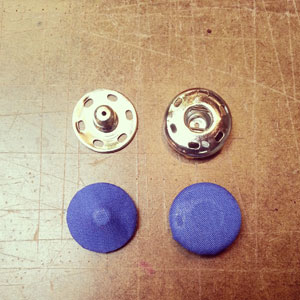 Step 5Snap your snaps together. This process will break the fabric on the male side of the snap. If you find you are getting alot of frays, simply run a small amount of clear nail polish along the raw edge. Just a heads up, when you are trying to snap the set together, the first time will be difficult due to the extra fabric in the way. Once the fabric breaks away, your snaps will snap away normally.
You can now proceed with hand sewing snaps onto your garment.
Happy Sewing! Photographed and written by Sheila Wong Studios
2 Comments
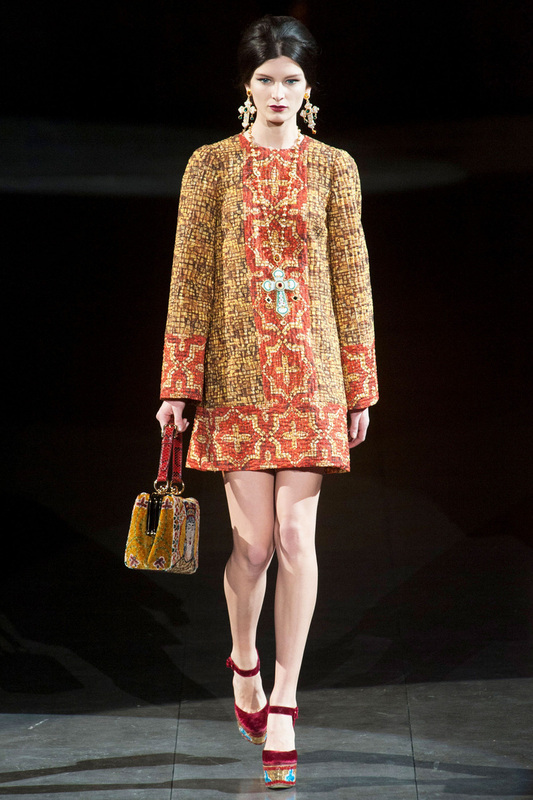
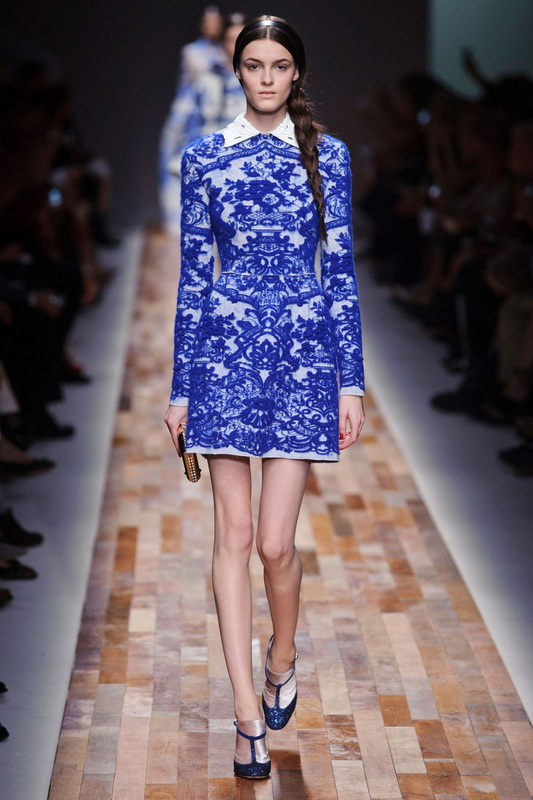
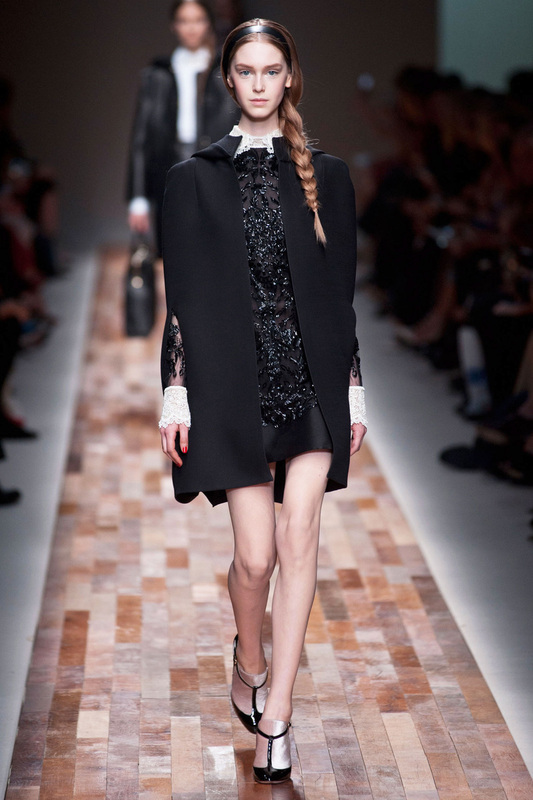
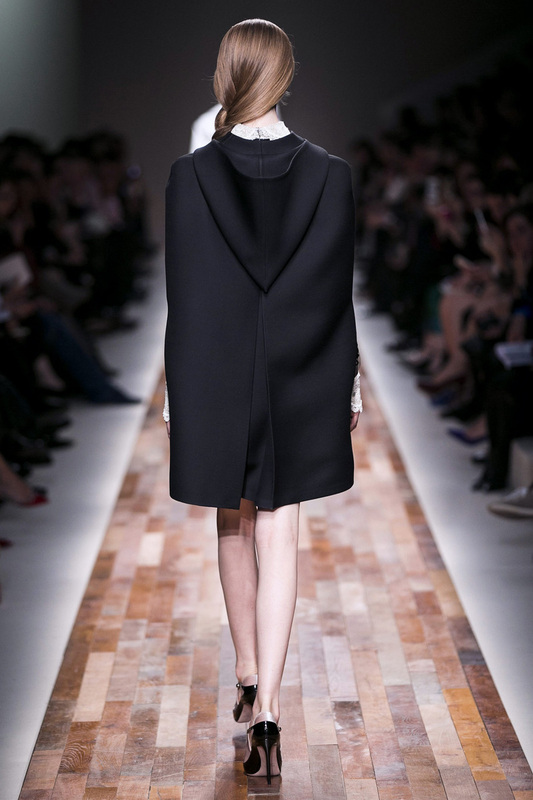
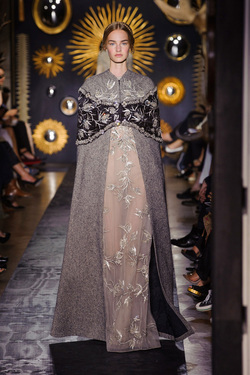
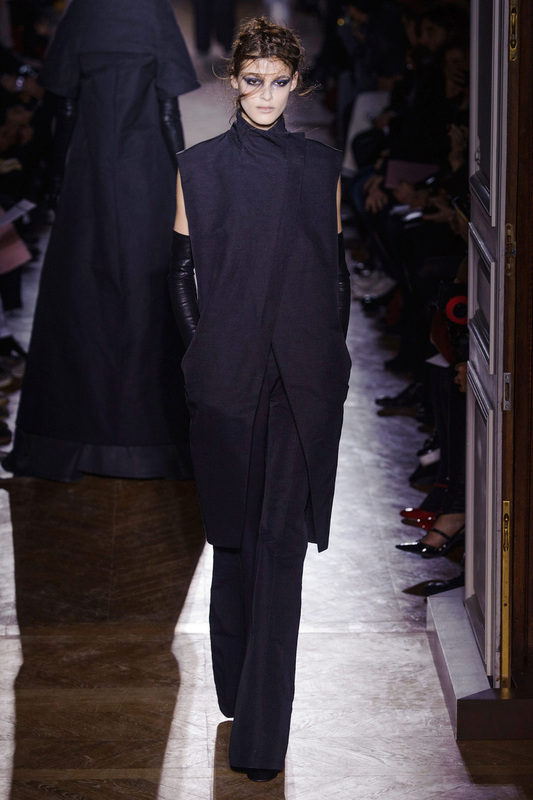
Winter has technically arrived according to the calendar, even if snow decided to come earlier. As each new season approaches, I customarily peruse through designer collections to see what key fashion trends or pieces I need in my closet. I have had a bit of down time in between holiday feasts this season to organize what I feel are the top 3 key fashion pieces you can sew. And I am not promising anything, but I will try to sew these 3 fashion trends for you in the next few months. Basic Dress Made in Opulent FabricsThe title should be descriptive enough for you. I call it a basic dress as to describe the pattern drafting is rather basic in this one. Pattern pieces would consist of a basic set in sleeve, a front dress (probably cut on fold) and a back dress piece that probably has a zipper down the center back as closure. What makes this dress so coveted would be the opulent fabric choice. So I guess I am on the hunt for the perfect fabric! Minimalist CapesCapes come and go each season, but I am really loving the silhouette of these Winter 2014 capes. Its fairly boxy with clean lines. I have always found past capes with flare are a bit much and just remind me of Robin hood. Notice the hand/arm openings are rather streamlined. It is as if they do not exist or you could even wear the cape without having to use the openings. Made out of wool, this would be a perfect layering piece in Vancouver. Long Vest CoatBeen really feeling the longer top silhouette over pants recently. It has a very worldly feel about it. In our colder climate, you can see variations of this vest in the zip off sleeves option of a winter coat. Personally I don't want a coat with zip off sleeves. I feel the zipper teeth may snag a scarf. I will try to find a dark grey or indigo color to make this long vest coat. This will be perfect to wear closer to the end of winter. If you are going to be making this one, don't let the hem fall past your knees. It may shorten you. I know it is the last thing I want...being short and all. Happy Sewing!
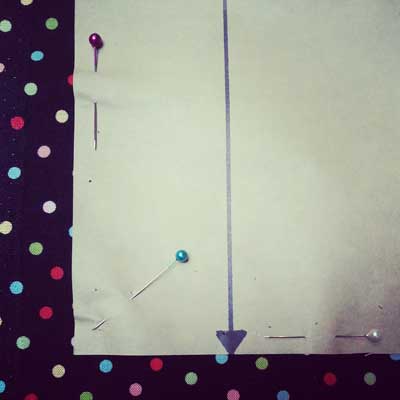
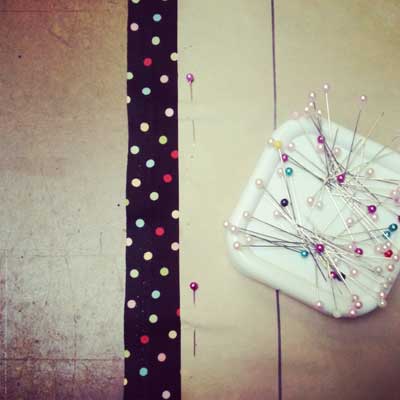
Written by Sheila Wong Studios Speak to anyone who sews, and they will let you know that all the steps leading up to sewing take longer than the actual sewing itself. These steps can include pattern drafting, fabric preparation, pattern placement, pinning, cutting and marking. In this post I will focus on two steps in which you can easily improve your skills. These include pinning and cutting fabric. Other areas will be covered in future posts. 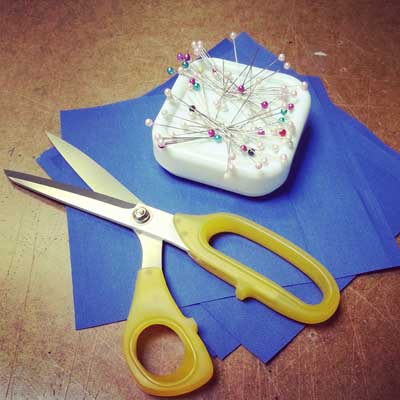 PinningPinning well will ensure the fabric cut out, looks like the pattern. Here is how I approach pin placement.
Cutting Fabric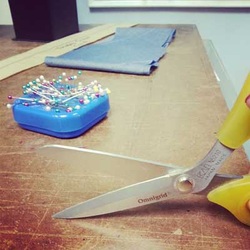 Lets use the table to our advantage. Keep the bottom blade of your fabric shears always sitting on the table. This will give each cut a stable feel. The only time I will ever lift up the fabric shears from the table, is if I am cutting out a small pattern the size of my hand. 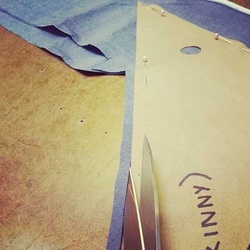 If you are right handed cut with the pattern to the right of your shears and the fabric to the left. Reverse if you are left handed. You will notice a cleaner cut that resembles your pattern. WOOT! Hope you have enjoyed these few pinning and cutting techniques that will make your a better sewer. If you have any questions feel free to leave them below.
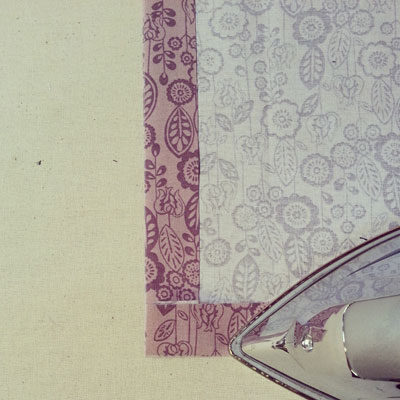
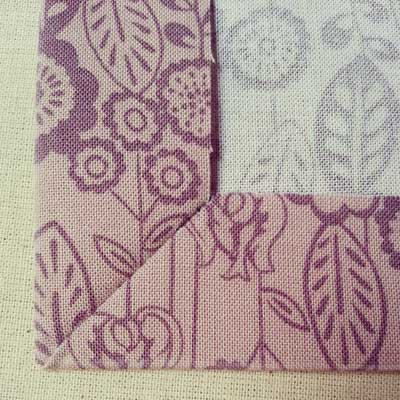
Happy Sewing! Photographed and written by Sheila Wong Studios Corners in sewing are tricky, they can look clean and professional if you put the effort into them. Here is a step by step sewing tutorial on how to sew a mitered corner. A mitered corner can be sewn in a variety of areas in a garment. Commonly seen at the hem intersecting with the center front opening of a garment or perhaps at the hem at the back opening vent.  Step 1On the right side of your garment, mark your hem seam allowance or your fold in line. It is OK if the two are not the exact same measurement. Most likely your hem is larger in measurement. Please refer to your pattern for hem seam allowance. In this example, I am using 1".  Step 2Press your marked hem seam allowance back, one at a time. Once pressed, you will get an intersecting point or what will become the corner of the garment.
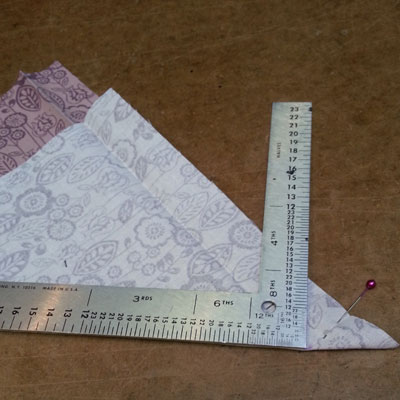
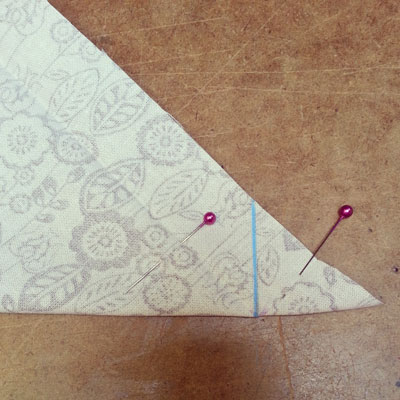
Step 3Right sides of fabric facing each other, line up pressed lines as shown below. 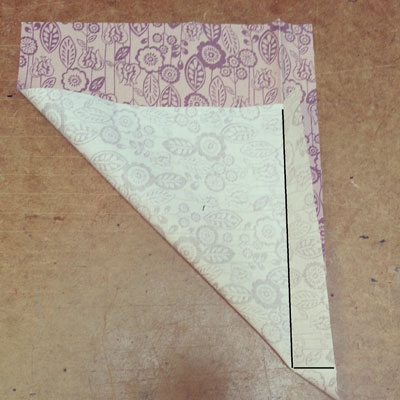 Pin pressed lines in place, and mark where the intersecting point is exactly. 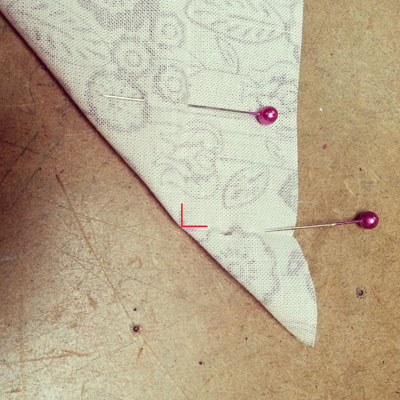 Step 4With an L ruler or anything that will give you a right angle, line up 90 degree corner to intersecting point as shown below and mark sew line.
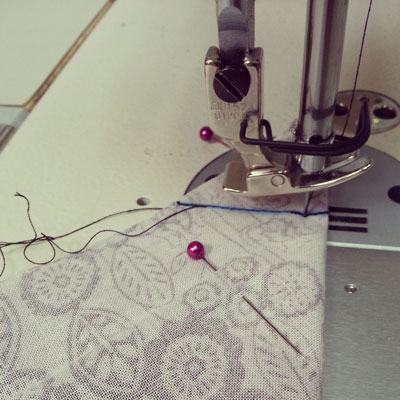
Step 5Sew marked line at 1.5 stitch length. Ensure you sew all the way to the intersection point exactly.
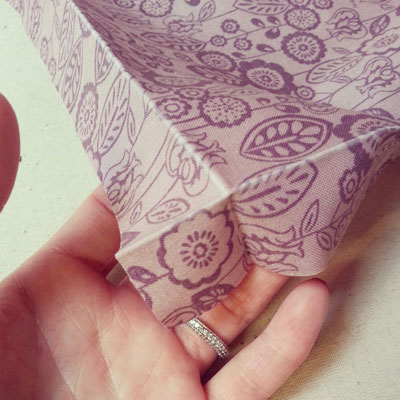
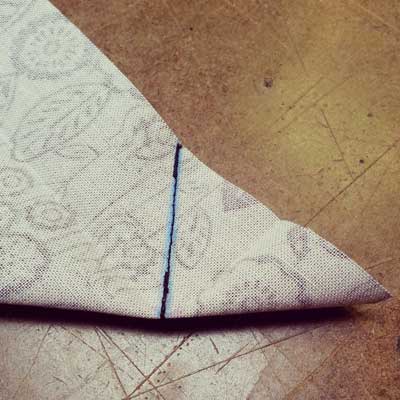
Step 6Trim seam allowance down to 1/8". 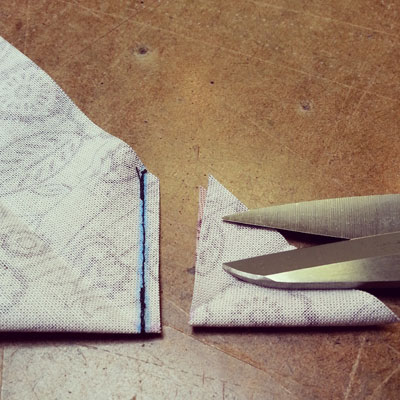 Step 7Flip corner inside-out and poke corner until it looks as close to a right angle as possible. If it is looking bulky, go back and trim off more seam allowance from step 6.  To create a super clean look to easy fray fabric, finish the raw edges prior to completing any of these steps. An easy way to finish the raw edges would be to serge.
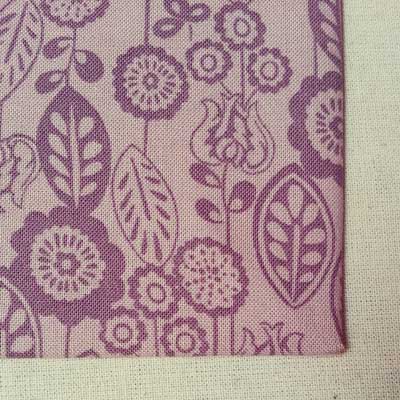
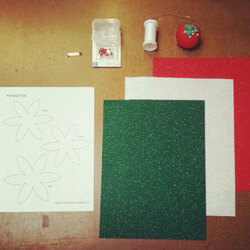
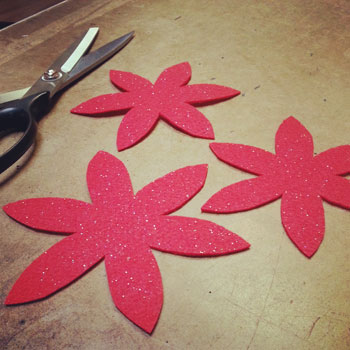
Happy Sewing! Photographed and written by Sheila Wong Studios This tutorial is inspired by my client Connie who made a traditional stocking for her grand daughter. We created beautiful felt poinsettia's to be hand sewn onto the front of a stocking. Now, I will admit I had no clue what a poinsettia was, but they are big during the holiday season. I was so inspired, that I started to think where else could these fabric poinsettia's be placed. Thought of decoration around the house, tree ornaments, brooches and even extra décor on gifts. 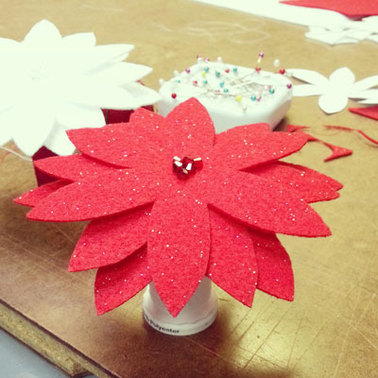 Materials
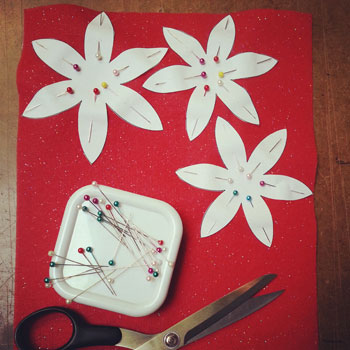
Step 1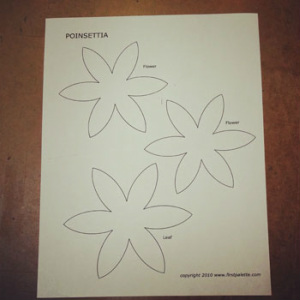 Create a pattern or download free patterns online. I found mine HERE on First Palette. Cut out your paper pattern. Step 2Pin and cut out your poinsettia felt layers.
Step 3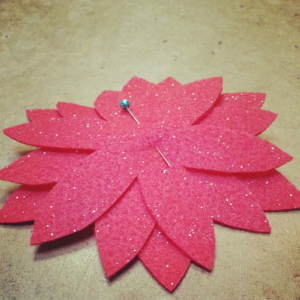 Position 3 layers of felt to create a flower, and pin in place. Step 4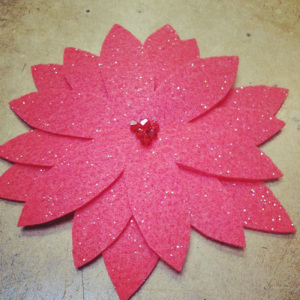 Thread up a hand sewing needle. Prior to sewing beads, secure the 3 layers of your flower with a few stitches going top to bottom in the center 3-4 times. Sew as many beads as you like, keeping beads centered in the poinsettia. Finish and tie a knot in the back. Step 5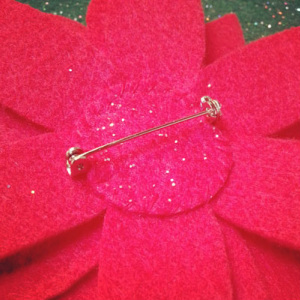 Now you can decide how you will use your poinsettia. Hand sew a ribbon to the back if you are making it into a decoration. I'm making my poinsettia into a brooch. First hand sew the brooch back to the back of flower. Next, cut out a small piece of felt and hand sew felt down around the circle. Happy Sewing!
Photographed and written by Sheila Wong Studios A bound seam finish is not often seen in mass produced garments. Its a beautiful way to finish off raw edges inside of a garment. It is typically used to finish unlined garments in which the fabric has a high fray rate. Follow this step by step tutorial on how to apply a bound seam finish. 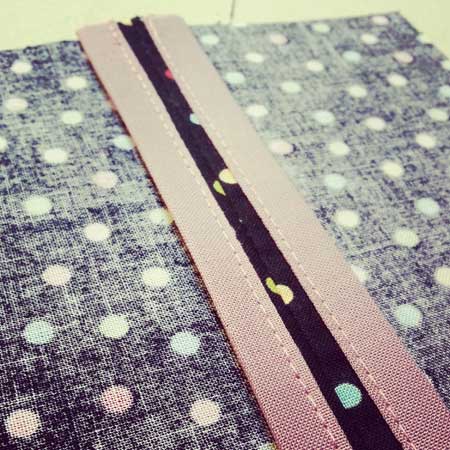 Step 1
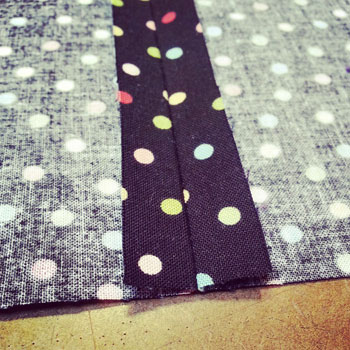
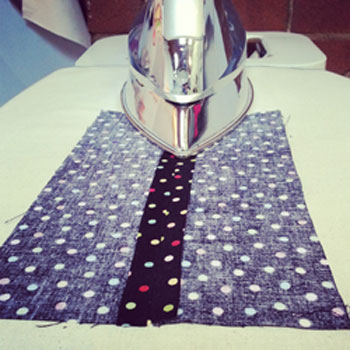
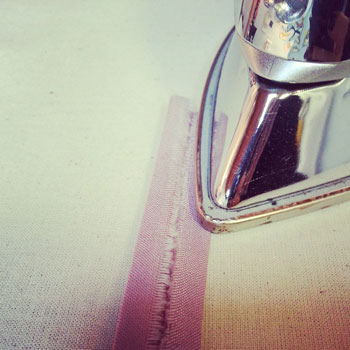
Right sides facing sew your seam at 1/2" seam allowance and press seam open. Please note for this tutorial I will be using a 1/2" seam allowance, please check your pattern prior to sewing to see what the allocated seam allowance is. You have the choice to bind the seam allowances together, or bind them separately. Consider the thickness of your fabric, where the seam is located in the garment, and what style you desire. For this tutorial, I will demonstrate how to sew them separately. Step 2Now its time to create the binding tape. For a straight seam, cut a strip of fabric on grain or on the crossgrain as per sketch below. If you are applying a bound finish to a curved seam, cut your strip on bias. If you are unfamiliar with the terms: grain-line, crossgrain and bias please click HERE to learn. Its best to use light to medium weight 100% cotton for the binding tape. 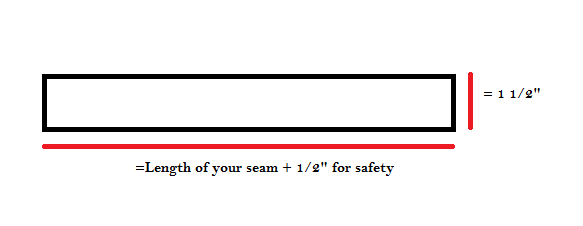 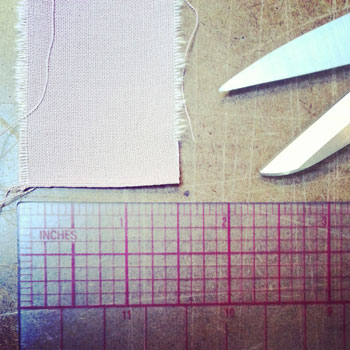 Step 3This is a 3 part pressing process to create the binding tape. Follow photos from left to right.
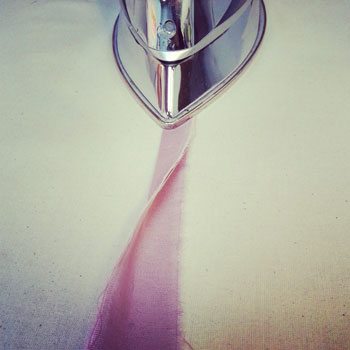
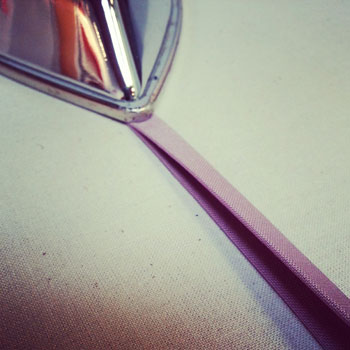
Once the 3 part pressing steps are complete, you will have 4 sections measuring 3/8" each. This fits the original 1/2" seam allowance from step 1. 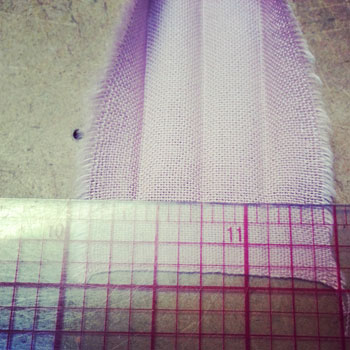 Step 4Pick one side of your seam allowance, right sides facing pin the binding tape to seam allowance.
Sew binding tape to seam allowance on first fold line.
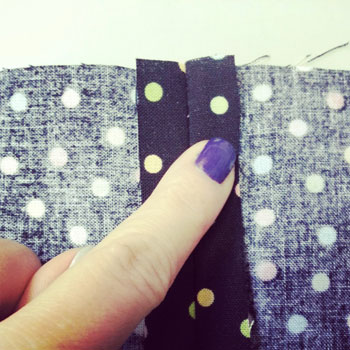
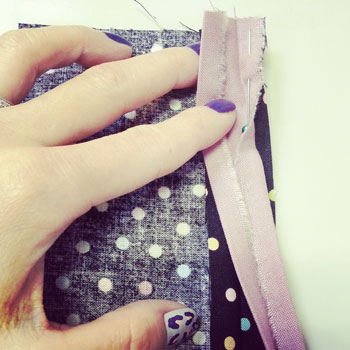
Step 5Wrap binding tape around seam allowance to the back, lay flat and edge stitch (approx 1/16") tape down. This sew line should capture the back of the binding tape too. Click on my video link below to see the TOP and BOTTOM views.  YoutubeHere is a clip I took on what the Bound Seam Finish should look like from the top and bottom view of the seam allowance. Happy Sewing!
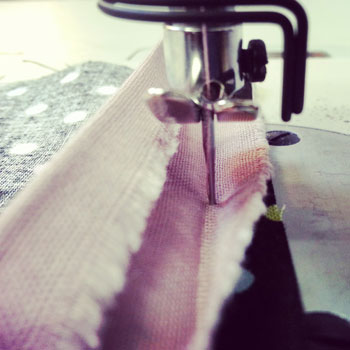
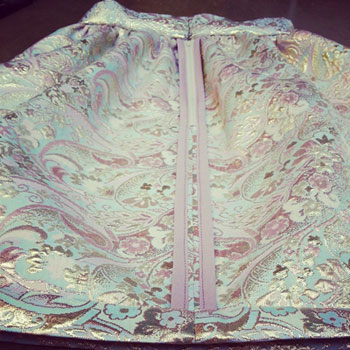
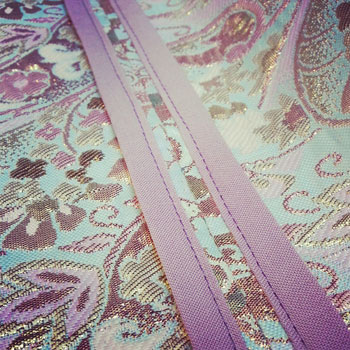
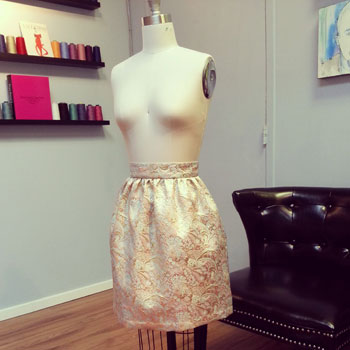
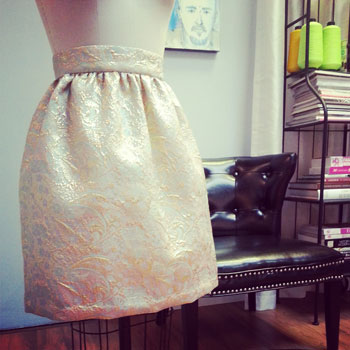
Photographed and written by Sheila Wong Studios My latest sewing project is a holiday party skirt. What makes it holiday? Definitely the fabulous fabric. What makes it a party skirt? Every skirt is worthy of a good party in my eyes. 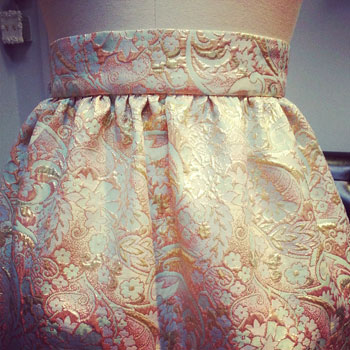 The following are some of the design elements and techniques used to construct this holiday party skirt. Design ElementsCentered Zipper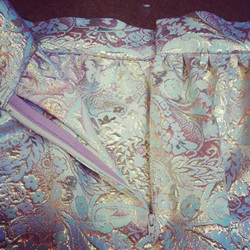 Inserted in the center back seam to avoid bulk, a zipper is the easiest skirt closure out there. Hook & Eyes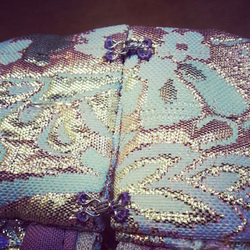 Hook & eyes are a fantastic closure choice on top of a zipper to ensure the opening lies flat. I used two sets as my waistband is 2 inches in height. These are fully hand sewn. Fully Enclosed Waistband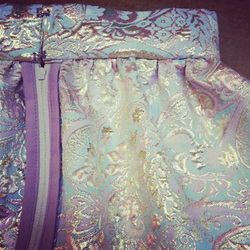 Top of waistband was cut on fold of fabric, then all seam allowances pressed in and slip stitched shut to avoid any exposed raw edges. If you are not adding any lining to the skirt, this is the best technique to keep all your mess (threads, fraying fabric, etc.) hidden. Hand Gathering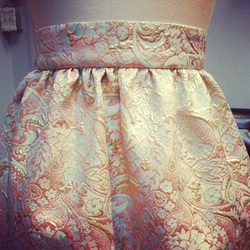 Prior to attaching waistband onto skirt, a running stitch in the longest stitch length possible was sewn in the seam allowance area. By hand, I pulled the ends of the threads until an even gather that matched the length of the waistband was achieved. My tip is to take your time so you don't snap the threads! Bound Seam FinishMy fabric frayed just looking at it, so the best way to hide ultra fray rate fabric is to apply a bound finish to the seams. In this case, I also bound the zipper tape to the seam allowance for a clean finish. PS-I will be releasing a blog post on how to create your own binding and how to sew a bound seam finish soon!
Slip-Stitch (Blind Hem)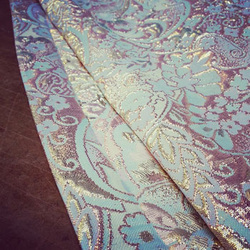 One of my favorite ways to finish a hem is a blind hem in a slip-stitch finish. Click HERE for my video tutorial. Final DesignI've sewn this entire skirt on my Juki industrial sewing machine and a hand sewing needle.
Want to learn how to create your own holiday party skirt? BOOK time in the studio now with me.
Happy Sewing! Designed, photographed and written by Sheila Wong Studios This one is for the boys! All men should know the top three types of lapels commonly found of blazers and jackets. If not, then continue reading. Lets begin with Intro to Lapels 101. There are three major sections you need to know. 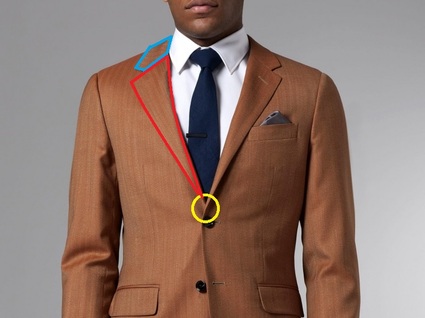 Starting from the top, highlighted in blue this is the collar. The collar changes very little from suit to suit. Marked in red is the actual lapel area, this shape changes depending on the style of lapel. The break point is marked in yellow. This is the point where the lapel begins to fold or break to create the lapel from the center front. Notched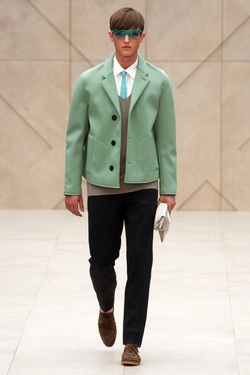 Used in women's and menswear, a notched lapel is commonly used on single breasted jackets. I have heard several people describe a notched lapel as looking like a step from the collar to lapel. Sure that works, but I think the easiest way to point out a notched lapel is to imagine the shape of a bird with their mouth open. Burberry Prorsum Spring 2014 retrieved from NY Mag. Peaked Peaked lapels are found commonly on more formal and double breasted blazers/jackets. Can also be called a pointed lapel. Who am I kidding? I have to include the ladies too. How beautiful is this extremely peaked lapel by Alexander McQueen? Alexander McQueen Resort 2013 retrieved from Style.com Shawl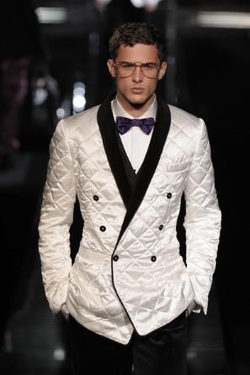 This version brings together the collar and lapel in one continuous piece. Can be referred to as a shawl collar or shawl lapel. A shawl collar brings out a more casual feel. Its origin is on a smoking jacket. Hugh Hefner popularized this style of collar/lapel as he was typically seen lounging around in a smoking jacket. Dolce & Gabbana Fall 2009 retrieved from LA Times. Happy Sewing!
Written by Sheila Wong Studios Essential for Fall and Winter, pants keep us warm. But they can also be an extension of our personality through colour, fabric choice and silhouettes created when worn. Get your learn on here with pants you may not see everyday. Paper Bag Waisted Pants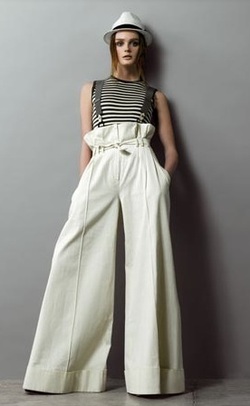 How fun are these pants?! The waist is tied like a paper bag, hence the name, paper bag waist. Naturally they sit at the smallest part of the waist. When unbelted and laid flat, the pants look like a rectangle from top to bottom. I recently inherited a vintage pair of Ralph Lauren paper bag waisted pants. Check out my Instagram as I wear them this Thanksgiving Monday. Pant example retrieved on Google Images. Pegged Pants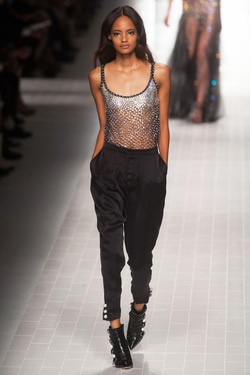 Think volume at the hips then narrows by the time it hits the hem. Perfect pants to install a side seam pocket. Pegged pants are easily mistaken for jodhpur style pants. But, jodhpurs volume at the hips is so much more exaggerated. I always think of pegged as the city version of the jodhpur. Blumarine Spring 2014 RTW retrieved from NY Mag. Bell Bottom Pants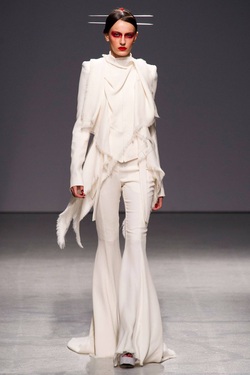 If you grew up in the 90's, you definitely owned a pair of bell bottoms. I admittedly owned several pairs. Remember the brand Silver? I loved wearing my Silver bell bottoms to school. Characteristics that make up a true bell bottom is fitted at the waist, hips and down to the knees then flares out dramatically to the hem. Gareth Pugh 2013 retrieved from NY Mag. Cargo Pants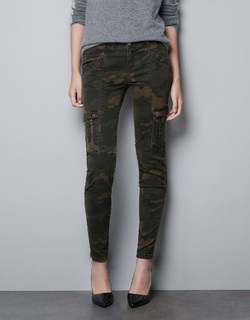 Cargo pants where made for utility purposes. The wearer needed to hold alot of items easily and keep them organized. must have several pockets and made from a durable material. This version from Zara is a modern cargo pant. Do not think you can fit more than a slim phone and a lipstick in these. But who needs to hold things in your pockets when we have big purses right? Zara 2013 retrieved from Zara Online. Harem Pants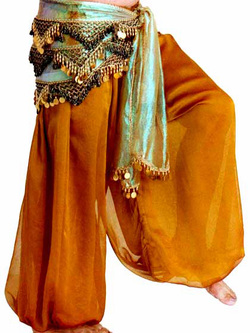 Absolutely a gypsy feel to these pants. Traditional harem pants are super full then gathered at the hem with an elastic or cuff. Newer versions are not as full but follow the elastic cuff at the hem. Pant example retrieved on Google Images. Palazzo Pants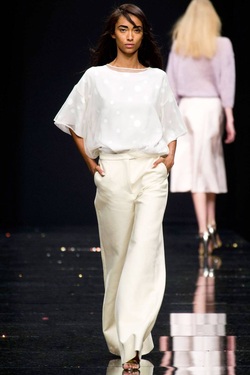 Palazzo pants are fitted at the waist and hips then flares out dramatically to the hem, they are much wider than wide leg pants. Often times can be mistaken for a long flared maxi skirt in certain angles. Great for showing off a small waist, but be prepared to make some attention while walking with all the extra fabric! Antiprima 2013 retrieved from NY Mag. Happy Sewing!
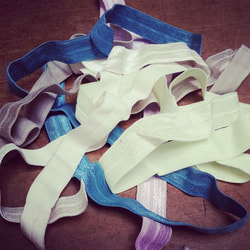
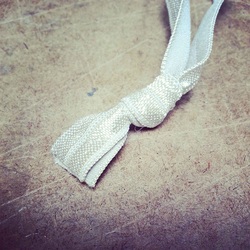
Written by Sheila Wong Studios OK, first off I want to apologize for lying to you in the title, there is absolutely no sewing involved in this tutorial. This is all about how to make your own hair ties. I am posting this tutorial because it is simple enough for anyone to do and because it does not cost very much either! Materials
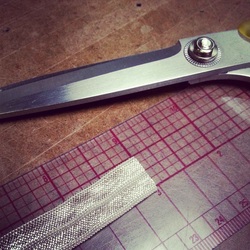
Step 1
Step 2
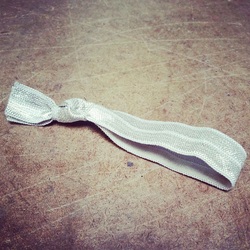
Step 3
Give-AwayWant to win a package of handmade hair ties? Here's how:Winner will be announced on Oct 30 2013 at 3pm. 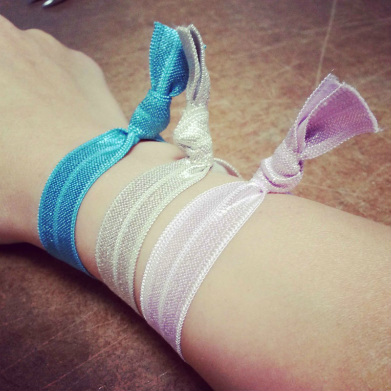 These will make fantastic gifts and/or colourful arm candy.
Happy Sewing! Designed, photographed and written by Sheila Wong Studios |
Archives
November 2022
|


 RSS Feed
|
|
Copyright © 2024 Sheila Wong Fashion Design Studio Ltd. All rights reserved.